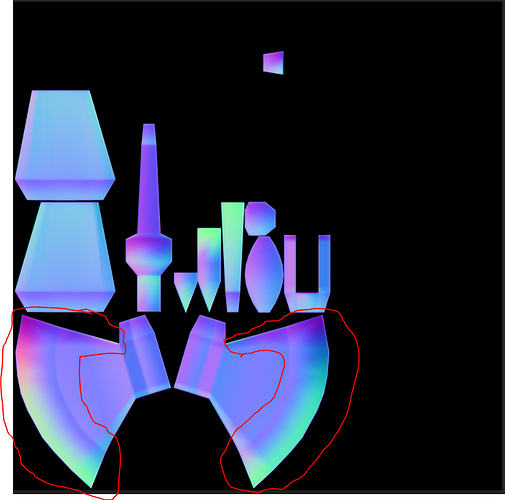
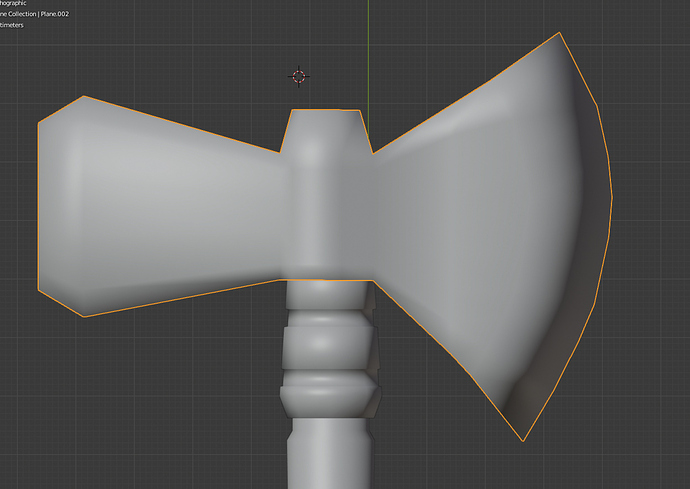
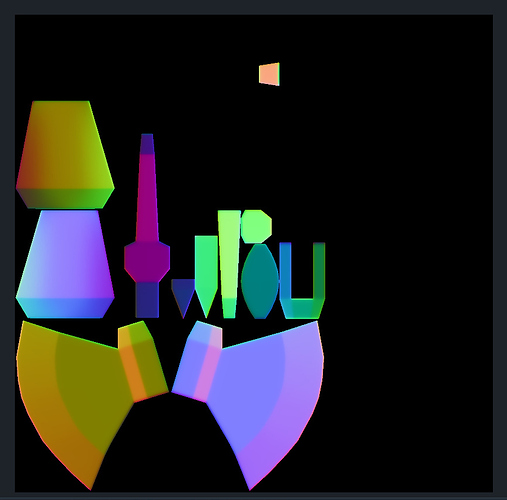
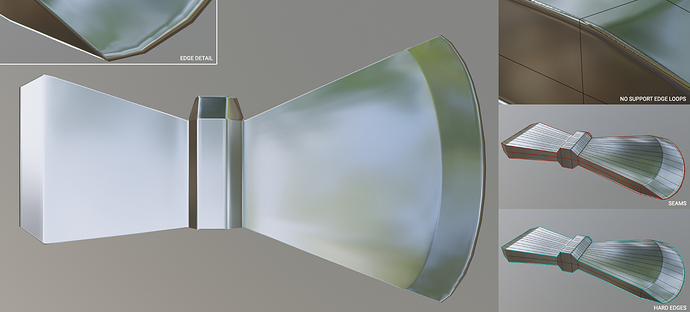
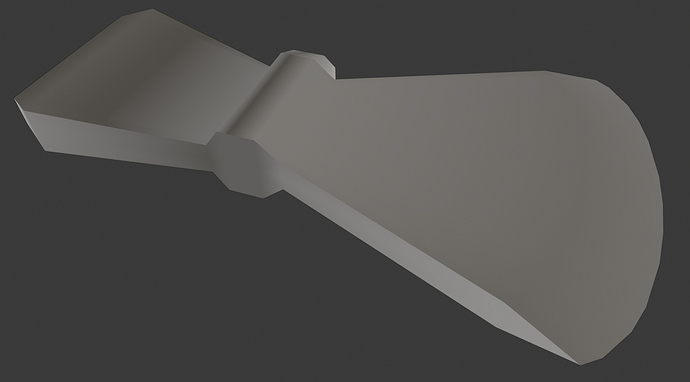
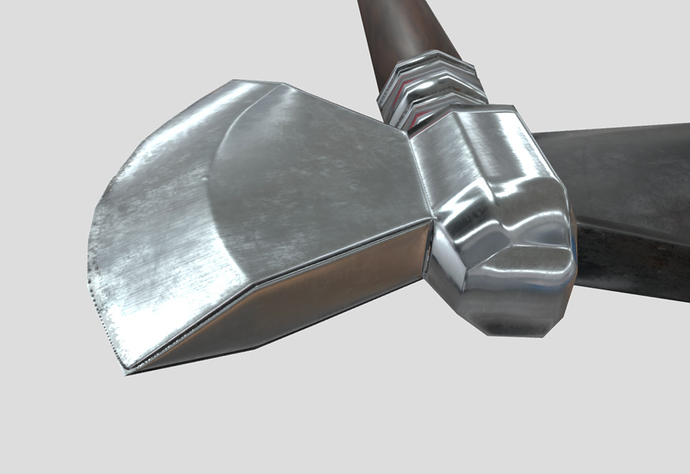
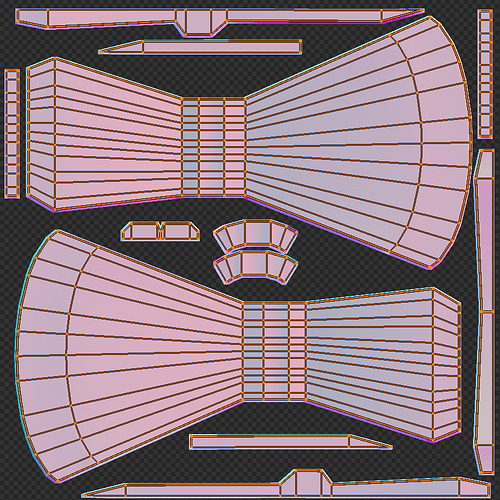
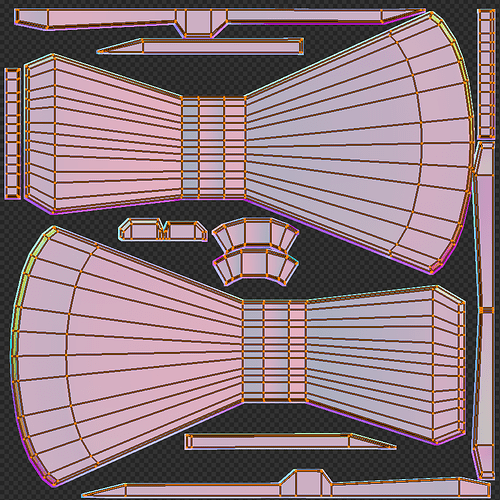
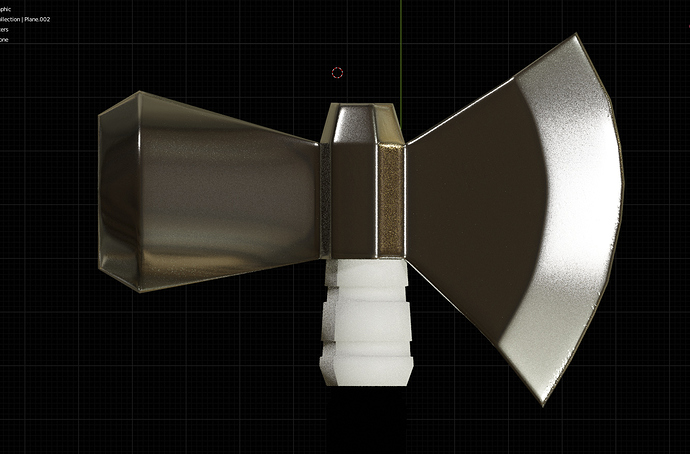
Why does the edges of my axe look like this on the normal? Whilst the high poly looks like the second picture. I’ve tried everything, triangulating the lp, triangulating both, testing with different resolutions, different extrusion lengths you name it. I just don’t understand why this is happening specifically at that edge? I’ve chosen to only show the axe uv’s as an example to put the focus solely on that, but I can assure you that the rest of the model has also baked fine as well. This is ridiculous, any help would be highly appreciated.
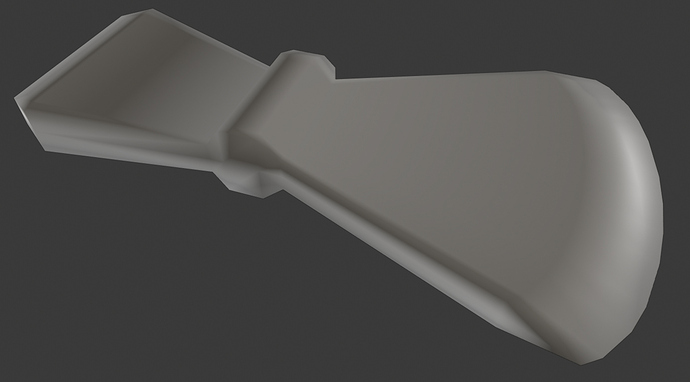
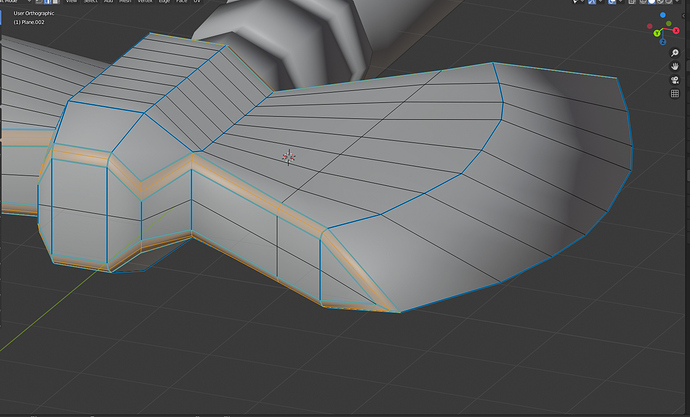
The lowest image is of the low poly model. The geometry is very good, no tris or ngons at all just very clean quads so I don’t understand why this is happening. I think I’ve run into this problem once before, but then I ended up manually fixing it in Photoshop, but I shouldn’t have to do that. Can any experts out there tell me why this is happening? Is Blender’s baking engine just trash when it comes to normals?
If I understand you correctly, your problem is that the edge of the blade is shaded incorrectly. But I don’t get why you blame the normal map. You took these screenshot in solid view, but objects in solid view are not affected by materials, what you’re seeing is the smooth shading artefact caused by the low amount of geometry. Try to enable auto-smooth option in the object data and mess with angle until you get what you want
Hello! If you turn on autosmooth on your lowboly whilst you’re baking your normals its going to result in very unnaturally sharp edges. The textures which the high poly contain are also nothing extreme enough to effect the normals that drastically.
I can make all of this work in Photoshop, but it’s a bit of hassle to have to do it like that every time. So any advice would be nice.
As you can see the edge is shaded with the high poly shading when baked in object, but when baked in tangent it uses the shading of the low poly, which is very confusing.
Show us the wireframe of the low poly and a different angle of the high poly so we can see the curvature.
I agree with @Vefery, off the bat it looks like your low poly doesn’t have enough geometry to produce a good bake. The blade edge also seems to be a pretty sharp edge to me, so I don’t understand why you wouldn’t want to use a hard edge there.
Forget about the Object space map and painting baking artifacts away on Photoshop, it’ll only mask issues you’ll keep having until you understand their causes so you can avoid them. That’s counterproductive and will cost you more time and effort than a couple of minutes of reading and a little practice to internalize that information. I don’t know how frowned upon is posting links to other forums here, but there’s an awesome thread explaining how normal baking works and common issues arising from low poly geometry that can help you.
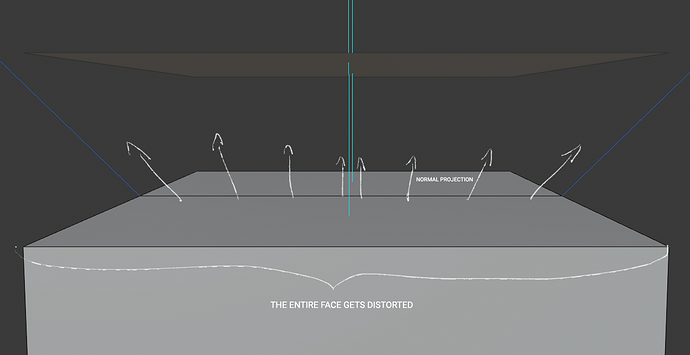
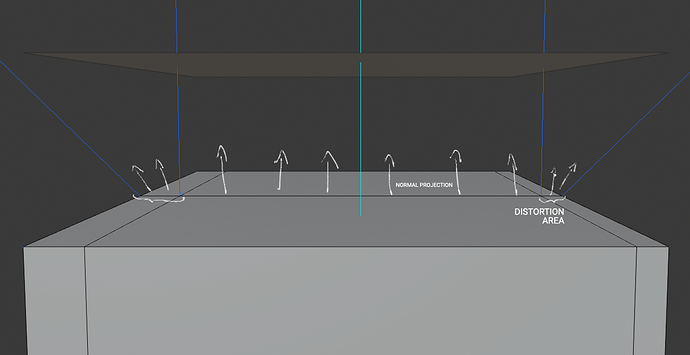
You need a low poly that matches your high poly curvature reasonably well or you risk getting black areas and distortion where they differ. Try to avoid large areas without any kind of support edges or you’ll get distorted bakes too, as averaged normals get stretched over the entire face.
This is what I suspect to be behind your baking issues. You may want to add support edges / bevel so the normals point in the right direction during the baking, confining the parts where they’ll inevitably skew to smaller areas where it won’t be nearly as noticeable.
Ideally you’ll also use a cage instead of ray distance to get better projections, and as a last tip try to match UV seams to hard edges to avoid ray miss artifacts.
Ah ok now I understand what you meant. The LP photo is just to show you what the low poly looks like without any materials. With the normal map it looks almost perfectly like the HP, except for the blade edge.
Yeah I tried to modify the HP’s edge to fit perfectly with the LP, but I still got the same results. That’s quite weird as it doesn’t have to deal with non compatible geometry. I’ve also tried a cage now that I think about it. Maybe I forgot to apply the transformations after I extended the HP edge to be like the HP. And I don’t mean actually extended as in pressing E, but I just tweaked the bevel weight a bit.
I got enough time to sit down and model and bake the axe head to show some sloppy examples.
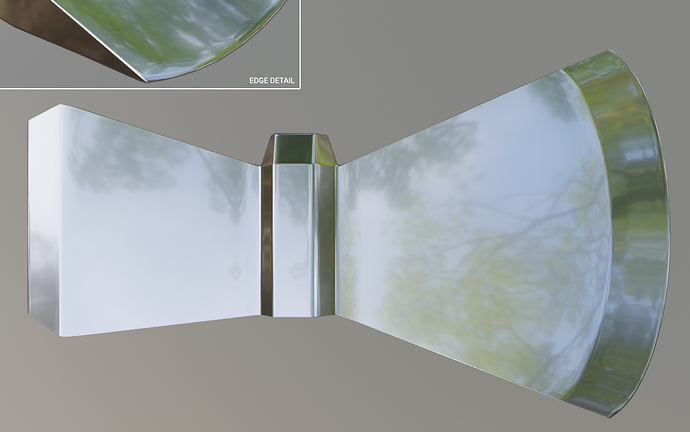
The High poly
Take note of the curvature of the high poly blade edge, it’ll be important soon.
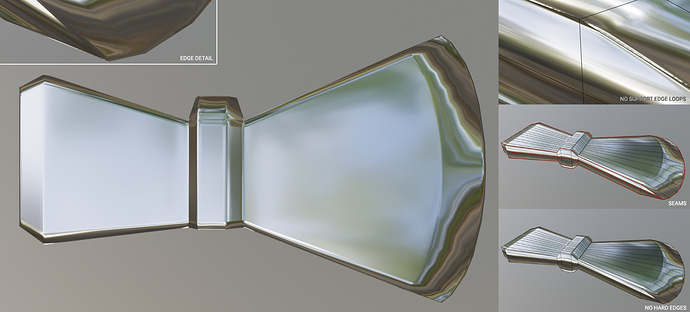
Low poly 1 v1 - No hard edges, no support loops
This is basically your case, a bake with averaged normals. The flat faces are passable from a distance, but the blade edge clearly shows what happens when you get stretched normals on a curved surface.
If you look at a matcap of the low poly you’ll see the normal bake came out very similar to it. If the low poly normals don’t look good the bake won’t look good either. The weird gradients and inappropriate ghost tris are great markers of a potential poor bake.
Note: The reflections look rougher on the low polys because their shader roughness is in fact higher. I only noticed it after saving all images because I’m a doofus!
Low poly 1 v2 - Hard edges, no support loops
Same low poly with hard edges in major plane changes. I planned ahead so they’ll match the seams—except the central loop, which exists only so the UV can be mirrored as it’s often done in game engines.
This is what Vefery was talking about. Hell of a difference, right?
There are still some issues though. Can you see the strange glass-like effect on the edge detail?
This is caused by the difference of curvature between low and high poly meshes. The rays will miss the surface and register nothing, and that shows up as a dark edge in diffuse materials or a weird shading in metallic/glossy materials. The solution either making the low poly silhouette more similar to the high or changing the high to conform better to the low poly.
And the matcap reveals much better normals, flat where they’re supposed to be, no ghost tris.
Low poly 2 - Hard edges and support loops
This version has extra loops to support the major plane transitions. I created them by beveling the mesh—not the entire thing, only the edges on major plane changes, which also happen to be the edges I set as hard edges. The normals look even closer to the high poly now the normals skewing was confined to the smaller faces surrounding the hard edges.
Thanks to the supporting loops you could even try to ditch the hard edges, as they alone are enough to hold the normals of the larger faces in place.
The matcap is nearly identical to the one above, so no point in showing it.
Your chosen approach depends on the quality requirements and your poly budget. It's worth keeping in mind that while both approaches add tris and vertices in a game engine the most expensive aspect of your scene in a tends to be shaders, not poly count. Plus, you can get rid from a lot of internal edge loops from my examples by creating the blade curve with tris instead.
Put a sharp edge along the crease near the edge of the blade. That’s probably where your baking error is coming from.
Aaaaah ok you meant to add the support loops to the LP, I thought you were talking about adding them to the HP. A bit unsure what you mean by adding “hard edges” though, I’m guessing you’d want me to mark the edges as sharp and then apply the autosmooth. Because I just tried playing a bit around with mark sharp and autosmooth just now and I got unsatisfactory results (see below). I’ll play a bit more around with pixel margins to see if that improves it, if it doesn’t I’ll try to add some support loops to the LP.
(Ignore everything else other than the axe head (part you made), I’ve chosen to only bake the normals for it as of now to keep things simple. It helps put the focus on it compared to everything else.
Because it would be a bit redundant to add them to the HP seeing as I’m already using weighted bevels which serves the same purpose and I’d say works better in most cases. But may I ask if I can remove the support loops after I’ve baked them or if I should still have them on?
Tried that, it fixed it somewhat, but it led to too many shading errors to be beneficial.
@birb So this is what I should do to my mesh to get the normals to work in the fashion I want them to? And as I asked earlier, should I export my LP mesh with this new geometry or can I still use the previous mesh without the support bevels?
This post is really good example why we need very comfy and easy to use baking so artist can focus on iteration of their creation not messing with tons of settings. I have great hopes for 2.9x in this area.
Normal baking is completely fine for the most part, you just run into issues every now and again. As I wrote earlier 90% of the mesh is baked perfectly fine.
A bit unsure what you mean by adding “hard edges” though, I’m guessing you’d want me to mark the edges as sharp and then apply the autosmooth.
Hard edges is another name for sharp edges. I’ve been doing a lot of reading on general 3D resources and ended up using it instead of the Blender-specific term.
But may I ask if I can remove the support loops after I’ve baked them or if I should still have them on?
You could try to use the bake from the beveled axe on the non-beveled one if you wish—whatever is faster and gets the work done is valid!—, but ideally you’ll match the bakes to the geometry used to generate them because weird things can happen in the engine, you may need to bake a new map and forget to use/backup the beveled version, or other unforeseen circumstances.
Texel density
Because I just tried playing a bit around with mark sharp and autosmooth just now and I got unsatisfactory results (see below).
The pixelation happens because there isn’t enough space in the map to store the normal gradient of this area. It happened in my bake too, and I used a highly advanced technique to minimize it… I resized the UVs. ![]()
This is the UV I got right after unwrapping and repositioning the islands of the low poly 2. If you pay attention to the low poly 1 v2 there’s already some pixelation happening, making me suspect the new bake would look terrible, thus I already left a little extra room around the islands.
This is a detail of the resulting map.
To minimize the issue I simply selected the beveled edges and resized them so they’d have a higher texel density—more pixel per meter, aka higher texture resolution.
The new bake.
Sometimes you’ll want to increase the entire texture resolution—let’s say go from 2k to 4k—, others just relaxing the UVs or resizing the affected parts is enough. Your needs will dictate what strategy you’ll use.
Oh, and I found again two fantastic posts about baking normals, this one full of examples comparing sharp/hard edges and edge loops and this one about what causes common normal baking artifacts.
