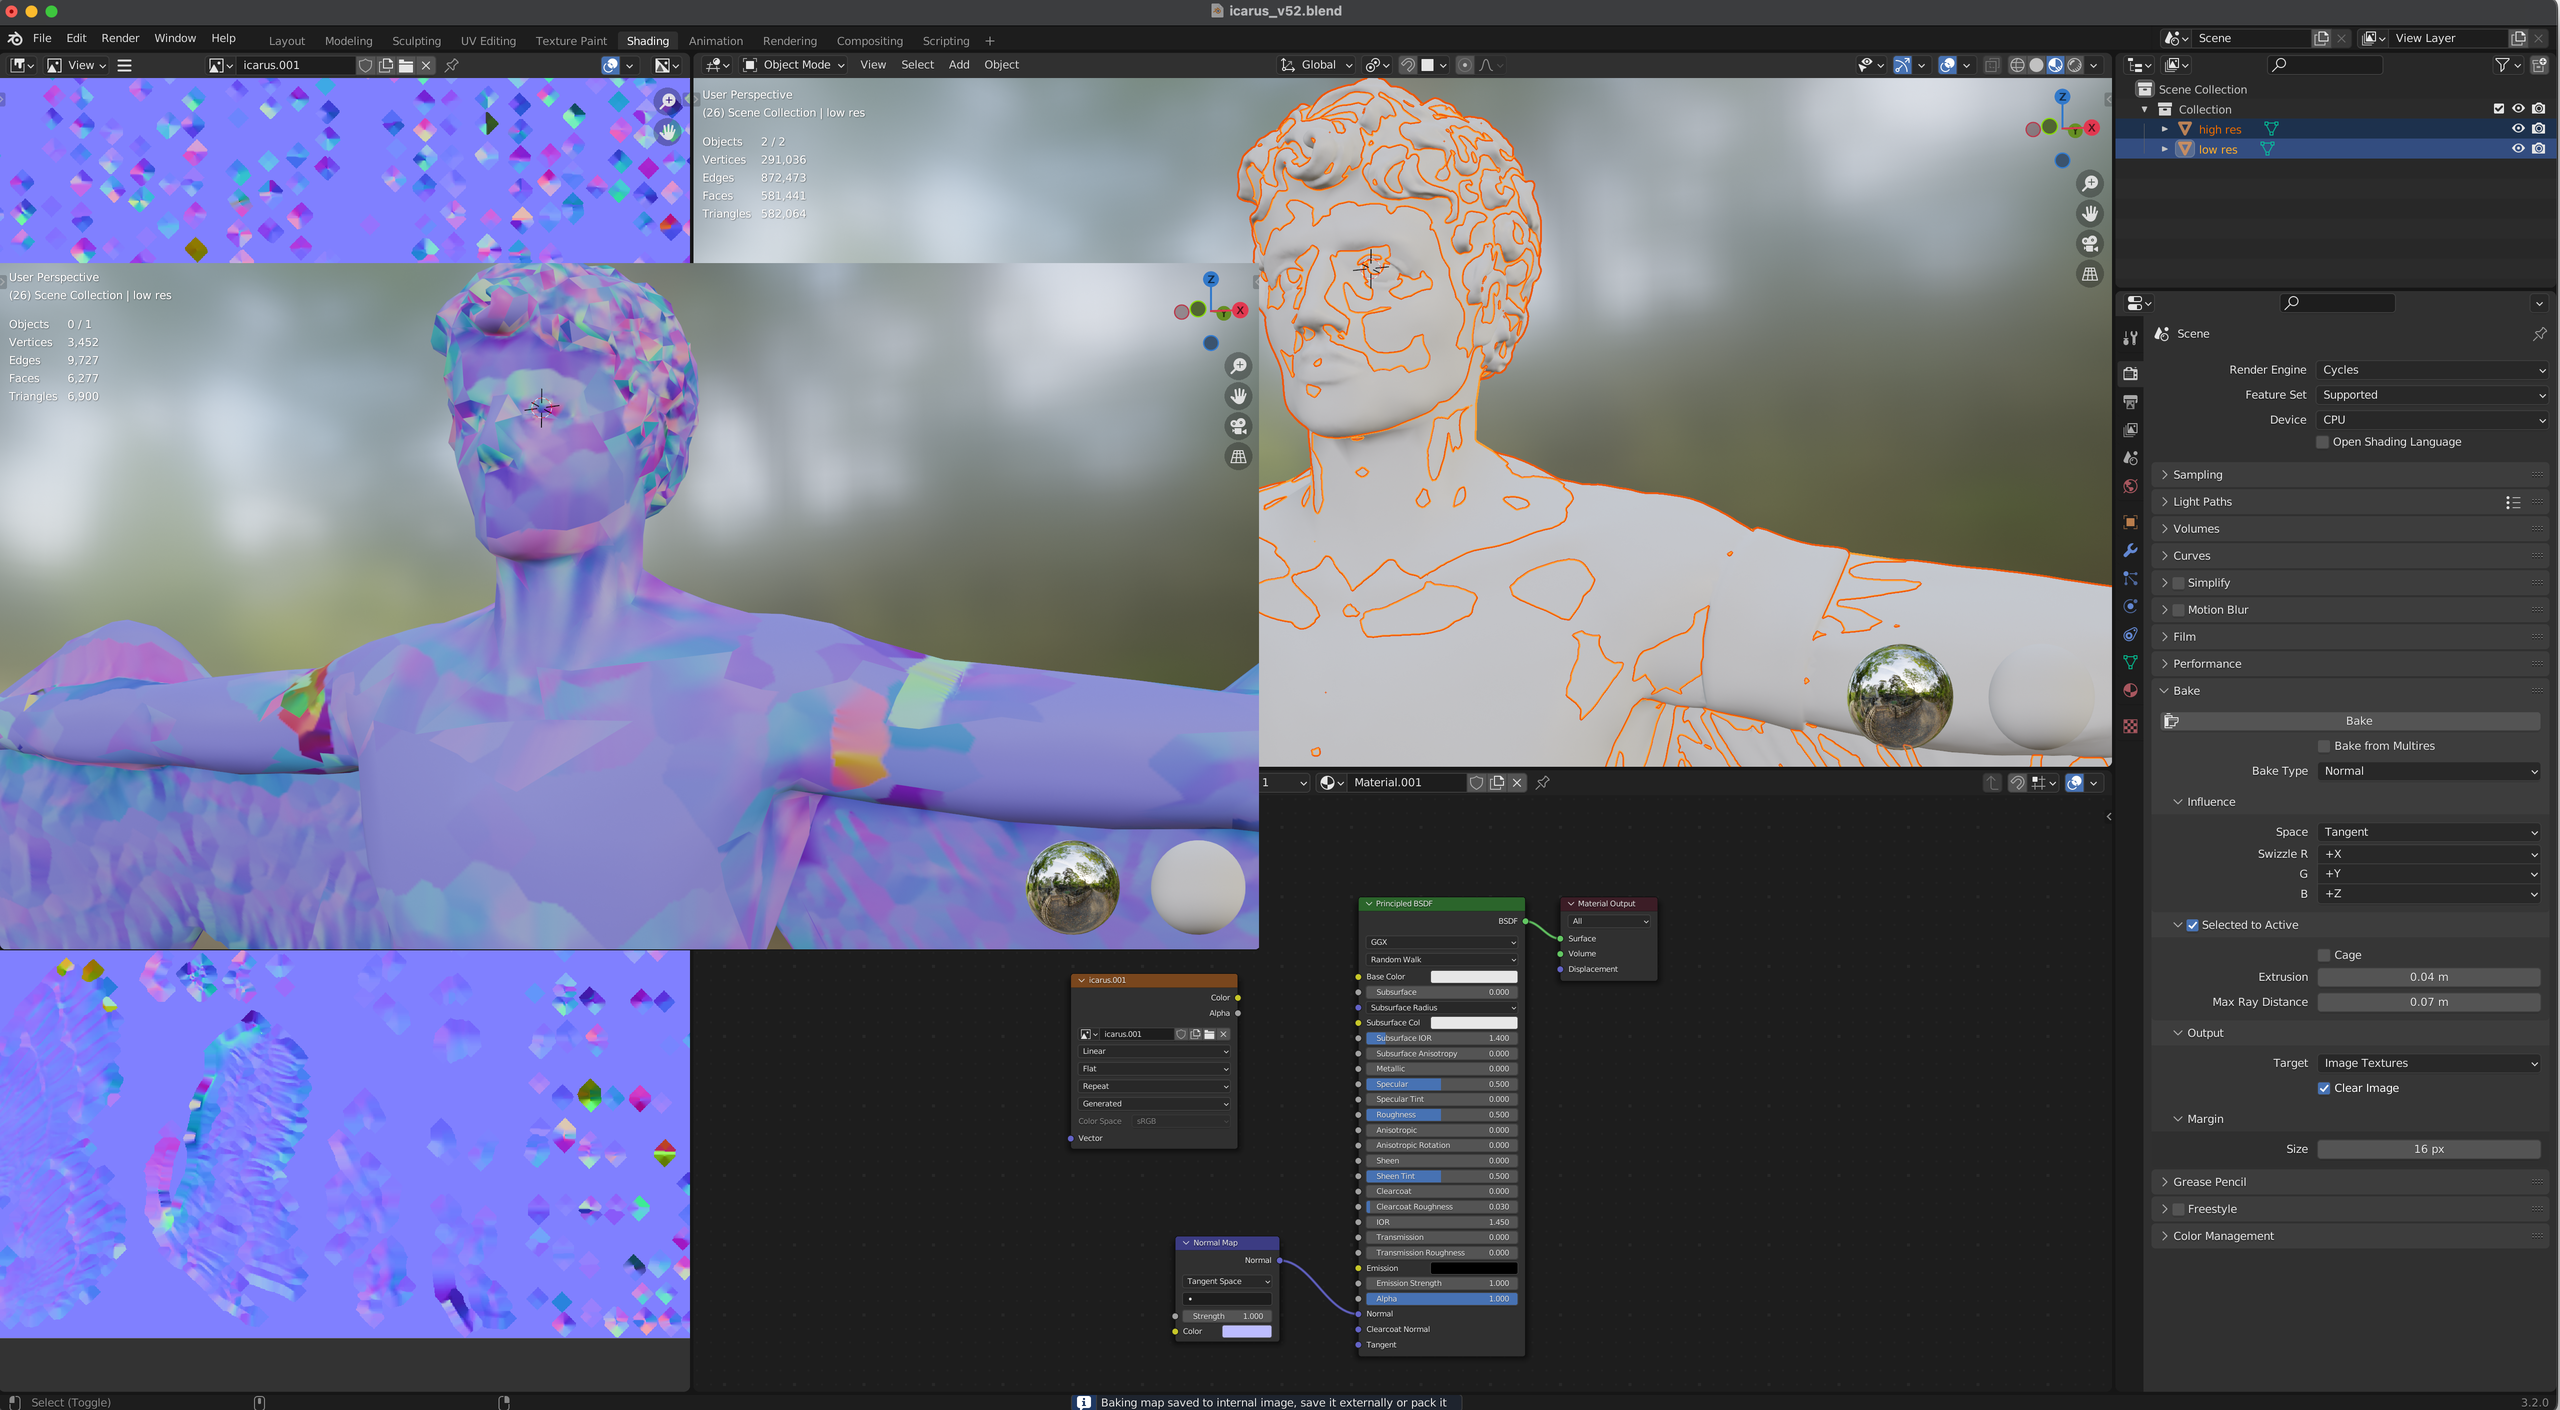
I need some help. I’m trying to bake high res to the low res normal map. As far as I can tell everything is set up correctly. It appears to be combining the normals from both the high res AND low res model. The “flecks” of color in the normal image are the polygons of the low res model.
I think it doesn’t work because the meshes of both objects are intersecting.
I’m not sure I understand what those “flecks” are. They are all over the image and appear to be extremely distorted O_o
Can you share a part of a file?
1 Like
This looks like the UVs are showing wrong sections of the texture. Do you have multiple UV sets on the model?
Also, could you show us a screenshot of the low res model’s UVs? I would like to know if all those little facets in the bake match anything.
1 Like
This doesn’t make sense in terms of how blender works, and using the shrink/squash tool to fit the low poly entirely inside still returns the same results. It literally looks like it’s adding the normals of both models to the normal bake.
There’s only one UV map, and the facets do match, they are the polygons of the low poly mesh. It’s adding the normals of both models to the normal map.
Does the high poly model have a material with a normal map applied to it? If it does, that’s going to be taken into account when baking and so you should remove the high poly’s material before baking.
If you get yellow in your normal map like this, it means that the backside of some faces was captured. Either you have some flipped normals or some rays went through the model.
Do you have some modifiers that are hidden and move the model at render time?
What are the dimensions of your models in meters? You have used an extrusion distance of 0.04 meters for your bake, but is this value adapted the the scale of your scene? If the statue is modeled at real world scale, that would be a reasonnable value, but if it’s 1 centimeter tall, that same value is going to result in a crazy bake.
Also, is the scene’s “unit scale” setting at default in the scene properties tab, or has it been modified?
None of this is about the “yellow,” that just indicates normal direction. The model’s scale is applied and the extrude distance is just how far from the model it calculates. Lowering the scale to .02 erases any normal data beyond that and returns the neutral normal color of light purple.
Interesting though in the test I made with the icosphere it returns ALL yellow, green, and orange instead of the expected blues and pinks, growing the low-poly polygons to be outside the high poly polygons fixes the color but is still combining the normals of both models. I just updated to the latest version of blender and it still does this so I have no idea what is going on.
Here is a closeup of the normal map problems (I crunched it in photoshop to show the angles better)—this is from the icosphere normal bake. I just pulled out a few vertices with proportional editing turned on, then decimated the high poly object into a low poly, added a material and an image node, lowered the sampling, checked “selected to active,” and it is clearly returning polygon information from the low poly into the normal map which then makes the low poly look like it’s low poly. So I don’t know if I’m just doing something wrong or if Blender is doing this on purpose for some reason and nobody knows why? There is no info in any tutorials about this, everyone just selects their high poly and low poly, sets up the material, hits bake and it comes out perfect.

Could you attach a scene with the icosphere that bakes incorrectly? I could look at it and see if I find the cause. I can’t seem to reproduce the issue on my side otherwise.
Thanks, I appreciate that but the forum won’t let me upload a file since I’m new.
I’m on a mac, are you on a different platform? I wonder if it’s a platform specific bug?
It could be, I’m on windows. I know the 2 platforms use different code for the GPU, but you seem to be set to cpu in your screenshots, so I’m not sure if there is a difference there.
1 Like
I think I have just managed to replicate the icosphere exemple. I noticed in your image that the low poly mesh isn’t visible, which means that it’s smaller than the high res one. I did the same and managed to get the same yellow shades, because the normal map is capturing the inside of the high res mesh. I managed to solve the problem by adding more extrusion in the bake settings.
The way the extrusion setting works: when baking, the polygons of the low res mesh are first inflated so they are completely outside the high res mesh (that’s what extrusion does), then they shoot rays inwards towards the high res mesh (the max ray distance is the length of these rays).
Thanks but like I said earlier, that isn’t the problem. The problem is the polygons of the low res mesh are showing up in the normal bake combined with the high resolution mesh. I opened a bug report with Blender but nobody’s addressed it yet, when they do I’ll post the results here.
Well then, I have no idea what’s happening. Maybe I could help you more if I saw the file, provided it’s not a bug like you think.
The problem was that the normal bake image has to be set to “non-color,” AND set BEFORE baking. This returns the expected result. I would never have intuitively figured this out since a normal map inherently has color, but I think non-color in blender means it’s used as data or vector data instead of texture color. Not even the tutorials I was using point this out. I think this is due to a change in a more recent version of Blender, as in the tutorial I was using the color space just greys out after baking (I have also never encountered this problem in blender before but recently updated to the newest version). So just be aware this is a thing and any tutorial on baking normals is outdated if it doesn’t include setting the color space. https://www.youtube.com/watch?v=Yx9TvvnxCAM&list=PLbEW2LEts-oX9FTSHqAFhvIkxZ7mggKDH&index=85&t=416s

1 Like
Did you shade smooth both high and low versions? It can improve the result significantly