I have an unwrapped object, and an image for it. It copied the object, modified it a bit with sculpting, then baked to normals, tangent. Unfortunately, i’m not getting the looks i thought i would. heres an image: http://picattic.com/files2/ebp5v98svu8edhwv3o3m.jpg
Just as a note, i’ve tried this with all setting, and it’s pretty much the samething, only different colors here and there. any ideas?
I can’t see the picture
but I can recommend that you alter your workflow just a bit, sculpt the object first, THEN lower the multires value to the desired level and copy it this will give you better matching volumes for your bake
also make sure that you unwrap the low res mesh properly-there is no need to unwrap the high poly mesh - also have the normals map mapped to UV, have normals not color value on there too.
Hey Sammoron!
Your link is not working…but it is like kay_Eva said…your mesh that you are baking to, needs to match your sculpted mesh to get the best results…Things where I also found some issues sometimes…quite random though…When I did not apply the multires first, I got strange results (word of worning though…remember so save a copy of your work before applying the multiress…or you might not be able to go back and edit it!!!:(…then remember to have the object that you bake to…set to set smooth…(not always the case)…otherwise the bake will still incorporate the rough angles from your Low Poly…And overlapping areas can create some artifact!..other than that…without your image it is almost impossable to give more suggestions! Hope this helps a little though!
The reason i didn’t do high poly first is because i only altered one piece, his tail. I just put a couple lines on, so the volume is very close to identicle.
Sorry, left the tags on the image, heres a better one: http://picattic.com/files2/ebp5v98svu8edhwv3o3m.jpg
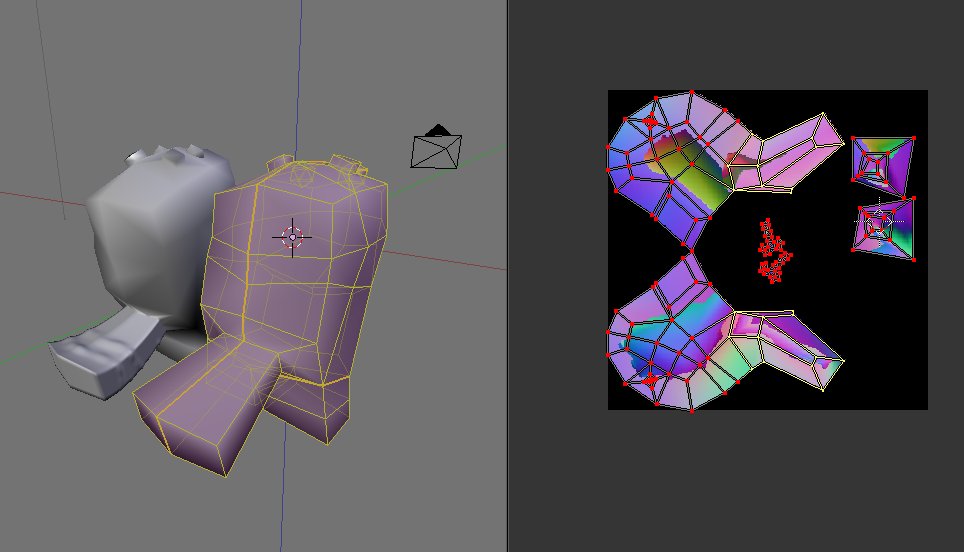
The selected, unpined vertices in the UV window are the tail verts. you can clearly see that it’s kinda wierd. This was baked with as Tangent, no margin, and Quad Split Auto. Selected to active if it helps any 
I cant see your pic but you should have some margin, when far away from the face it seems to pull some of the pic from outside the boundries set in UV/Tex editor when you unwrap
It makes seems look messed up if you don’t have it, I usually have it at 4
well, i’ll be damned, you might have solved a different problem i had (AO mapping seems to make black seams along edges at a distance :D). But that’s not the issue. Here’s the picture. Hopefully it’s big enough 
You can see the bumps on the high poly beavers tail (the one in object mode) had no effect on the normal map, and it has weird, smooth effects throughout the map. The selected unpined verts in the UVImage Editor are the tail coordinates.