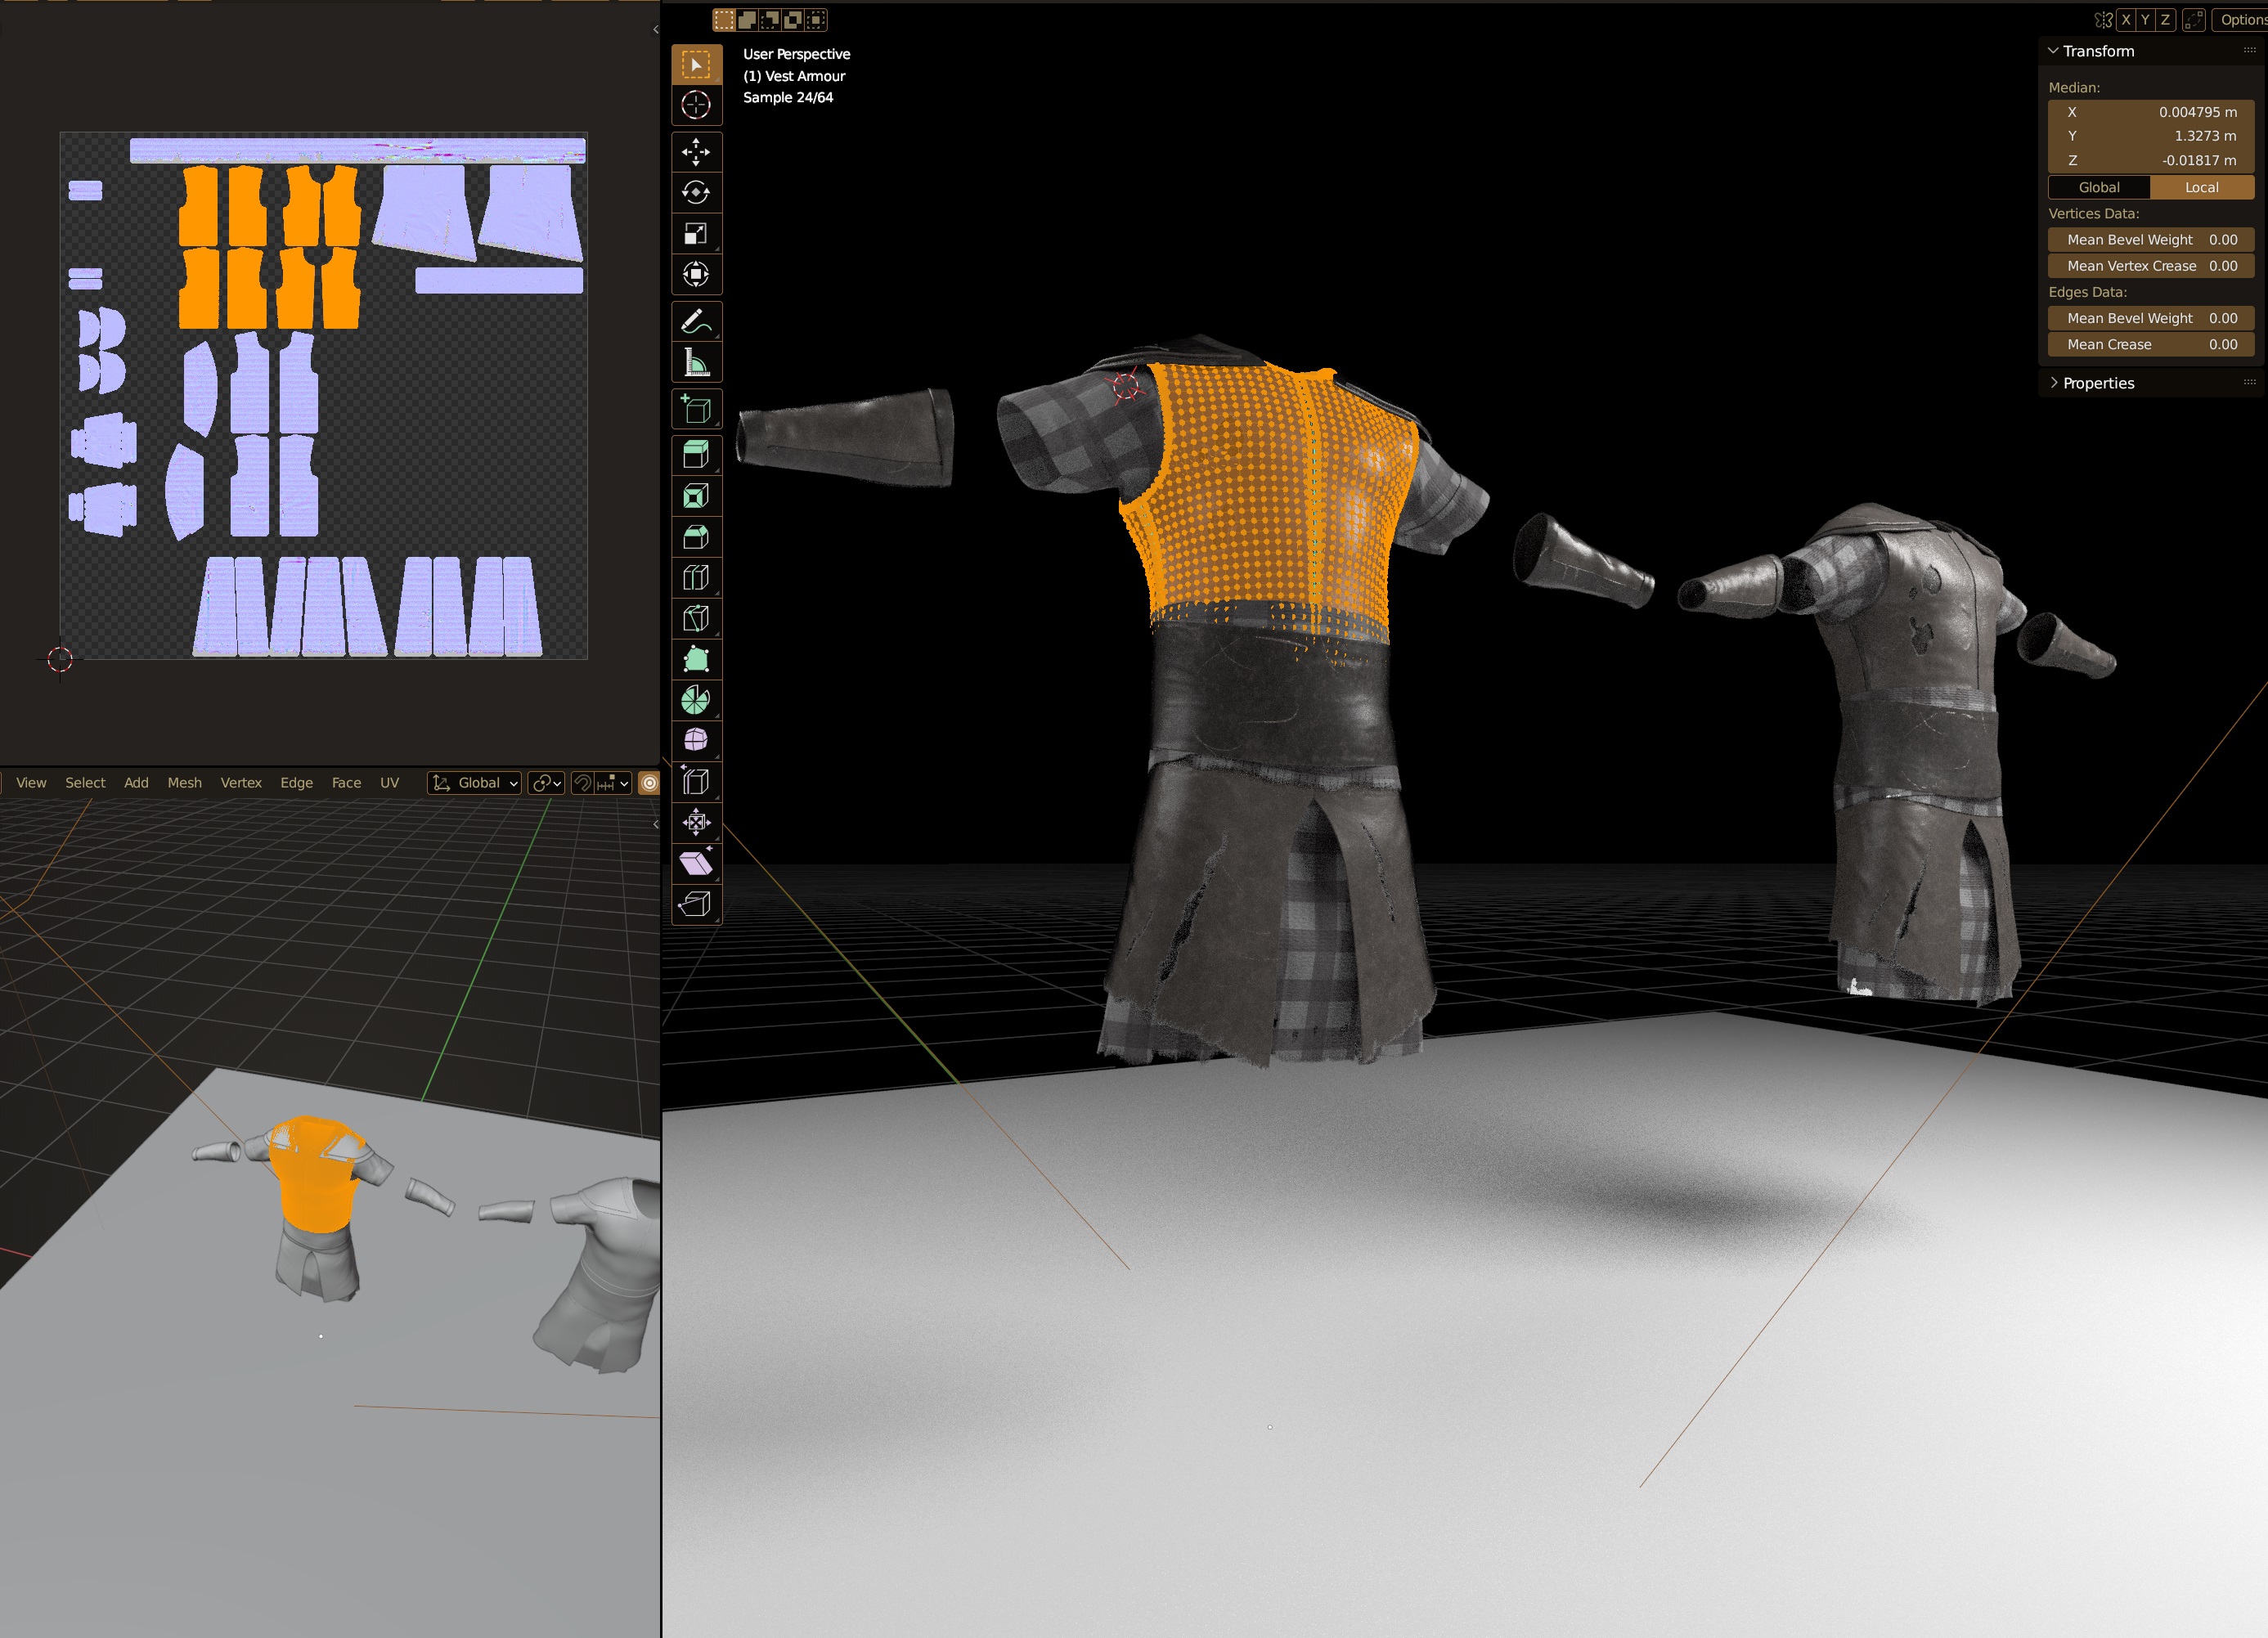
Hey guys, i’m having a problem with the normal map, after I bake it from my high resolution object (left, and apply it to the low resolution object (right) through shader nodes, the sculpting form the Multires modifier shows INVERTED on the low resolution object.
(all textures are procedural besides alpha maps on holes … don’t think thats part of the problem though?..)
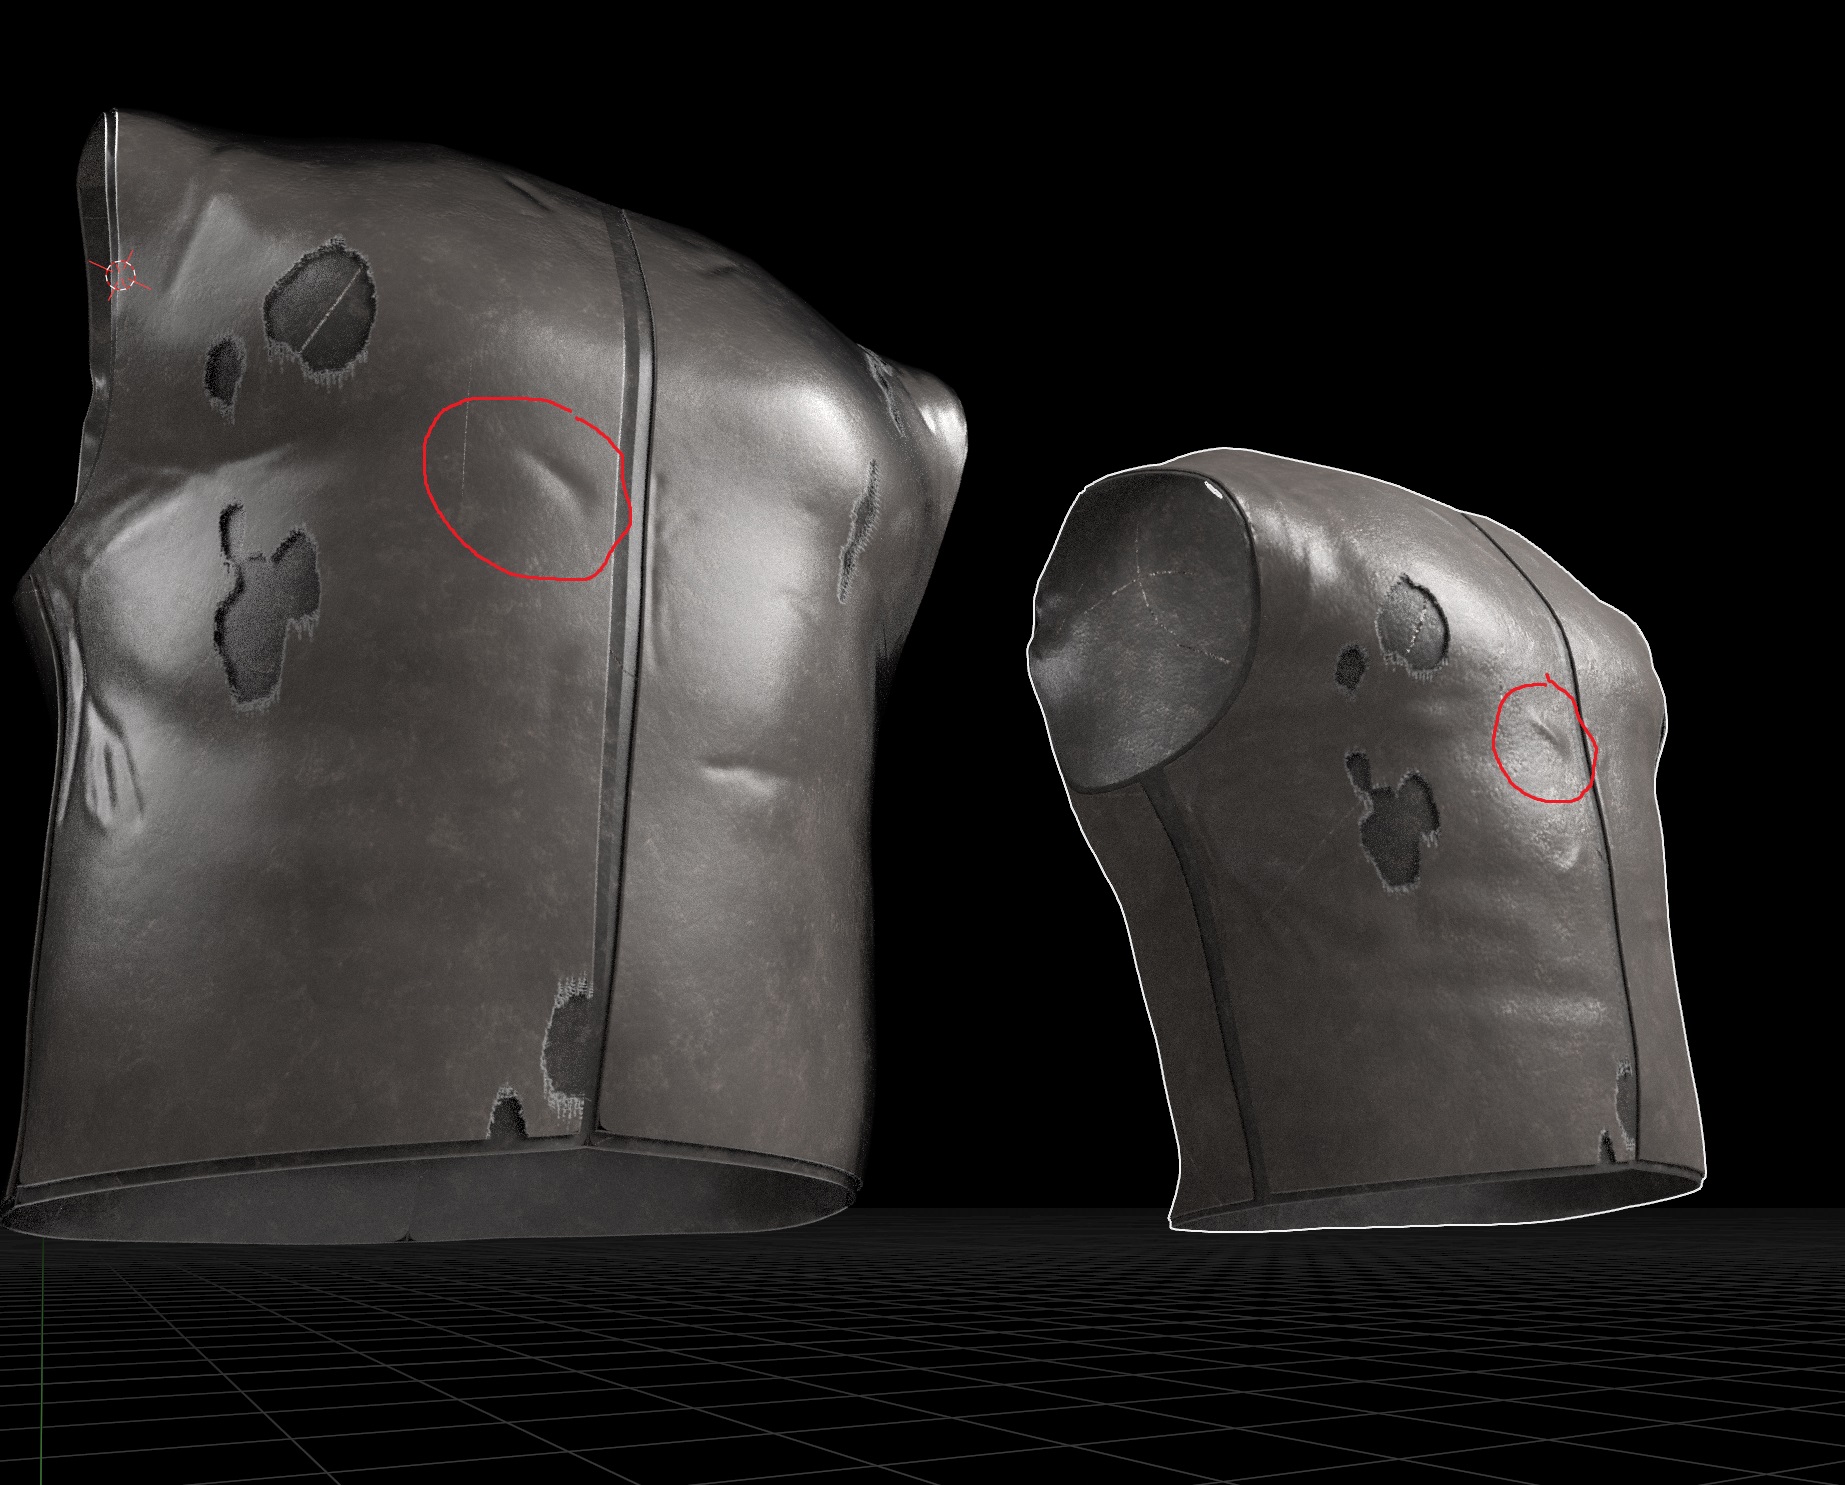
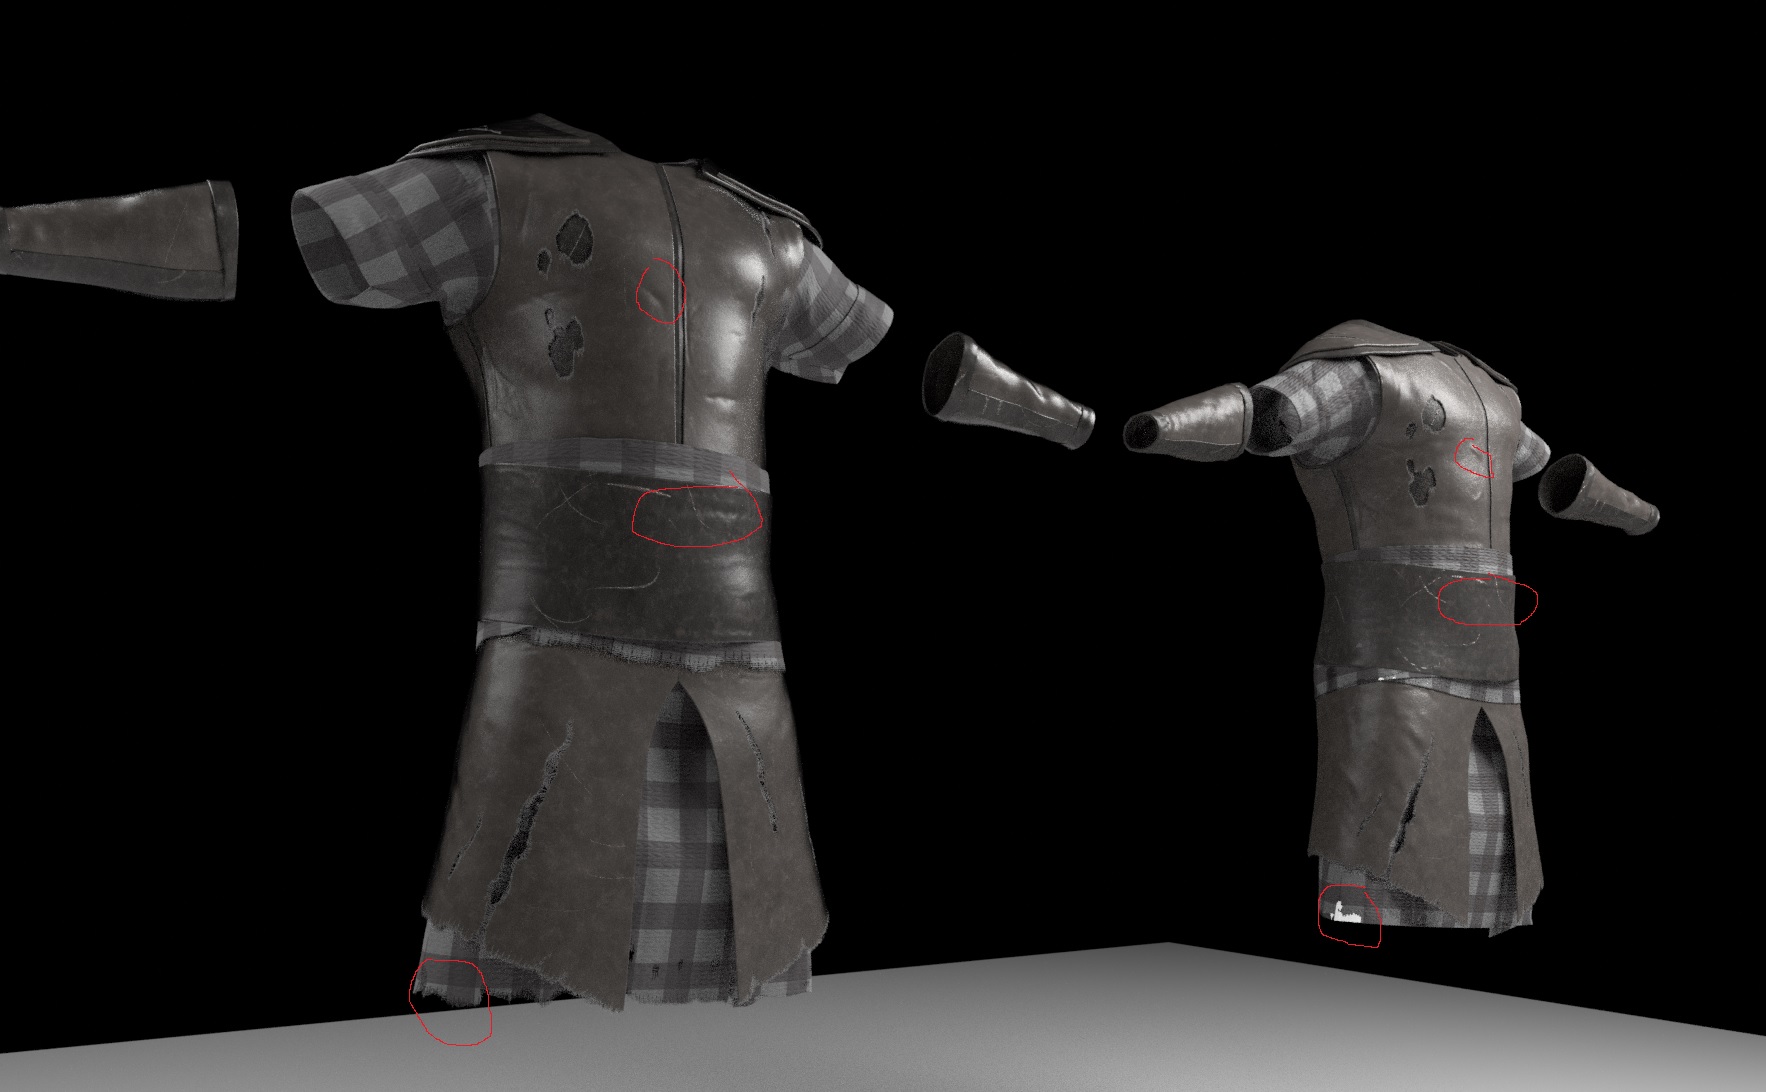
(Inverted Indentures) - LEFT = MULTIRES MODIFIED & SCULPTED / RIGHT = NO MODIFIER
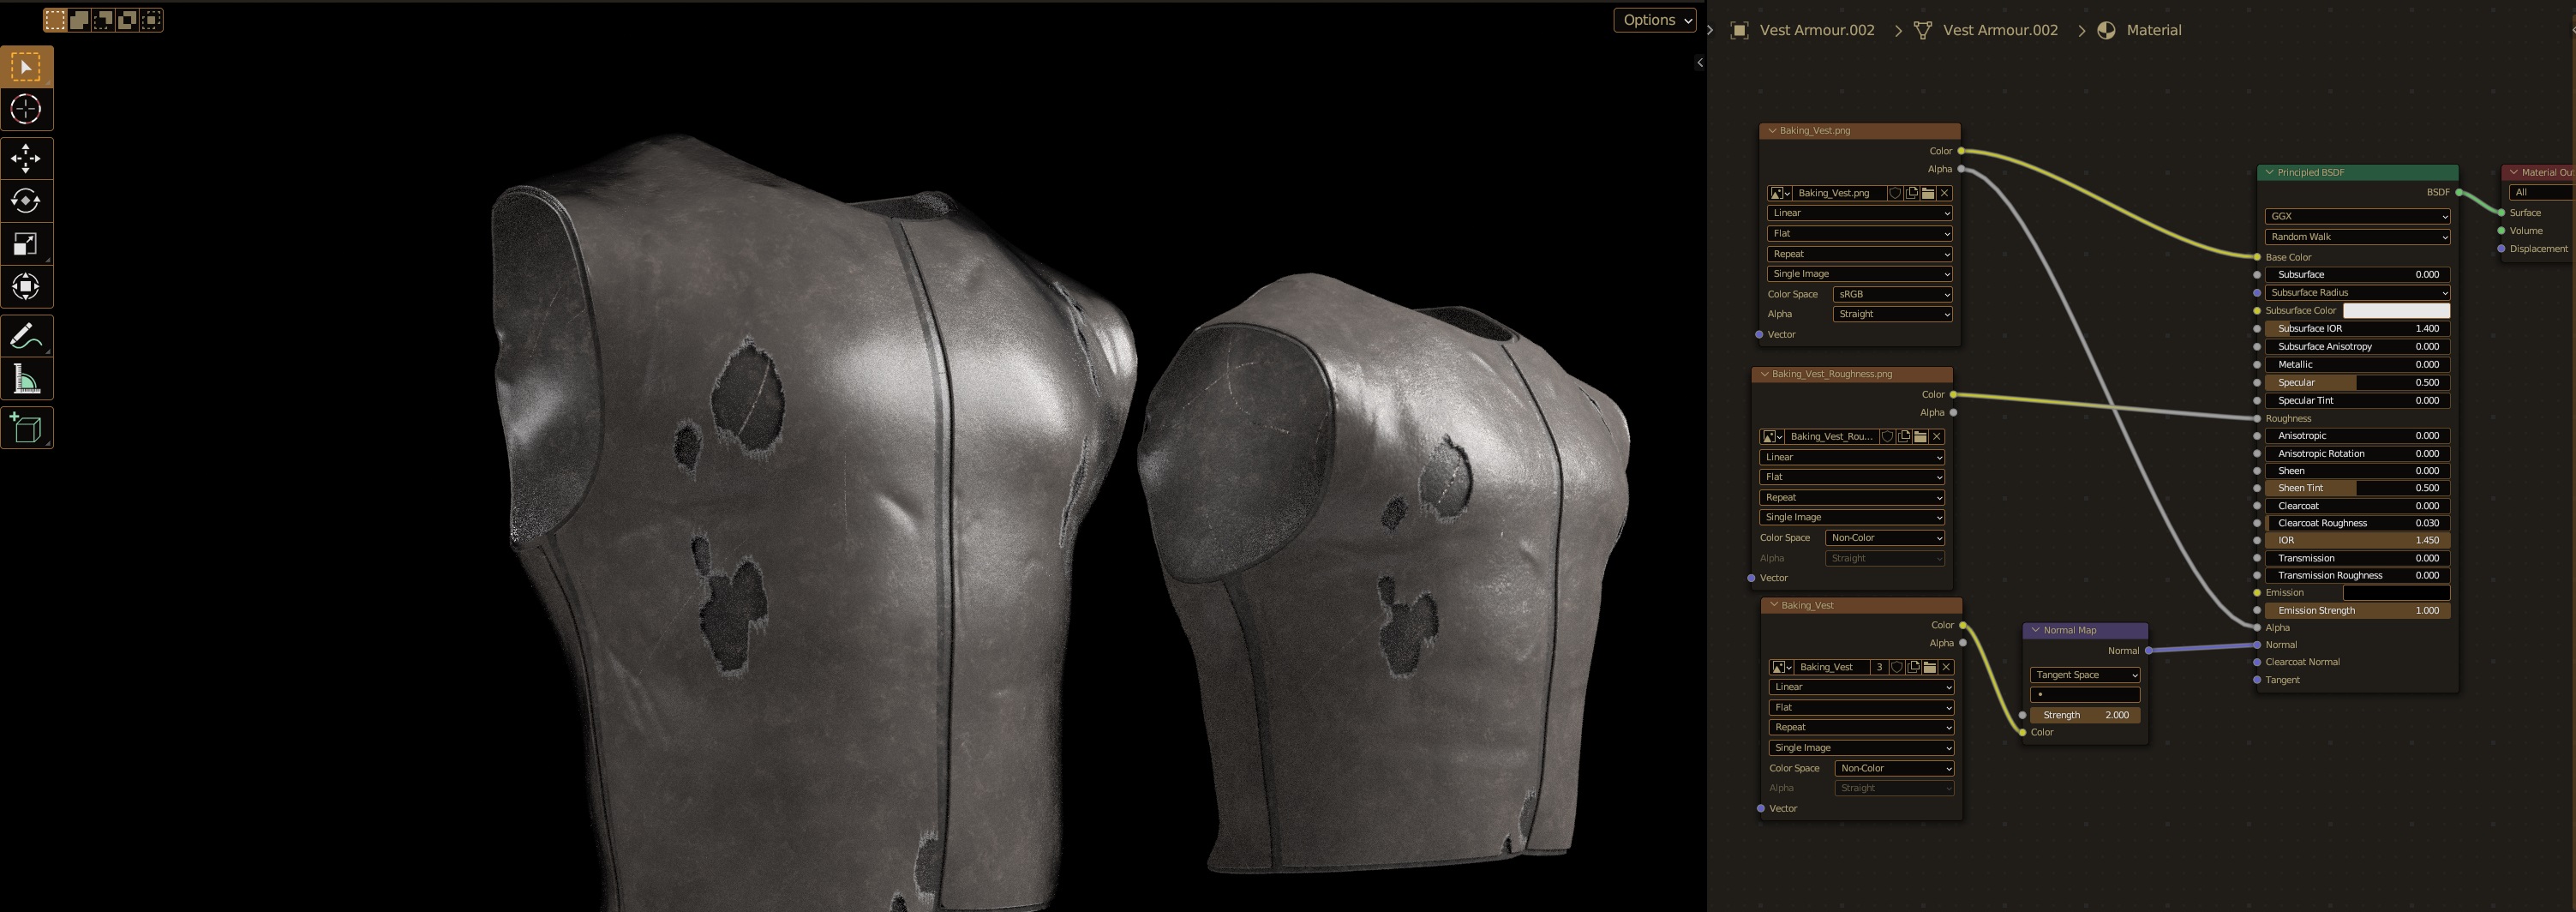
Baking method used is without cage & ‘selected to active’, as shown by Ryan King Art on youtube (link to video tutorial) everything seems to be fine, the diffuse comes out perfect, the roughness map is good, for whatever reason though… the normal is inverted
I had similar problem just a little while ago. Check if low-poly asset normals are facing out. Select all lowpoly model vertices and press shift + N (Recalculate outside). That was the problem for my case.
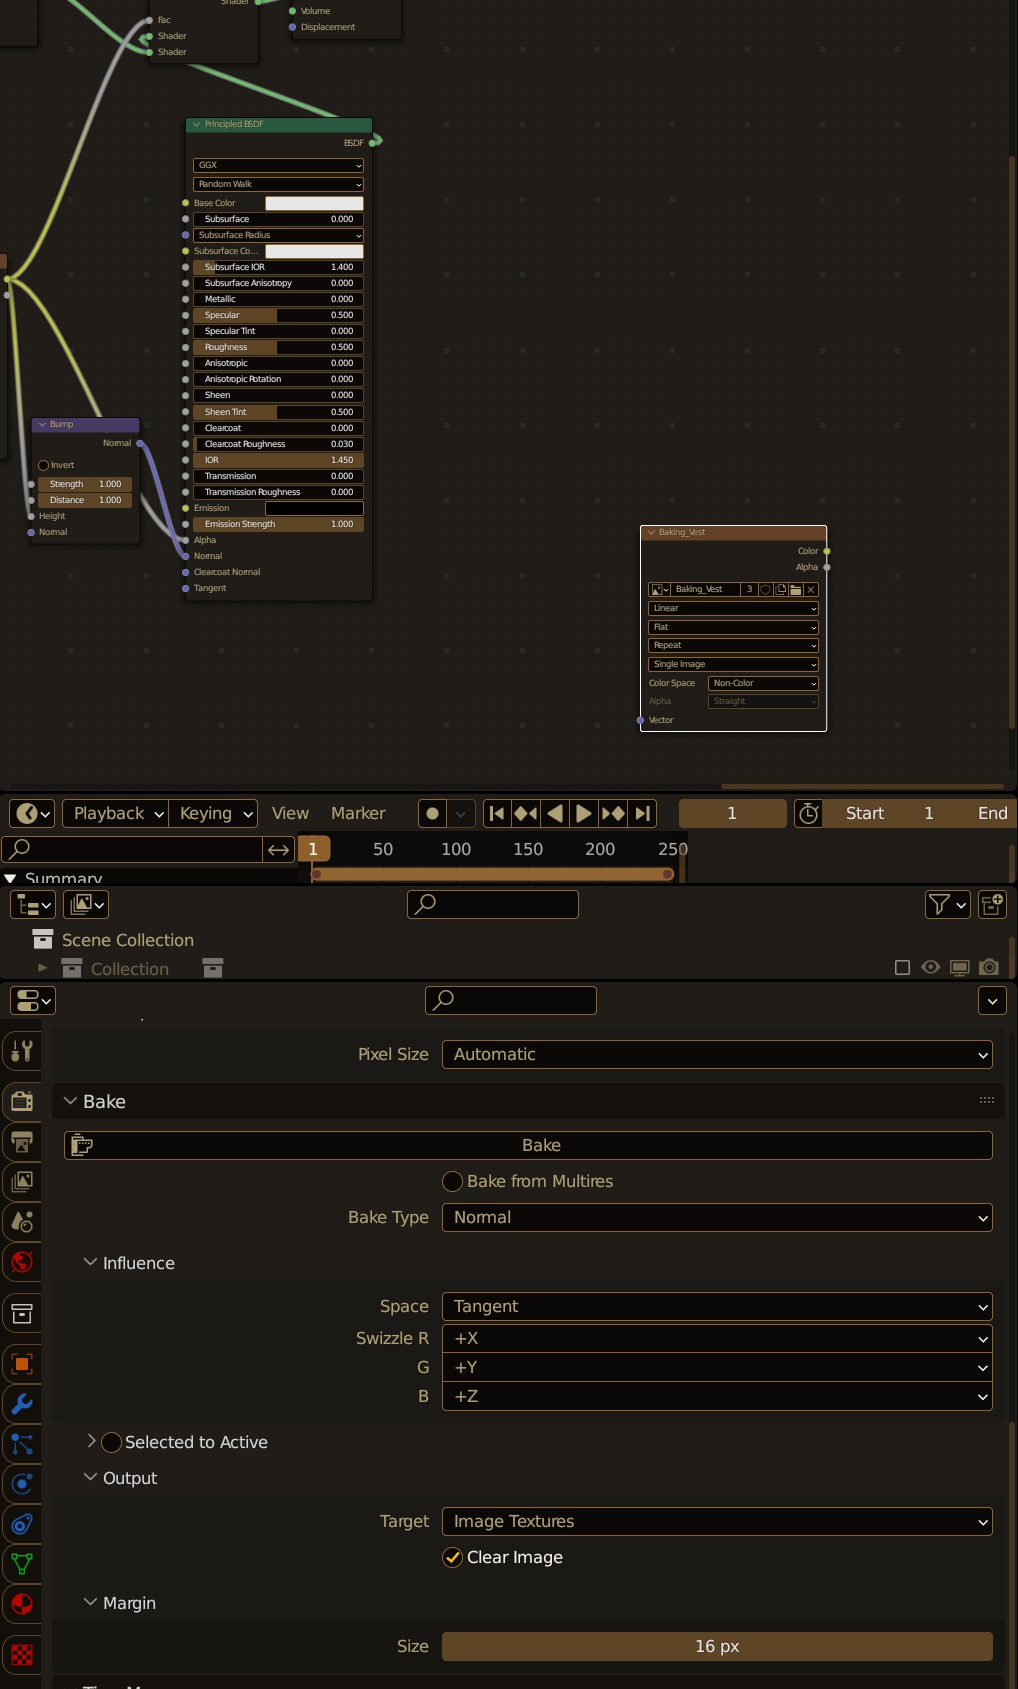
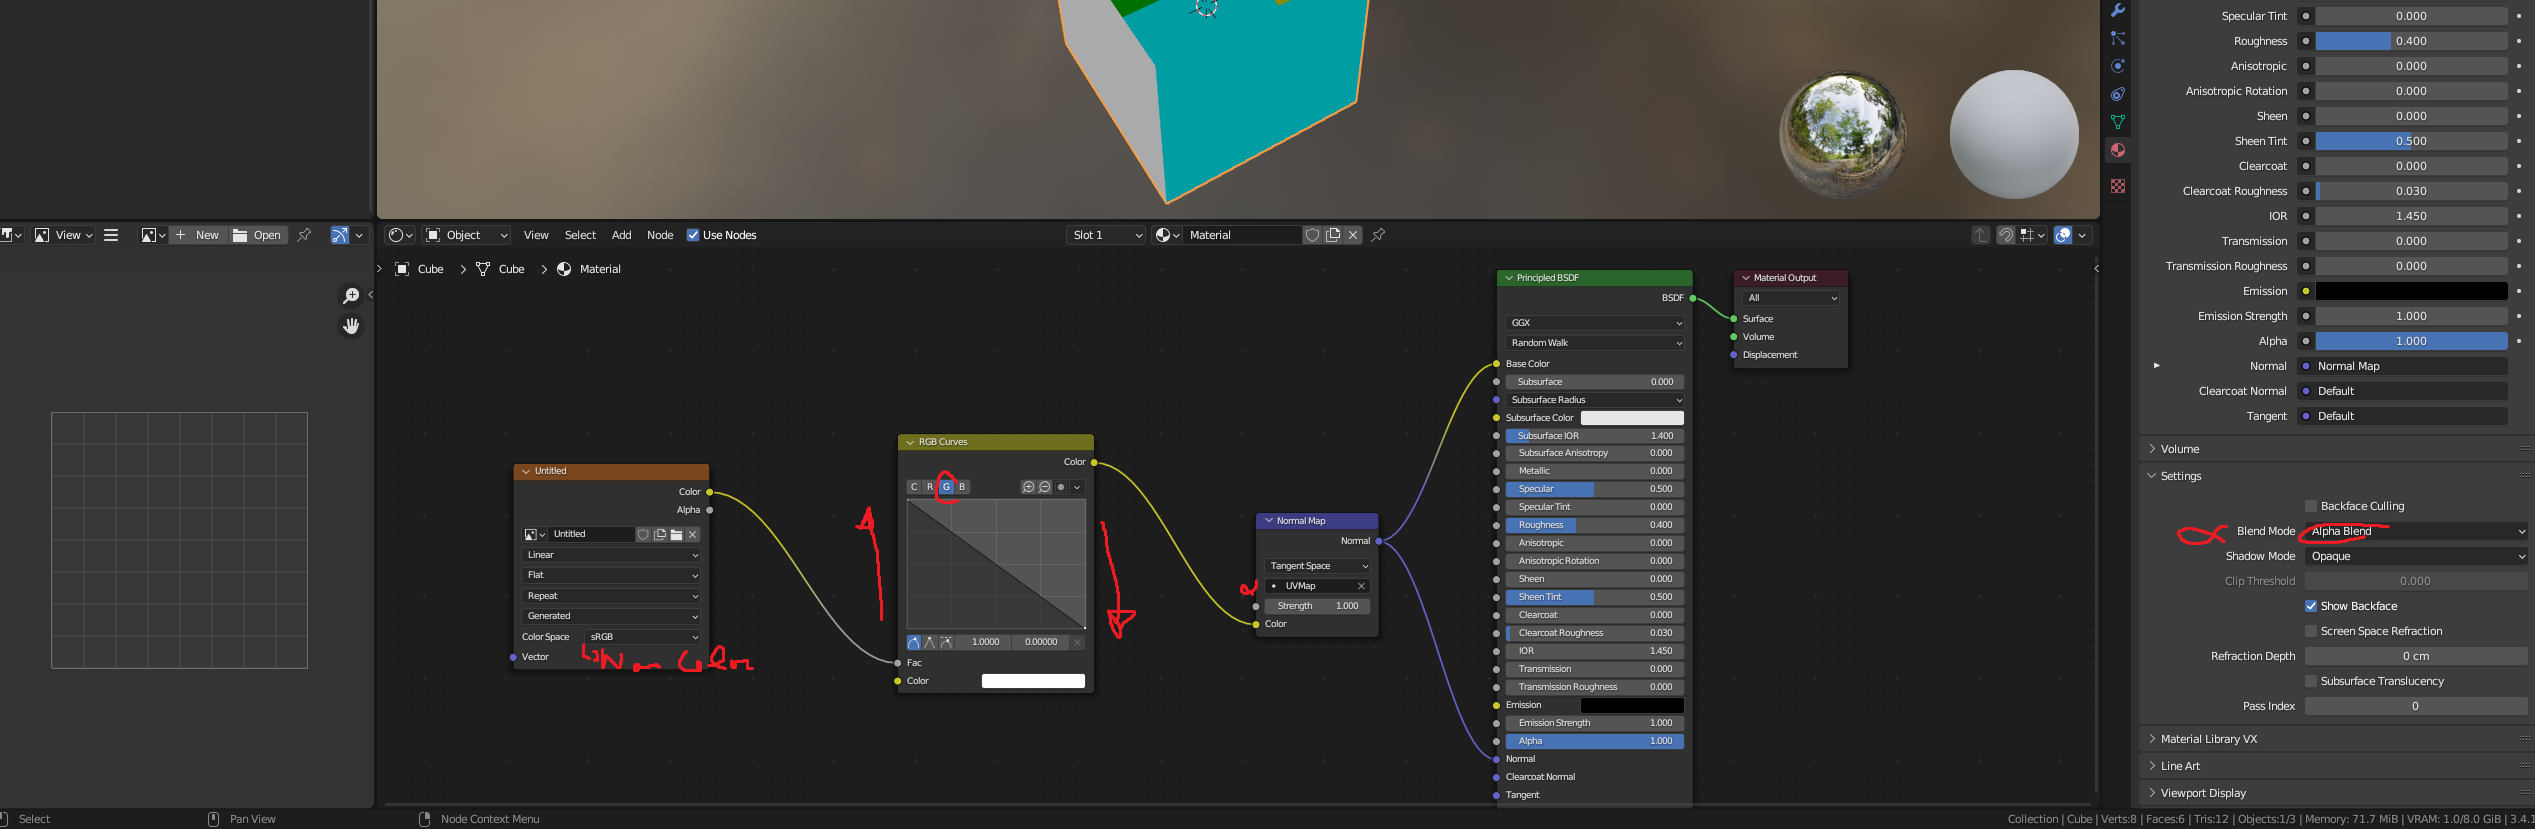
is this before bake or after? if it’s before, can you give me an example of the node tree? i’m not too well versed on what you mean by curve node with an inverted g channel :S, if it’s AFTER bake, i don’ tknow if it will help me since i need to import this into game engines such as Unreal and if they will have the option for such a procedure :S
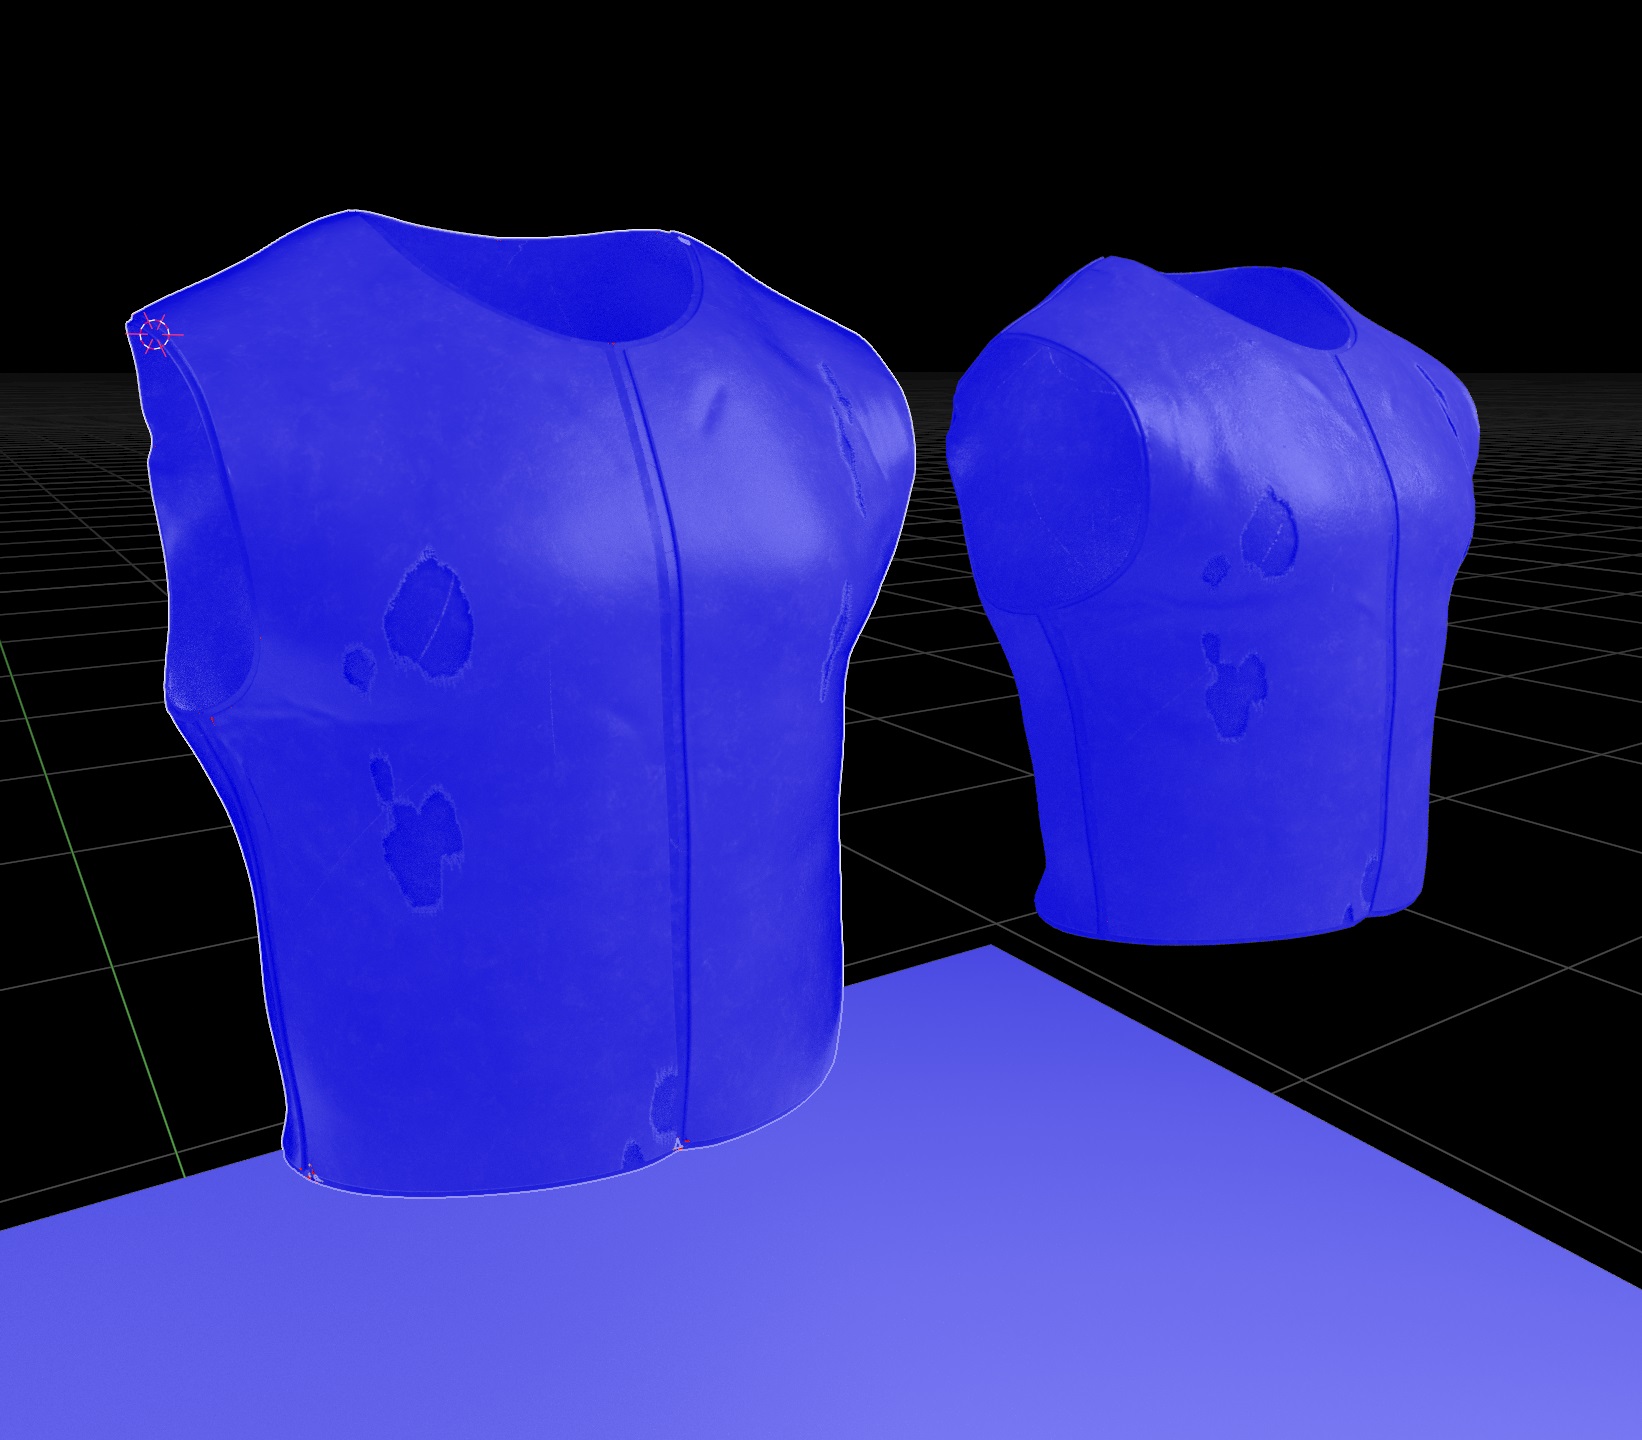
also, there is a blue screenshot above that has the Face orientation checked, everything is blue which means it’s all oriented correctly
also i did a bit further testing with the entire set, and baking the textures made some other problems also… so maybe it’s a software issue but … does that mean i can’t do game-dev stuff because of it?
That’s not that helpful.
I wanted to see, if the UVs are flipped. Double check that.
If that’s not the case, chances are that the culprit lies in something that already has been mentioned in this thread (negative axis, wrong normal map interpretion and so on)
Another rare case that might lead to this problem is an inverted, negatively extruded cage. But I doubt that you used a cage?
Hi
something is inverted in blender. Mb not in other app. You can try a trick node. For further info on space coordinate https://www.youtube.com/watch?v=ybNpspJZEqE
Your alpha aren’t set properly too. You must set this on tabmaterial bottom.
Yes that works too, but in case you have a texture that needs this kind of trick, placing a node in the material “remains” for future uses while ticking that box, well, you’ll have to remember!
Not to mention that the -Y option flips every normal, and you might have shaders that don’t need it
Thanks for the info guys, @lsscpp i’ll keep your method in mind for future textures, the ones i’m using at the moment have big node trees (without using principled bsdf) so hard to figure out where to place the curves…
and @mp5gosu , yesterday i used your method of changing to ‘-Y’ and it worked… for a while, i did maybe 10 test bakes but when I opened blender this morning and tried to bake a few more textures, the setting stopped working for whatever reason, now if i change -Y or +Y it makes no difference.
Very frustrated, can’t figure out what i’m doing wrong or program doing wrong, or some kind of cache backed up that doesn’t execute the bake correctly…