This thread has been setup to make duplicating the problem easy.
I am having a nightmare trying to get normal mapping in Blender to work right. Everytime I think I set it up right - hours setting things up - I normal bake it and theres always a problem! Either the normal map is stretched or skewed in places, or some parts are distored.
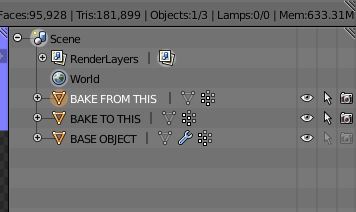
Here is the structure of my blend file: (I set it up and named everything to make it easier to duplicate the problem I’m having.)
Objects in Scene: 3 seperate Meshes
Meshes Names:
BAKE FROM THIS (this is the high Poly Mesh)
BAKE TO THIS (This is the Low Poly Mesh)
BASE OBJECT (Original Mesh: school bus uni-body frame)
OBJECTIVE:
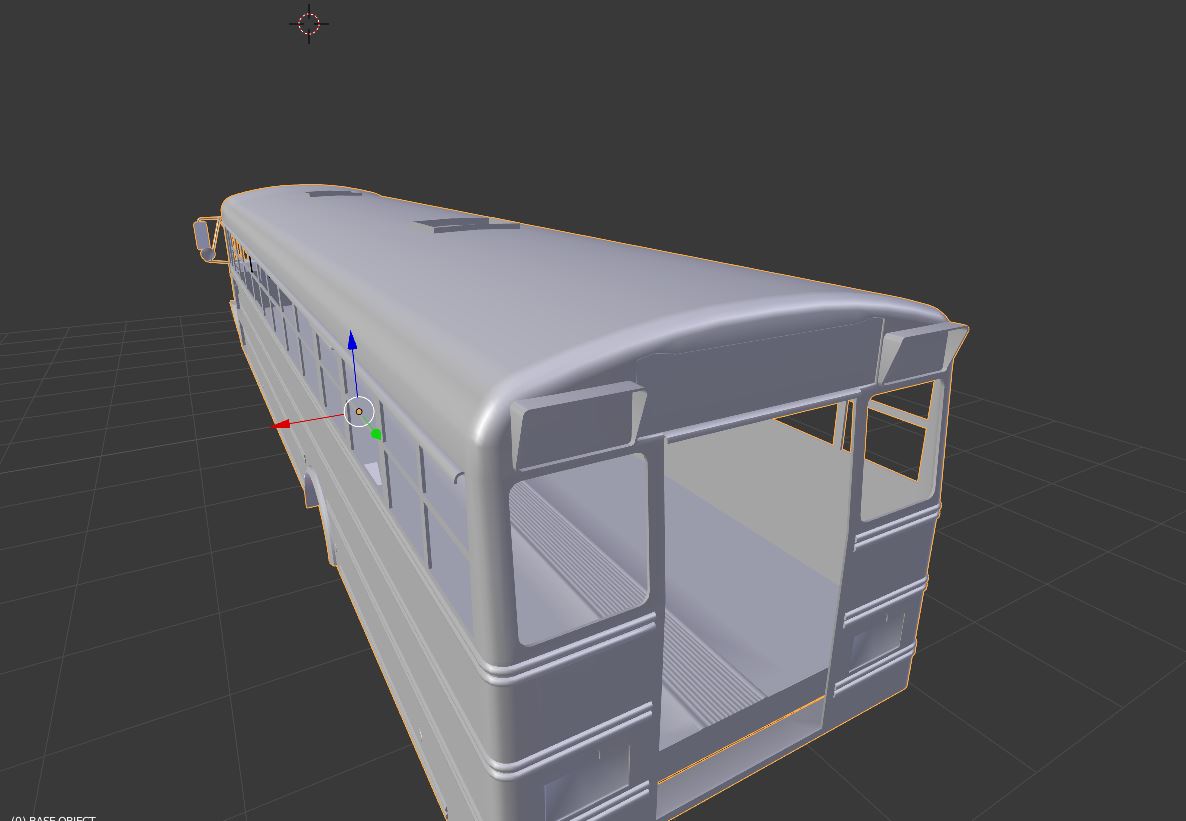
Im trying to normal map bolts and straps onto the roof of the school bus,
WORKFLOW STEPS:
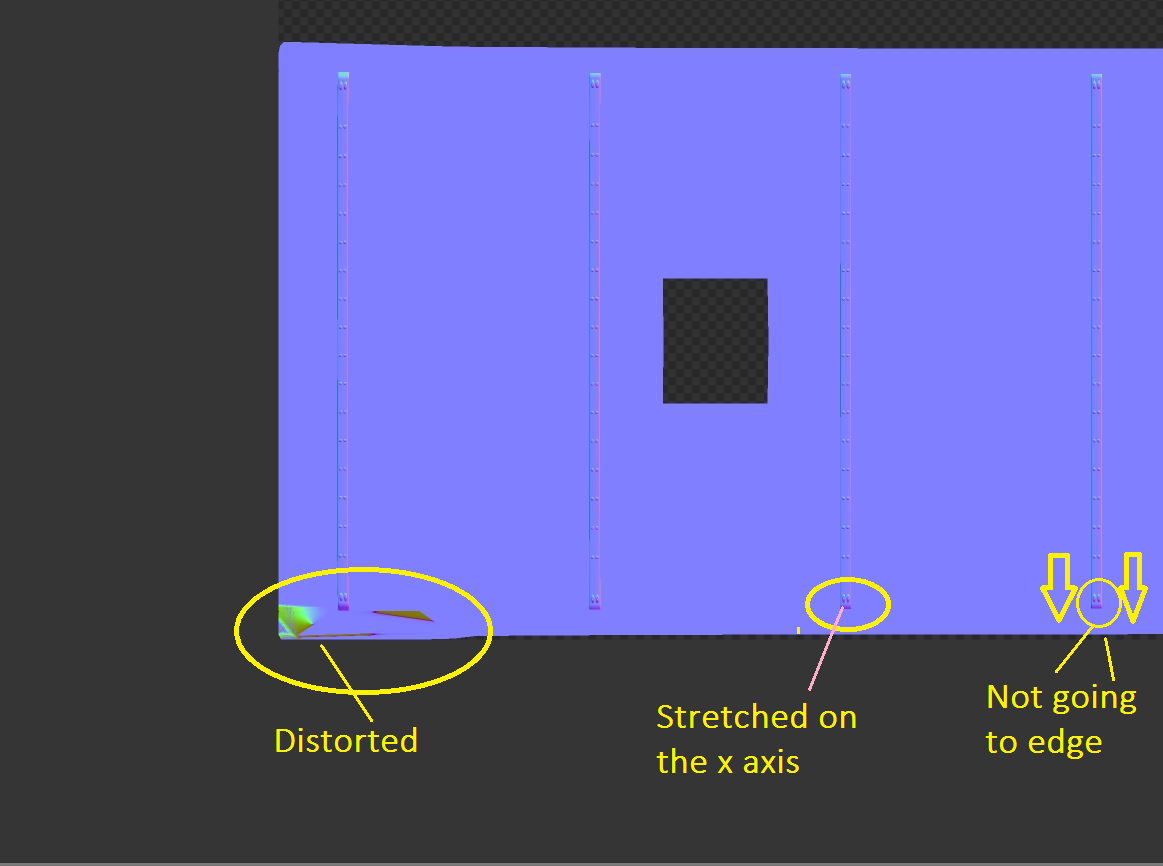
selected the roof faces > Marked Seams > UV -Unwraped the Roof > duplicated the roof in edit mode > pressed P separated the roof, now its a separate object with identical UV map information > (Named the roof: BAKE FROM THIS) > Scaled BAKE FROM THIS on the z axis to 0, it is now flat >duplicated the BAKE FROM THIS in edit mode > pressed P separated, > Named the mesh BAKE TO THIS now its a seperate object with identical UV map information > added high poly details to BAKE FROM THIS > Selected BAKE FROM THIS > Shift selected BAKE TO THIS > baked the normal’s, bad resulted are below>
Your “Distorted” area is caused by overlapping faces in the high-poly mesh in that corner. Looks like a simple mistake. Take a close look and you’ll see. Shouldn’t take too long to fix that part. Maybe you can just get away with moving a single vertex that was moved to the wrong spot…
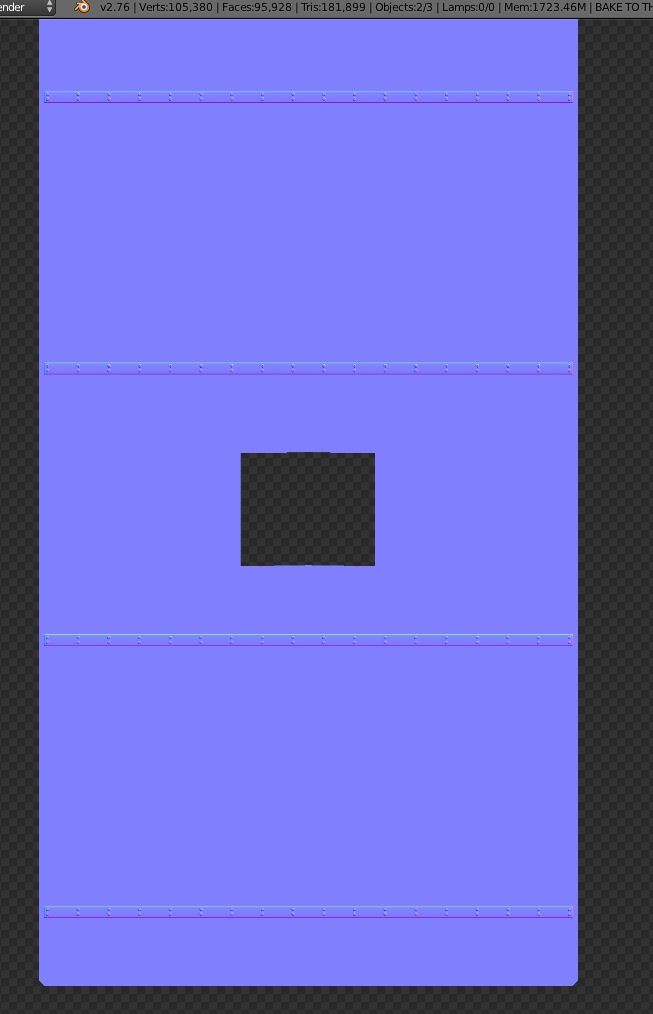
Your low-poly unwrapped UV Map has some stretching in the areas where you’re seeing the other problems. I re-unwrapped it from a top view, projection map. That bake seemed to work fine.
Remember that even if you’re transferring imagery, the UVs don’t have to line up between the high-poly and the low-poly. It’s most important to have a good unwrap of the low-poly, while it’s important to have the high-poly LOOKING good, regardless of how the UVs are laid out.
I am new to UV unwrapping, Normal mapping and so on so I have an absurd amount of questions haha, I see you unwrapped from view, i would do that but the scale is affected by how close or far you are from the mesh in project from view mode, I want to get all the unwraps to a uniform scale on the UV island for some sort of continuity in quality.
So what was it that caused the distort (stretching) on the edges of the original mesh? is it because doing an unwrap from seams takes into account the bend in the original Geometry which the copy is taken from?
also my next questioon is how do i get super high quality uv maps/islands. I will be unwraping the whole school bus to a uv island and I want it all to be of the highest quality.
Here is my plan
use a high quality 8192x8192 UV image background > create each unwrap and Normal bake on its own 8192x8192 UV background > open them all in photoshop >scale all of them so they can fit onto one UV island (high quality is mostly preserved) > load the resulting image into blender > move and scale the UV-unwraps to match the image created from photoshop.
Try flipping your normals. Could be that a few faces have their normals facing in instead of out. OR you may have inadvertently seperated unintended geometry when you duplicated the roof. This is very easy to do. Though, there could be 100 reasons why this might happen. If you unwrap by other methods (project from view, active quads, cube project, etc) and you rebake and this problem still shows up, it is most likely your geometry and/or a seam that isn’t in the intended place. I’ll take a look at your blend and see if anything jumps out at me.