when plugging my normal map into my principled bsdf, the shading looks flat for some strange reason. [I RAISED THE STRENGTH SO YOU CAN SEE THE PROBLEM MORE EASILY, BUT THE PROBLEM IS STILL PRESENT AT 1 STRENGTH] The image is set to “Non color” And the texture does not appear to be baked in a flat shading looking way, so I don’t really see what the problem is here. This normal map was baked using the multiresolution modifier and, despite some tiny artifacts, it looked fine. I then moved it to substance painter and made some additional changes there (it looked fine up until when I moved the textures into blender) But now the normal map makes it look somewhat shiny and flat. Any answers?

Strength is too high.
1 Like
I mentioned that I raised the strength so you can see the error easily, didn’t you read that bit? Even with the strength low it has the same triangular problem, which I’ve personally never had before
Your result looks exactly like I would expect, given how flat and triangular your normal map is. That is to say, I’m not seeing any incongruities between your normal map and your object’s appearance
What’s the rest of the material/mesh look like? I’ve not had normal maps affect specular, at least not to a significant degree, in my materials, but I have had a low roughness pick up issues in the model I didn’t know where there.
What do you mean? That’s the entire mesh there. It’s actually 7 objects sharing the same material
Well the normal map looks smooth and the mesh looks like its both flat and smooth at the same time, it’s really weird. It’s not that important really, because the asset is to be used in unreal engine, and I’ve already exported it there and it looks completely fine, I was just wondering how to fix the issue inside of blender
Here’s the information you need.
[Part of the content of the link]
There are two different standards for Normal Maps - DirectX and OpenGL. Substance painter exports DirectX maps by default, whereas Blender assumes the maps are in OpenGL configureation. Baiscally, Blender is reading the normal map wrong and flipping the orientation of some normals.
Substance Painter에서 내보낼 때 잘못된 노멀 맵: r/blenderhelp (reddit.com)
Actually, I had already fixed that problem in substance painter and set every normal map to OpenGL, so that is not the problem.
I mean, what’s the underlying mesh, the object without any material look like, maybe even a wireframe. And seeing the rest of the node tree making up the material might help people figure out what’s wrong.
1 Like
Sure. On the right there is the material and on the left is one of the objects that uses this material in solid mode The topology is slightly messy and slightly uneven because of the multiresolution modifier, but nothing crazy. I can say with confidence that the topology is not to blame for this error. (By the way, I intend to use these assets for unreal engine, and in unreal engine the material looks absolutely fine, I was just asking because I wanted to know what was causing this problem in blender, it’s not that important)


You’re using Eevee, right? Your mesh looks fairly low poly. When I made a similar shader to yours I got the same triangles (Visible mainly in the shadowed areas).

I think that’s just part of how eevee handles rendering, especially on lower poly objects.
1 Like
That mesh specifically is about 2000 triangles, and it’s good enough when put with the normal map
I don’t doubt that, especially if it already works fine in the destination software. I was just offering an explanation for the weirdness you were getting in the render.
Both the look of the artifacts and the circumstances that caused them (modifying it in an other software) make me think that your normal map either:
- got its colors shifted a little bit
or
- at some point passed through the wrong color space / color transform, which changed the data slightly.
Normal maps work with very specific hues for each channel and the slightest shift will make it mismatched with the normals of its mesh.
1 Like
By the way, when baking the normal map in blender with the multiresolution modifier, I got some (although small) really ugly artifacts. I don’t really know how to solve this problem, and I’ve already deleted the multiresolution modifier off all the objects, so the high poly versions are lost
I would have to know what they look like before I could even try an answer. Normal maps can get multiple types of artifacts. Do you still have the image with the artifacts?
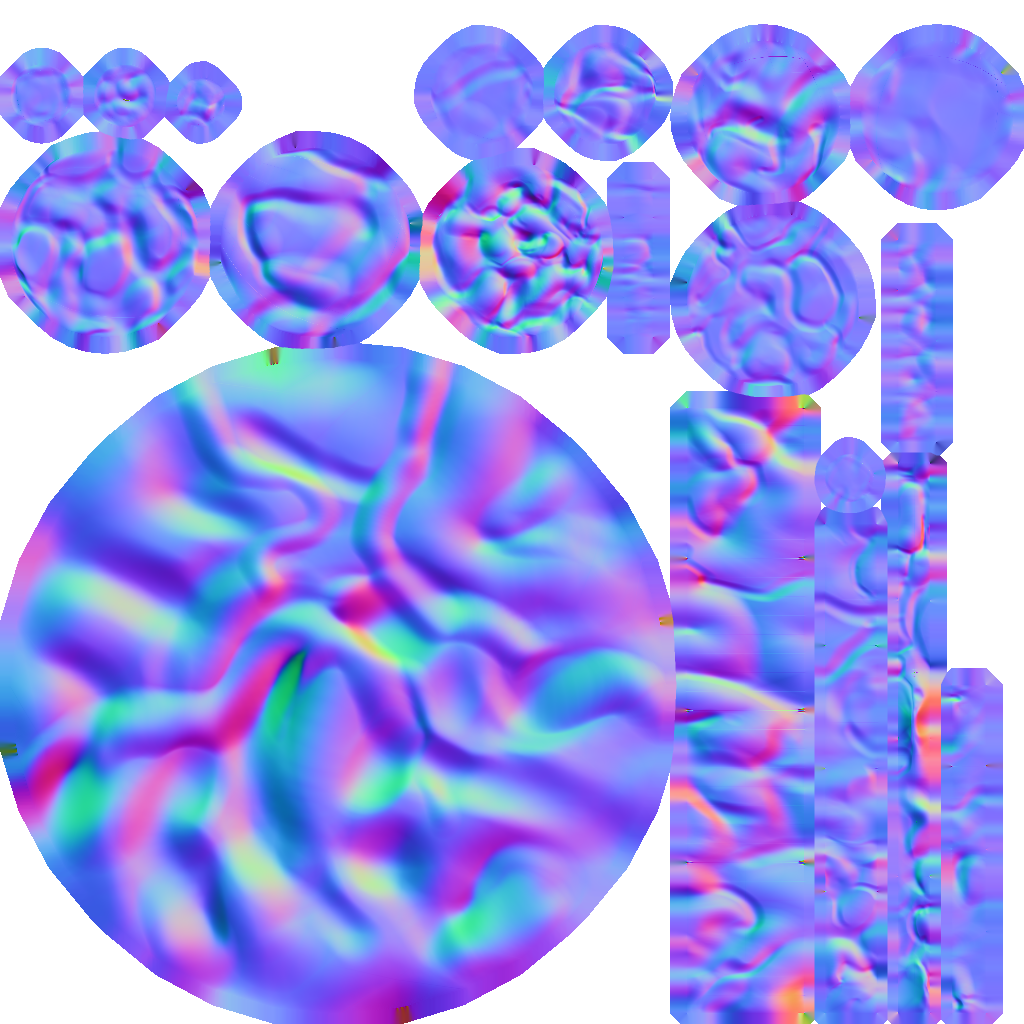
Here it is. It was mostly fine, with minimal seams, but zooming in on some parts you can see weird holes and sort of like scratches that looks like absolute garbage in it. This is the version I imported into substance painter. The reason I did it was so , when creating the albedo texture, I could preserve some extra normal detail that came along with it.
Seeing this, I would check my UVs, to make sure they are all correctly merged and have no overlap.
I would then check my mesh itself, for the same reasons.
Then, check if the normals are facing the right way and recalculate them if needed.
If that’s all correct, I still have an other idea. Blender’s multires is sadly well known for being a bit unstable. However, there is a way to remove and reset the modifier without losing anything:
- Apply the multires at the highest level.
- Put a new multires modifier on the object.
- Use the “unsubdivide” button to reconstruct the lower levels.
Now, you have a fresh multires modifier with a low poly mesh that’s guaranteed to match perfectly with its higher levels.