I’ve been looking into a bunch of different NPR shading techniques, and felt it would be good to try my hand at them.
The main limitation that I’ve seen is that most systems are extremely limited when it comes to lighting. Take Lightning Boy Studios’ system for example. If we use two channels for character and environment shadows, that leaves room for only one accent or rim light.
This system uses axis-aligned empties (or other objects) as shadowless point lights (with backface masking), and uses a modular masking system to give fine-grain control over color.
I am also using a shadowless directional key light built through drivers in order to separate cast and normal-based shadows on some materials.
Very impressive - will you be sharing your setup? I do a lot of Blender to Illustrator graphics and that robot is exactly the style I’d like to achieve.
To give a little more detail in text, I’ll start with Lightning Boy Studio’s light system, which this extends.
In order to have lights be fully independent of each other, and to separate lights from shadows for individual control, Lightning Boy uses pure Red, Green and Blue as independent channels for lamps.
However, this is naturally limited to 3 lamps, which Lightning Boy separates into:
R) environment shadows (any -> environment)
G) Character shadows (any -> character)
B) Back / rim light
Naturally, this limits us to only one accent / rim light, as we cannot use the Alpha channel on lamps.
This system gets around that limitation by finding a way to treat other objects as lamps using the Object texture coordinate.
While the material still needs to be aware of each “virtual point light” in the scene, this may actually be beneficial, since you get to decide how different light sources interact. It also avoids using Drivers, though if I create an addon for this, drivers would be more flexible.
One built-in limitation of this method is that lamp objects must be globally aligned (world coordinate rotation is 0, 0, 0) in order for normal-based occlusion to function properly.
I would be happy to share! I’m still working out some features, as well as how I want to handle mixing the masks.
Currently, the node groups in my setup almost purely generate masks, and many of the materials end up looking messy when i quickly link them together.
I’m looking into ways to make things conducive to well-organized nodes, but a lot of my options severely limit how you can mix the colors.
I can upload the Blend to Google Drive or something, but I will likely update it soon, and this is mostly a stopgap solution until Beer 1.0 comes out.
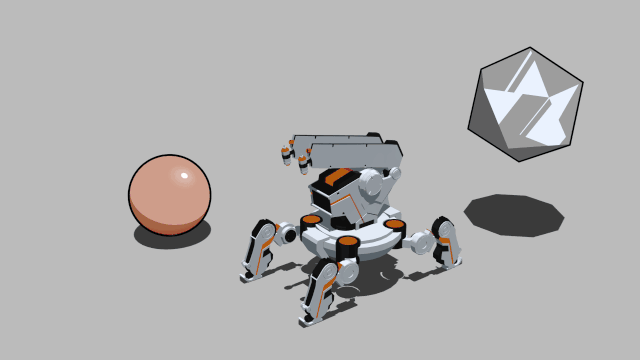
I’ve continued reorganizing the way masks are generated and combined, and am starting to come up with something worthwhile. Here’s a new image to mark the progress:
As you can see, I have been choosing a variety of different object types to see what nodes are desirable, and how they are often combined.
I’ve added an input for previous masks on most nodes, and worked out the math to create point and line lamps (shadowless, of course, but with normal-based culling).
My final step is to organize these into a single unified set of nodes that combine consistently.
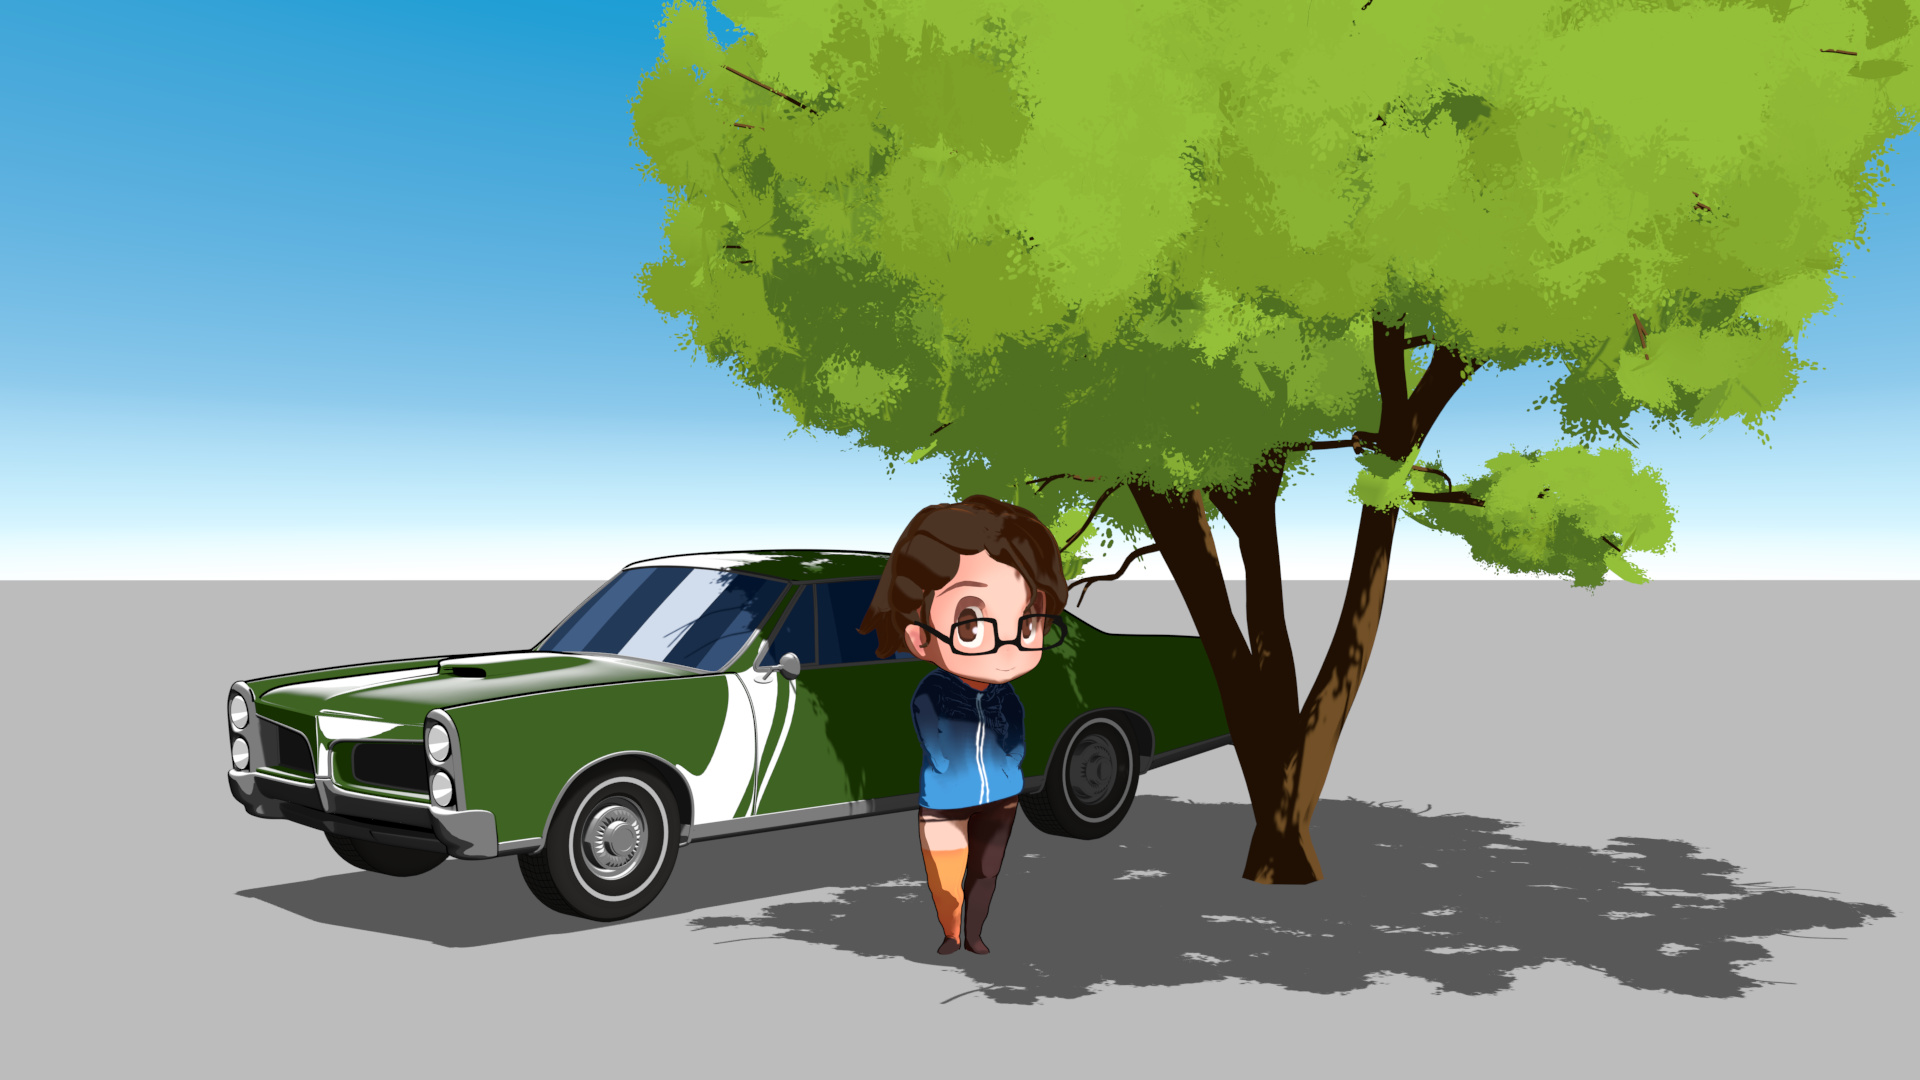
That is the raw output from the rendering engine - It takes advantage of the fact that the Vector Transform node plays nice with particles, and uses this to form the leaf normals.
Each leaf clump is made of 4 warped planes - 3 are visible but cast no shadow, and one casts shadows but is invisible; All faces act as if their normals point in the local +y direction.
This post is old, but I would love to see how you managed to separate core shadows and cast shadows. I have been looking for a way, but I haven’t found any so far. Information for Npr is still pretty hard to find. Maybe a node tree or a process explanation, if you don’t mind, would be nice.
It’s a workaround with some drawbacks, but it’s the best I think is possible within the constraints of the EEVEE rendering engine.
The overall strategy is that objects should only cast shadows on the back face. Combining this with a low shadow bias makes it so that convex shapes don’t cast shadows on themselves.
You can find a detailed breakdown here: https://blendernpr.org/downloads/
I looked it up and there were a lot of different NPR shaders. Do do happen to remember the specific title for the npr shader download? Would it happen to be ‘Advance Shadow Control’?