Object clipping into each others

Hi, I’m new to blender and trying to follow the tutorial of blender guru to make a donut.

I encounter a problem at the moment of making the icing dropping for more realism. My problem is that the icing, as I drop it down, clip into the donut and in the render I can see the donut through the icing.

I’ve followed the instructions of “Snap” tool with “Face nearest” and “snap to next target” but it don’t work. I’ve tried too with “face project” and then " Project individual elements" as blender guru told to do after the update but it didn’t worked either.

So I ask your help for that. BUT, I’ve seen rewatching the previous video on how to make the icing appear that I have a different thing on the wireframe mode.


That’s what he gets and that’s what i get is just like I don’t have any icing (no space between the interior of the icing and the exterior like if it were a thin paper) (sorry I can’t put two images cause it’s my first post)

I’ve followed all his instructions but don’t have the same result and I’m asking myself if it could be part of my problem.

I’m sorry if it is too long and for the english (not my first language).

Thanks in advance for the responses !!!

Welcome to BA, and the Fellowship of the Torus of Doom! :doughnut:

Your icing is very thick. Ideally it should be a thin layer on top of the donut (even with the Solidify modifier, the inner layer should not intersect with the donut). Make sure your scale is applied, because that affects how thick the Solidifier becomes. If Scale is applied, make the modifier thinner. Might also have to scale the icing up just a little (again, apply scale after doing that).

But even then you might have problems. The way BG originally described it does no longer work in recent versions of Blender because snapping has changed, and even his pinned comment didn’t work for many people. We had a recent thread debugging this… where was that… Blender Guru Donut; Snapping/ Proportional editing woes

I think that user ended up waiting until the next episode, whichever is the one where BG shrink wraps the icing, and then he got it to work.

1 Like

Im glad you could confirm my growing suspicion that scaling and snapping dont that way anymore! I made sure that i applied scale to both the donut AND the icing… but was unsure if i should select ALL topology and apply said scale, OR apply scale 2 times (donut and then icing afterwards), did it over 2 times - well maybe its not important… What concerns the Shrinkwrap and the thickness of the icing intersecting with the donut, you probably have a point there - i will look into it! Thanks for your input :slight_smile:

1 Like

You can apply scale to several objects at once. If you’re not sure whether you did apply it, you can look at the item information in the N-panel – if the scale values are all at 1.0, then scale has been applied.

1 Like

I checked and they look ok - but what about dimensions? I have different figures for donut and icing?

Yeah, because they are different. These are bounding box dimensions, and therefore estimates of actual size because the bounding box encompasses the object on all sides, but it’s not exactly form-fitting – it’s a box. (If you’re curious you can see bounding boxes by going into Object Properties → Viewport Display and turning on the Bounds display.)

1 Like

Well that clears that up! What concerns the thickness of the icing, I cranked the thickness down from 6 to 4… whick expectedly gave me clipping-thru issues, but scaling it a little a bit up solved it it seems… i applied scale again, but have to admit that i cant figure if the inner icing still intersects with the upper of the donut… dont know if there are any readings for this hidden inside of Blender. I often wondered about how many Blender Youtubers made their models and seemingly gladly forgot all about inner unseen unwanted geometry… it may be a problem only if the models is intended for a game… but anyway. Thanks for your input as usual!

Looking good, your donut!

Yeah, many don’t care because, heck, out of sight, out of mind. It doesn’t necessarily matter – if all one does is render the scene for a pretty still image, you can forget about the inside. Mere intersection might not show – however, coinciding faces will, for example, and that’ll cause shading issues. And it does matter in so many other situations (games, 3D printing, animation) that I think it’s better if one learns how to avoid it, which isn’t all that hard. But that’s personal opinion from a generalist; if it never matters in your specialty the extra effort might be a waste of time.

I usually just model so overlaps don’t happen, or happen only in situations where I am planning to use a boolean anyway. If I did the donut today I’d probably solidify to the outside.

Blender has no single setting that can tell you whether you have overlaps, but it has 3D printing tools which will analyze your mesh because for 3D printing it has to be “watertight” and not contain internal geometry; those can help.

1 Like

Being bit of a nit-picker :wink: I turned to the addon 3DPRINT and checked the geometry finding non-manifold faces which I then let the addon fix… i think that the warning “non-manifold edges” is as it should be… but could of course be wrong :slight_smile:

Could you possibly clarify your sentence “If I did the donut today I’d probably solidify to the outside” … in which way? Im sorry, but im less than fluent what english concerns… :stuck_out_tongue_winking_eye: :crazy_face: :stuck_out_tongue_closed_eyes:

1 Like

He just means in the solidify modifier on the Offset switch from the default -1.00 to 1.00 (Negative to Positive…so that the icing grows away from the donut and not into it…)

3 Likes

Yeah, checking for manifold edges was what I was referring to. Being a nit-picker is excellent for 3D modeling. :wink:

As to the solidify, RSEhlers got it right. Watch how the solidified object expands when you change the offset. One can solidify in different directions depending on one’s needs. If I need to maintain outside dimensions, for example with a drawer in a cupboard, I solidify to the inside (negative value), if I want to avoid overlaps like with this icing I solidify to the outside (positive value). Sometimes I solidify from the centre outward in both directions (value of 0), like with a knife blade where I located the outline in the centre of a knife handle.

2 Likes

Thanks to you both for elaborating on this subject :+1:

1 Like

The picture right there is not from my render, it’s from the Blender Guru’s video.
Mine look like this :


The scale is applied, my thichness is at 0.01m, I’ve tried to put the icing a little bit up the donut but it doesn’t change anything.
I’ve applied the subdivision modifier and then made the icing more thick. I can now make it drip more and I’m satisfied with how it look. BUT, when I try to make it drip more I have the same problem, so I got around the problem but didn’t solved it.
So do you know why it didn’t solved the problem or is it supposed to work like that ?

Short answer: It’s supposed to work like that.

I reproduced the donut in 3.3.1 with the new snapping options. And I can get it to work but not if I use the same numbers as BG. It does snap fine with the right combination of options selected, but while the vertices snap correctly, the faces created by the Solidify still clip. Even after I added a couple of loopcuts to the bottom to get more vertices. There’s basically not enough geometry here to avoid it.

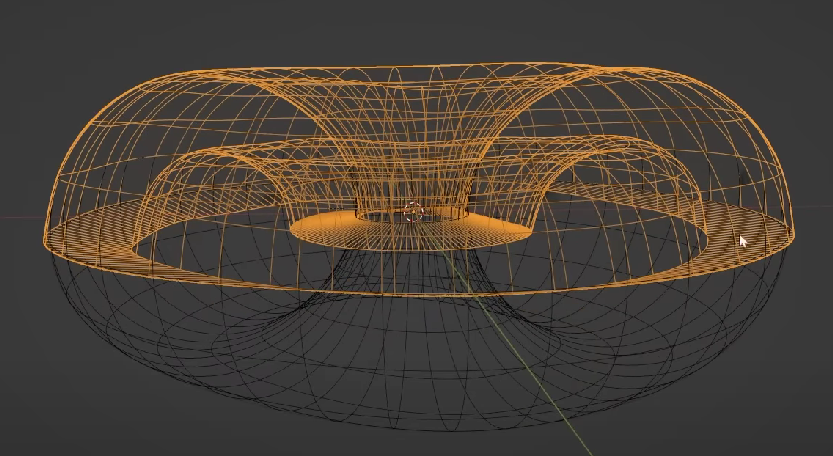
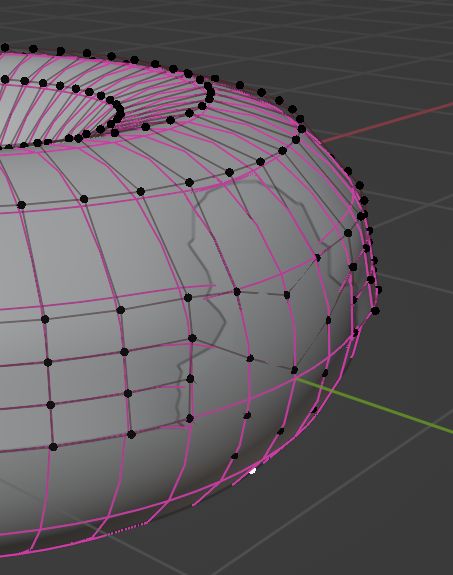
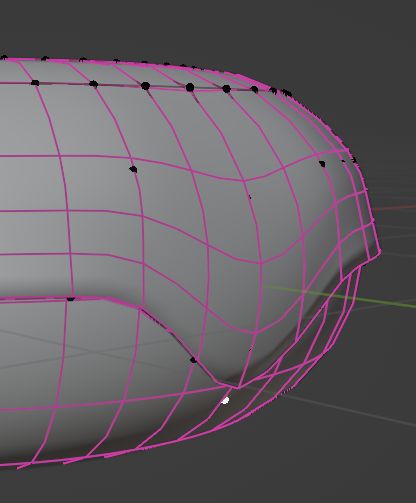
See here; Solidify modifier is turned off:


All the vertices within the circle of influence of the proportional editing have correctly snapped to the donut. But you can see the faces still clip.

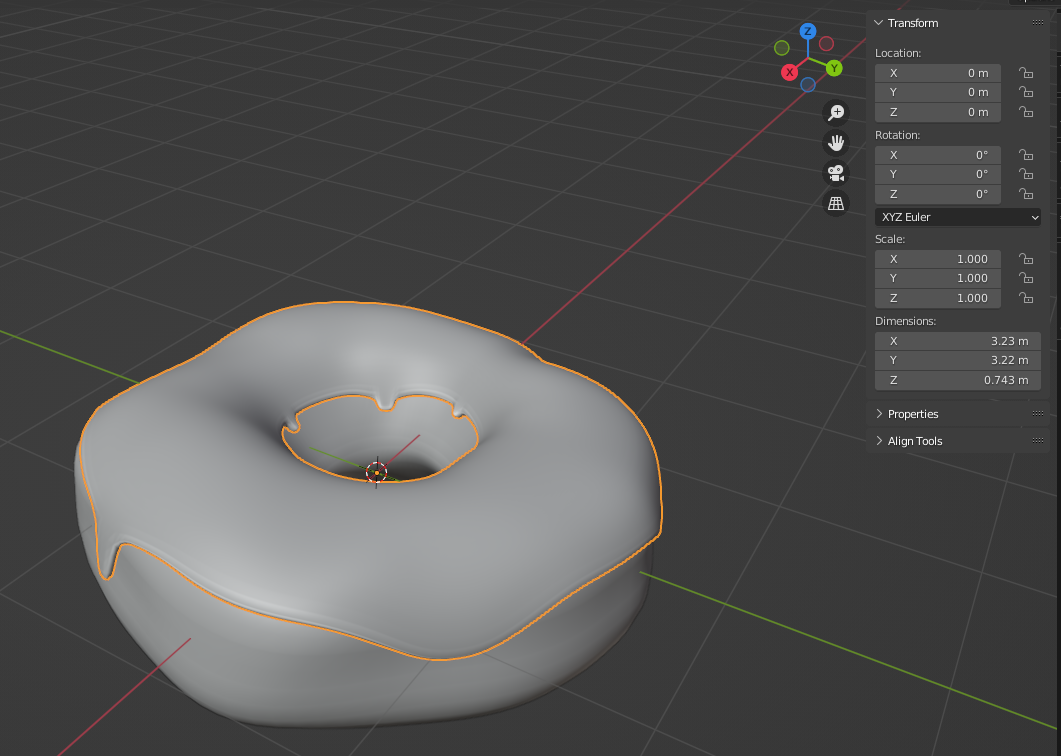
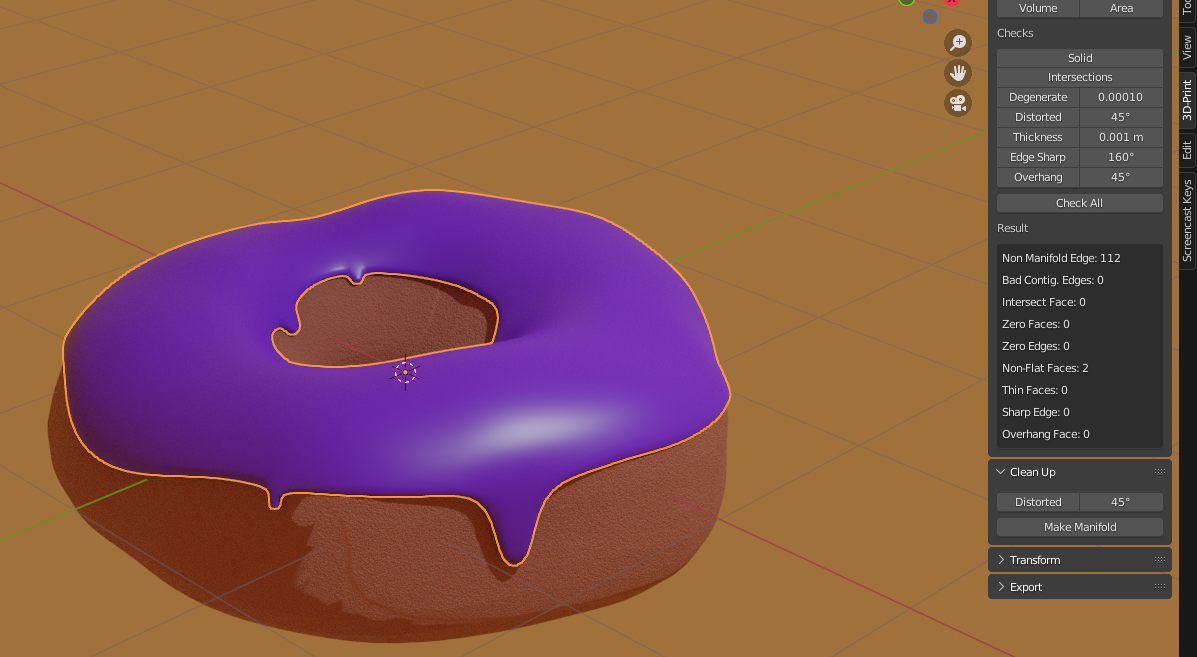
Solidify turned on; looks alright:

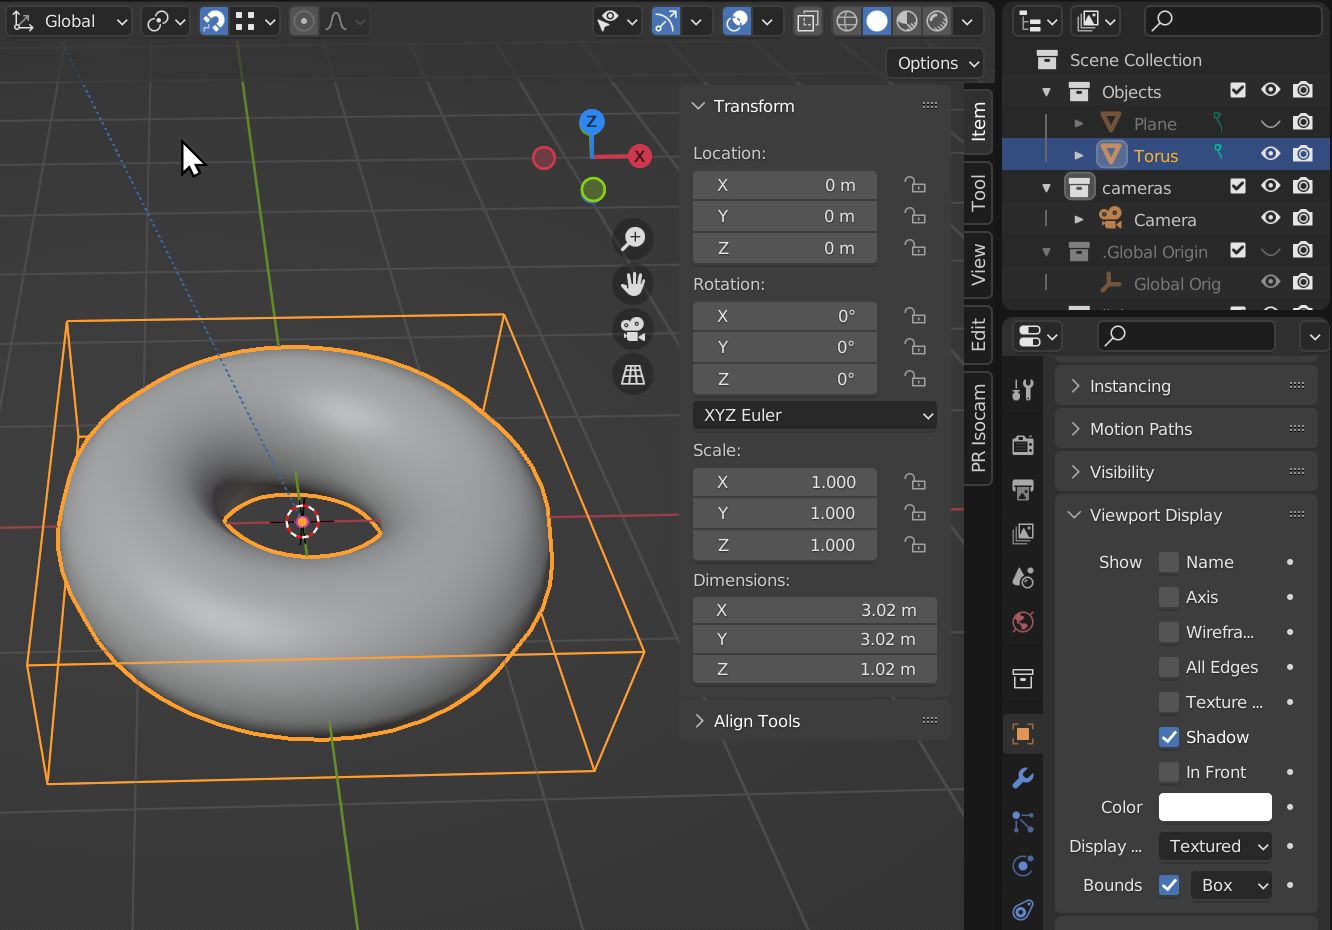
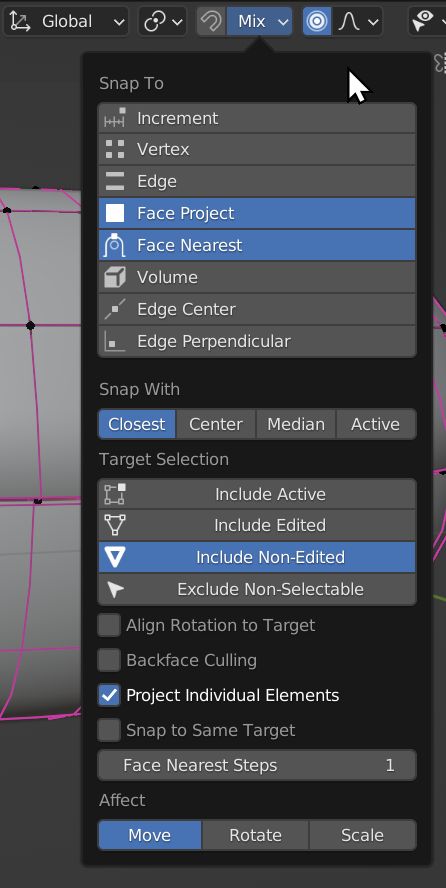
These snapping options make it work:

Edit: Actually, these options are not all needed either. I’m not sure what I did wrong the first time, but after more experimenting I can get it to work just with Face Nearest and Include Non-Edited. Face Project plus Project Individual Elements plus Include Non-Edited also work – that one is the closest to how it worked before this change. One more notable thing seems to be that the snapping doesn’t appear to take a subdivision modifier into account – there should have been enough geometry to not clip so much in my case with a subd of 2, but… Which means one can get a much better result if one applies the subdivision before starting to pull the drips.

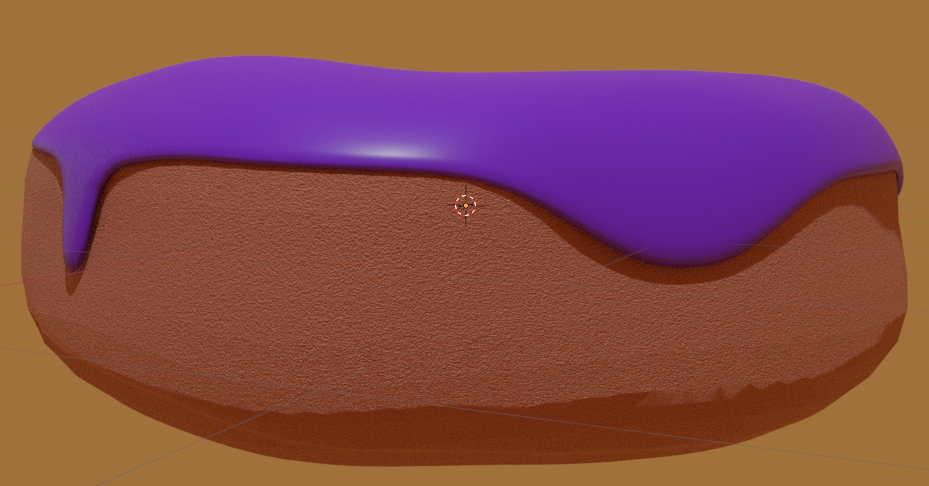
What exactly did I do? First I raised the icing up a bit above the donut (not much, just 0.014m in the z) and scaled it up a little (1.011) to get some distance between the donut and the icing. Then I solidified to the outside (positive offset value – make sure your normals on the icing are pointing to the outside). I made the icing 0.03m thick. Added a couple of loopcuts at the bottom. Then I snapped with the options I showed above.

This means that you simply have to play a bit with the positioning and the thickness of your icing and you can achieve a good result. If you don’t add more geometry, you’ll have to make the icing even thicker. If you want thinner icing, you need even more geometry. Once you know this, you can adapt to most situation. (Also, IMO this works a bit more intuitively with shrinkwrapping – which BG will introduce in one of the next lessons.)

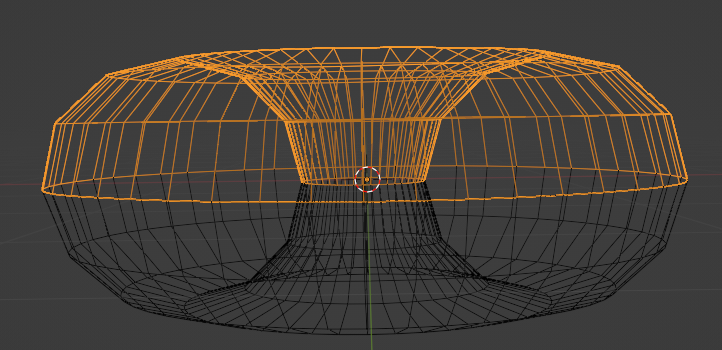
Yes, there is still overlapping geometry on the inside. But since this never shows up in any renders, and you’ll never do anything else with this donut but render it in Blender that doesn’t matter. If you want to learn how to fix that with some help from Blender, just so you know for other objects where it might matter, scroll up and see where @tommyolesen uses the 3DPrint tools.

Good luck with the rest of the donut!

3 Likes

Very informative!

1 Like