Hi! So I’ve decided it’s about damn time I stop TALKING about doing things in blender and actually start doing them. I’ve got a few base models behind me and now that I got comfortable with the control schemes I decided to get around to doing something more complex.
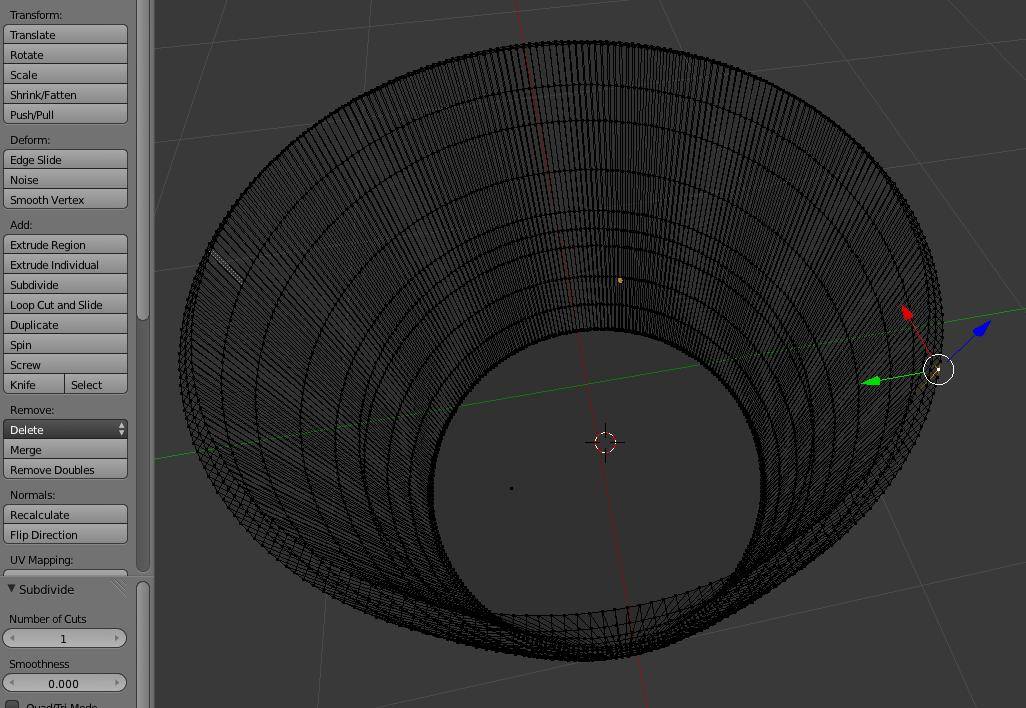
So I decided to make a mug… or at least a base mug that I can modify for other projects, Everything seems normal, I added a cylinder, subdivided it once for more roundness and circularized it with shift+alt+s. Than I took the top edge and split it, raised it up and shrunk it down a bit on the x and y axis. After that it was a matter of splitting what remained again and moving it to the bottom of the mug. Afterwards I manually selected (I would love tips on that btw) each section and using the F key I created faces connecting the new ring with the old ones, All that I’ve done to create a wall of the mug. Now here comes the issue. After I was done with creating faces manually (since the fill tool hates me) I’ve messed around with what I had and noticed a highly annoying issue. Whenever I try to subdivide the whole thing to round it up a bit one of the walls decides it should smooth the other way to everything else.
Photographic evidence:
I don’t know what to do with that issue. Obviously I’m not going to smooth the whole thing by a factor of 1 (maybe 0.1 or 0.01 if anything) but it’s showing a problem that I might have in the future.
Any advice on how to deal with that?
Additionally advice on creating faces on a big object faster would be marvelous.
Herp. I’ve uploaded it to sketchfab https://sketchfab.com/models/gFLBYtpQDmjBKBlcU5rUvYwNxFJ
.
Or would you rather have me upload it to a service like mediafire? I’m not sure if I’m allowed to link to services like that as a new user.
Anytime something does something “the other way around”, the first thing I think of is “flipped normals”. You could try recalculating them, since Blender sometimes gets them wrong when you attach faces manually.
Plus you are using a very large amount of polygons for this, especially around the cylinder as a whole. You really only need 8 to 16 sides, and let the subdivision surface modifier do the rest with smooth shading turned on.
Yeah I might have gone overboard with the amount of verts used to achieve the circular shape. I’m of course not going to have it subdivided to 256 for modelling (only used subdivision here to showcase the problem), in base there are 128 verts in each section for circular shape. The main reason I’m using so many is because after I’m done with this thing I will 3d print it, I’m not sure if smoothing affects the object after printing so I decided to go crazy.
And I’m also testing how well my PC can handle objects with so many poly’s, it’s not bad… yet.
Anyway, since I grew a brain today I’ve uploaded the blend. file to mediafire it’s here : http://www.mediafire.com/?ed3b0yqbajgbe5e . Since the post is moderator approved anyway I’ll know if I can’t do that :P.
While we’re on the subject you mentioned flipped normals earlier, how does one go about fixing that kind of thing? You probably don’t have to go into keystroke detail but it would be helpful nevertheless.
Additionally, I will be adding objects to the outer layer of the mug, I would like them to be mirrored and symetrical on both sides. If I remember correctly that means I have to essentially cut the thing in half and work with one of the sides with some sort of mirror editing on. Thing is I’ve seen that done years ago, and not only do I not remember how to do it, it is probably different in this version of blender. Help?
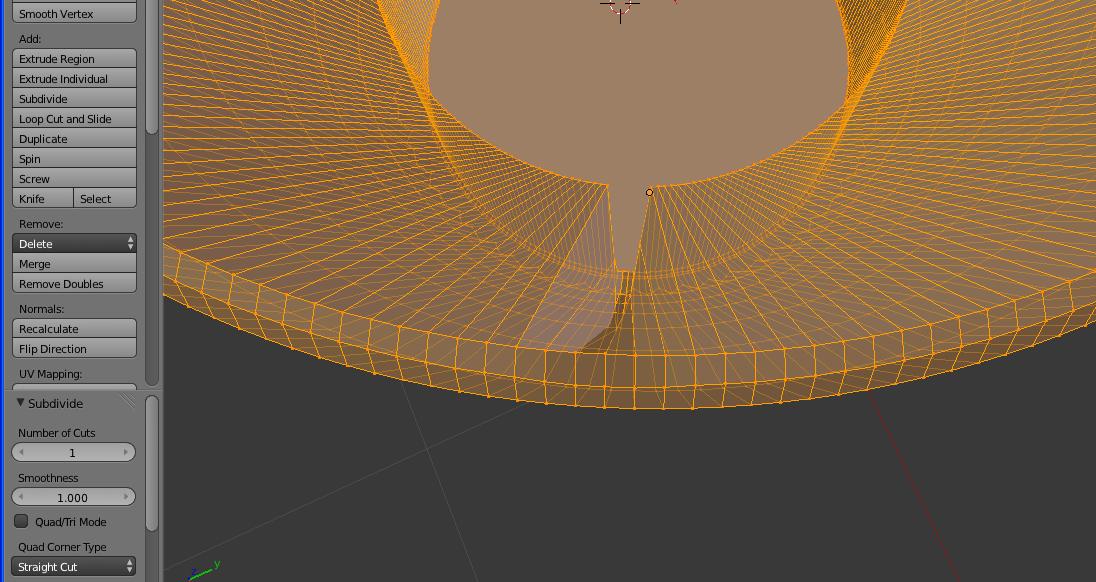
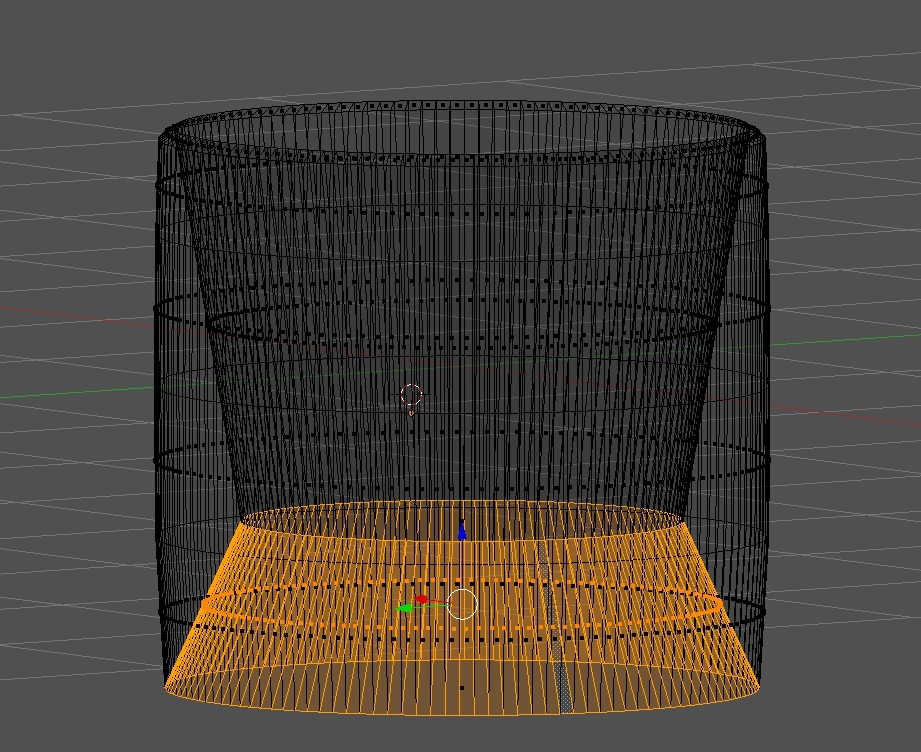
Jus took a quick look at your .blend. You have some flipped normals indeed, but thats not the main problem. You have interior faces in your mug. I don’t know how you did it, it looks like you tried to connect the outside of the bottom with the inside of the bottom. This causes the main smoothing errors.
I scaled the inside in a little to show it better. The orange faces are the ones causing the weird shading.
Delete them (select them -> x -> faces).
Once deleted, recalculate the normals of the mesh (select all faces, press CTRL+N).
Now the weird shading on the edges comes from the giant round ngons that make up the inside and outside bottom. Select each individually and press i to inset them a small amount.
You might also want to add some edge loops on the edges of the mug as supporting edges for the subsurf modifier.
You have flipped normals. In edit mode select all vertices (A) and type Ctrl-N.
I second ajm’s comment… Way too many vertices to work with; also you have some smoothing issues because your faces are long and rectanglar – it’s best to keep faces as square as possible.
Ah I see what I’ve done now. Yes my intention was to connect the edge of the outer wall with the bottom of the mug that was supposed to be slightly indented, didn’t expect it to cause such an issue.
Since this is a really simple thing I’ll just remake the whole thing from scratch and I’ll try to use less verticles this time. Thanks to this I’ll at least know what do to if such an issue arises again (and let’s be honest it probably will :P).