Oslpy adon - running a subset of osl on the gpu

OSLPY is an addon converts a subset of OSL that can be expressed in nodegroups in cycles to nodegroups that can run on the GPU

Can I just use any OSL script and expect it to work?

Sadly: no.

This add-on only converts the bits of OSL that can be expressed in cycles nodes. So if it wasn’t possible in the past it in a cycles material won’t be possible now, so…

OSL’s wide range of noise sources: unsupported
while loops: unsupported
closures: unsupported
string functions: unsupported
raytracing functions: unsupported
Returning from the middle of a function: unsupported

This doesn’t sound overly useful, what is it good for?! what does work?!

Most purely procedural texture shaders will work or can be made to work with minimal changes.
most math based functions like sin/cos/tan/asin/acos/atan/atan2/dot/length/add/subtract/multiply/ceil/floor/mod etc
Limited support for static loops, loops in the from for (i=0; i<10; i++) { do something } will automatically be unrolled at compile time. Dynamic loops (based on an input parameter for instance) are not supported.
if constructs (like if (x) y=a; else y=b; )
most logical operations and/or/xor (like if (x and not y) y=a; else y=b; )
function calls
Limited static array access

How to use

Install the plugin from https://github.com/LazyDodo/oslpy and add an OSLPY node to your material, beyond that it’ll work pretty much like the regular script node. There are a bunch of sample scripts that are compatible with oslpy include in the zip file, including the source files for bricktricks.

It’s not overly great at reporting errors yet, keep an eye on the system console, it tends to print there why it is unhappy.

And finally some results:

RenderTime OSL 5:29.16 (i7-3770)
On the gpu with oslpy 1:14.59 (gtx670)

small demo showing the addon in use

https://youtu.be/eLsujpx2ItU

It’s far far from complete, but good enough to be useful to other people, so … enjoy!

1 Like

I’ll post some scripts to get some more OSL love going.

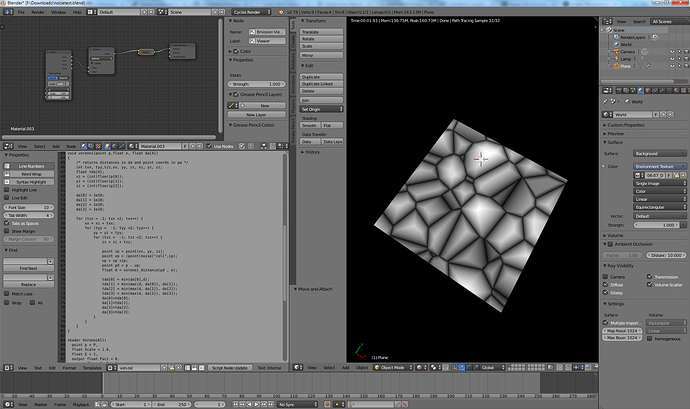
an improved Voronoi texture, being able to do the classic F2-F1


/* this is node_texture.h from Blender 2.74 with all excess bagage removed */
/* the VoronoiAll shader I implemented is at the end (varkenvarken) */


/*
 * Copyright 2011-2013 Blender Foundation
 *
 * Licensed under the Apache License, Version 2.0 (the "License");
 * you may not use this file except in compliance with the License.
 * You may obtain a copy of the License at
 *
 * http://www.apache.org/licenses/LICENSE-2.0
 *
 * Unless required by applicable law or agreed to in writing, software
 * distributed under the License is distributed on an "AS IS" BASIS,
 * WITHOUT WARRANTIES OR CONDITIONS OF ANY KIND, either express or implied.
 * See the License for the specific language governing permissions and
 * limitations under the License.
 */


/* Voronoi Distances */


/* For some reason most of the distance metrics were commented out in the */
/* original node_texture.h I just restored that (varkenvarken) */


/* Having this massive if switch here, really slows down the shader given oslpy has to calculate */
/* all values an then mix them to resolve the if */
/* Just uncomment the one you need (LazyDodo) */


float voronoi_distance(vector d, float e)
{
    return dot(d, d); //Distance Squared
    // return length(d); //Actual Distance
    // return fabs(d[0]) + fabs(d[1]) + fabs(d[2]); //Manhattan
    // return max(fabs(d[0]), max(fabs(d[1]), fabs(d[2]))); //Chebychev
    // return sqrt( sqrt(fabs(d[0])) + sqrt(fabs(d[1])) + sqrt(fabs(d[2])) ); //Minkovsky 1/2
    // return sqrt(sqrt(dot(d * d, d * d))); //Minkovsky 4
    // return pow(pow(fabs(d[0]), e) + pow(fabs(d[1]), e) + pow(fabs(d[2]), e), 1.0 / e); //Minkovsky
    // return length(d) + (1 + sin(e * length(d)))/2; //Sine
}


void voronoi(point p,float e, float da[4])
{
    /* returns distances in da and point coords in pa */
    int txx, tyy,tzz,xx, yy, zz, xi, yi, zi;
    float tda[4];
    xi = (int)floor(p[0]);
    yi = (int)floor(p[1]);
    zi = (int)floor(p[2]);


    da[0] = 1e10;
    da[1] = 1e10;
    da[2] = 1e10;
    da[3] = 1e10;


    for (txx = -1; txx &lt;2; txx++) {
        xx = xi + txx;
        for (tyy =  -1; tyy &lt;2; tyy++) {
            yy = yi + tyy;
            for (tzz =  -1; tzz &lt;2; tzz++) {
                zz = zi + tzz;
                
                point ip = point(xx, yy, zz);
                point vp = (point)noise("cell",ip);
                vp = vp +ip;
                point pd = p - vp;
                float d = voronoi_distance(pd , e);


                tda[0] = min(da[0],d);
                tda[1] = min(max(d, da[0]), da[1]);
                tda[2] = min(max(d, da[1]), da[2]);
                tda[3] = min(max(d, da[2]), da[3]);
                da[0]=tda[0];
                da[1]=tda[1];    
                da[2]=tda[2];
                da[3]=tda[3];                
            }
        }
    }
}


shader VoronoiAll(
  point p = P,
  float Scale = 1.0,
  float E = 1,
  output float Fac1 = 0,
  output float Fac2 = 0,
  output float Fac3 = 0,
  output float Fac4 = 0
){
    float da[4];


    voronoi(p*Scale, E ,da);
  
    Fac1 = da[0];  
    Fac2 = da[1];  
    Fac3 = da[2];  
    Fac4 = da[3];  
}

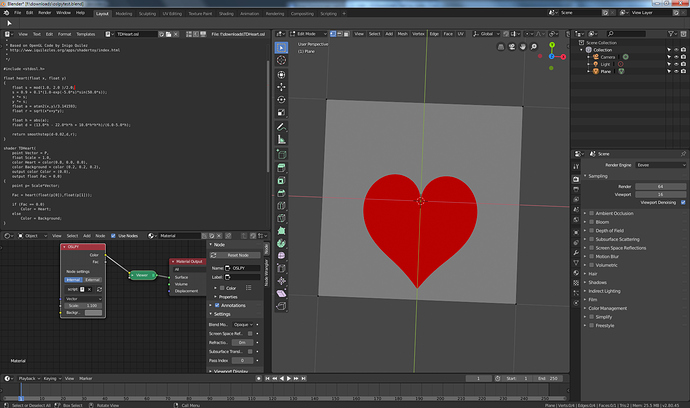
Latest Version on github now supports EEVE / Blender 2.80 !!

4 Likes

Does it matter where in the node tree it is placed?

Why would it? Same rules apply as the regular nodes (ie don’t stick a gray or yellow socket into a green socket)