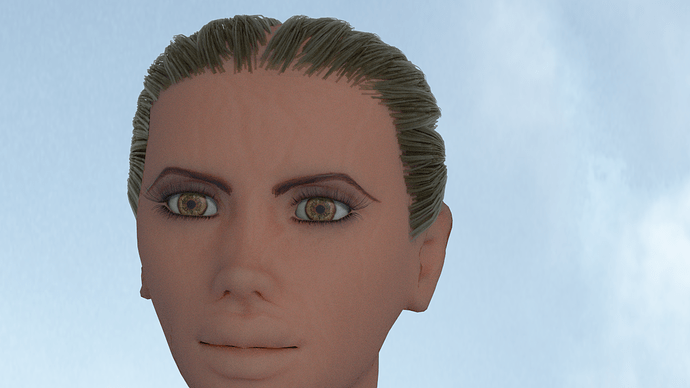
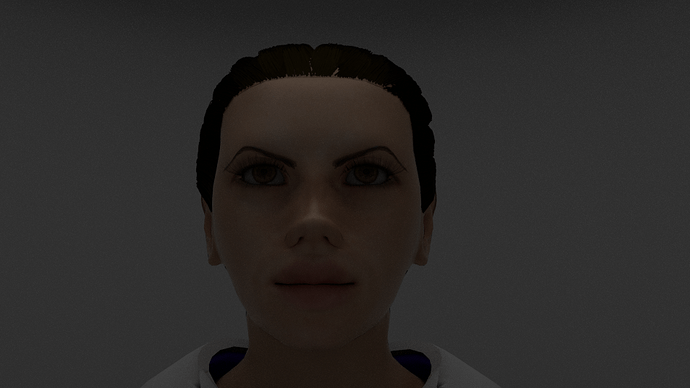
further testing has proved absolutely ludacris.
Using a dark skinned texture map doesn’t do any good without SSS, but, at every turn, the SSS wants to make the skin white.
[ATTACH=CONFIG]487350[/ATTACH]
I had to stop the render and verify that the image texture was right…
[ATTACH=CONFIG]487351[/ATTACH]
…I’ve tried various mixtures and combinations…this is freaking impossible…
I set all of my SSS nodes to a variation of the texture map color…
The result…does not look promising…

Alright. Finally got some tone to work the way I want it to.
Making small adjustments to improve the overall quality. May increase influence of displacement.
Will post more when I have more.
This duplicate post stuff is REALLY irritating.
In any case…I worked the nodes a bit more and my result is starting to be more…ideal…
Also: hair material nodes corrected to function.
Adding notes from someone else:
SSS descriprion is not that in depth. Keep in mind Color is the surface color, Radius is the scattering color, Scale is the amount of scattering in real units
Scale is actually multiplied by the Radius then, so if you use Scale = 1.0 and Radius = 0.1, 0.1, 0.1 is equal to Scale = 0.1 Radius = 1.0,1.0,1.0
Pluggin a RGB node into Radius is the same as entering the same values in the RGB dropdown (with the color node is much quicker and you have a feedback in the node editor)
For Hair i personally use add shader with Transmission+Reflection, than another reflection layer…be sure to not use big values in Add shaders otherwise you will break energy conservation and introduce strong noise.
Which explains white skin when the diffuse was brown. Plugging the specular map into the SSS node’s “radius” was basically telling it that the material starts off brown, but scattered light make it white.
Result of adjustments with above insights in practice:
Some Minor tweaks (slight color changes to various nodes)
No changes to the skin. Just a lighting change.
Finishing touches to work on, but I think I’m satisfied with this node setup and the knowledge I’ve gained from it.
Original:
New:
Hi.
If you want good quality feedback on how to improve your skin material, you should post shots of the node tree (in the case you might be doing something wrong such as too much application of the add shader node, which can cause a violation of energy conservation).
Also, it would help if you also mention whether or not you’re using the new Filmic transform or standard sRGB (as the former requires one to look at an albedo-based approach to color selection as opposed to what one is used to).
See…
I don’t really want feedback…right now.
That’s the best I can say without going into pages of explanations and reasoning.
EDIT
To give you an idea, just as an example, the below test was done with 1 add node.
0 mix nodes.
On to the next test.
With what I learned about tones from test 4, I’ve kind of taken a step back to my original node setup. I reworked the maps and gave it a “quick” render:
Not exactly ideal and the maps don’t really work together…some minor adjustments are made and more samples added for render quality.
Not convinced the tone is quite where I want it to be, I switched the lighting.
Not exactly a water balloon, but not exactly far from it, either.
Tone adjustment to the SSS shader is currently rendering out…
Soooo close on the tone…a little darker…and i should have the right tone for this character…
[ATTACH=CONFIG]487600[/ATTACH]
More “minor” tweaks…
Adjusted PBR material node. Found unnecessary “glossy” node (PBR node already has one).
Low sample render:
[ATTACH=CONFIG]487608[/ATTACH]
[ATTACH=CONFIG]487609[/ATTACH]
More satisfying result. Especially in the lower lights…
Getting much closer now.
Got the right tone…other small things to do.
Without hair:
If that is what you want for now (due to wanting to figure stuff out on your own), fine, but don’t expect anyone to reply to your work since there’s nothing to comment on.
The reason I inquired about feedback is that there’s already node groups out there (including paid ones on the Blender Market) that already take care of everything needed to create a good skin shader (with completely photoreal results).
A piece of the issue that I held back: you kind of figured out. I want this to be mine. Not someone else’s.
Another: I started this BECAUSE I paid for one of those “good” skin shaders and I can’t even open the file. No big deal, I understand why and have a friend that offered to help, but by the time the offer came around, I was already neck deep in figuring it out for myself.
I went through the trouble of trying to find the answers for myself and learned a lot. I feel like it would spoil the result if I even looked.
I don’t expect replies and never have. Hardware limitations keep me from using a lot of things that would make this easier…yet, despite the fact that others can spend a few minutes on the internet and download a realistic, physically correct skin shader, I’m getting something out of this that can’t be taught or downloaded. This is art. You can assign a procedure to make it look a certain uniform way, but I will learn my OWN way.
So, while I appreciate your time, I continue to experiment.
Started experiencing crash.
Upon opening material pane in the properties window, blender would just crash. Removed most recent material. Blender still crashes. Opened another blend file: blender still crashes.
Perhaps a system event? Somehow my system became LESS compatible with blender? No. Apparently there’s some sort of bug with that version of blender that the material preview ICON, not the window, crashes blender. My only issue with that is: it was working fine up to this point.
Installed 2.76b version of blender and the issue went away, even with the new node group. The question remains: what happened that caused it? It was working fine…until today…


