I’m creating volumetric clouds in Cycles. The result is good visually speaking, but the render time is terrible. Yet, I have an RTX 3080 Ti.
The problem is concerning overlapping volumes. The render time is still fast if there are two or three overlapping volumes, but it increases exponentially as I add more overlapping volumes.
I also had good-looking results with clouds made from geometry nodes, but the render time was terrible because of the overlapping volumes.
I experimented a lot with volumetric rendering and it’s complex to get good results. There are many parameters and large volumes create artifacts. Without positioning volumes that overlap, it is far more difficult to create scenes with clouds, fog and haze.
Possible solutions:
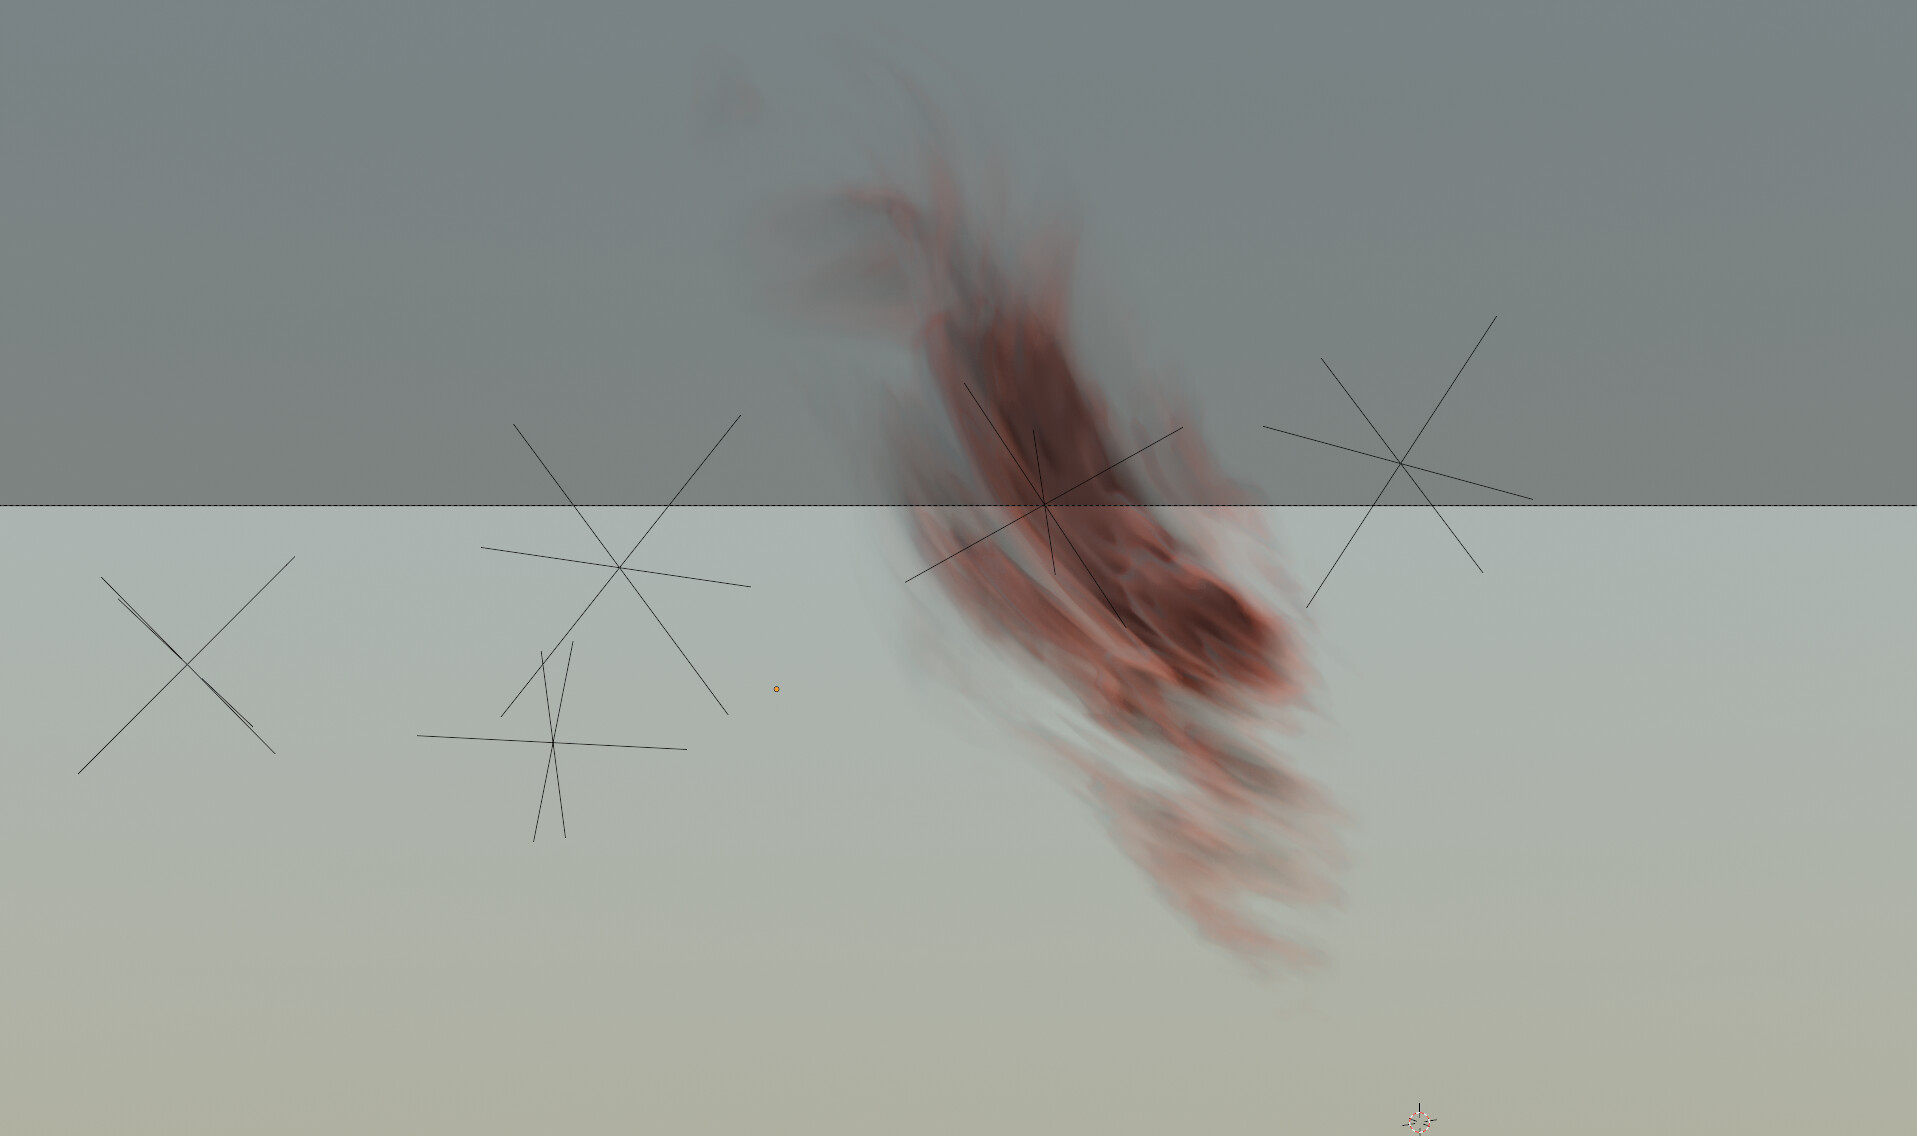
As a solution or workaround to create an atmosphere with clouds and haze, I created a large volume that combines two shaders as groups: “Clouds” and “Haze”. In the atmosphere material, I combine the density of the two shader groups. That way, I’m able to come up with only one volume, which is faster. The problem is that I need to increase the “Max Steps” for example to avoid artifacts because the volume is really large. The render time is still slow, but not exponential. There are caveats. I don’t have much control over the placement of the clouds and I’m limited in quality and render time to create a real-size atmosphere.
Another solution that I would probably try is to create one volume with many cloud groups inside to represent different cloud fragments assembled. By combining the density of each fragment, I can create a more complex shape in one volume. I can also control the position of each fragment represented by groups. That would work well for a small number of fragments since I have to position the fragments manually inside the volume shader.
In generally, it is faster to have one large volume with a noise texture inside to create different clouds than having one cloud created from many overlapping volumes.
Question:
Is there a way to deal with more complex volumes when they are overlapping without having an exponential render time?
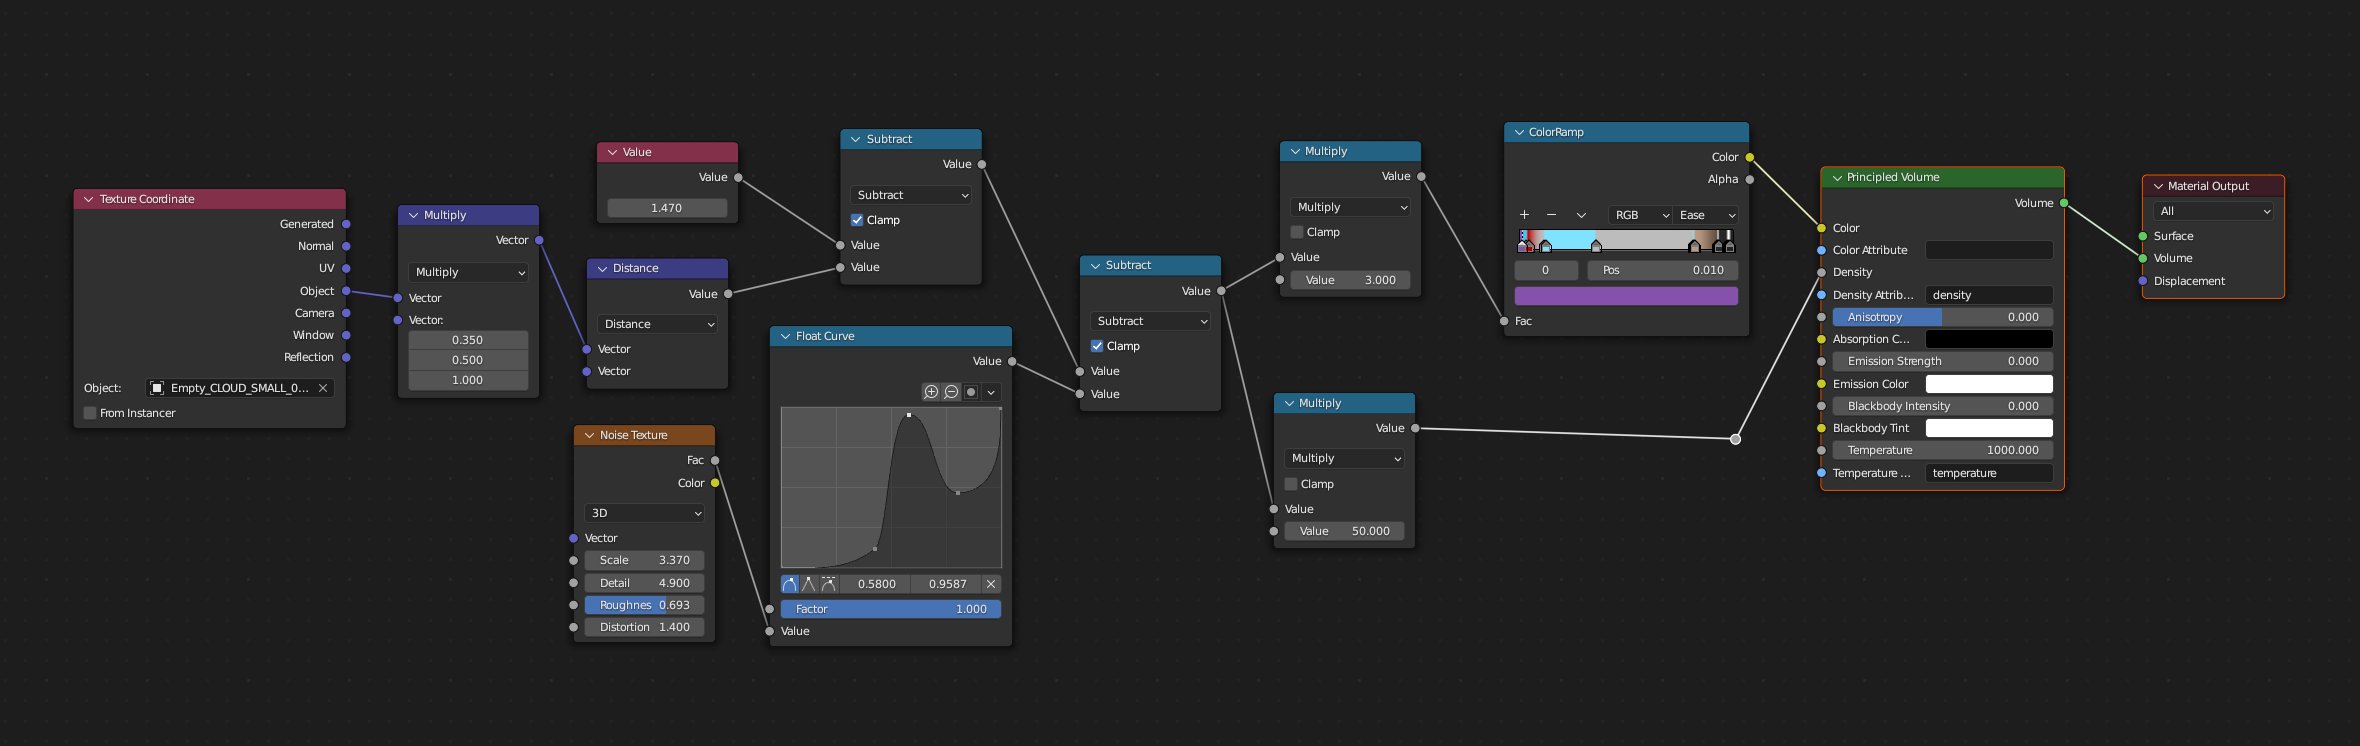
You could use object positions to drive your shader. this gives you more user friendly handles for adjusting the look of your clouds, without overloading the renderer with multiple overlapping volumes
Thank you for your reply. That’s an interesting approach. I downloaded your project and I tried to play with the parameters. Although it’s not the ideal solution, it still provides a good compromise to creating clouds with some control. I’m going to look at it more in detail.
One thing that I changed was to set the “Empty” objects as children of the cloud object. Otherwise, if I want to move the cloud object, all the empty objects stay at the same position and the cloud disappears.
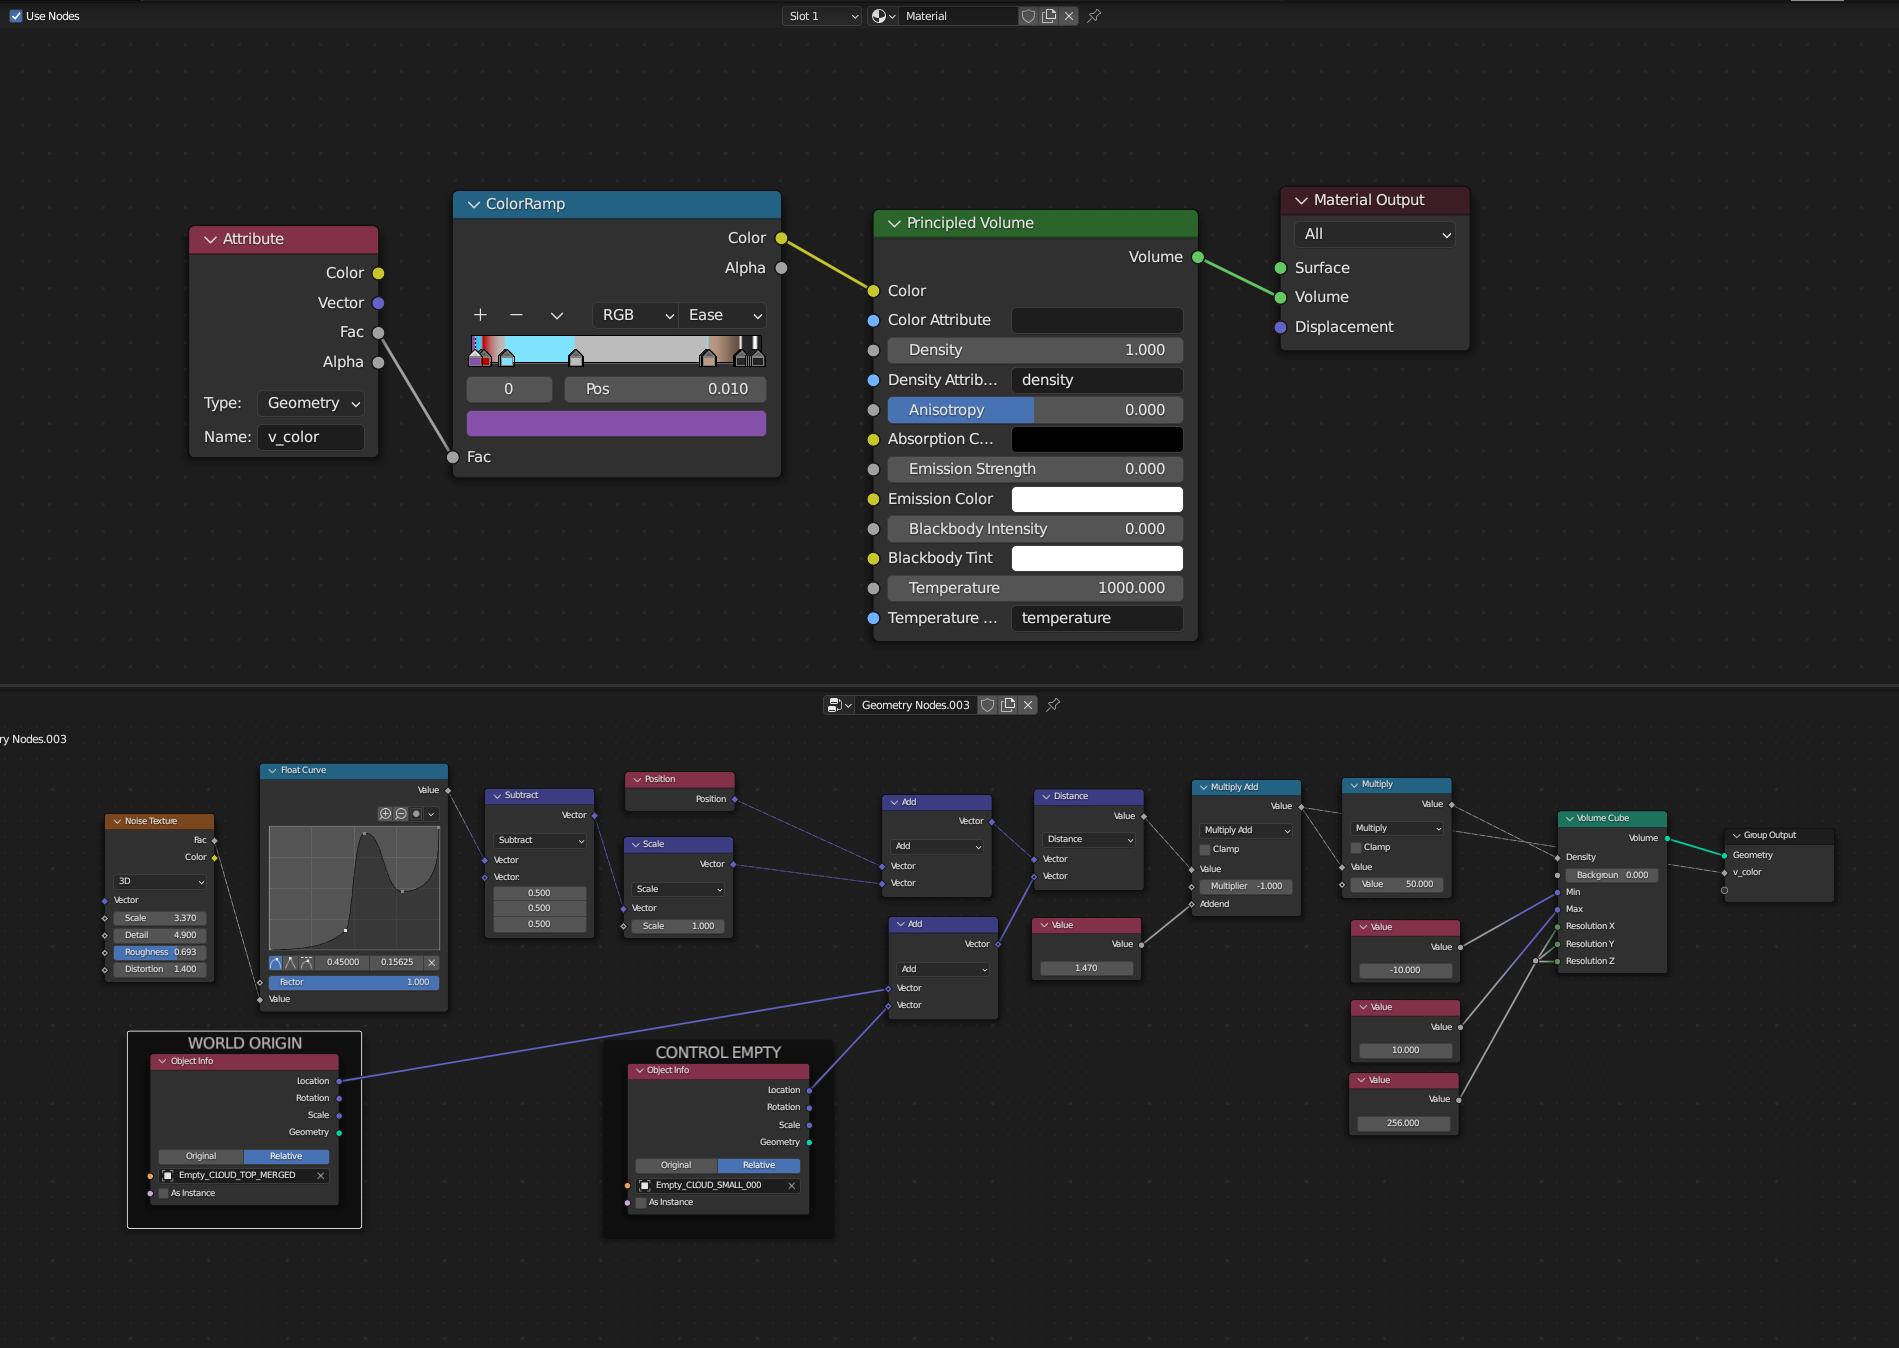
Another method you can try is to use Geometry Nodes. With them you can convert Mesh → Volume and vice versa. So you can temporarily convert your volumes to mesh, then join them as one object with Join Geometry node and then use Mesh to Volume node to turn them back to volume object.
That’s an interesting approach, but not for all types of clouds. Actually, I tried it.
I don’t know if you or other people got interesting results with this approach. The problem that I had on my end was to get the UV coordinates for every cluster of the cloud. The generated UVs are used to create the edge definition of the cloud. When combining the objects into one, the UVs are calculated for the whole object and not for every cluster. Therefore, I lose the UVs for every cluster, which results in sharper and more blocky edges at the center. In other words, the cloud is not as fluffy as it would be with independent clusters.
If you have an example of someone who got great results, could you mention it here?
Unfortunately I don’t. I too started to poke in this area of Blender just recently, and so it happens that I’m working on a scene with overlapping volumes too. I might just accept rendering times as they are.
The problem I’m facing is attribute preservation. Mantaflow generates attributes for density and if you do conversion with Geo Nodes to mesh and back, the volume attributes are lost.
I wonder if there might be a way to use Volume cube to recreate volumes from shader editor.
I have a personal interest as I’m trying to mix OpenVDB from Mantaflow with some procedural volumes generated with very similar method to one described by @SterlingRoth above.
First step would be recreating procedural volume shader inside Geometry Nodes. However this is not as straightforward as plugging Gradient Texture to Empty mapping, throwing some noise on top and calling it a day - like you would do in Shader Editor.
For a start I picked a method described by @Leonard_Siebeneicher in SDF thread:
Here is first naive attempt to see how recreating shader based volume density looks in Geo Node SDFs:
Geometry Nodes are set on top of 1 vertex mesh object with the origin at 0,0,0 parented to an Empty which is referenced in GN tree as WORLD ORIGIN. This construction can be simplified, but it’s convenient for my use case.
But so far the outcome is completely different.
If shader recreation pan out - next step would be to convert both volumes to mesh, then joining them and finally converting back to volume.