hey AMDBCG,
You caught me right inbetween projects, so I thought I would take a moment to try out some alternate solutions on your rig. I did my best to keep the behaviour of the rig the same, but tweaked a few things, and changed some other things completely. I also made sure to keep it simple enough that it would be easy to dissect it, so you can figure out how it was made.
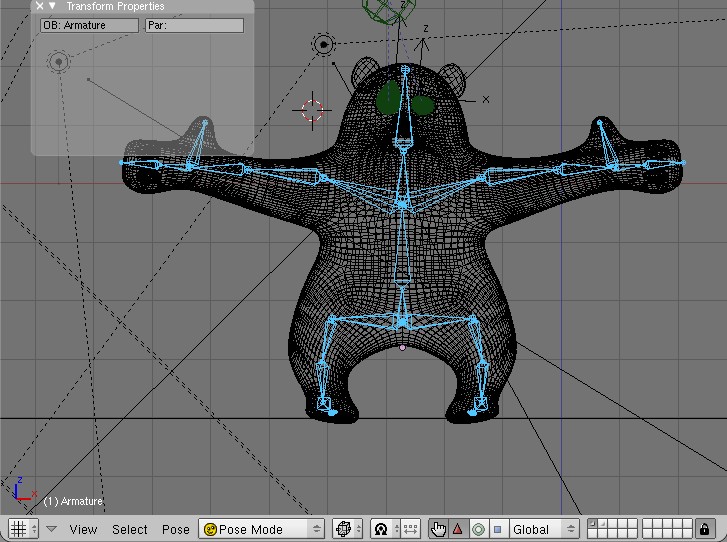
First I want to address some initial problems I had to fix before starting in on the rig. One was the initial position of the character… down and to the right of world 0. It is a good idea to position your character mesh, and the armature in the exact center. Clear all of the transforms on the armature before beginning, and move the bones where you need them in edit mode. I like to also position the character so ‘the feet are on the floor’, or on the grid as if it were the floor. It isn’t in this case, but that is because I wasn’t sure how to reposition the mesh without changing it’s relationship with the armature. Generally, just be aware of the center line, and build your character around it :yes:. There is also a dent on the back of the right arm, which was already there (it wasn’t me! Honest! :eek:).
Also, name your bones. Actually name everything! It is an invaluable habit to have. 
Now, this solution is not complete! It’s overly simple, just to get you started. The hands are FK only, and the feet are IK only. To position the arms you can use the auto-IK feature, but he won’t be able to lean on anything, or walk on all fours without arm IK. I just didn’t want to complicate the rig with the bones it would require.
Since your character is so chubby, I would suggest looking into the meshdeformer. There is a great example of how to use it provided by the BBB crew in the form of a chinchilla. This would really help the neck and mouth area, since you can paint the parts to exclude from the deformer, and control them with the armature instead (like the mouth). In the chinchilla file, it is the vertex group called “NoMdef”.
I didn’t add a solution to the mouth. You could use shape keys, or add in bones. Whichever way you want to go :yes:
The eyes were setup using a transform constraint. You can read more about it here. I setup the lattices more or less as you had them, but now all the controls are bones. This keeps the animation nice and organized within the armature, instead of mixed between bones and objects. The problem with the eye rig is that the brows can’t be moved without squashing the eyes. But there are solutions for that, I just went with what you had.
The legs I re-did using the basic technique outlined in this tutorial (except far simpler).
I didn’t change all that much, just mostly added new controls, and re-organized the bones a bit. The deform bones are all on bone layer 16, and the mechanism bones are next them on bone layer 15. Bone layer 1 is controls.
There are many resources for rigging available in the links found in my signature. All of the tutorials I know of are linked in there, as well as many examples of rigging components, and full character rigs made by other users. I would suggest taking a gander to get familiar with different solutions for characters :).
I hope in doing this I’ve taught you something, and not just done something for you.
Cheers!
P.S. I didn’t create any shapes for the bones either, since this is demonstrating what happens ‘under the hood’ anyways.
Attachments
AMDBCG_panda_FGC.blend (653 KB)