Greetings Everyone!
I would like to introduce all of you to the progress I made
regarding parallax occlusion mapping (short POM).
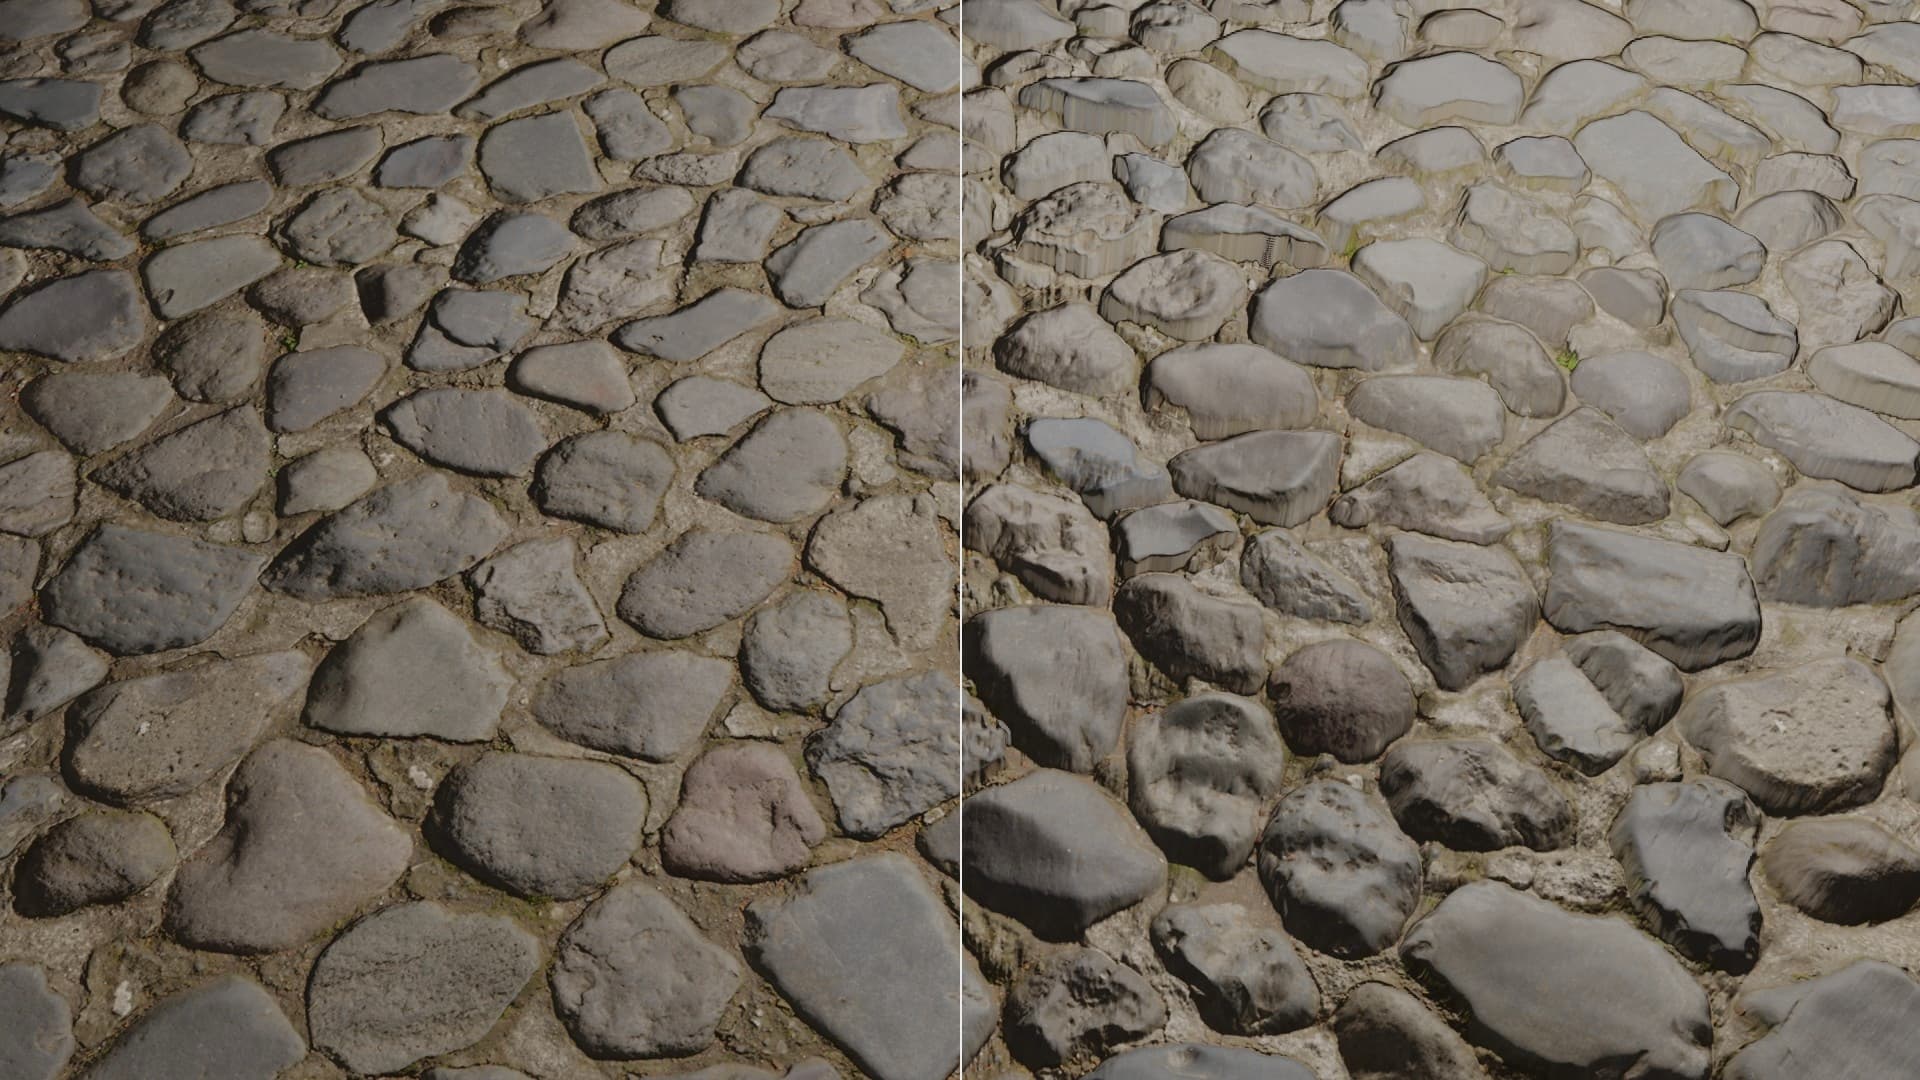
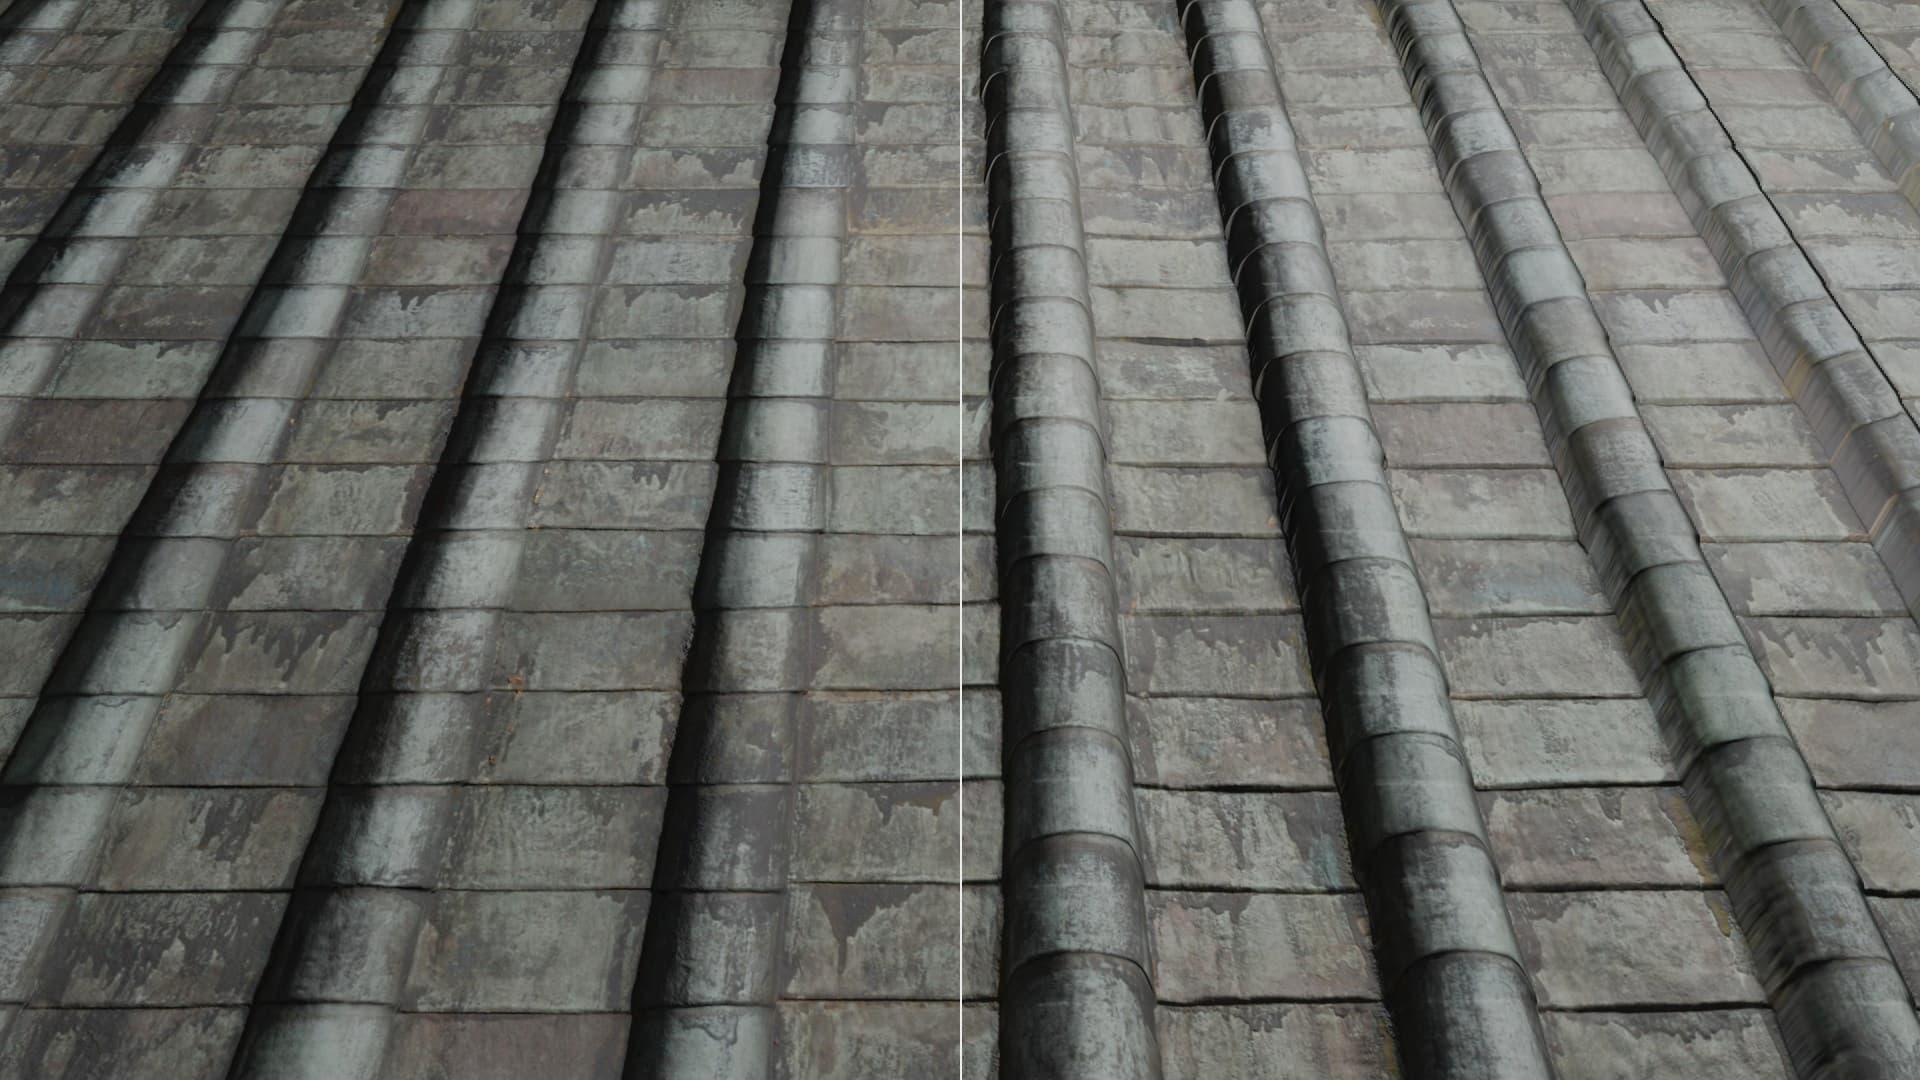
For those who are not familiar with parallax occlusion mapping, its a third way of displaying height of a material, next to normal mapping and physical displacement.
Instead of displacing vertices, the texture coordinates are getting warped along the heightmap. This all happens in the shader and not physically. Following this, its cheaper than physical displacement, but more expensive than plane normal mapping.
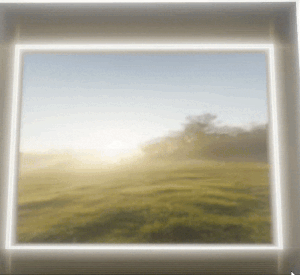
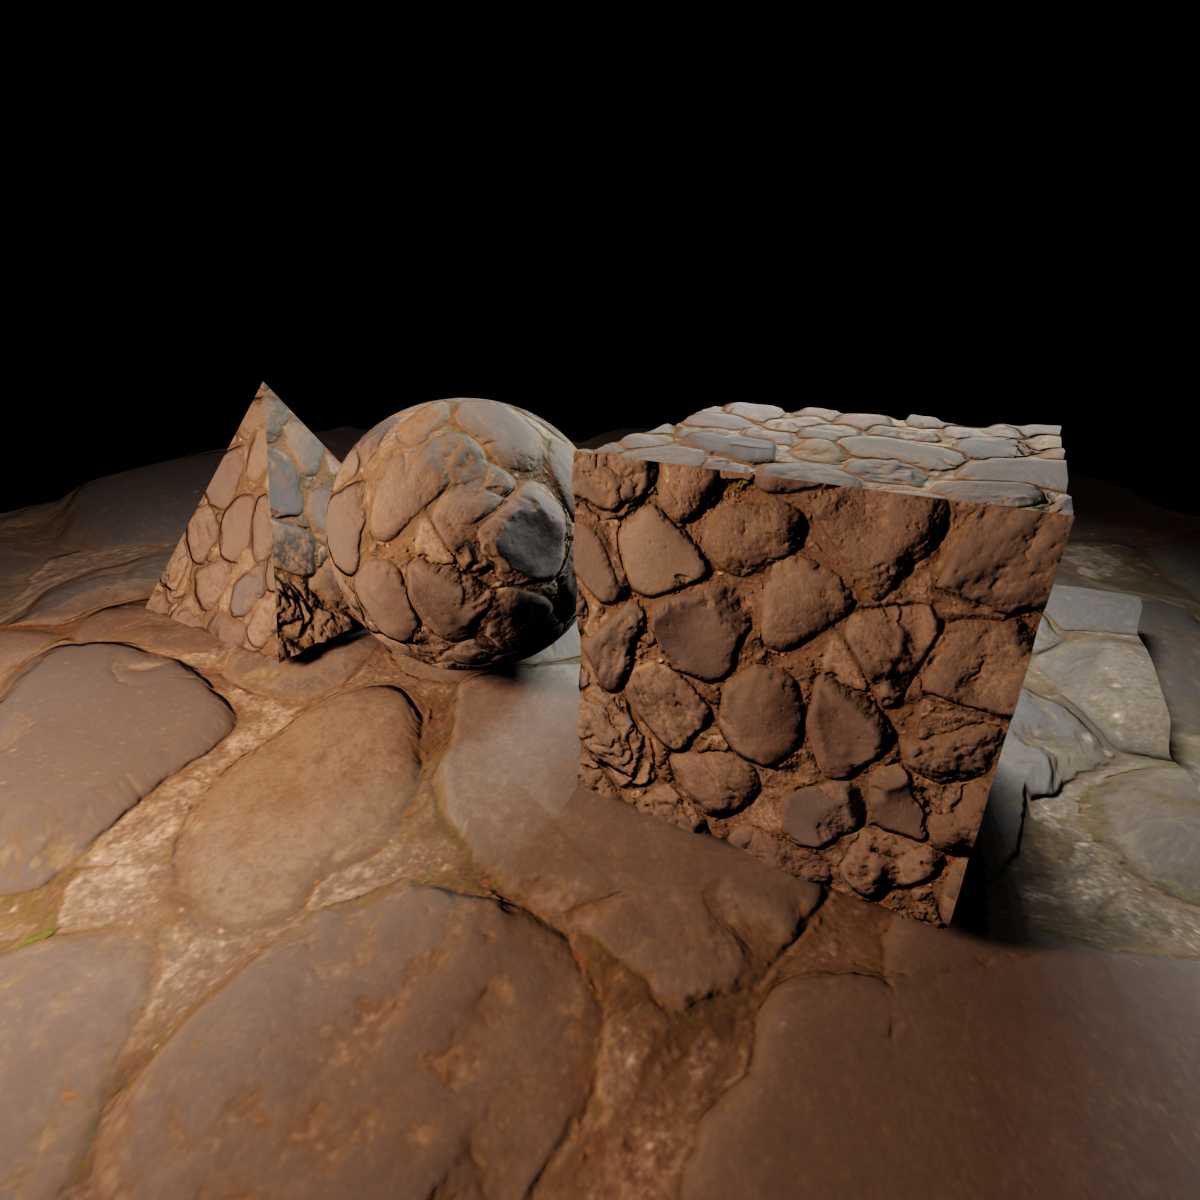
Here are some examples for comparison (Left: Normal Map, Right: POM)

So how does it work?
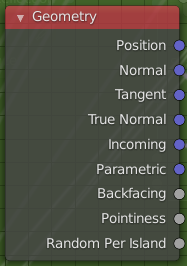
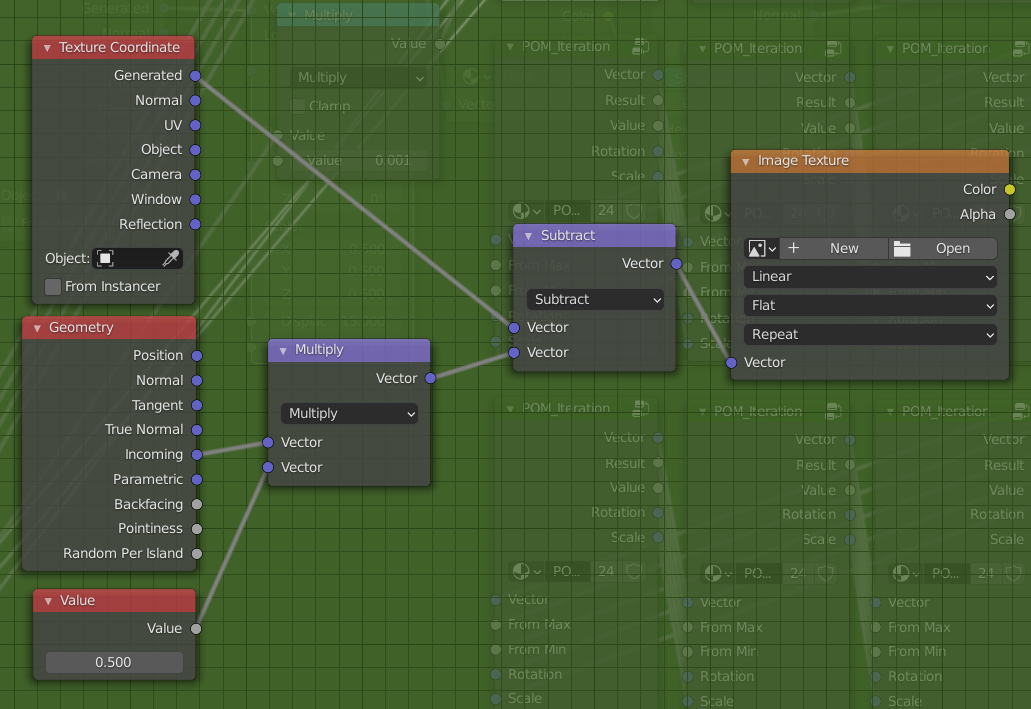
Key for it all is the Incoming Output of the Geometry Node:
Adding or Subtracting its output value with the Generated Texture Coordinates causes an effect as if
the texture is getting displaced along the normal of a surface.
This already can be used for some interesting holo effects:

Now all that needs to be done is multiplying this with our heightmap:

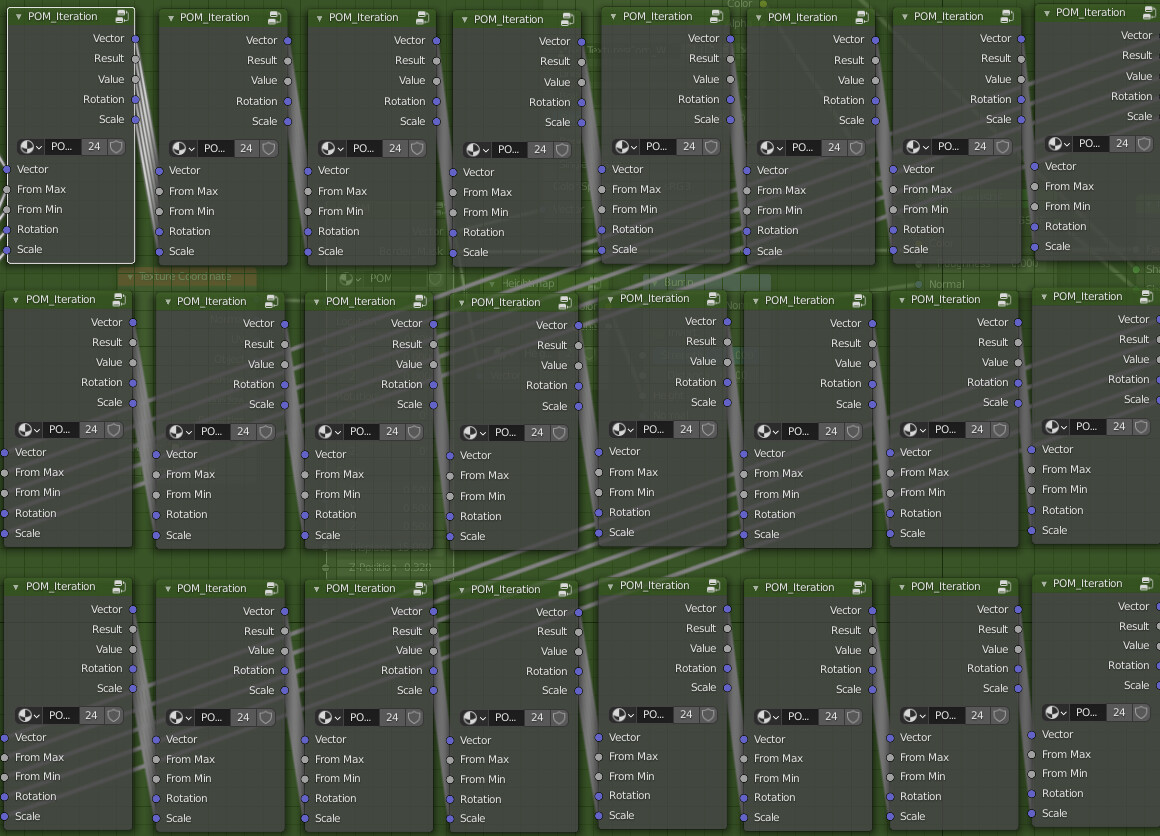
Repeat about 32x more times:
et voilà! We made ourselves a neat little POM Nodesetup.
You can now either recreate it by yourself or you can download it for FREE from my Gumroad Page.
There I added a few more extras, such as border masking. If you are happy with it, I wouldnt mind a small donation as well.
Side Note: It only works with generated texture coordinates, not so much with UV coordinates, due to its nature.
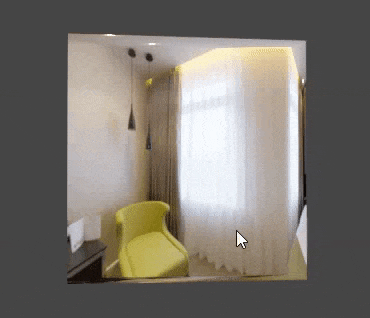
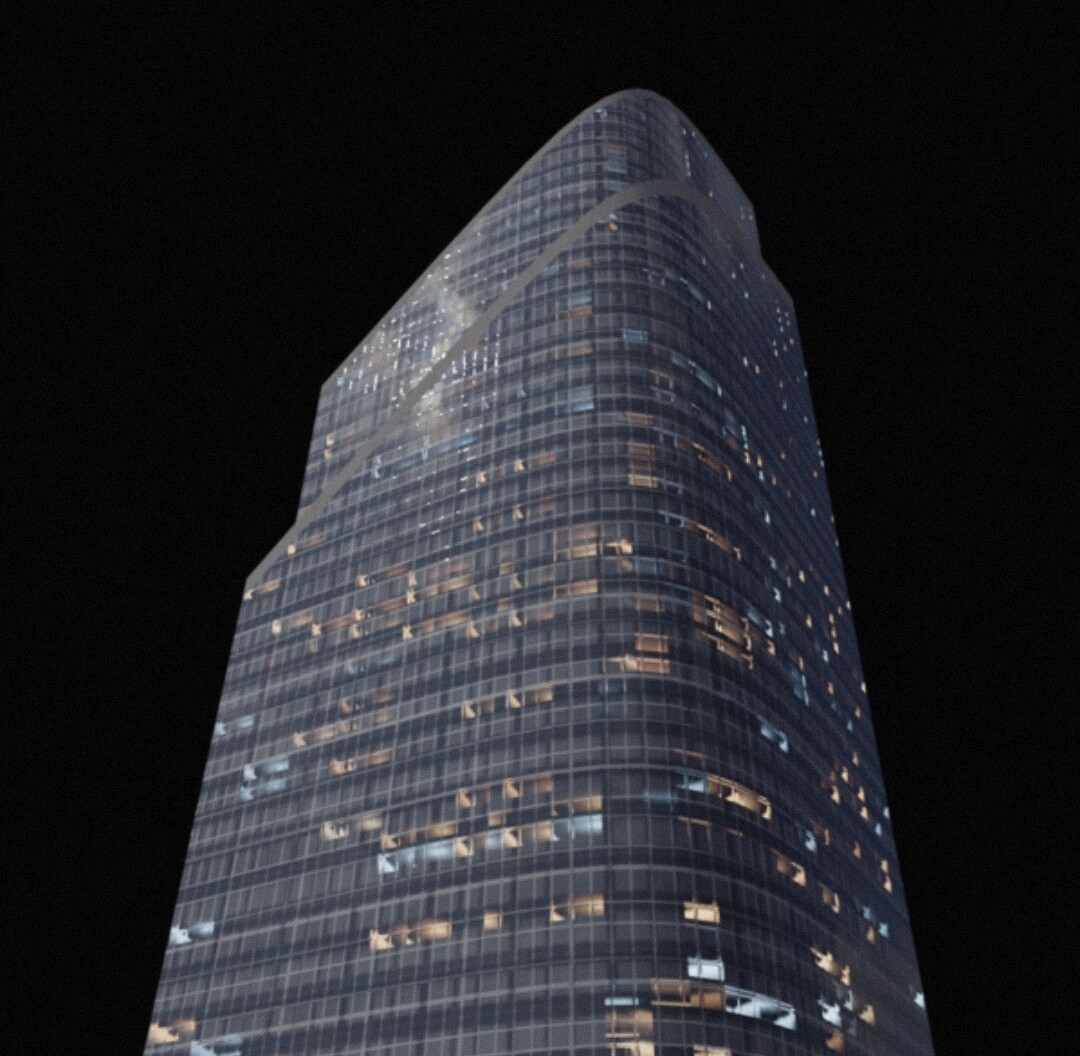
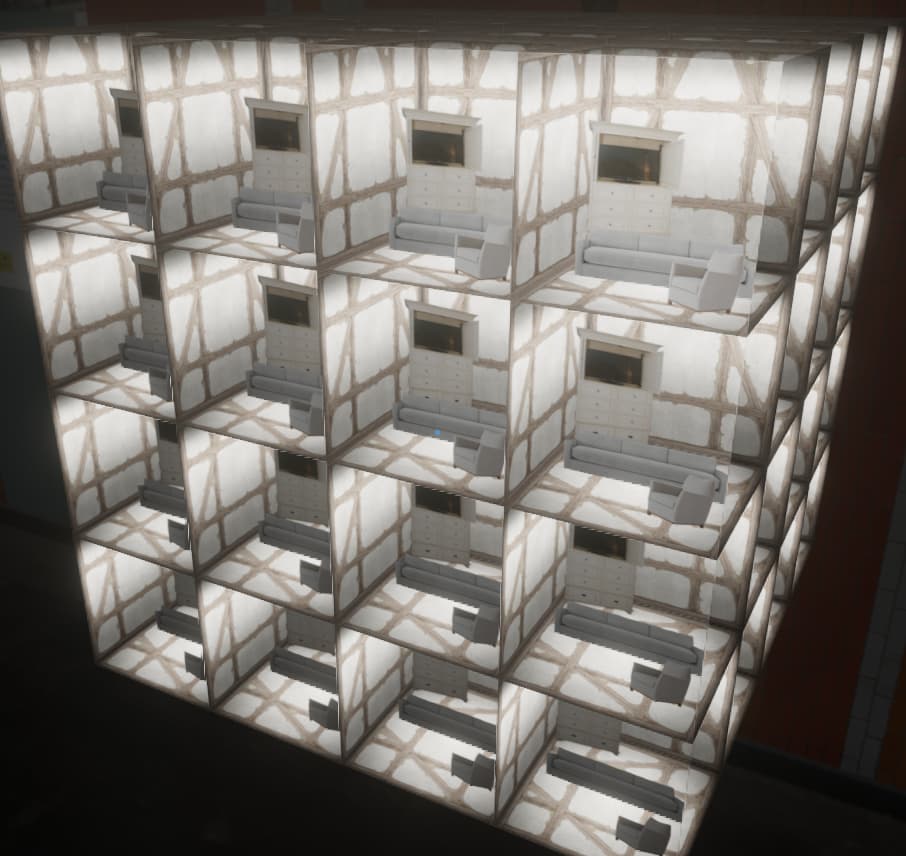
Now onto another Topic: Parallax Occlusion Mapped ROOMS
Thats right, the method I just showed you works nice with textures but its only a sort of stretching, nothing that really goes into depth. How nice would it be to use a similar method to create three dimensional rooms out of two dimensional planes with maximum 4 Vertices?
The Twitter User @Magryllia came up with a solution to this some time ago which Luis Cherubini presented in a Video on his channel two years ago:

This however was limited to a single UV unwrapped plane, which then could be stuck behind windows.
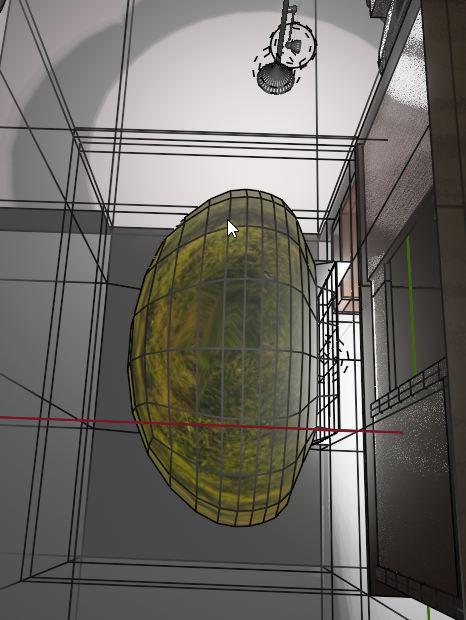
So I went ahead, downloaded the source file and created this monster out of it:

But it does exactly what its supposed to do:

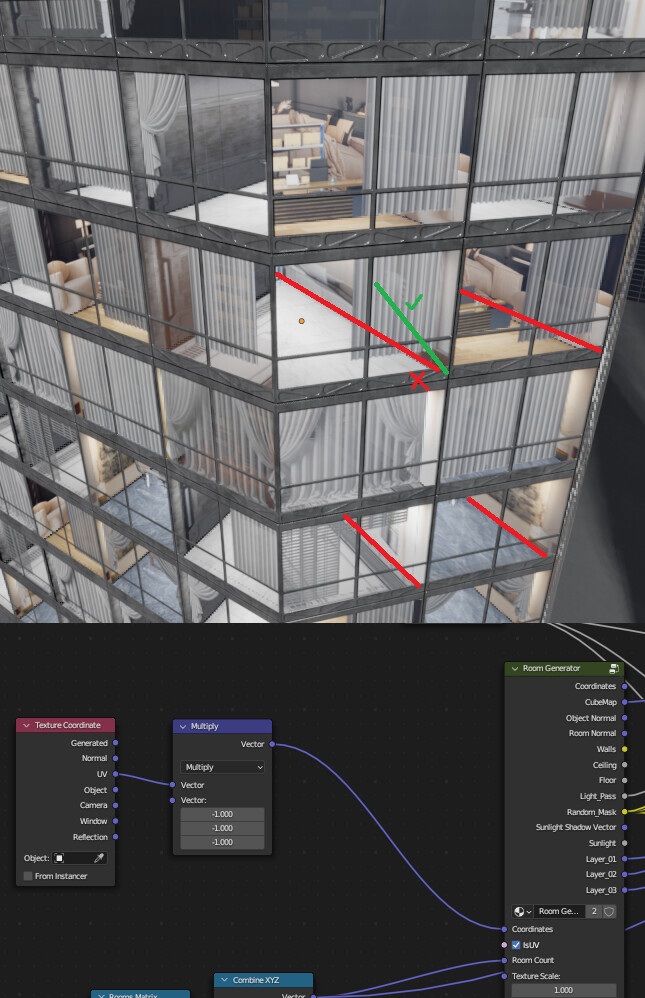
Now while the inside is quite messy, the outside of this node group is maybe not as messy, but not that much smaller:

First of all, the setup works with both, UV and Generated textures, however those need to be manually switched, since they work with different methods.
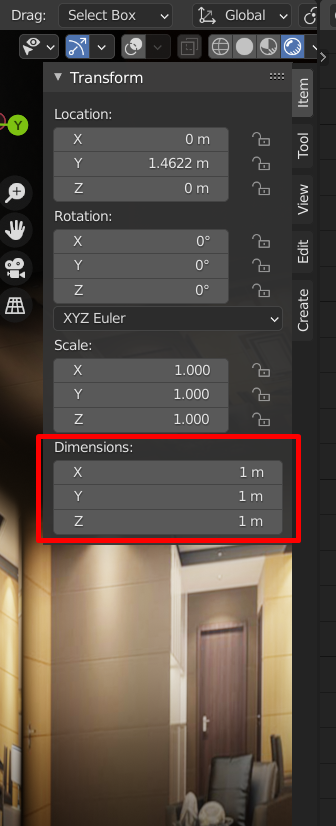
Another important thing before starting is to set the object dimensions, as those can cause stretching effects in the rooms if not done properly.
The Object Dimensions can be found in the Item Tab while having the object selected:
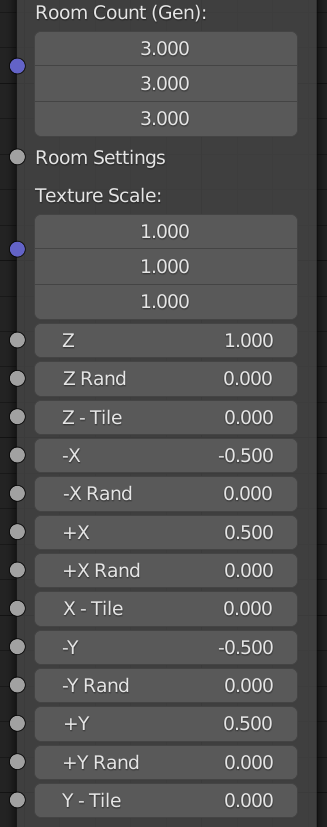
Now the room count can be setted, the size in x,y and z direction as well the way the texture for each wall is supposed to be processed.
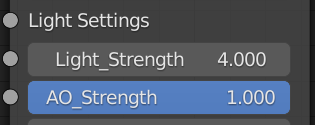
I also included a fake light setup for the rooms inside, all together with a fake ao setup:
And a layer system which contains three layers, which can be arranged individually inside of the room, allowing for layered furniture etc.
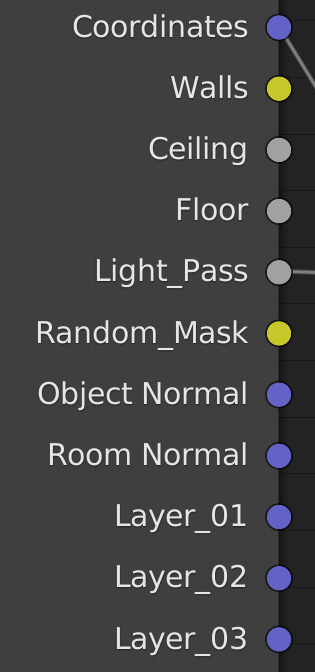
The Group Outputs:
-
Coordinates for the textures on the wall
-
Masks for each wall, ceiling and floor.
-
A light pass to multiply with an emissive node, used for lit rooms
-
A random mask output, for random light intensity, light color or random interior. All up to you

-
Object Normals, giving each wall the normals of the object itself.
-
Room Normals, Normals if treating the rooms as an object itself.
-
Coordinates for all the three additional layers
This as well can be downloaded for free on Gumroad, if you like it you can also consider supporting me
If you guys have questions to any of those two topics, just let me know. I would also be happy about you guys feedback ![]()