I have a model, with extra bones in place for facial expressions. The main skeleton does bond appropriately to the mesh, but the expression bones do not. I am getting the Bone Heat Weighting error, but this is the first time it does not apply to the entire rigging structure.
I have tried deleting the entire skeleton and redoing it from scratch. I have selected my mesh and made sure that all holes are filled, and removed doubles. I have made sure that all my bones are rolled correctly. Both rig and mesh have been applied symmetry. I continually receive the error every time to try to bond the two, and every time the extra facial bones are faulty.
I have no idea what to do now, besides completely recreate the mesh itself from scratch. As it took me several hours to get to this point, I am not inclined to do so until I have no other option. Any assistance would be appreciated.
It sounds like the face bones you’re using are a separate armature from the body rig… have you tried joining those two armatures before parenting with Automatic Weights?
If I’m wrong about that, you’d probably need to post some images or the .blend file for better advice.
I did as you suggested, but still encountered the same problem. While it was a good idea, I’ve had armatures in the past with exposed tails and heads and they worked, but it was still worth a shot.
No, the faulty bones are of the exact same armature. In one of my attempts, I separated the faulty bones into a separate armature and redid from scratch a new armature, then joined the two. The faulty bones still remained faulty when I tried Cmmd+P → Automatic Weight.
I’ve forgotten the way to appropriately upload .blend files. But here’s a few references:
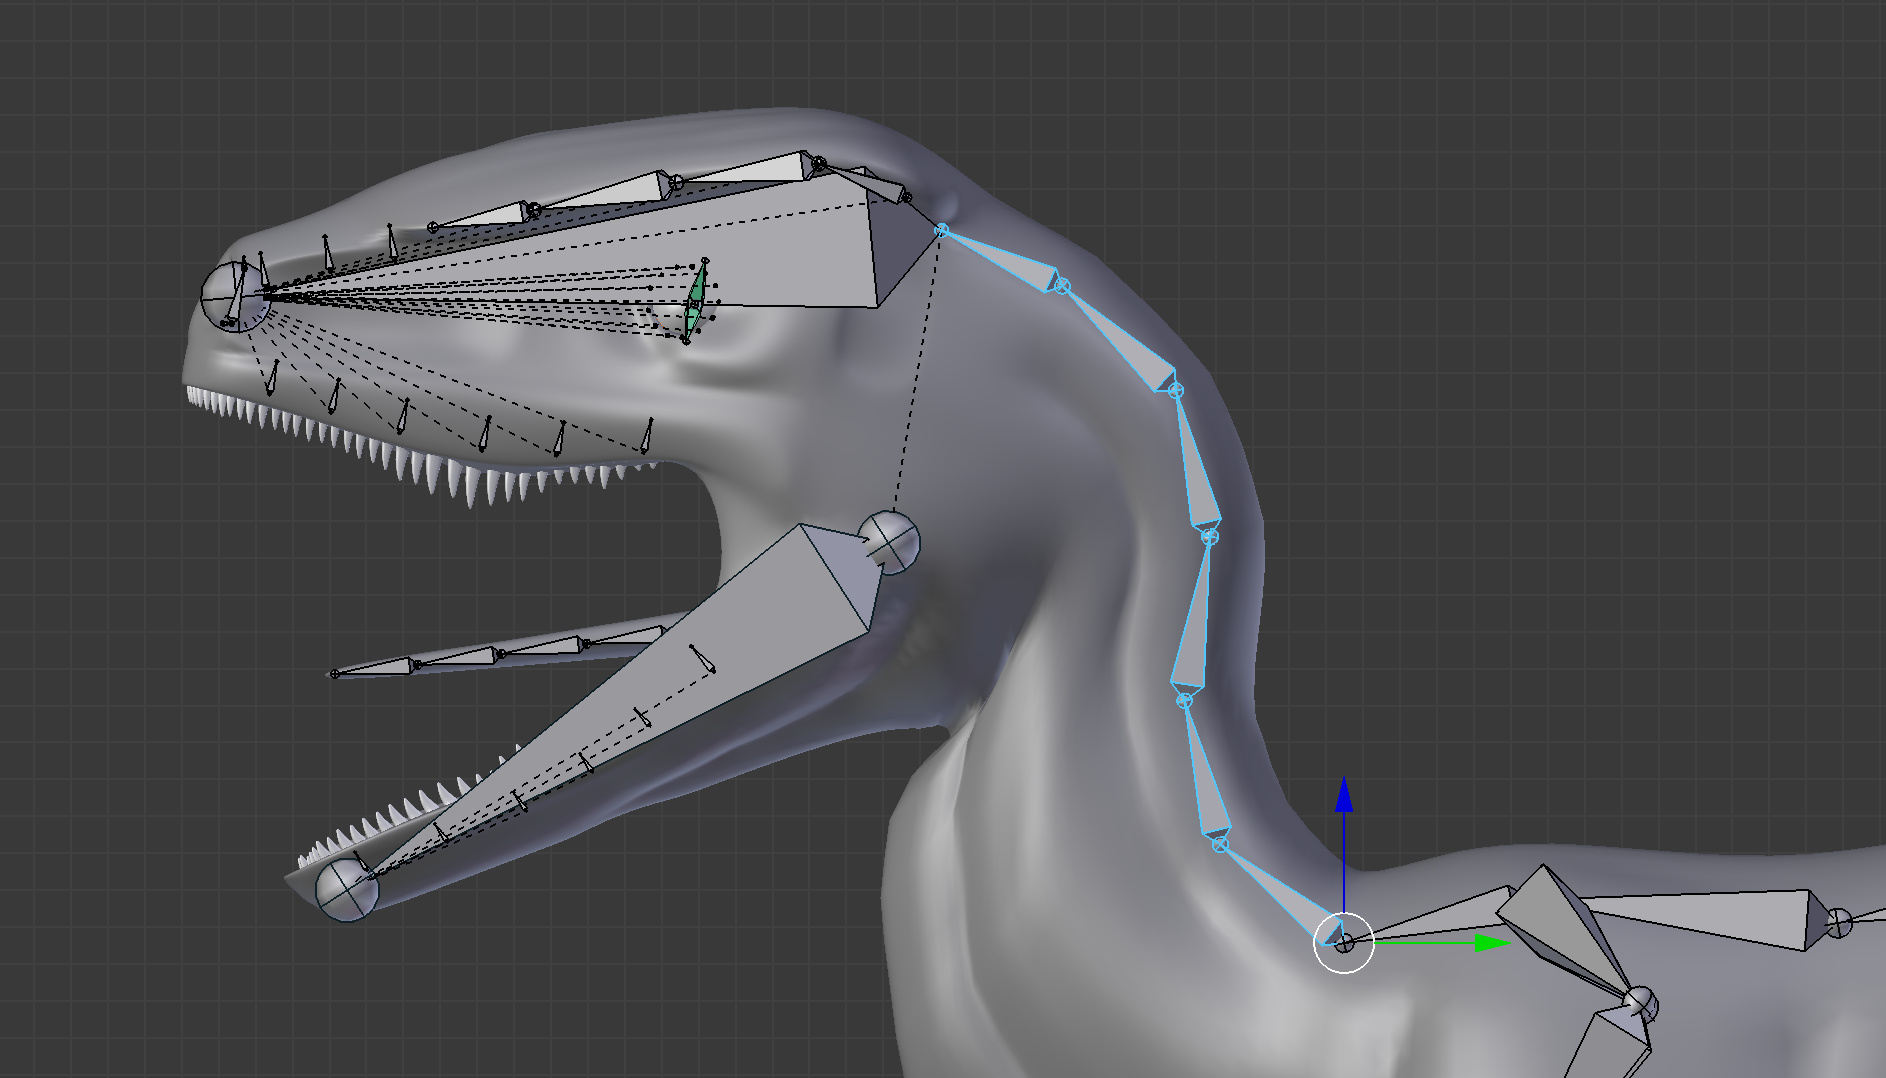
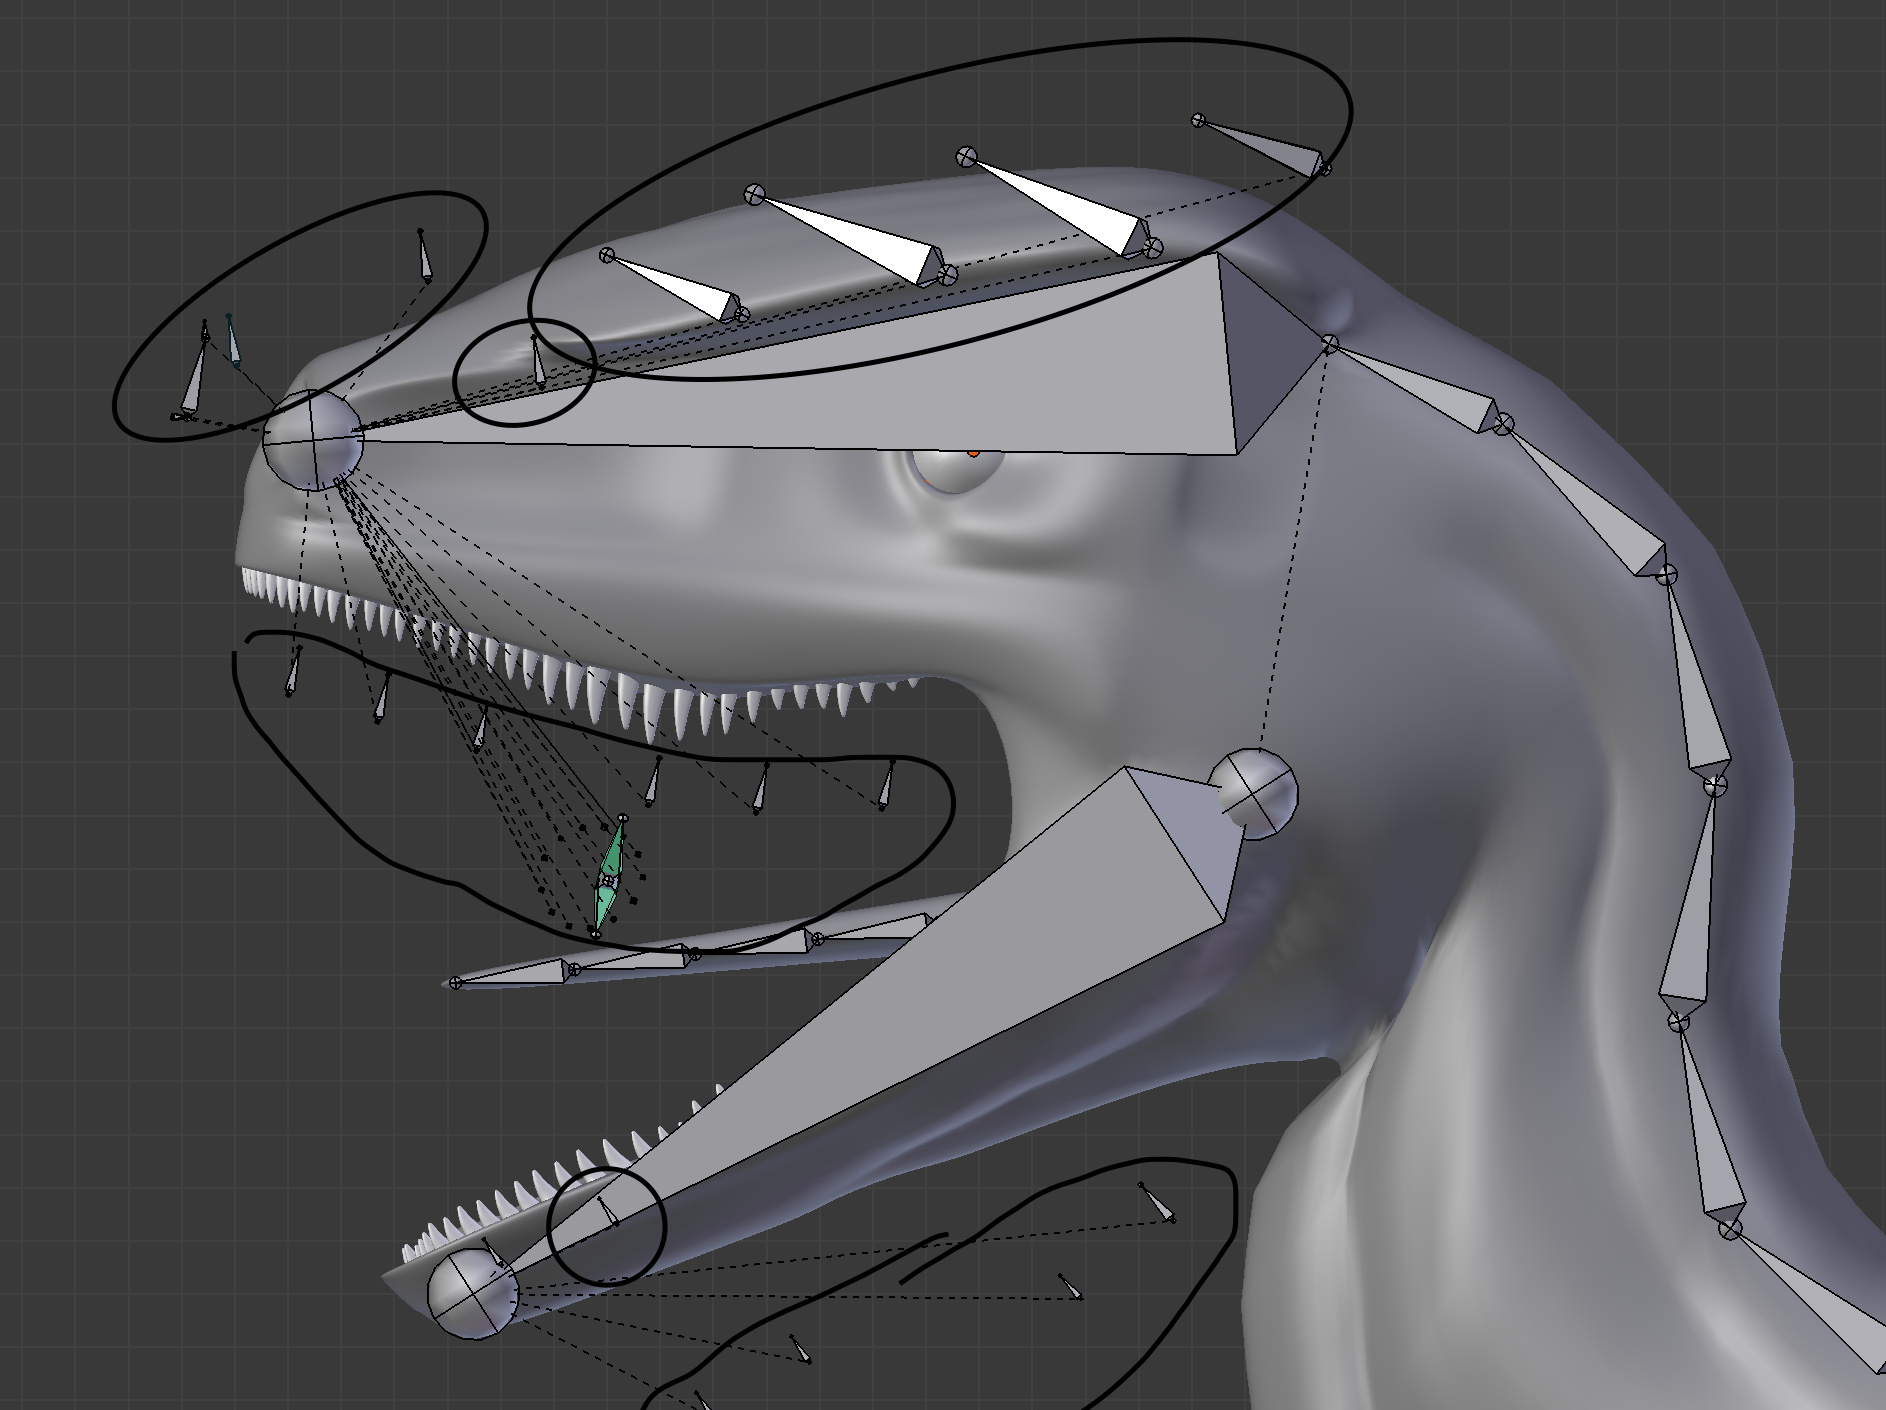
As you can see in the first picture, I can move the main armature just fine and adjust it as I please. In the second picture, I have circled the faulty bones that do not do anything. (You can see their proper placement in the first pic)
Did you make sure that all those bones are completely within the mesh, as bandages mentioned above? Wanted to check since it’s hard to tell from just the side view and with X-ray on for the armature.
My best guess without seeing the .blend file is that those bones are not set to Deform, which would make them useful only as control bones for other parts of the armature. Maybe you set one bone to be non-deforming, and then that setting got carried over to the others by duplicating that bone?
Hope that helps.
(Btw, uploading other file formats is done the same as images.)
Bandages suggested something similar, and I did try it. Didn’t work.
All bones are set to Deform.
I’ve been tinkering with the modifiers tab. I select the mesh, delete the armature mod, and attempt to reapply. I’ve noticed that even when the armature modifier is no longer applied, the mesh is still under the Armature hierarchy. I wonder if that has anything to do with the problem?
No. (But just to clarify, your problem is with “bone heat weighting error”, right?)
When you parent with armature deform, it does two things: it parents the mesh object in the hierarchy and it creates an armature deform.
Before weighting, you should have applied scale and rotation to both mesh and armature, or it can cause a lot of problems-- but considering that, it really doesn’t matter that the armature is the parent of the object. (It lets you pick up and move the armature, allowing the mesh to follow, but that’s not really something that I’d recommend doing anyways.)
BTW, if you linked a .blend, you’d probably get better help.
I’ve tried linking a .blend, but it’s too big. It’s been a couple years since I last had to link one, I think I used a secondary sharing site but I cannot recall what it was. If you have a site in mind, I’ll look into it.
Yes, it still is “bone heat weighting error”. I recently nixed the entire armature and just did a spine, and then the facial bones (the ones that are receiving the error). The spine worked, the facial bones still didn’t. I’m believing that it’s a problem with the face of the mesh itself and not the armature, so I’m in the process of creating a new mesh and starting completely over.
If, after deleting everything but the mesh and the armature, and making sure you’ve enabled save compression (in save options or user preferences), it’s still too big, that suggests that you have a vert density problem-- like you did a million vert dynotopo sculpt and are now trying to rig it.
Autoweights don’t do great with that kind of mesh. But it’s one of those things where it’s kind of, nobody cares about that, because even if autoweights did, those kinds of meshes aren’t really usable for animation anyways-- there are too many verts to get anything close to real-time feedback for posing, nevermind trying to play an animation to get a sense of timing.
If you do have a million+ verts, I’d strongly recommend learning how to retopo your mesh before trying to rig it.
Unfortunately, now my problem has doubled. I have two meshes that do not accept their armatures. Both are in the same file, on different layers.
I’ve tried getting rid of doubles, symmetry-izing. and everything else I could find on the internet. If anyone can solve this, that’d be awesome.
First thing I did was fix the non-manifold verts. Always fix the non manifold verts first.
Second thing I did was split concave faces. There were a few.
Then I started separating out bits of the mesh. Your problem is in the fingers and if you get rid of those, it will autoweight.
You have a higher vert density in this model than you ought. It looks like a good three or four levels of subdivision have been written to it. In the future, consider a multiresolution modifier or retopo and bake normals. The vert density is probably the reason for the problems in the fingers-- if I run a decimate unsubdivide, 2 iterations, on the fingers, autoweights work (and I don’t notice an appreciable loss of detail.)
In fact, I guess that’s what I’d recommend: fix the non-manifold, duplicate the model, unsubdivide your duplicate, autoweight, data transfer weights to your original.
I didn’t know about non-manifolds vertices, or concave faces. Was that an issue in both meshes?
As for the high subdivision, I was using the large count for detail instead of dynotopo. I also have three other meshes with equal subdivision that did end up working with their armatures… I guess it happened while I was modeling.
Can you list a step-by-step of what you did so I can fix it on my end? Or you can export the file back, whichever is easier for you.
Thank you very much for your assistance!
AerialBot
I went into Edit mode for each mesh and did Shift+Alt+Ctrl+M to select non-manifolds. On the allosaurus the problem was in its tail, with erroneous material. I redid the tail and tried to apply the armature. That did not work; none of the bones did anything. On the utathraptor, the error was on both cheeks (a single vertices on either side) and a segment inside the mouth on either side. I fixed both, and reapplied the armature. That did not work; The armature partially bonded, and bones either did nothing or controlled a somewhere else on the mesh. I am 99 percent sure I’ve missed something.
In answer to your second question, I understood the mechanics of what you did, but I don’t know how you did it. “Go to THIS and select THIS, then perform THIS key combination” is what I meant in a step-by-step.
If you managed to fix at least one of the meshes, can you send me the .blend file back, so I can see what was changed to work?
Using your hints, I figured out what I think is a workaround, as I only ended up using the Decimate and non-manifold clues you gave earlier.
For the next person who comes across this thread, the steps I performed are:
I employed the Decimate modifier a few times, applying one step at a time. In between decimations, I used Ctrl+N to sync normals and (Edit mode w/vertex select) Ctrl+Alt+Shift+M to detect non-manifolds. After each step, I would do Ctrl+P → Auto Weights to see if the armature would bond, If it did not and returned the error “Bone Heat Weighting,” I would delete it from the mesh’s modifier stack and continue with the next step.
In short, my two dinosaur meshes are now properly synced with their armatures. I will be using the MultiRes modifier for detailing.
As for the fingers, I still don’t see how they threw off the weighting. Were there extra vertices? Should I have remodeled the hands entirely? Would you like to share more specifically what you changed?
The fingers wouldn’t weight because they had too much vertex density (and I suspect saddle shaped curvature contributes.)
To test that, I selected the hands and separated them to a new object, then weighted the remaining mesh with autoweights.
That doesn’t leave you with weighted fingers, but as I said, you can duplicate the mesh, decimate/unsubdivide it, autoweight it, then copy weights from your duplicate to the higher poly.