Hi,
I’ve been trying to assign an image sequence to a particle system in a way that each particle got assigned a different frame.
I wanted to use a driver to assign the particles index number to the offset of the sequence, that way I should have a single unique frame for each particle.
For some reason I have not been able to find the correct RNA or phyton expression for the driver.
Any ideas out there? is there something so obvious I’ve overlooked it?
You can’t do that with the standard particle system because the particles generated are not objects. In Blender, only an object can have unique material assigned to it. The RE:ticular AddOn could help in this situation because it scans a particle system and makes a unique object for each particle, each with it’s own material. However, you would still have to write extra code to assign the unique image frame to each RE:ticular particle.
Try to limit the scope of your project. For instance, how many unique images do you have? You could put all your unique images in a single folder and import them all using Images To Planes AddOn. Then you would have an object per material as requested. Make all the planes active physics objects and you could push them around using forces and gravity. Kind of like making your own particle system.
Thanks Atom, althou by your reply I’m afraid I didnt explain myself properly.
I dont want a unique material for each particle. I want a single material for the particles using the unique ID of the particles to choose amongst a set of images arranged as an image sequence so each would look different. Is the same as assigning a different color but instead using images.
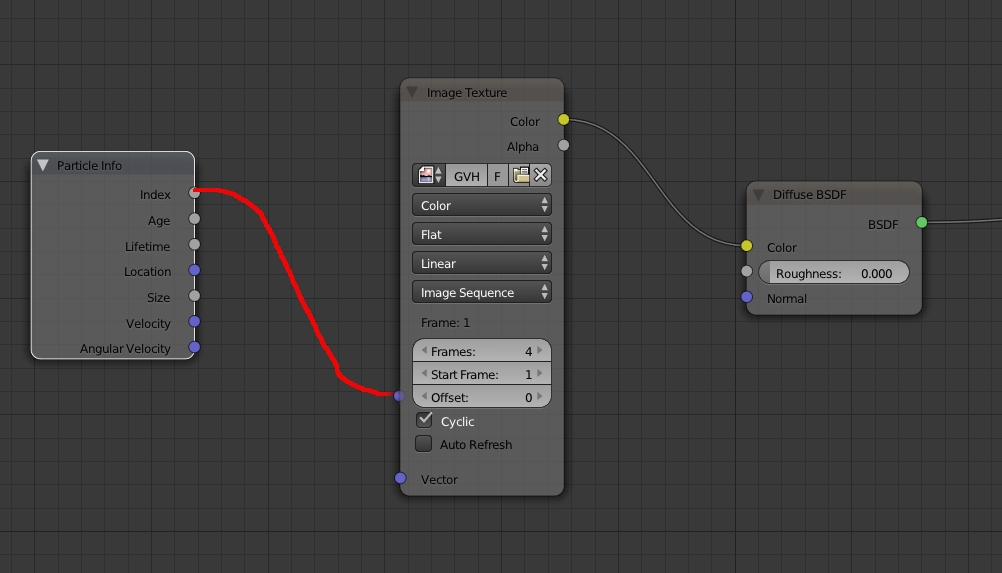
This is what I would actually like, to be able to connect the particle index of the particle info node directly to the offset of the image sequence node, but since this is not a feature at the moment, neither I know how to hack it, I thought I could do it using a driver assigned to the offset value of the image node and there pointing to the index of each particle, which is there somewhere but I don’t know how to find it.
Your idea is fine if I needed just a few pictures, 'cause once imported it creates a single material for each plane that then you have to tune to suit your needs, if you have tens or hundreds of materials changing each single one of them is a pain, if later on I need to change those pictures also I would need to go back to each material to point to the new ones.
This is what I would actually like,
Me too, we all want thinking particle inside of Blender.
All textures are essentially instances in Blender. If you could change the Offset value (with a script or driver) you would be changing it for other particles that share that texture. You would still need an individual texture or material for each particle. Thus back to the RE:ticular model of an object per-particle.
If you really only have 4 frames in your image sequence just create a group of planes, each with their own material/texture and Offset and then pick randomly from the group via the particle system itself. No nodes needed.
Even if you have 100 images in your sequence the same technique can be leveraged. Load each image into a plane using the Images To Plane AddOn (which will import an entire folder, select them all) and then add them all to a group for the particle system to pick from.
lol, I wasn’t asking for that much, no yet at least.
I can assign an individual color to an individual particle using a single material and the particle info’s index number
I’m guessing that with this setup, the material’s color is being evaluated for each instance’s particle index and assigning a new one.
That’s exactly what I want but instead of a color I want a to use a picture, but for that I need a way to call the particle’s index.
Your idea with grouping planes and then picking from that pool is neat, but it still leaves 2 big “buts” I would have to go inside each material to add all the necesary shaders (using just a diffuse was for the example above) and I would have to edit all meshes to the one desired (this is easier, but yet) and not easily done for hundreds of pictures, which is the real target.
ok, and what if you use a strip instead of a sequence of frames, and offset the uv with nodes…?
https://db.tt/SYM3XEbx
I would have to go inside each material to add all the necesary shaders
True but the new Images To Planes does support Cycles materials now. Just remember to have the Cycles render engine selected before you import all your images. A placeholder Cycles material will be created for you. It does depend upon how specialized your materials need to be.
I would have to edit all meshes to the one desired
More of a show stopper, so you don’t want just images on a plane, you want images on a surface…hmm.
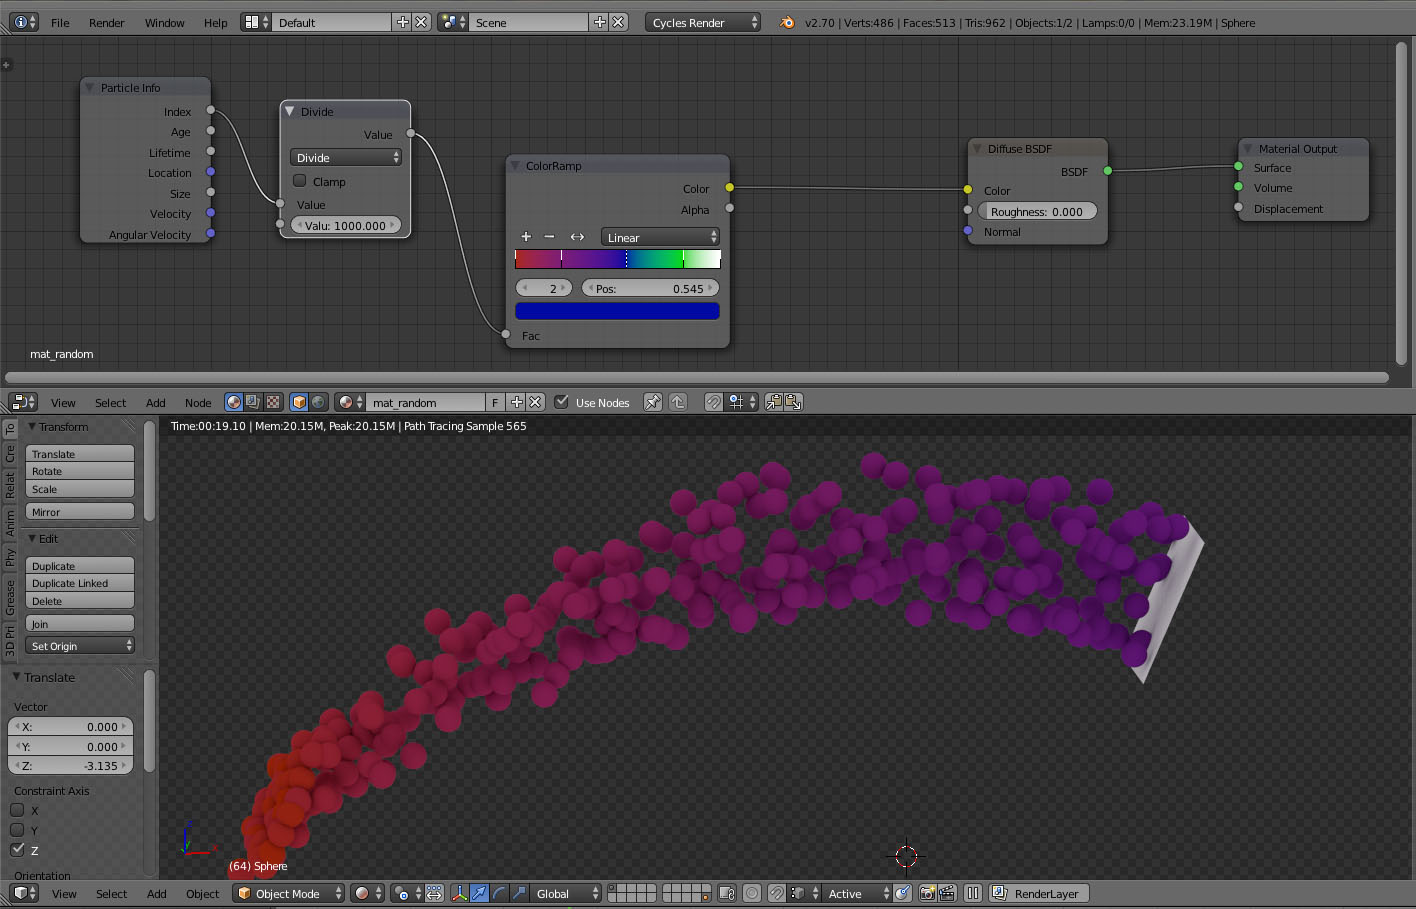
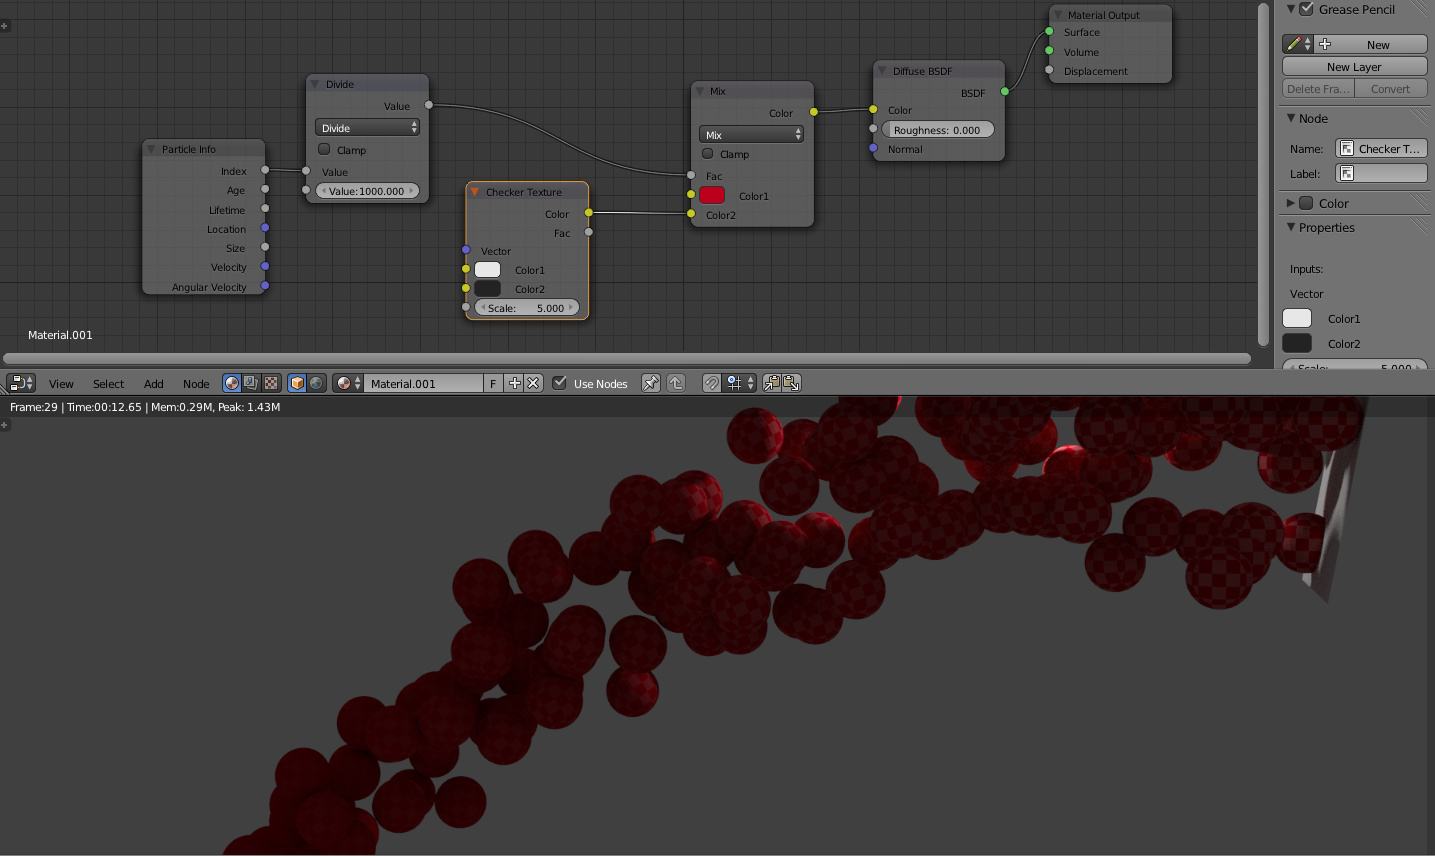
You can actually use a texture instead of a color. In this setup I have 1000 particles being emitted over time so the ones that get emitted first have the color and as more are born, over time, they inherit the texture instead. You could stack up several Mix nodes to add more textures in.
Attachments
Thanks,
Both methods work great when a few images are needed.
Let me explain further I might need something from 100 to 1000 images, I will need to play with the particle’s age so they won’t all be loaded at the same time or else I won’t be able to use it. Each particle will instance a mesh from a group, those meshes will be small variations (mesh wise) but would have a single material which should change its texture in a determined order (by the sequence frame number) and should not be repeated. That said:
I can not compose a single image, it would be too big, althou for a small quantitie the uv displacement is a great solution.
I can not use a mix node, because even thou I can load as many image nodes as I need, with the node wrangler I can load all of them in a single click, I would have to do tons of mix nested nodes and I’m not certain if there is even a depth limit for this operation, but sure would be time consuming.
Thanks guys, I might have to keep this idea in the freezer till is its time and think of something else for now for my current project.
Hi Kubo,
I would like to be able to have my particles change color over time as shown there in your picture. However, I’m new to Blender, so I don’t know that much about all the techniques you and Atom are discussing. Using 2.70, I tried to duplicate your node tree, but I couldn’t get the colors to change. Here is my blend file:
https://drive.google.com/file/d/0B_yQeQQ8ImENZ3VPWE5HcVJ3a2s/edit?usp=sharing
Can you see what I’m doing wrong?
Thanks in advance for any help.

Hi Thom, I’m quite new myself, so problem.
Your blend file is fine, the particles are changing but just the first 50.
The color ramp has a 0 to 1 value to define colors, and the index is the actual number of the particle starting from 1 till the last one you have setup in the system.
Hence if you divide by 50 (which is a way of normalizing the index) you only get the first 49 particles to have a value between 0 and 1, the rest 50 and up, will have values equal or above 1 so they will be assign the last color always.
So if you want to use a color ramp and you want the full spectrum equally divided amongst the particle set you have to divide the index by the same number of particles you have in the system.
Have fun.
Oh, ok, thank you very much. I just discovered that the colors won’t change in the 3D Viewport if it is set to Material display – they only change color in Rendered display. Thank you very much again!
Lol, I didn’t notice that either, I changed to renderer and checked it there. A new thing learnt. Thanks to you too.
No problem, that’s a really neat effect…thanks for sharing.