Hey everyone,
I would like to know if there’s a way of “baking” a projected color on a particle.
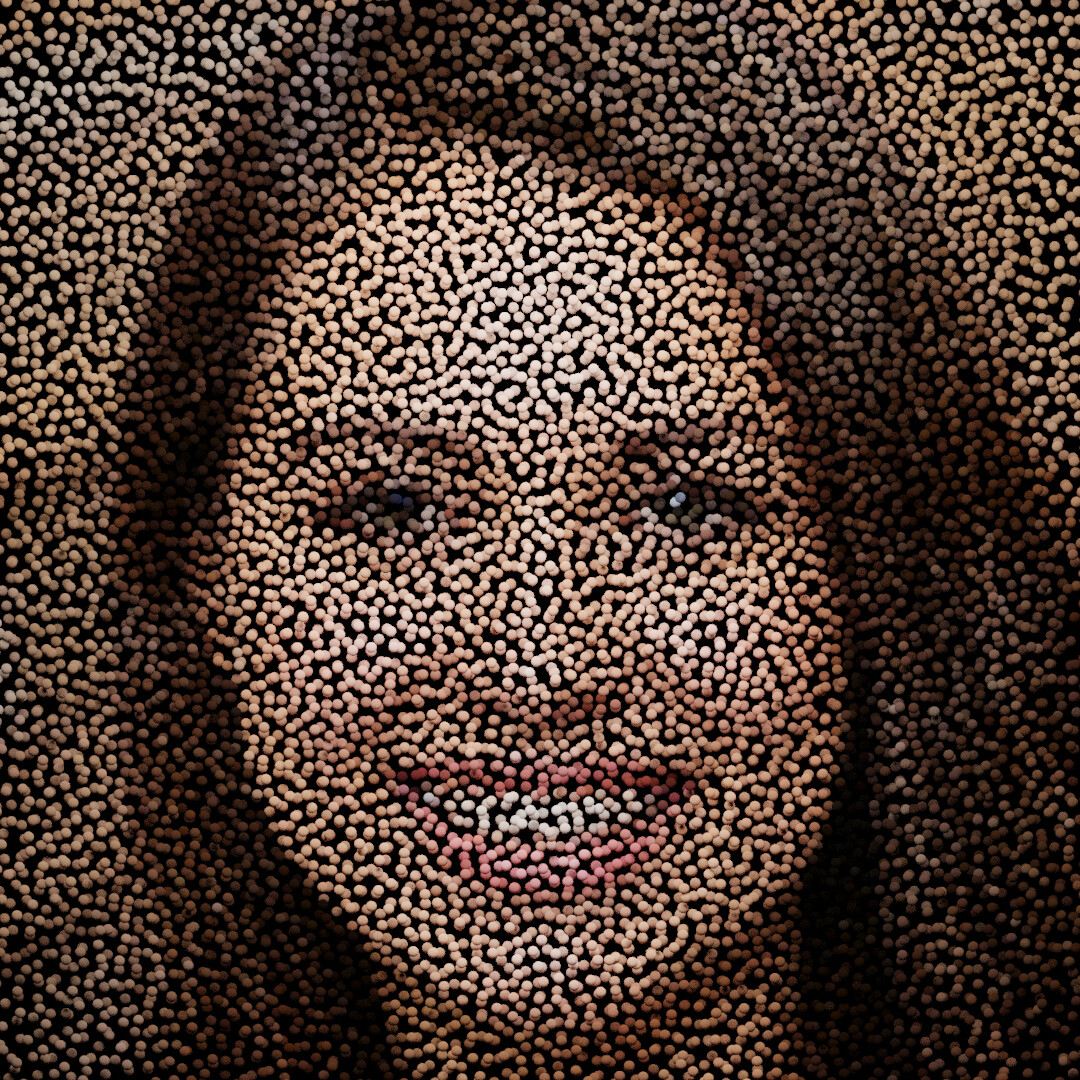
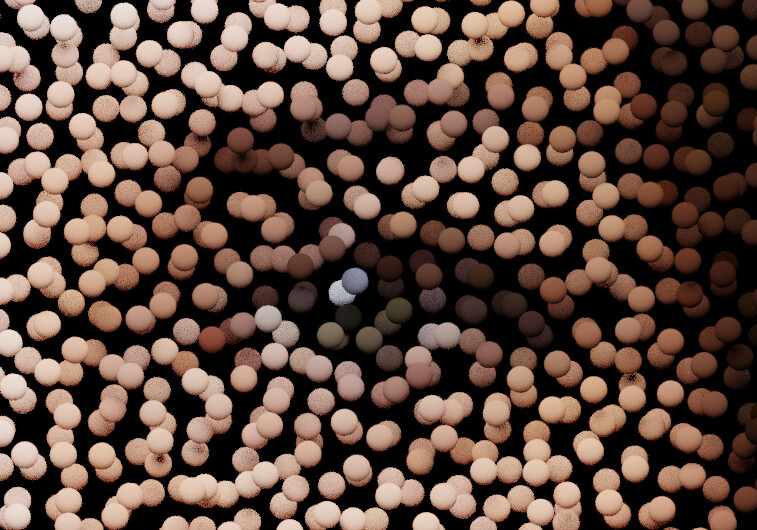
So for a project, I need to have each particle colored with the RGB color of the pixel from an image, based on the location of the particle at a certain moment. Here’s the effect:
.
What I want is to choose a frame where I can bake the color so that the color would stay on the particle if the particle moved, because now when each particle moves its color changes to match the location of the pixel it’s covering. I tried using the UV map of the emitter instead of the particle info / location but that would allow me only to use the colors from where the particle was born, and not another frame that I would like.
That implies memory: you color a particle and the value stays. You can only do it through programming (scripting). An easy way to do this using scripting is to create a material for each color and apply it to a particle based on its location in the first frame. You could end up with thousands of materials though, I’m not sure how Blender will handle it.
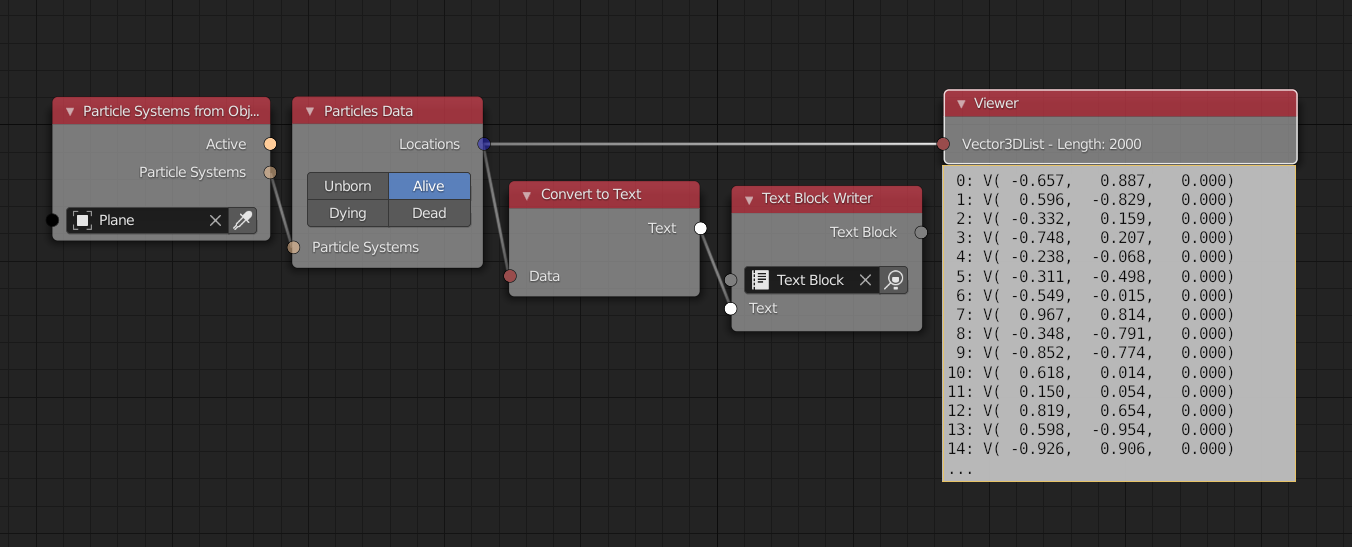
Thanks for the reply. Unfortunately I have very little knowledge in scripting. What I tried so far is extracting the particles locations with animation nodes to a text. This is good because I can choose which frame I want and export the corresponding data as a text. But the problem is how to import that data back in blender in a way the shader editor could read it.
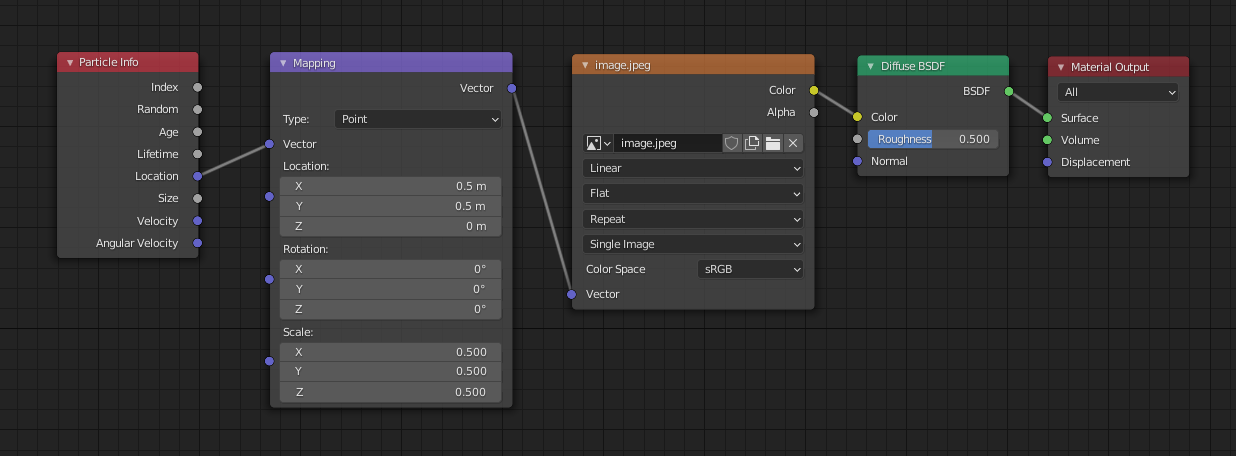
Here’s what I did. This basically gives you a 3D vector list.
I tried as well exporting the simulation as an alembic file and reimporting back into blender which is also good because now you have a mech with keyed vertices instead of a simulation, plus you can freeze the mesh at a frame that you want. But that also didn’t help, since I didn’t know how to translate vertex location info into something the shader editor could read.
No worries, you understood perfectly, thanks for the feedback !
Yet, the thing with this method is that you’re stuck with color mapping of the first frame of the simulation, when the particles are born. What I’m looking for is to be able to choose any frame from the simulation and bake the color mapping of that moment on it.
So after two weeks of trial and error, I managed to find a solution in scripting.
I know that probably this is not the most efficient way to solve this problem, but for me it was the only way. Small heads up, the script takes time to run specially if there’s a lot of particles: in my case it took around 40 seconds/frame for 10 000 particles.
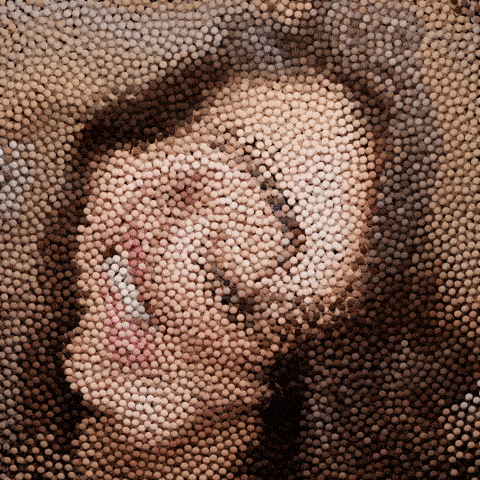
Here’s the result:
Note that this is NOT a reversed video, the particles actually move forward in the simulation and come together to form the image.
Since I have extremely basic knowledge in coding, I compiled a script from different snippets that I found online. bake-colors-animation.py (4.9 KB)
Basically what the script does is four things:
converts the particles to object instances and bake their animation to keyframes (from start to end frame)
decimates the keyframes (which is crucial because having keyframes for every frame for thousands of particles can make the file extremely heavy)
links the material to the original object and then create a single material for each instance
assigns a different vector to each instance based on its location at a particular frame
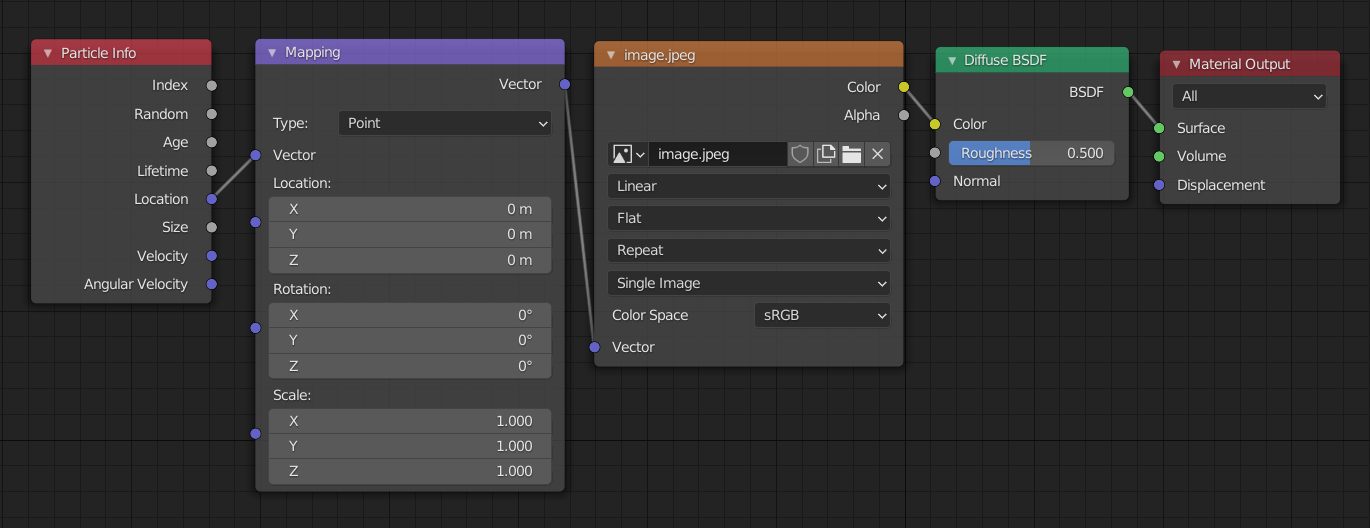
For this method to work, the camera need to be seeing the scene from the z axis (above the particles with all rotations to set to 0)
This will give you preview on the look. You might need to adjust the location, rotation and scale in the mapping node to have a perfect aligning of the image.
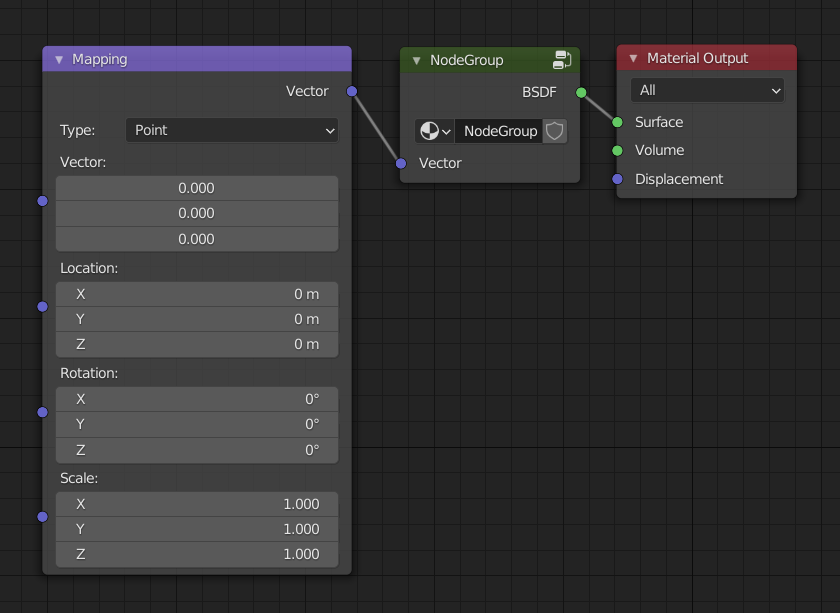
then duplicate the shader, delete the particle info node and group the diffuse with the image texture, that way when the script creates individual materials for each instance you can still change the image of settings in the shader since the nodegroup won’t be duplicated but only referenced.
choose the frame where you want the particles to form the image
load the script and set the properties you want to bake to true (location, rotation, scale) in the beginning part of the script
select the emitter and the instanced object, with the emitter being the active one
run the script and go for a walk
you now have a collection with the color and animation baked particles. In case you decided you want the particles to form the image at a different frame, you can choose the frame and run this script. There won’t be any baking this time, just vector adjustment for each object, so it’s very quick in comparison to the initial script.
import bpy

for obj in bpy.data.collections['particles'].all_objects:
    obj.select_set(True)

for obj in objects:
    bpy.context.view_layer.objects.active = obj
    bpy.context.object.active_material.node_tree.nodes["Mapping"].inputs[0].default_value[0] = bpy.context.active_object.location.x
    bpy.context.object.active_material.node_tree.nodes["Mapping"].inputs[0].default_value[1] = bpy.context.active_object.location.y
    bpy.context.object.active_material.node_tree.nodes["Mapping"].inputs[0].default_value[2] = bpy.context.active_object.location.z
Feel free to ask me and I’ll help as much as I can.
Edit: it would be great if someone more experienced with python in blender could help me make the script more efficient.