Yeah… PLace57 is right. It’s too thick. But that’s a minor problem compared to the rest.
From experience, I can say that such a design will be rejected by Shapeways if you want to print it in metal (gold or silver). Too fragile too handle when it will come out of the “oven”. And if you want to print it in stainless steel, it’s too thin… unless you’re going gangsta rapper and that pendant is a big as your palm. That little bit floating inside the loop of the “L” at the bottom left is another problem.
In short, the hollow “L” is the problem. To make it printable, I’d fill it and make a concave surface to give the idea of the hole. (If you see what I mean.)
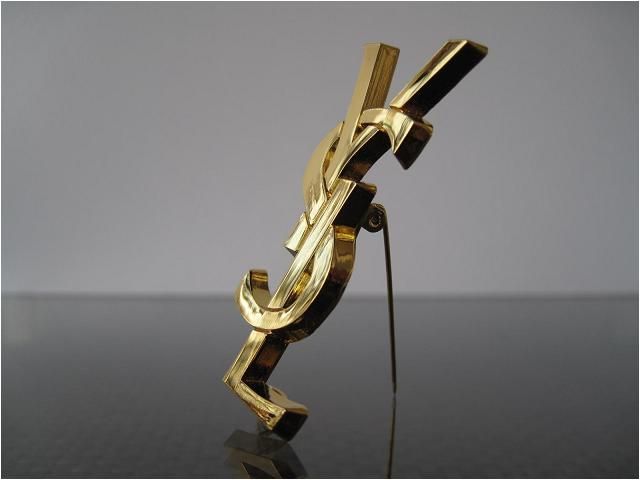
Now, to make it nice and smooth like the Yves Saint-Laurent brooch, you need to add a bevel along all the edges… and all the triangles are going to come in your way. Seriously! Very seriously!
If it were my blend file, I’d go back to the original vector import. I’d convert the curve to 3D to keep only the outlines and to work from there. Once converted into meshes and extruded, the Solidify modifier can make nice quads all around everything. Inside, outside, where you need it. You join everything and you fill the holes with [ALT F] (Beauty Fill which makes plenty of ugly triangles) or the Grid Fill. Here the triangles won’t be a problem as long as you have all these nice quads along the edges. Finally, you’ll be able to apply a bevel to make everything smoother.
This sounds like a really stupid rule but it has worked fairly well for me - when designing for casting, if you cant draw the design at a 100% scale with a standard sharpie permanent marker it’s too fine.
So using this rule the entire hollow inside of your ‘L’ has to go. As do the two little cutouts on the left side of the ‘C’. Assuming a normal size pendant and not hood ornament size bling.
Thanks for the help everyone, the thin line on the “L” was a stroke on original image and I just left it that way when it entered blender3d.
I wil re draw and convert with blender 3d again to get a closer to the brooch :). I would be happy with a color print in plastic or ceramic and then refining for metal later.
Iam not shooting for the gangsta rapper style so I guess I have a little more work ahead of me.


 That little bit floating inside the loop of the “L” at the bottom left is another problem.

 so I guess I have a little more work ahead of me.