What comes to mind now is compatibility with physical lights and maintenance.
I’m willing to pay for Photograhper4. This addon is getting better and better and your support is undoubtedly the best!
What comes to mind now is compatibility with physical lights and maintenance.
I’m willing to pay for Photograhper4. This addon is getting better and better and your support is undoubtedly the best!
I’m also willing to pay a small fee for the upgrade so you don’t have to split things into two different products.
You can do the separation and give a free coupon to Photographer 3 customers to buy “Lightsource” and upgrade to Photographer 4.
That would be the plan, yes 
Unrelated to the above discussion. Would it be possible to have features added that support Octane for Blender camera settings?
Definitely possible, it’s just a lot of work. Octane uses a different nomenclature, rendering options that don’t have equivalent in Cycles… It’s been on my list for a long time, we’ll see.
If I start using Octane more personally, that will definitely happen! I think it’s a great renderer but I’ve seen myself go back to Cycles every time for ease of use and EEVEE preview.
Hi @chafouin!
Thanks for your great Addon, really makes work a lot easier.
Would it be possible to extend the DOF function from a simple focus plane to some kind of “depth of field area” dependent on the Aperture value?
Best,
Vincent
It’s doable, I’ll put it on my list but it’s a pretty low prio for now, I have other features to work on first.
I am planning to start a testing phase in a week or two, and I’m looking for a few testers. Please send me a PM if you are interested in participating.
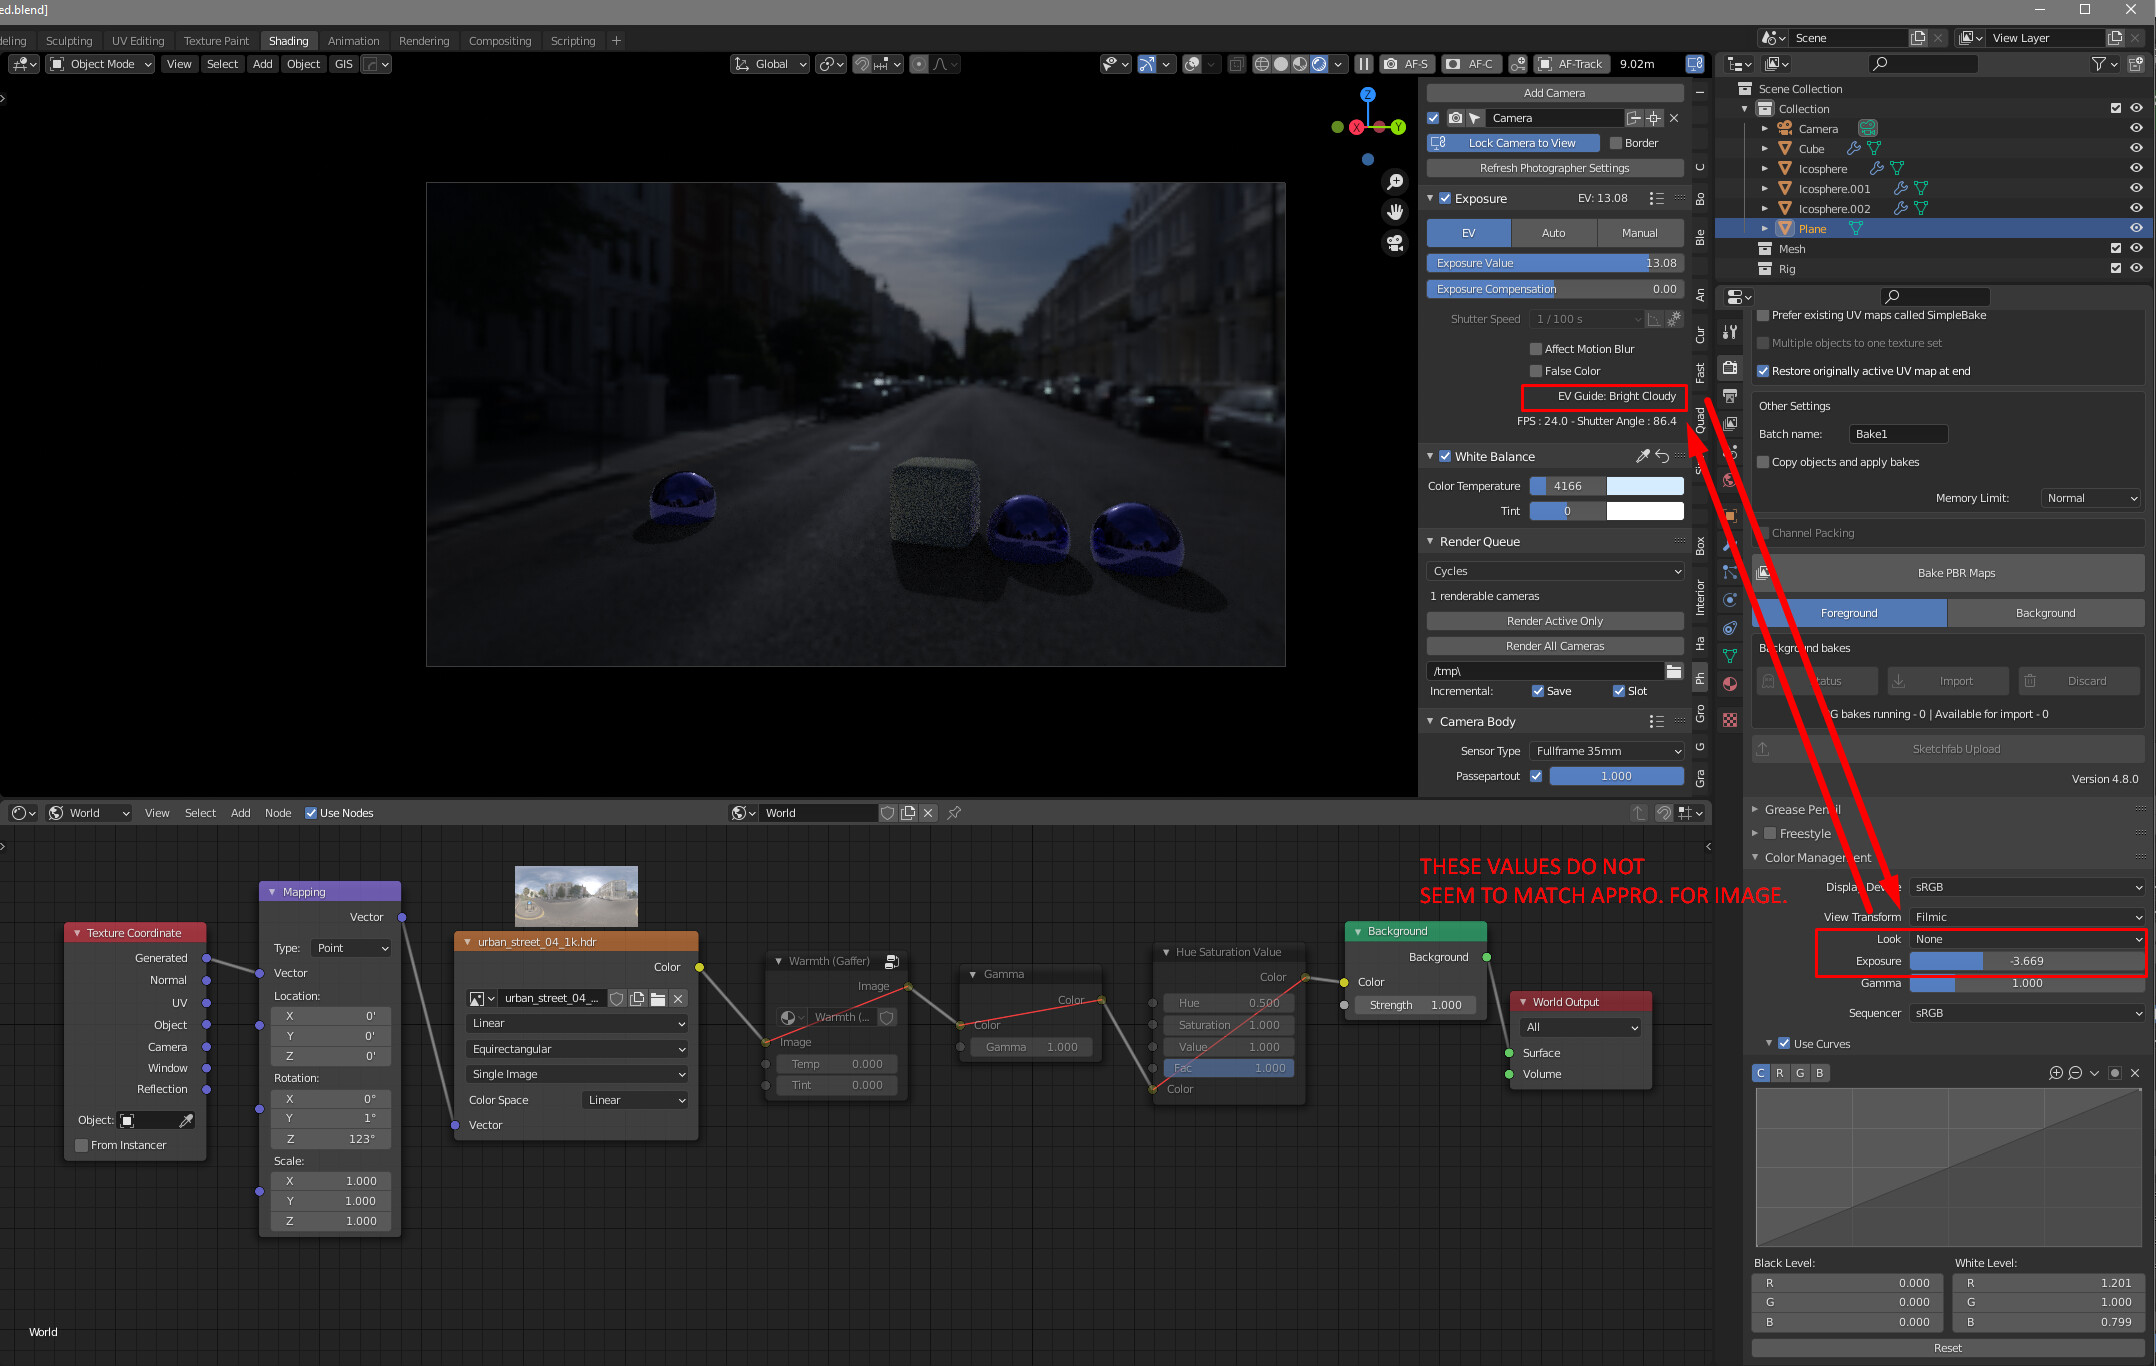
Not sure if this is a bug in 2.91 but my exposure settings in EV do not seem to match the HDRI I’m using. I’m using https://hdrihaven.com/hdri/?h=urban_street_04 which is a “Bright Cloudy” image. The image looks super dark in the viewport/render result. Am I doing something wrong? Also, changing the color management Exposure to 0 seems to work fine but then it changes back to the Photographer controlled value of -3. See attached image…
HDRI Haven HDRI are pre-exposed, so they can’t be used in a physically based workflow. However, if the HDRI was captured by Sergej, you will find the Color Chart images that can be used to re-expose the HDRI by matching a color chart in your blender scene to the reference.
Here is how I’d do it:
Thank you for this helpful explanation. Where is a good resource to use non pre-exposed HDRI’s?
I don’t know of any, unfortunately.
Hey everyone!
I just wanted to inform everyone that Photographer 4 will be a paid update.
Now, onto the good news. If I make you pay for something, it has to be worth it!
Here is a teaser of what you can expect:
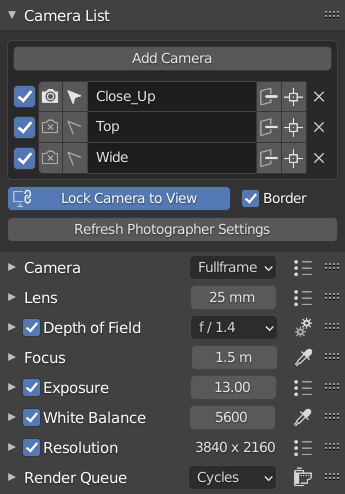
New Photographer UI. Close the panels to hide advanced options, and you will still be able to the most important settings. You get all the information about your camera at a glance.
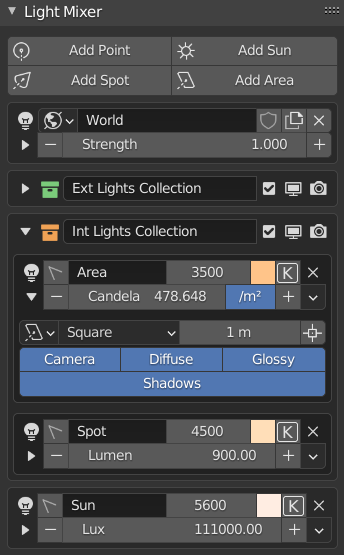
New Light Mixer. Solo or mute your lights, group them with collections, tweak their most important settings from the 3D view panel. Compatible with Eevee, Cycles and LuxCore.
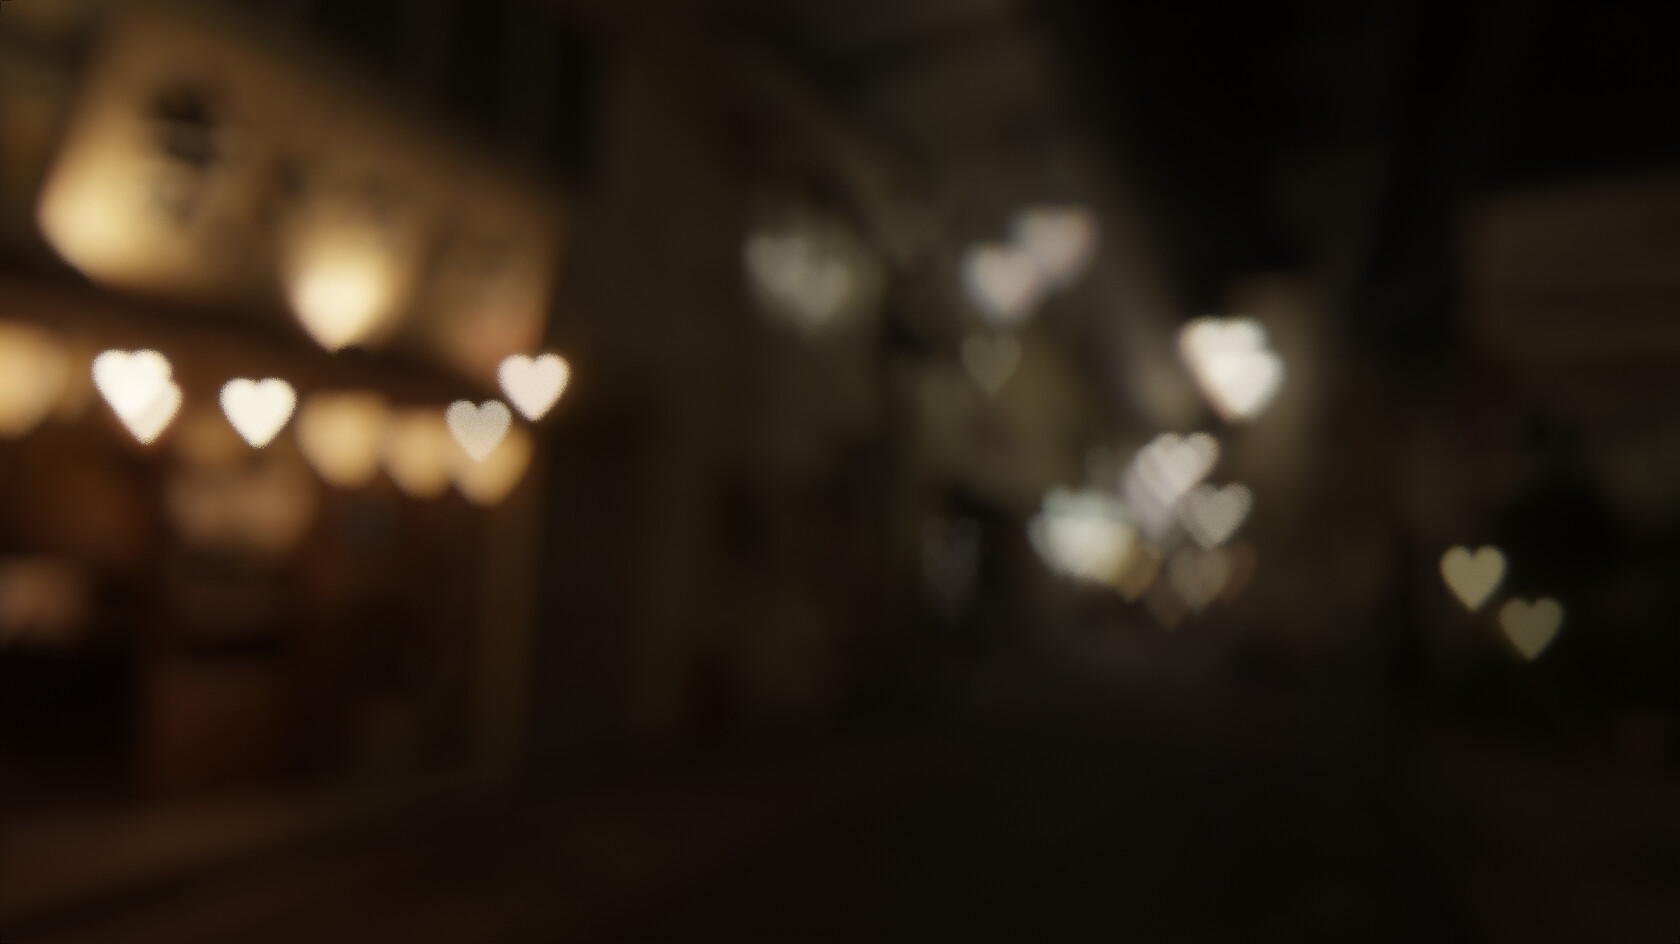
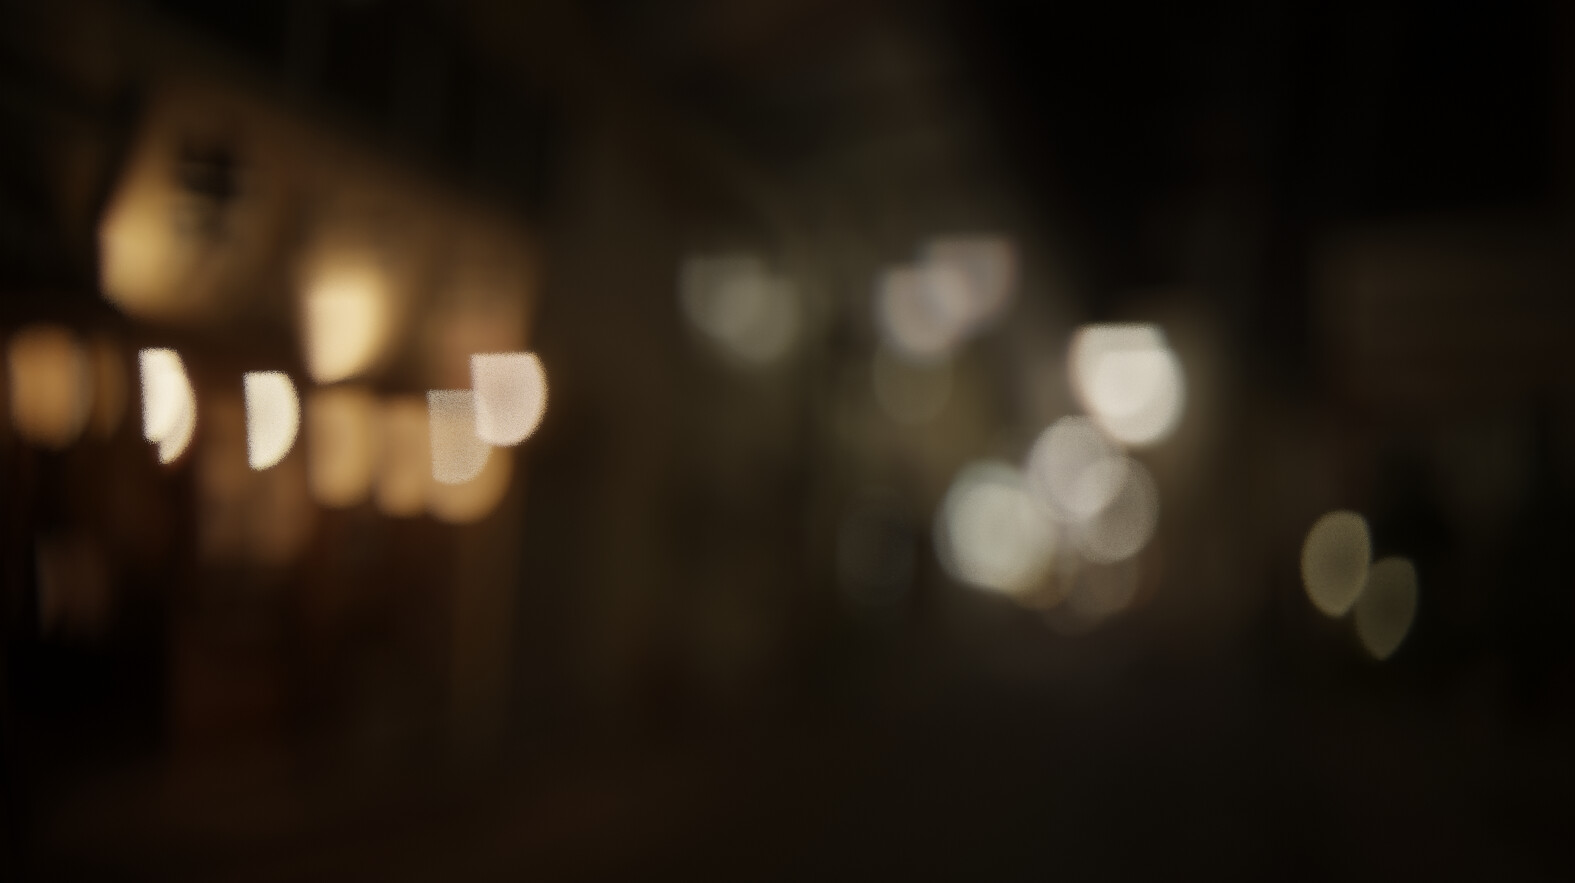
Everyone loves bokeh, so you now get 2 easy-to-use settings to make it awesome. Forget about struggling placing your images in front of the camera, Photographer does it for you (Cycles only).
Bokeh Texture: gives details or defines the shape of your bokeh, uniformely across the image.
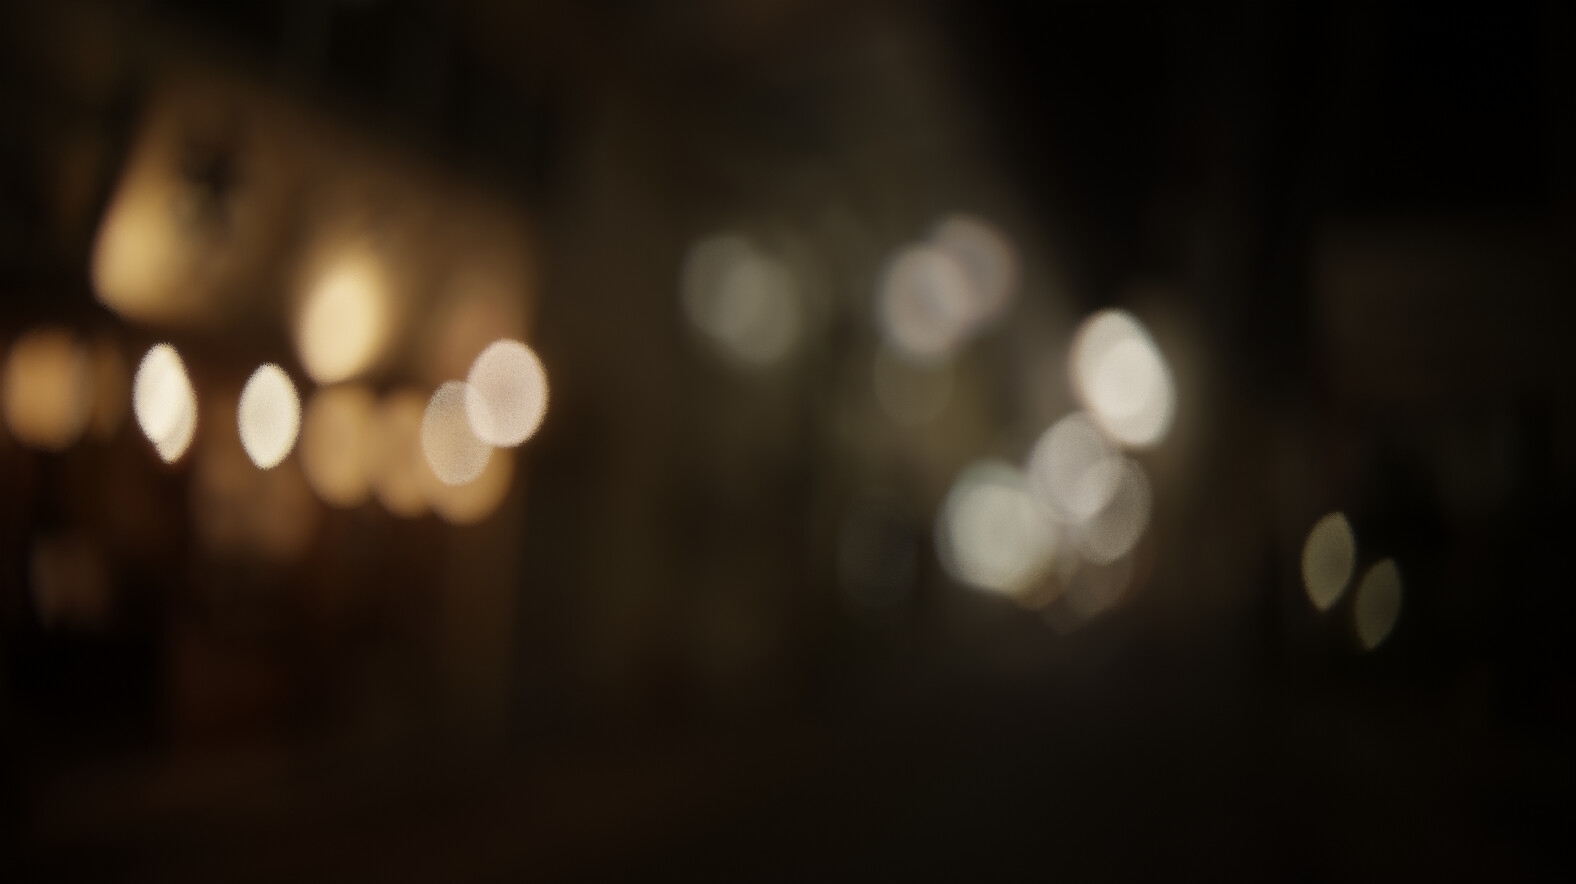
Optical vignetting adds lens occlusion further away from the focal plane, creating the swirly bokeh effect and the Cat’s Eye effect we all want!
Use a texture for the Optical Vignetting to create occlusion from matte boxes, lens hoods, or whatever else you think looks fancy.
Oh, and there are a lot of other tiny features to make your life easier when working with lights.
Hope I got you interested! Still need a few weeks to add some presets and bokeh textures, clean up some stuff, but it’s coming soon ![]()
This all looks nice!
I’ll update as soon as it’ll become available. Personally, Photographer is now part of my workflow, a must-have add-on. Thanks for your dedication!
Looks nice About upgrade, just don’t make the upgrade cost more than version 3 and everything will be good 
My wallet is ready. 
The new UI looks really nice so far.
May I ask if would it be possible to add more composting guides like the golden spiral for example?
Great work!! Super excited to upgrade.
Is there a chance diffusion could be implemented into the lights for Photographer? The only solution I know of that can be used with actual lights is extremely noisy, basically a plane with a translucent material in front of your light. Distance and thickness (could be controlled with a solidify modifier) control the amount of diffusion. It would be a nice option for some renders despite the noise. The other solution has it’s own drawbacks because it required using mesh plane lights instead, less noise though.
It’s always been frustrating to me that no matter the size of your light, which does diffuse the shadows, reflections still are perfectly sharp. I think it’s one thing that keeps renders from being more photorealistic if trying to match certain studio lighting setups.