I usually never use roughness of 0 in materials, and use HDR captured emissive materials like the ones in Lightpacks to get a more realistic reflection.
It would be possible, but as you said, the noise… I will think about it, a gel filter attachment makes sense.
Yeah, that’s fair. For very reflective objects it can be an issue. Especially for product renders where lowering the roughness does change the material type and doesn’t suffice in this case.
Oh yeah, if that’s just overlaying an image, that can be done, I was more thinking of actually drawing the curve in BGL. Hmmm… I’ll put it in my list, I would still prefer to render it in BGL, but the API is being replaced so I’d rather wait for Vulkan replacement.
Looks like a really useful addon, thinking of purchasing version 4 when it comes out!
I really like how you have different resolutions per camera. Just out of curiosity, how does your add-on behave when changing the width/height of the resolution?
Blender’s default behavior is very annoying.
If one axis is lower in value than the other, changing the value works as expected. For instance, if Resolution X is 1920 and Y is 1080, changing the Y value increases and decreases the resolution box size in the viewport correctly.
However, as soon as the axis the user is changing exceeds the value of the other, now it appears to be changing the resolution box size in the viewport in the other axis. In the above case, if the Y value is now over 1920, changing the Y value suddenly changes the resolution box size along the X axis.
Does Photographer work the same way? If so, would making the viewport resolution box to change as expected be something you can implement?
Oh, interesting, I actually didn’t realize selecting Horizontal/Vertical changes how the box scales, haha.
But it still doesn’t behave as expected. If Vertical is selected, both X and Y change only the horizontal scale. Horizontal, only the vertical scale.
Do you think this is something you’d consider adding? So when changing the camera resolution via your add-on, X value scales horizontal only, Y value scales vertical only?
What you are asking for would make the camera sensor size, and thus its field of view, completely irrelevant. Resolution would effectively have to change the sensor width, and this would be extremely confusing.
I think you might be approaching it from the wrong angle You can’t expand your canvas like a 2D painting, as you are working here with a 3D camera that requires physical units to define a field of view.
What kind of settings are you after? All of them?
I would personally duplicate the camera, but I can always add an option to reuse the current scene camera settings when adding a new one, if that makes sense (probably not for 4.0.0, but next update).
Just caught the tail end of your live stream - v4 looks amazing! I’ll be upgrading as soon as it’s released. Thanks for your hard work on this and all the free upgrades in v3. One (hopefully tiny) feature request - at some point in the future could we add/remove a half stop of light by shift-clicking the “+” or “-” buttons inside the light mixer? I saw that the shift-clicking functionality is already being used in the light mixer to solo a light so hoping that might be easily doable? Love having both the full and half stop options in the light panel so it’d be nice to be able to quickly use the half stop option too. This is my most used and useful add-on in Blender - thanks again
I was faster than you
At the end of the stream I figured that using half-stop with normal click, 1-stop with shift click would be handy, so I added it already
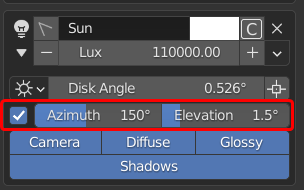
EDIT: I forgot to mention in the stream, the Sun light has Azimuth and Elevation settings that will automatically drive the Nishita Sky if you have one:
Great work, v4 looks amazing! Eagerly waiting to upgrade!
Just a wish…Would be possible to control the hdr or sky rotation per camera? So if I change the active camera from the Photographer list it will automatically adjust the world rotation.
Maybe a custom property in the camera panel that could be set as a driver could be enough.
It’s possible, but it’s cleary infringing on the Scene concept… Any specific reason why you wouldn’t want to use Scenes? My first guess would be that rendering settings aren’t linked and you have to manually copy them, which is quite annoying.
Yeap, you’re right. An option to keep render settings synced across scenes would be the right solution.
If I do multiple light moods (day, night, dusk) for sure I use multiple scenes.
Doing exterior archviz, most of the the time I just have to rotate the sky that fits better according to camera position. In this case, just rotating is faster.
Does Photographer has any other field that is global but changed per camera? (like Exposure)
So I could use it as a driver.