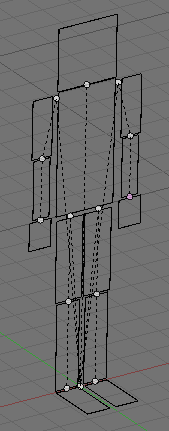
I’d like to UV map a very basic “humanoid” model I made. Each body part is made of planes (each part a separate mesh), so it is basically a plain figure with exception of the feets, wich are perpendicular to the body.
Since I also need to texture map the back of the entire body, for every part I’ve duplicated each plane, distanced it from the original by a tiny amount and then I’ve finally Joint these 2 planes together. So for each mesh/body part, I’ve 2 (front and back) parallel planes.
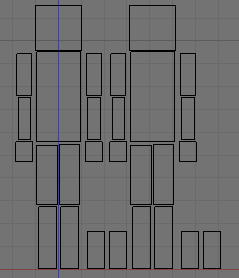
How could I texture map this object to be able to paint the front and back in the same texture, without any distortions in the body image of that texture? I imagine it shouldn’t be hard since my model is basically 2D, the only exception being the feets…
Thanks in advance!
EDIT: first screenshot is my model and then the arrangement I’d like in the texture.
if you want to make your multiple meshes all into one mesh, select them in object mode and press cntrl-j. your materials for each individual object will stay the same and you can see them in your editing window (f9)
after you join two objects together, if you wanna connect them together select the lines you wanna connect, enter edit mode and press “f,” then it will be a lot easier to texture and put a single image on the planes
I need my model as multiple meshes linked (parent/child), unfortunately I can’t change that (I’ve added some screenshots to my original post)
is there some technique to apply UV coords to individual vertices in separate meshes, deriving those UV coords simply from a unique “UV rectangle” arranged in world space?