As I’m still very new to Blender and all its many facets, I’m hoping perhaps that I have simply overlooked this answer to my puzzle. I’m wondering if there is a Node or Filter for applying Polar Coordinates to a material/texture or object? I am looking to more simply replicate the same type of effect created by Andrew Kramer (of Video Copilot) in After Effects for easily creating a shockwave style effect. I’ve searched through the manual and haven’t been able to find anything that might resemble what it is I’m looking for. I would prefer that there was a Node that could apply the effect/transform/modifier.
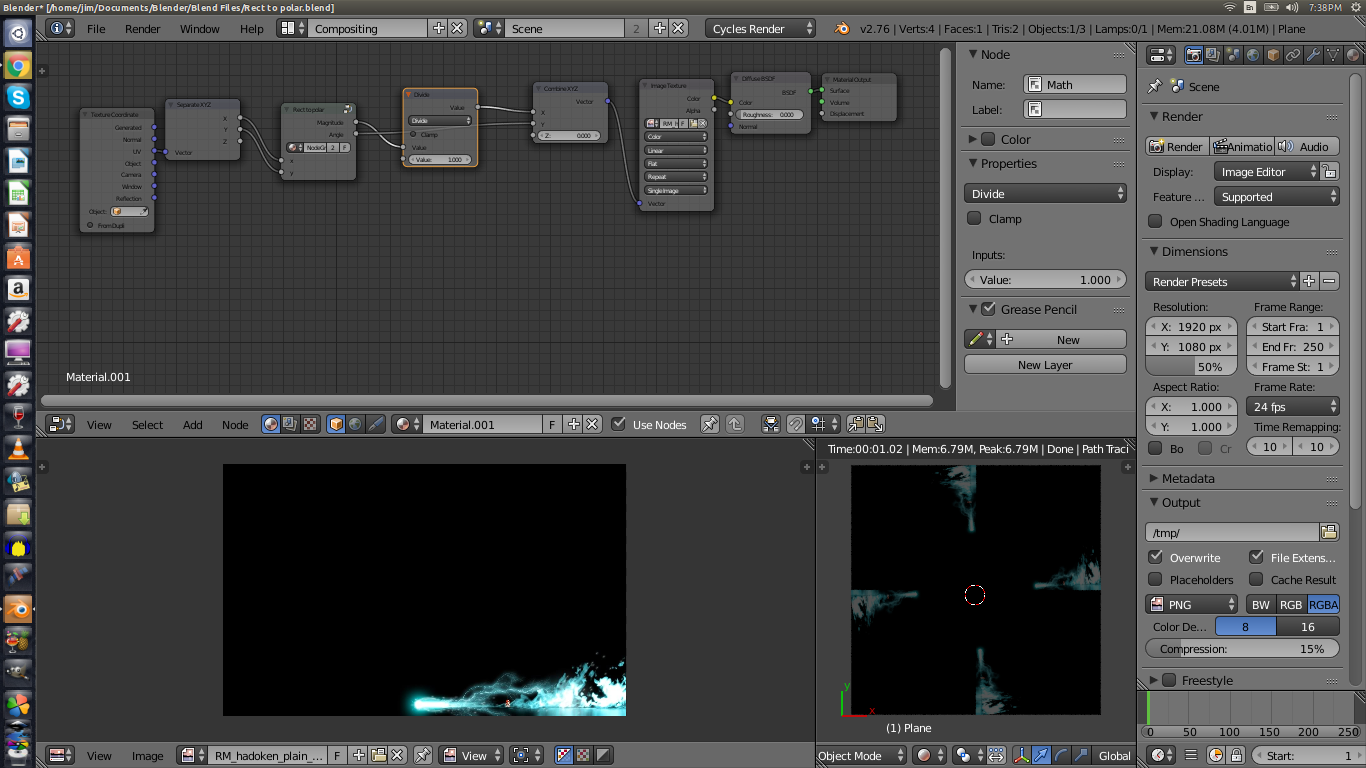
Here is a blend file with a cycles material that converts UV coordinates from rectangular to polar. The node group “Rect to Polar” (expand by selecting node and pressing Tab) does the math. The upper two rows of math nodes extract the U and V coordinates as X and Y and scales them to range -1 -> +1. The rest of these nodes implement [radius = SQRT(x^2+y^2)] to give distance from the origin (x -> r). The bottom math nodes in the group generate the slope and angular coordinates (y -> theta).
This file does the operation on an image texture, but you can use any texture you want.
Thank you for your reply, and also the supplied *.blend file with your setup. I appreciate you taking the time to help me out with this issue of mine.
I tried your file, loaded an image from my system and… I got for scaled copies of my image, arranged on the planar face, each rotated 90 degrees from each other going around the face:
I’m assuming I’ve done something drastically wrong, hopefully you can point out what misstep I took so I can fix it. I love the idea that I may be able to get this to work, which will definitely be a boost for effects, even if just in my mind.
You can go from rect to polar coodinates by importing your image as a plane then subdivide it and change its shape to a disc. I’ve done it once and it worked well. Might do a tuto if needed. Maybe it’s due to a lake of knowledge about the compositor capacities, but each time I dont know how to do something in it I remember that Blender is (also) a 3d software XD.
.
Looks like I lost the file, but I found an easier way:
In 3d view port, in top view, import your image as a plan. Make sur the top side of the plan is on the X axis. Your plan global location in Y should be -0.5 (half the size of the plan)
Then in EDIT mode, subdivide a few times, the more subdivisions, the smoother the end result.
Then, add > curve > circle.
Then select your plan, in the modifier Tab, add a Curve modifier and set the circle as object.
Now scale your plan on the X axis for the image to stretch and fill the circle.
I’m sure there must be a faster way using nodes but I have no idea how. So for now I do it this way.
hope it helps
PS: You can also apply an image sequence to the material, wich can result in prety cool effects.
.