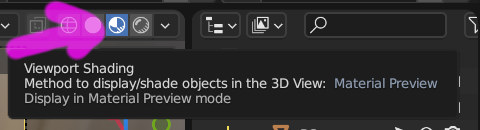
Huh, yeah, I’m thinking previous posters in this topic are right – we probably need to see your blend file, or at least a truncated version that has the problem. In the meantime, another possible source of confusion may be the Viewport Shading - Material Preview:
There are three renderers that come with Blender: Cycles, Eevee, and Workbench. Workbench is what Blender uses in its viewports by default – it’s not intended for final output renders, just for giving you an idea of what your scene looks like while using minimal computer resources. Viewport Shading - Material Preview uses the Workbench renderer and a low-res HDRI to, well, preview your materials. Emphasis on the “pre” in preview, this is a quick’n’dirty methodology. To look at something closer to what your render would look like, you want Viewport Shading - Rendered.
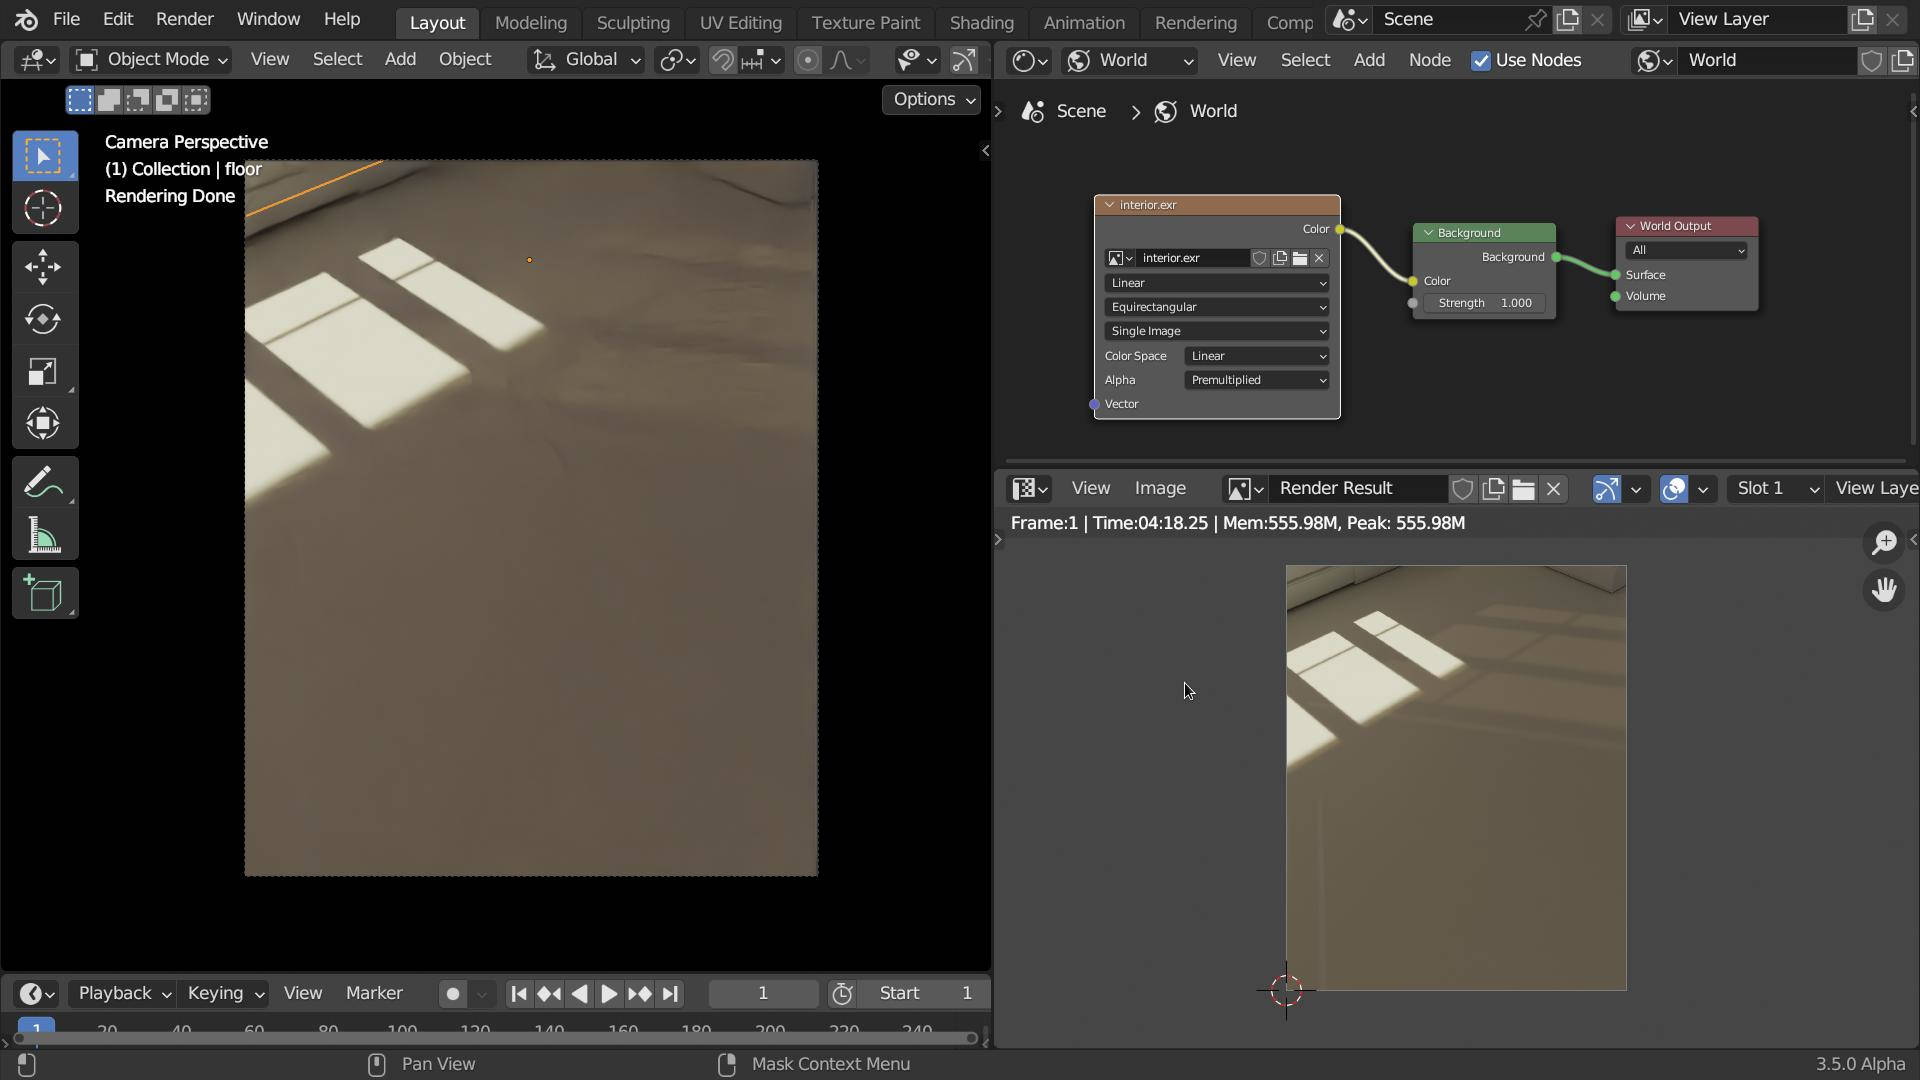
So, the HDRI settings in Viewport Shading - Material Preview are NOT those to be used in your render, and are not intended to be – the HDRI setting for your render are in the World Shader, accessed via Shader Type > World like I showed above.
It looks fine to me if you put the hdri in the world sharer.
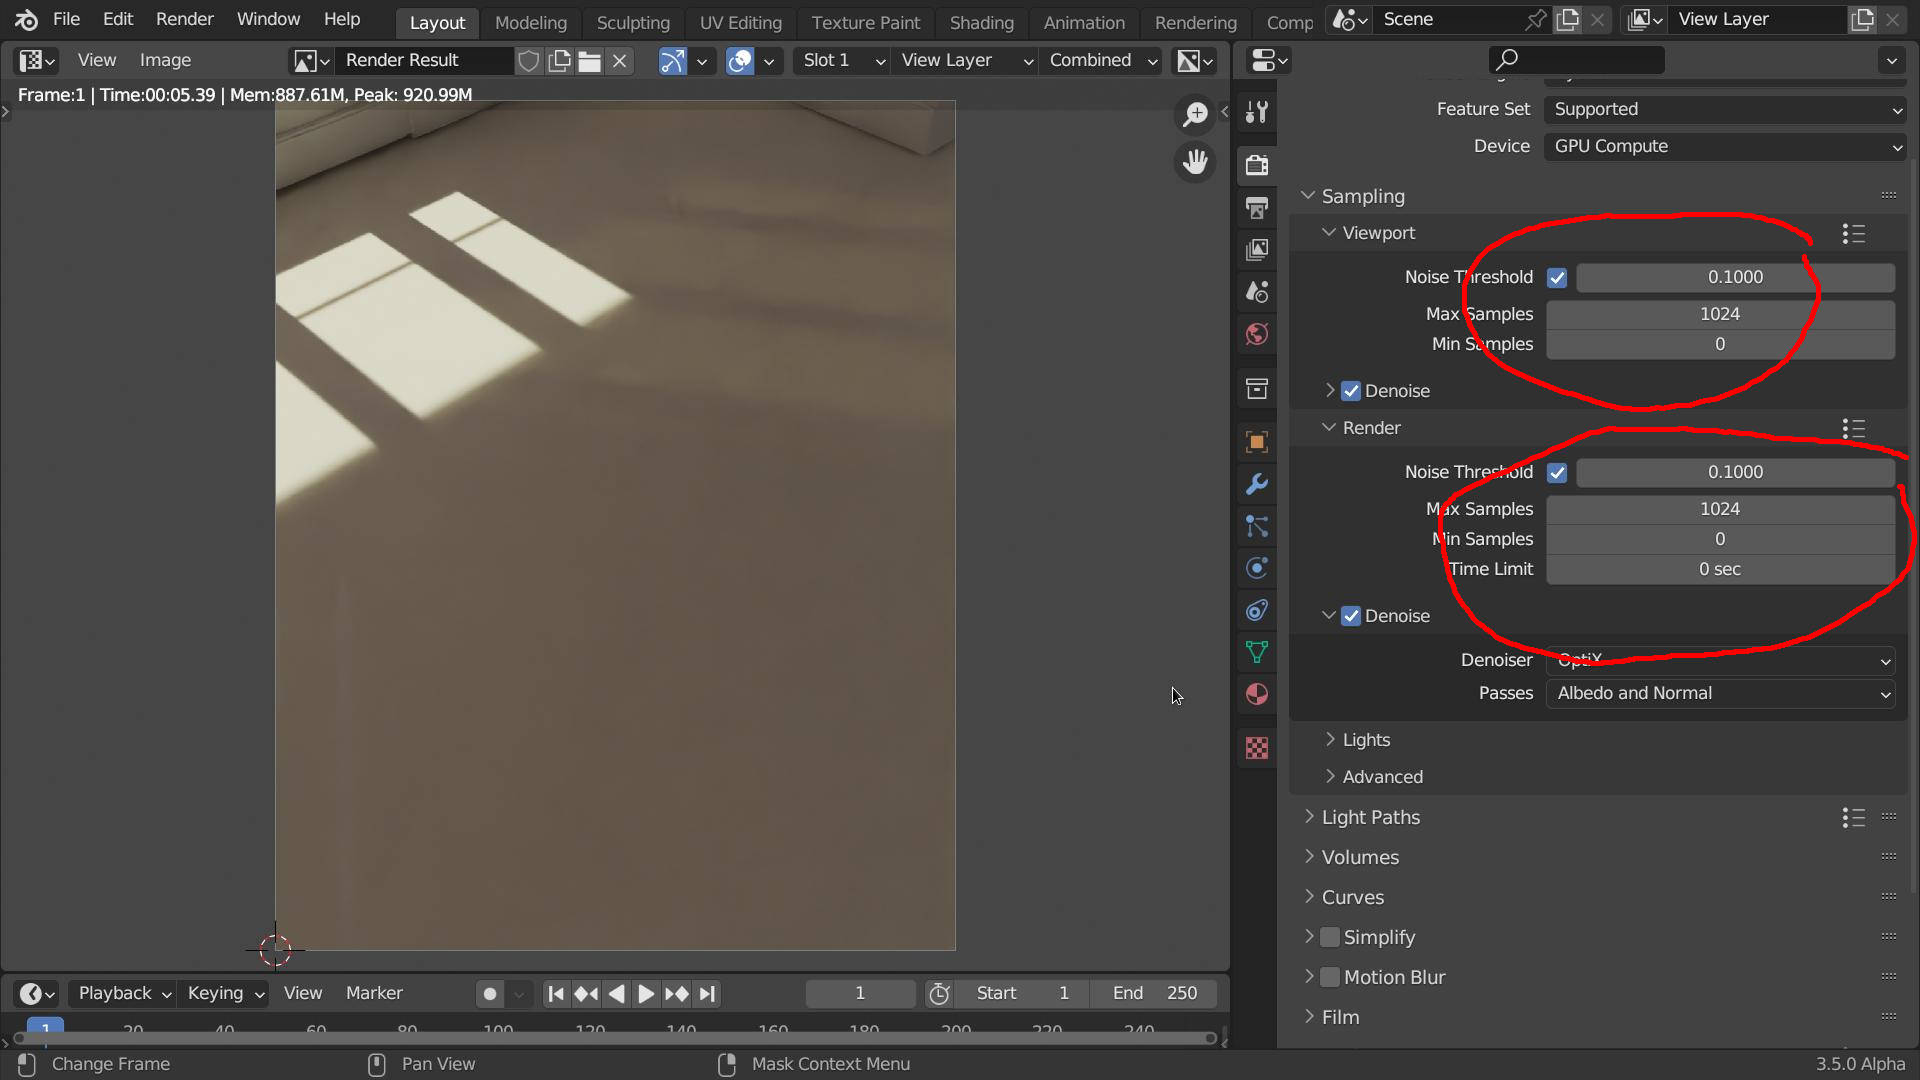
There is more light because you have more samples (you could turn down the strength in the background node to compensate), also the viewport one is blotchy due to denoise.
If you set the same sample count etc in render settings for viewport and render:
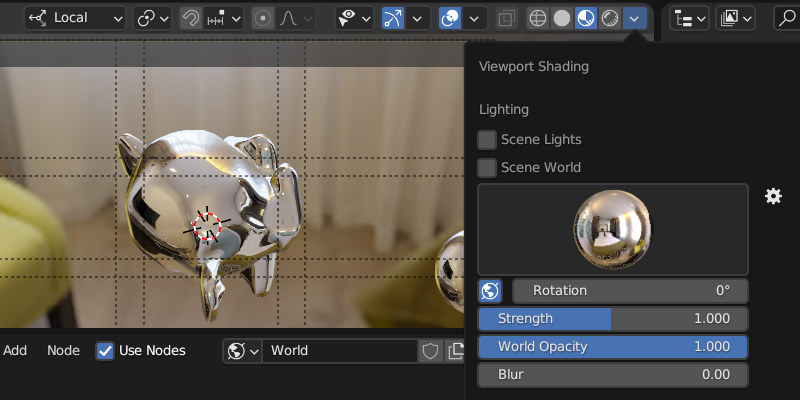
Looking again at your screen shot there are several things wrong with your world setup.
1 your have used the “studio.exr” (which is dark, black/blueish grey, nearly monocrome), but in the viewport you are using the “interior.exr”
2 you are using UV coordinates (and you have rotated them).
The world does not have UV coordinates, this will give you just one solid colour.
You have to use “generated” coordinates.
3 You have used an “image texture” node for the hdri, you need to use an “environment texture” node.
The environment texture node will use equirectangular mapping to map the image correctly in the word.
Look closely at my node setup in the last post and you will see the differences.
I did not use a texture coordinate node, Blender defaults to “generated” for the “environment texture” node.
To get the same result as the viewport hdri you do not need to rotate the HDRI.
Yep, that’s an easy mistake to make, happens a lot! Most people (including me) can’t spot it in a screenshot, it’s one of the reasons “post the blend” is common advice when someone’s asking for help here. (And why in answering screenshots I’ll usually label nodes that hide their names in use, trying to make it clearer.)
Also, I was wrong about this bit: although Blender uses the Workbench renderer in Wireframe and Solid Viewport Shading, it uses Eevee in Material Preview. Still intended to be a less-resource-intensive previz that won’t exactly represent the final render, but if you’re rendering in Eevee, the discrepancies aren’t because the Material Preview uses Workbench.
The solution to your original question was given by Okidoki ln his first post. The HDRI’s are from hdrihaven.
Edit:
It was not until I looked closely at the nodes in your last screenshot that I realized what was going on.
The file you linked did not include your world node setup so it was impossible for us to guess what you were doing wrong.