Wegaflex XT8000 made on earth 
Yeah had to call it something, we will see if the name sticks or it gets changed down the road. 
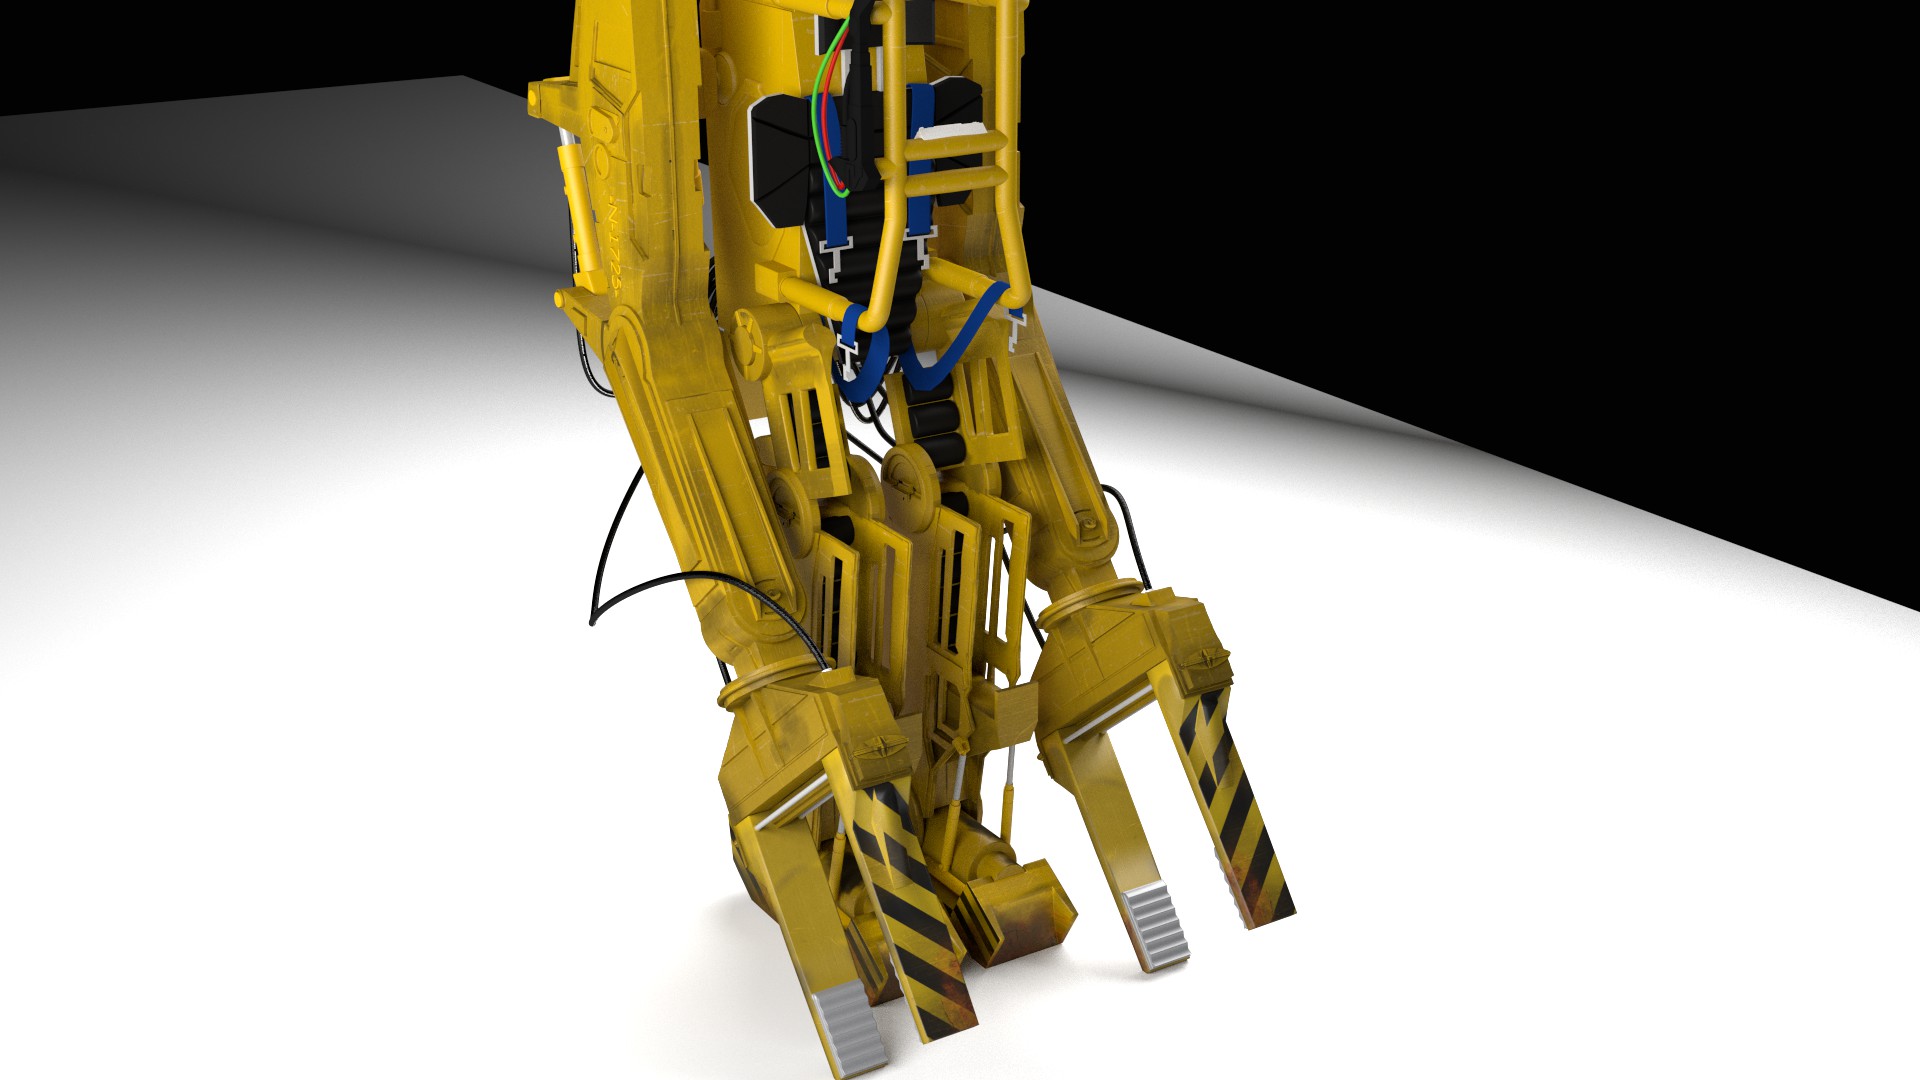
I’ve added dirt maps to most parts of the Loader now, but still need to do some tweaking to the intensity and amount. Small progress, but at least it’s still moving forward
I’m working a lot these days (Going on a 24h shift now) and will pick up my son again Friday, so I’l be pretty quiet over the weekend.

Have a great weekend out there, and thanks for stopping by my thread
I Din’t know that you could add UV textures to a curve! I’ll have to try that.
It’s looking good, but i think it should be more dirty.
Great work so far
Yes, it’s really looking good. And If I may add an idea, I think it should have some areas were it collided with the heavy charges and where the paint is spalling off and we can see the raw metal
@MonkMonk: Thanks. The amount of dirt is something that I keep tweaking, and cant really decide on. But I will try to post some renders with more dirt on later.
@Minoribus: Good idea I’ve been thinking about making a bump on the top mesh that looks like a big crate has fallen on it, but I’'m not sure how to do it. The same goes for your idea with the paint, I would like to do it but have no idea how to. So I’m very open to suggestions and tips on how to make some good looking paint thats peeling off…
make a new image to the same uv map, using a B&W texture that can be used as a stencil between the exiting material and a separate chain for the rusted, pitted metal underneath the paint, and this can also affect bump for the edge to look like it is raised.
Craig beat me to it, that is exactly how i would do it as well. I would paint my own B and W mask using grunge brushes in photoshop/gimp etc.
Hmm, I guess I should have checked this thread again before trying to add rust. :rolleyes:
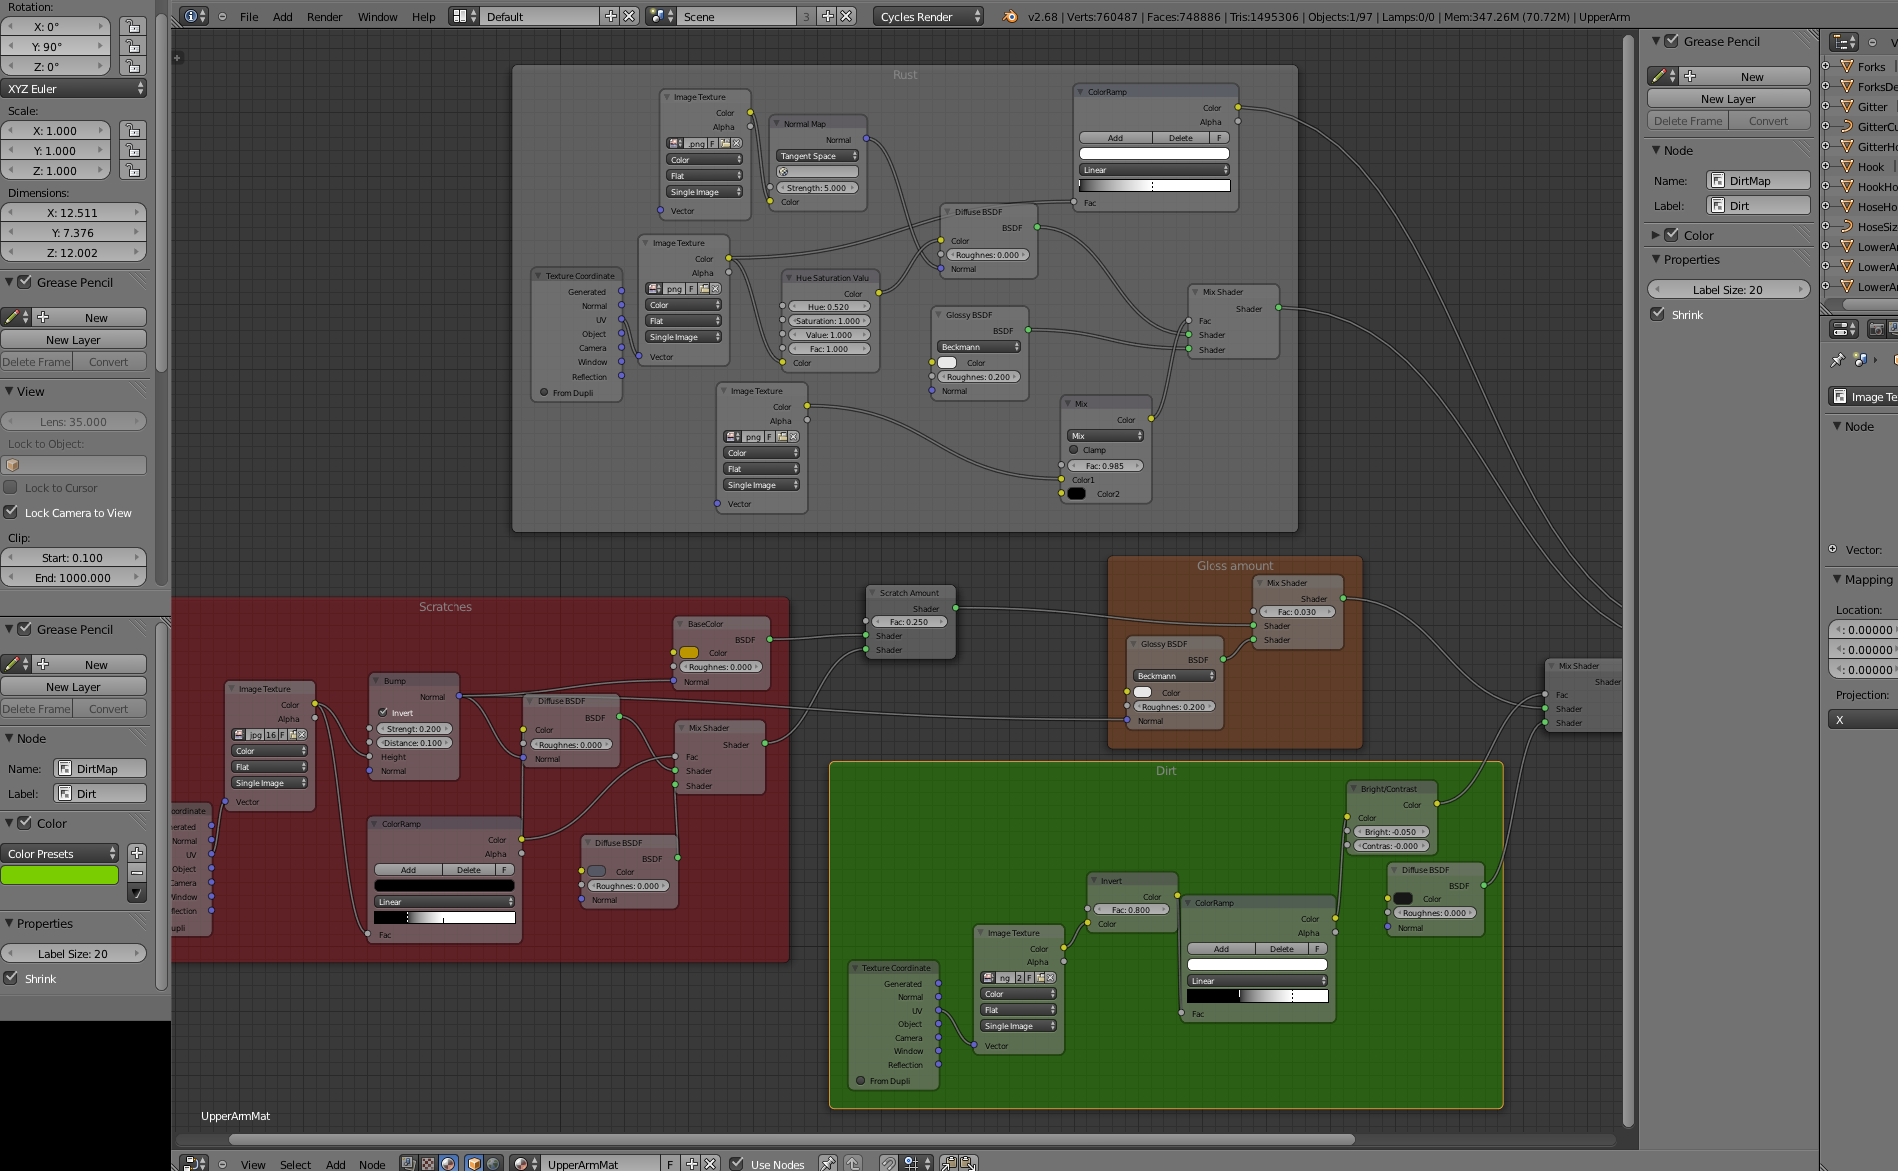
I went ahead and made a new layer in the paint texture layers, and painted in some rust where I wanted to have it. The texture I got from that, I applied to the existing material, and using the same texture to mask out how much I wanted to show (Controlled by the color Ramp Node). I then adjusted the color and added a normal map for bump, and then tried to use a spec map as factor to the mix shader on the gloss.
Here is the node setup:
I dont like the result, but i will try it the way you guys just explained and see how that works out.

At last I have a more dirty loader. Is this is better?
Ohh and MonkMonk, why would you add the grunge in PS/GIMP and not paint them on the model with texture painting inside Blender? Just curious
Monkmonk is just implying it is easier to get grunge brushes in those programs, but now it is very easy to set up similar brushes in the Texture Masking and do it there. Whatever works. Looks cool now, but I would make a strictly black and white map for some of it. There is a really cool node group that Nicolò Zubbin (Ni:Zu) made and uses for stuff in the background, I added it to a test file of mine.
https://docs.google.com/file/d/0B_AVIjamRlEXRjZEMGxpa3puWGM/edit?usp=sharing
Hopefully that works - I used a Suzanne and some dirty vertex paint as the stencil, and then plugged the images into the other portions. You might try using the node group to plug a stencil in, and then send your materials with uv images into the other elements of the stencil group.
Can’t really decide which one is better concerning the dirt - just as you said. But I tend a little bit to the dirtier version in post #88. Now I’m curious how your texturing turns out for the rust and the scratches.
Finally back from work and the GF is at work, so I got some time to work a bit on the project
Craig: Thanks a bunch for the file. I must admit that i took me quite some time over the weekend, figuring out how it all works together. Some of the nodes I’ve never seen before and had no idea how they worked. But I figured it out (I think :D) and have added some rust to the upper part of the arm. It looks much better that my first try with my own node setup

I still have to work on the way that I make the stencil, some places it looks better than other because I’m still figuring out how to make the stencil texture so it looks realistic where the rust is coming though the paint.
Moniribus:
I’ve finished making all the dirt maps for all the objects, it took like forever to do it, and I’m rendering a new shot right now. But the sizes of the project has finally exceeded the capabilities of my old GTX480, so I’m stuck at rendering on the CPU 
You’re welcome, I am just passing on what Ni:Zu freely gave from his own work. I liek this so far, looks really good. We often overdo it in an attempt to show realism and take it beyond that - I am of the opinion that every scratch, every mark should imply a story behind it as it does in real life. Not that I attain that, but it is a goal to reach for.
Are there any textures you can scale down so that you recover memory? I think not all areas need the same size map, right? At least with 2.68a ,you should see a speed up for renderin gthe size mesh you are working with I hope.
Looking good, i like the fact that the rust seems to be bubbling up under the surface of the paint.
Cant wait to see this done. Is it going in a scene?
Yeah I just noticed that I forgot to convert some of the textures, and the Paint Layers addon saves them as 16MB files, while they are only between 0.7 - 2.8MB if I just load them into Gimp and export them out again. Dont know why the addon saves the files that way?
Anyway I will try to convert the last files and hope that it clears up enough memory, when I’m done with the next render.
Can you re-size the textures without messing up the UV maps thats on them?
Yeah I might have gone overboard with the scratches, and will try and tweak them a bit.
The overall dirt amount that I think I will be using:

Thanks ![]()
Yeah I want to start working on the scene very soon, might even wait with the last of the rust because I want to do some modeling again soon.
So I placed the Loader in a quick room with very simple and quick mats.
Render times went from >20 mins to 1 hour and 57 mins… :eek:

AS long as you don’t change the aspect ratio, the resize of the images doesn’t mess with the uv placement. I mean that an image that is 1024x1024 reduced to half at 512x512 is the same ratio, so it fits the same to the uv. I guess maybe the images are saving at full float, so that would be why they are that large.
To lower memory in scene, try using alt-d copies that do not have subsurface modifiers on. Derek showed me that last night when we tried out the new stuff in 2.68a and I observed that I found memory did accumulate, but Derek found it was the modifier that was making memory increase.
Render times went from >20 mins to 1 hour and 57 mins…
Yes, of course. Now there are more bounces of the light rays to calculate because the rays are now bouncing from the walls whereas they formerly vanished into nothing. If you have four walls delete two of them and the render times will reduce again (lesser bounces to calculate again, but still more as without walls). Do you need a ceiling?
I only saw the first Alien movie… and it was so long ago I can’t remember if this was in the first movie… but just curious, what did this thing do in the movies ?