Compositing the background sounds like a good workaround. So I would just import a white background, make sure that world background is transparent and work with the compositing nodes right?
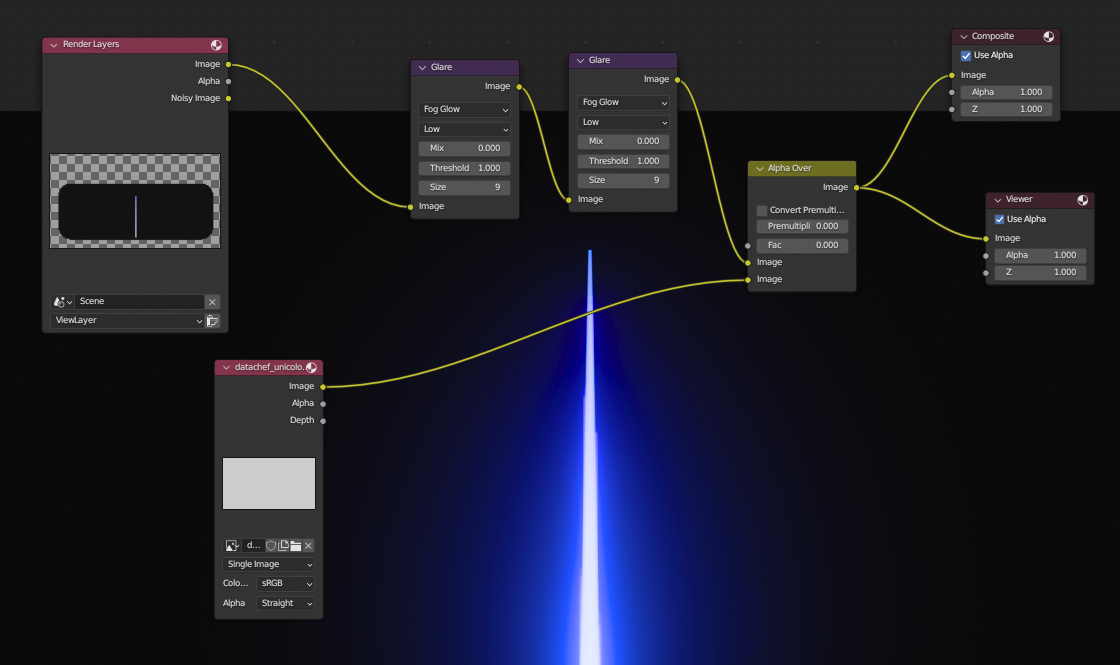
Please excuse my nooby questions but I never extensively worken with the compositor apart from the glare and alpha over. This was my first attempt but it isn’t doing the trick:
Instead of workaround, it just feels like what it’s suppposed to be. The white background is not part of the 3D physcial light-transport simulation’s diegetic world, ideologoically it has always been a “composited element” anyways.
Oh, and speaking of white; the background still isn’t really white as you can see. It must have something to do with the color management though. This was done with view transform “guard rail” and look “punchy”. If I switch it the view transform to “standard” and look to “none” though, I’m getting a perfectly white background.
Is this a bug?
Just to recap:
Under “Render Properties” → “Film” the “transparent” is ticked
Background is at intensity 1
The black overlay is done with a emission on a plane, intensity 1
Punchy applies an additional curve after AgX is applied, OCIO (Blender’s CM system) would then reverse AgX, and then apply Guard Rail. So if you are looking for exact values, maybe not a good idea to use Punchy.
Thanks Eary. According to this video: https://www.youtube.com/watch?v=eQlgLwvbIDc I could also just crank the value of the white in the Alpha over to like 15000000 instead of one, even with the punchy look, but there probably are some drawbacks? The Video is mentioning that it’ll kill Anti-Alising, but that’s not of an issue with my composition. I did a side by side comparison and have to say I like laser on the “punchy” look with cranked up value a tad more. And oh wonders, not sure why but now it works with the overlay!
Now I just have to correct some “jitter” occurding on the upper of the laser but I could imagine it has something to do with the double glare-node:
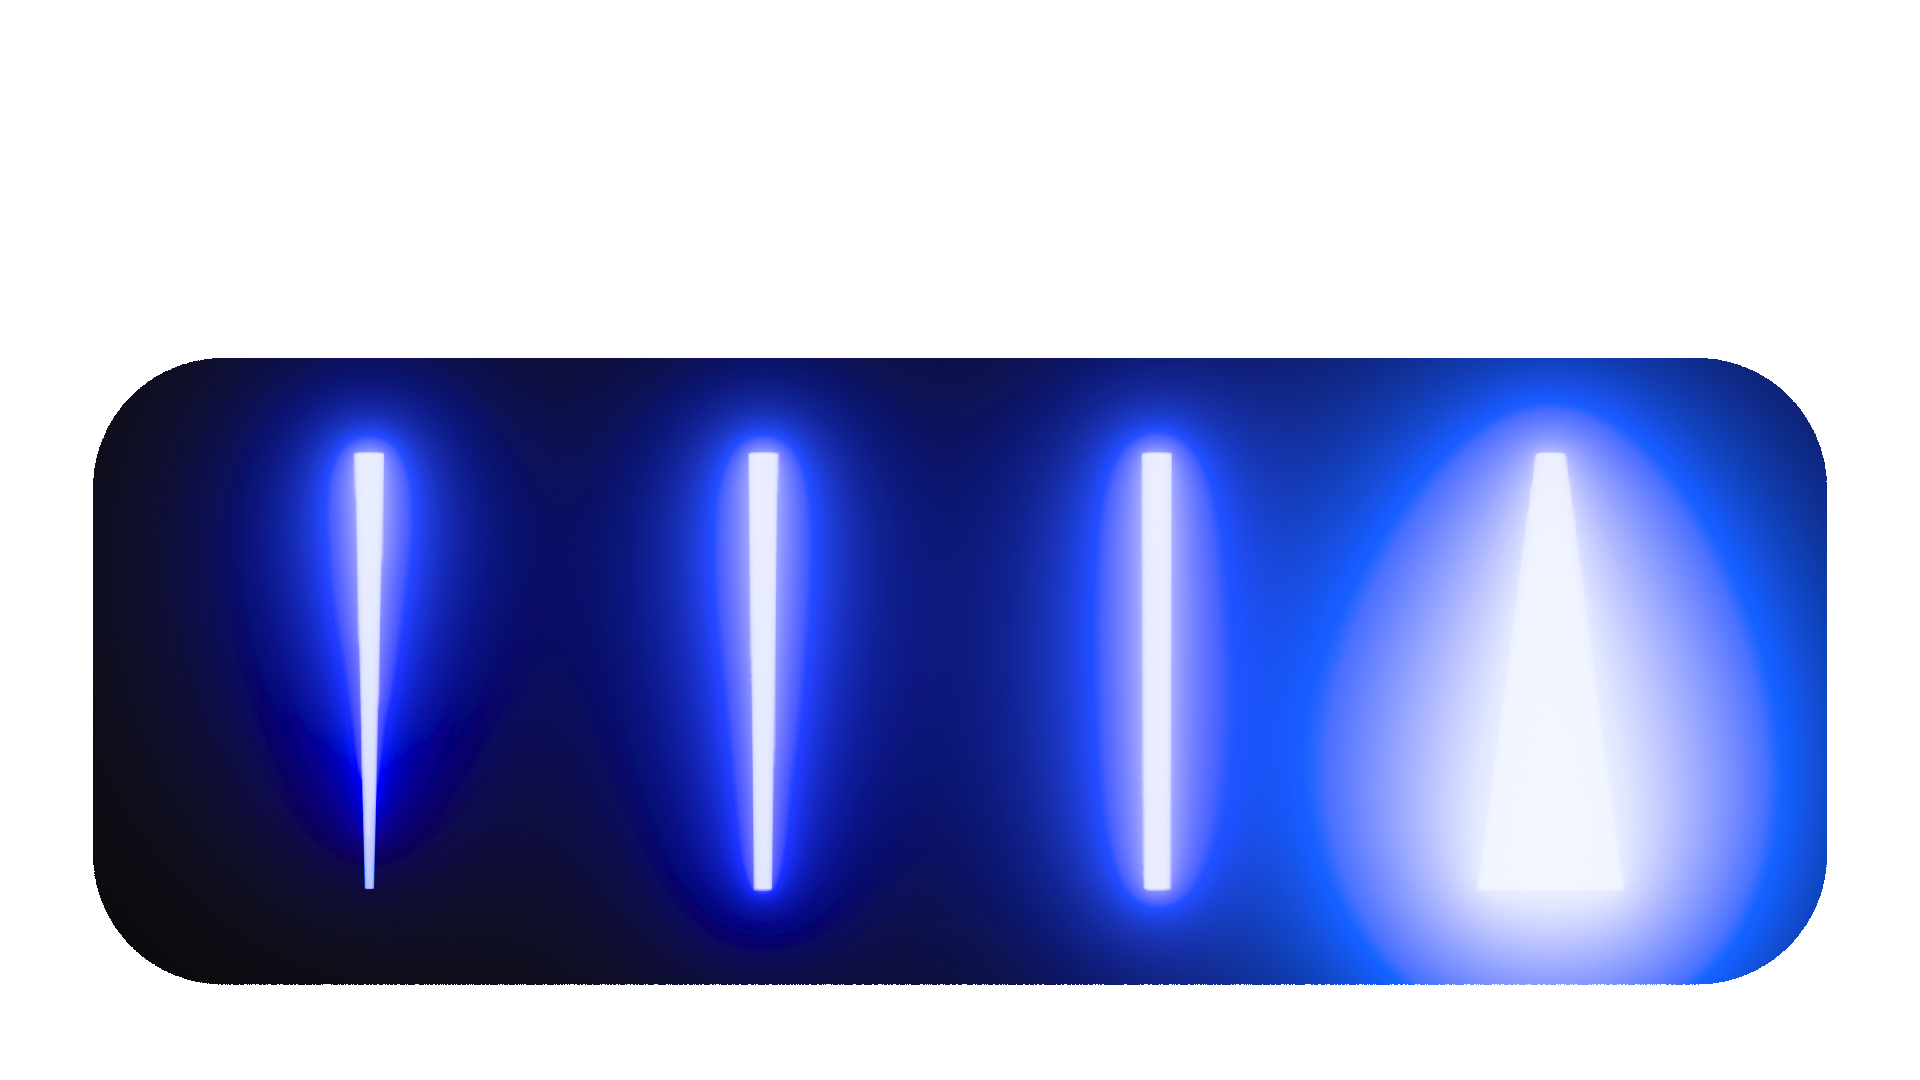
One thing I just noticed while fiddling around that is a bit off:
The Laser is brighter in the thicker parts, while it really should be the other way round, as the photons are denser there. Any way this can be adjusted?
You would have to fake it with a gradient texture.
Or, if you wanted to be completely realistic, make the beam by using a spotlight in a volume instead of what you are doing. That would simulate what lasers do in real life, but I’m not sure I would recommend it here, as it would be more complicated and cause a longer render.
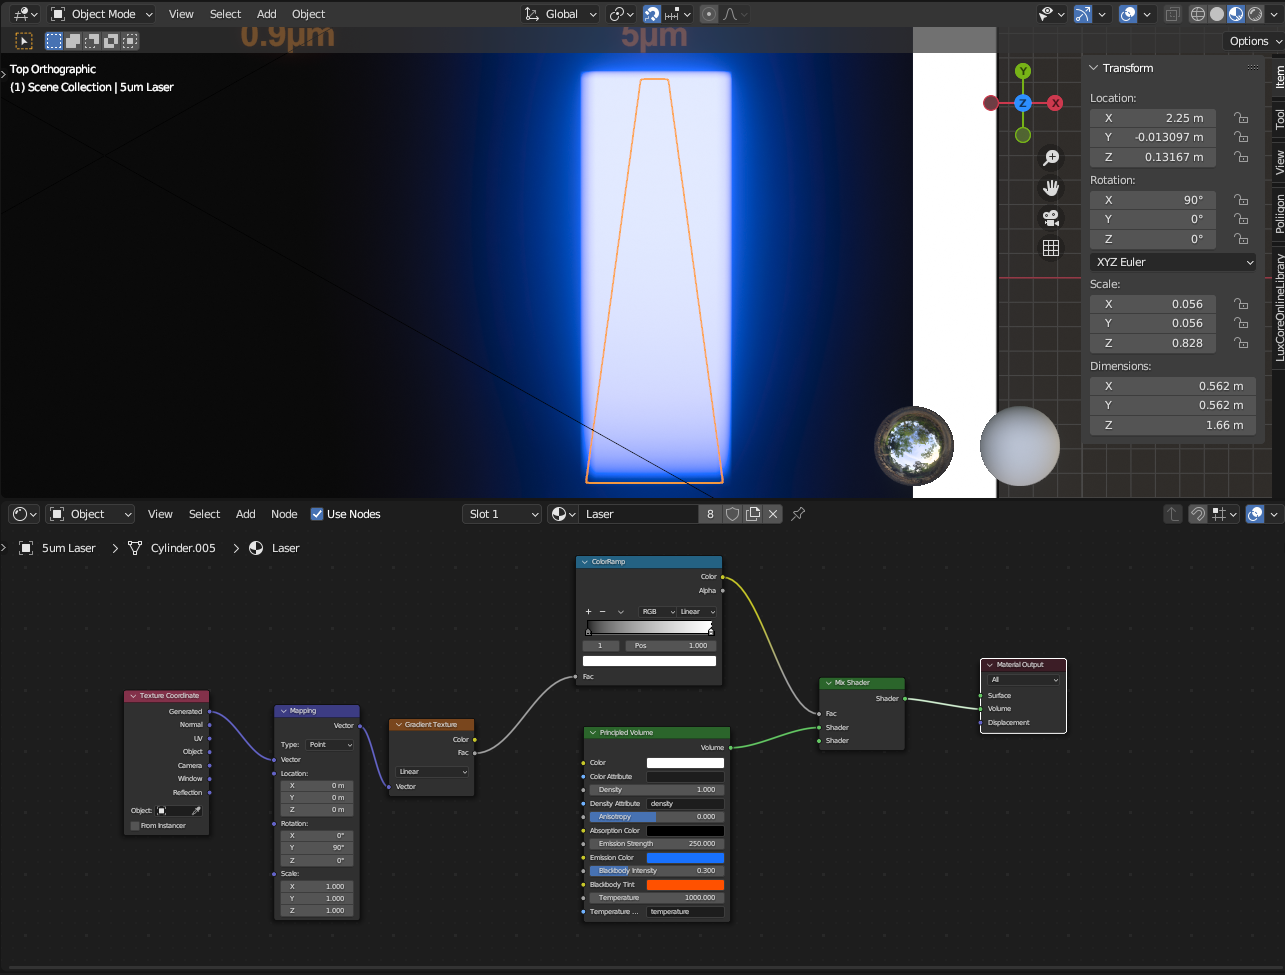
I’d prefer the first option too. Sorry to ask, but how would I do this? I’m not too familiar with the gradient texture yet. I managed to edit the shader so it’ll be able to fade in from the top, see the screenshot. But how would I flip the whole emission?
Simply flip the color ramp. There is even a button to do it (in the little arrow menu on the node). You can also gain more control over the gradient by adding more colors to the ramp and distributing them how you like.
Thanks for the input, but no. What I mean by “flipping” the emission is that the thinner part of the laser is brighter than the thicker part, not the other way round as it currently is. You said this could be done with a gradient right texture?
That already is the case in your image, the gradient just needs to have its scale and location adjusted.
Also, from my testing, I have found it works better to adjust the emission strength than use a mix shader. Here is a working exemple, you might need to readjust the numbers in yours.
Also, if you are going to render on a dark background, you can forget all the previous stuff about having a bit of density in the material, it won’t be necessary anymore and will just make the render take longer.
Sorry, but I’m not quite getting it. I looked into the beam-gradient-file you uploaded but as the look is a totaly different one (nowhere near as bright) I would like to go with my shader posted a couple of posts above.
No matter what I do though, whether adjusting the rotation, scale, location or flipping the colorramp, I just can’t get the thinner part of the object to be brighter than the top one. Is my approach wrong or have I just not found the right tweaking of the mapping yet? If so: any hint on what approach I could take that is less of a “stabbing in the dark”?
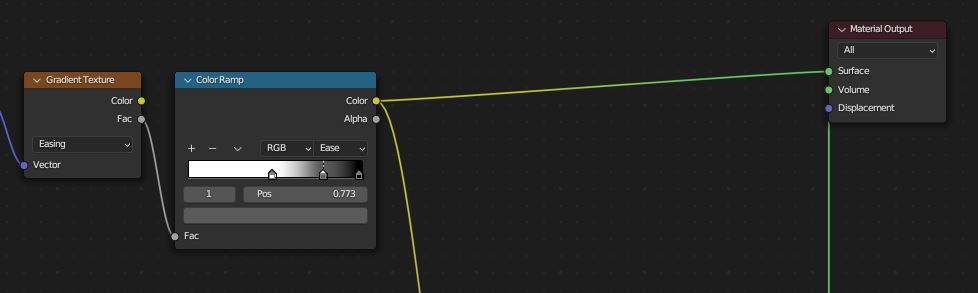
I have increased the strength of the emission, modified the color ramp and changed the gradient type to “ease” for a smoother transition.
If you are using a gradient, I am afraid it is going to involve some trial and error. However, you can make the process easier by plugging the output of the color ramp directly in the output node, allowing you to directly see the gradient on the model.