Hello everyone. I have 2 render layers set up. Each render layer has the same lighting and the same background. My scene is quite simple. I have an object in one render layer, and that same object in the other but this one is cell fractured. I want to combine the render layers into one but I keep having problems. Do I need to have both layers selected before I render? Because if I don’t, only one render layer actually renders and the other is just black. And when I select both render layers, one of the render layers render both layers and the other render layers actually renders what it is supposed to. Solutions?
You want to have both scene layers activated
Other than that, insufficient info. I can’t be bothered with having to use guesswork
If you have two objects in the same spot then you’re gonna have to move one of them to a different scene.
On layer 1, I have the original object. Layer 2 has that object cell fractured. I had the original object fall through the floor while the shards react to the ground and with those two images, I would calculate the difference and mix them together to get a realistic looking shatter.
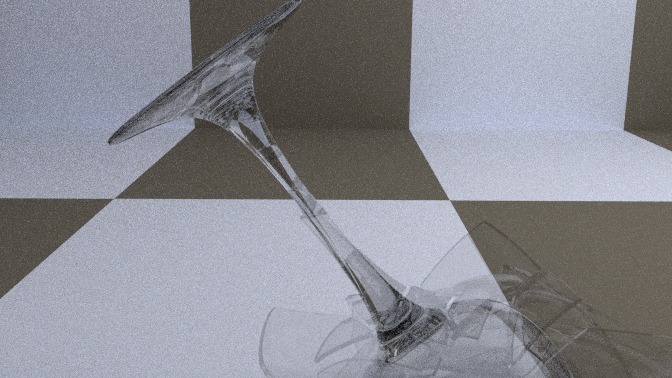
Here is what layer 1 renders as:

This is incorrect.
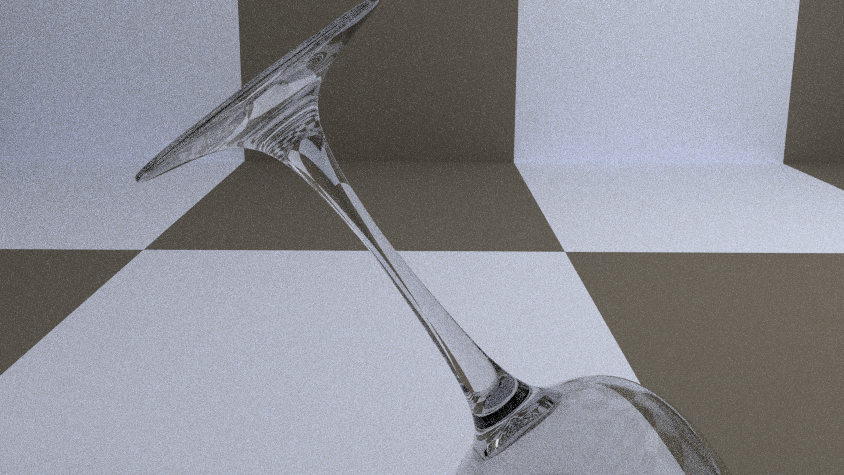
Here is what layer 2 renders as:

This is correct
This is what layer 1 should look like:
You have to add a time node to the factor socket of the mix node. That way they’ll only switch at the appointed time rather than mixing together. The node is fairly self explanatory.
Actually, I use the Matte output of the Difference Key node and put that into the factor socket of the Mix node. But that isn’t the problem. The render layers still don’t render correctly.
I didn’t ask you how you did it, I was trying to instruct you on how to get the job done. Cycling through frames 1 and 2 of this blend file, via arrow keys after rendering, will show you how one image vanishes while the next appears (via the mix node) without the two ever actually mixing.
Attachments
Time Mix.blend (638 KB)
I don’t want to animate the shatter. I just want 1 frame to render and then mix the two render layers together.
You need to check the render layer tab to see which scene layers are visible and which ones are set to render on a per render layer basis. Render Layer buttons>Layer tab> “Scene:” & “Layer:” fields. Posting screen shots or .blends helps eliminate this type of confusion.
My understanding of render layers is still very small because using them seems to give me completely random results. Here is the Blend: http://www.pasteall.org/blend/25457
Any objects which you can see in the 3D viewport…ray tracing can see them too, even when they’re not renderable they’re still tracable. That’s why I asked you to move one of them to another scene.
Here’s your file properly configured:
Happy Blending
Attachments
Alright. Now that I know that, I will be better off in the future. But, I’m still not getting the results I want. When I use the difference key, the stem of the glass still looks weird. I want the stem to be completely untouched while the rest of the glass is shattering. I based my compositing off of part 5 of Blender Cookie’s tutorial on using the cell fracture addon. When he used the difference key, it he said that the same results can be achieved with an object or something like that. If anybody knows what I am talking about, can you take the time to explain please?
If the difference key isn’t gonna work for you then you’ll have to try something else. I watched the tute and it’s probably due to the transparent nature of your glass. Try this tut for masking. Just animate your mask moving from left to right via shape keys. He refers to masking in the tutorial and just used the difference key because he found it to be faster for his application.
Oh wow. That helps a lot! Holy cow. Than you for posting that video. I will go experiment with the tool and see how real I can make the shatter look. Thanks!
Just post a video of your final result…it’s probably gonna look even cooler than his did.
Okay well, I have ran into more problems. I followed his tutorial as closely as I could for the first part. I saved the unbroken wine glass render as a reference to create the mask but when I go into the movie clip editor and open the image, it doesn’t show. The only thing I would think would be the problem would be that the guy in the video used the Blender internal rendering engine and I used cycles. Other than that, I am lost.
Ah wait, I think that the clip editor is looking for a video or sequence to use. Not just a single image. It says that the file failed to load. I have no idea why.
I loaded a render from your file just fine on my end.
Do this from a new .blend file…not the one that you were rendering from (or at least do it in a different scene):
Add your image sequence to an image node in the compositor and hook that up to an output node. Set the file’s render size to the same dimensions that your original sequence was rendered and render only one frame( failing to render a frame will prevent you from previewing the sequence). Load output node into UV/Image editor window and change the “View” button to “Mask”. Now you’ll be able to cycle through the entire sequence with keyboard arrow keys. Now it will work as advertized.
I haven’t had any problems loading either single images or entire sequences on my end.
Mask on, Brother.
Alright! Well, I went to a new scene and did the masking there. It is really weird why the image won’t load on the same scene. And, I would say that I am satisfied. I was only able to do one frame because my computer is so freaking slow. If cycles supported rendering on Ati/AMD Graphics cards, I would be rendering stuff a whole lot more often.

It may be memory issues but that usually causes Blender to crash. New scene == less memory usage. Blender does a memory dump when jumping between rendering of scenes. I’m on a 12 year old, slow 32bits Win-XP machine with 512 MB of RAM so I feel your pain.