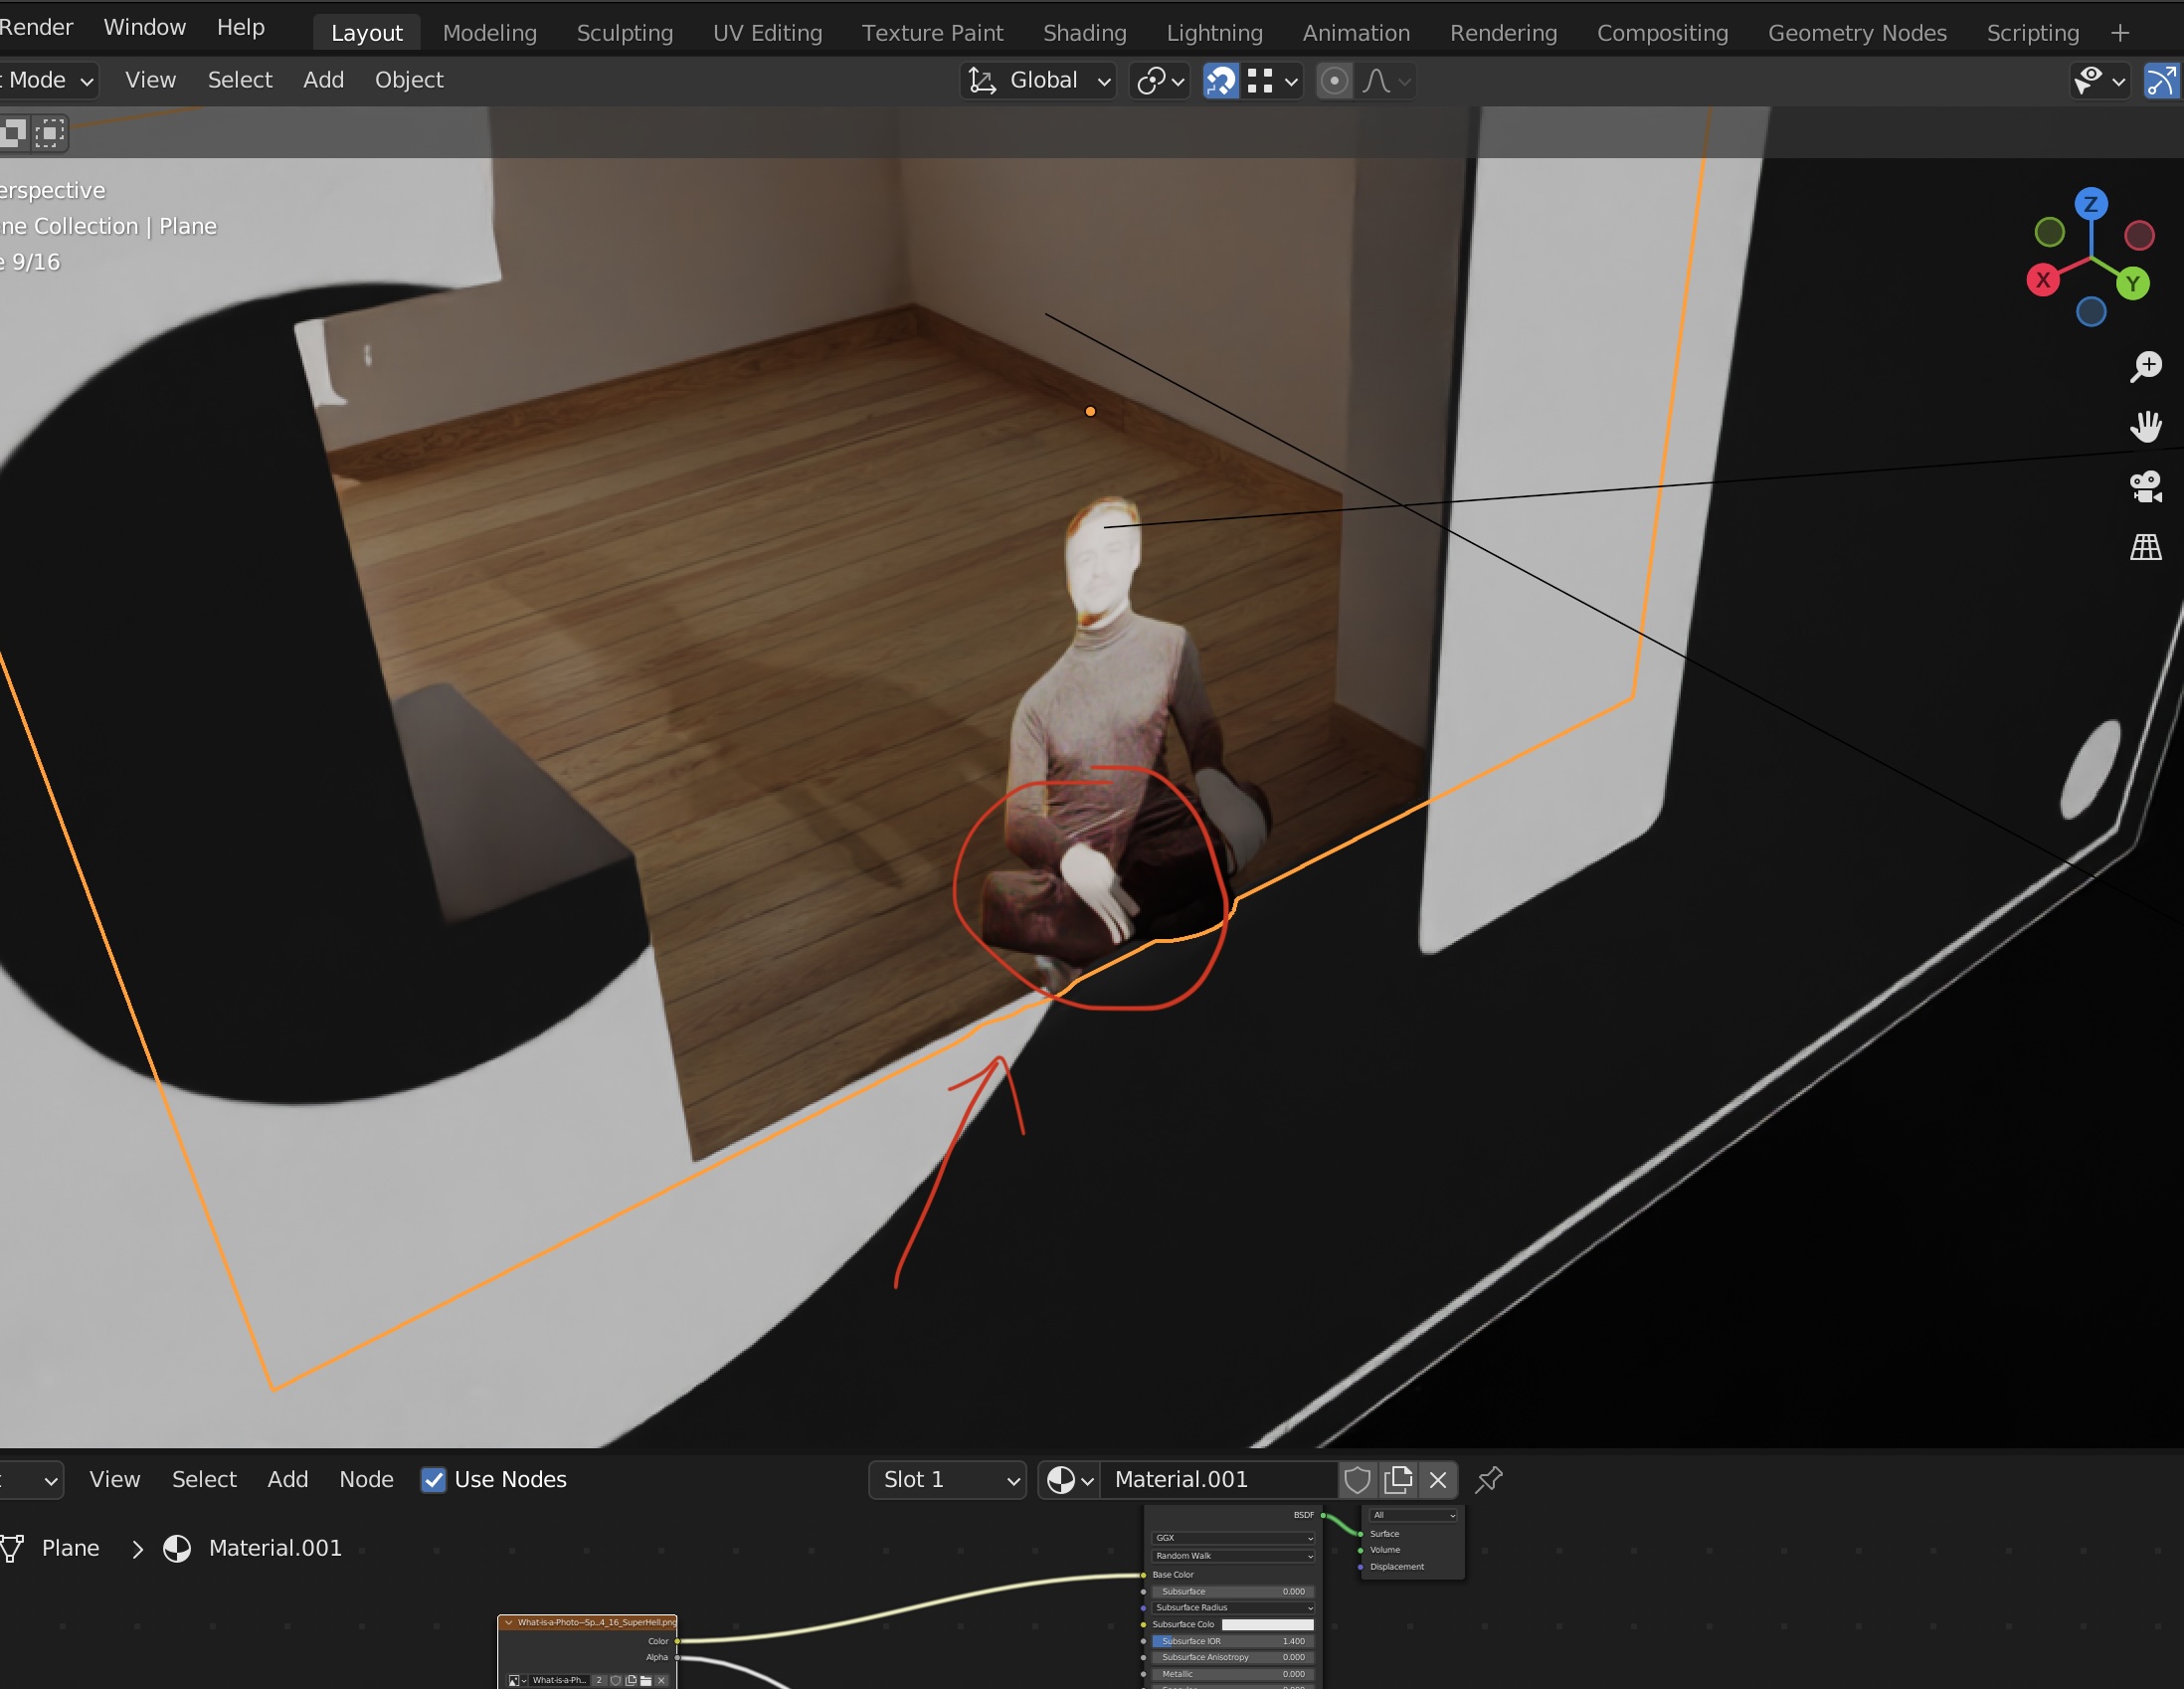
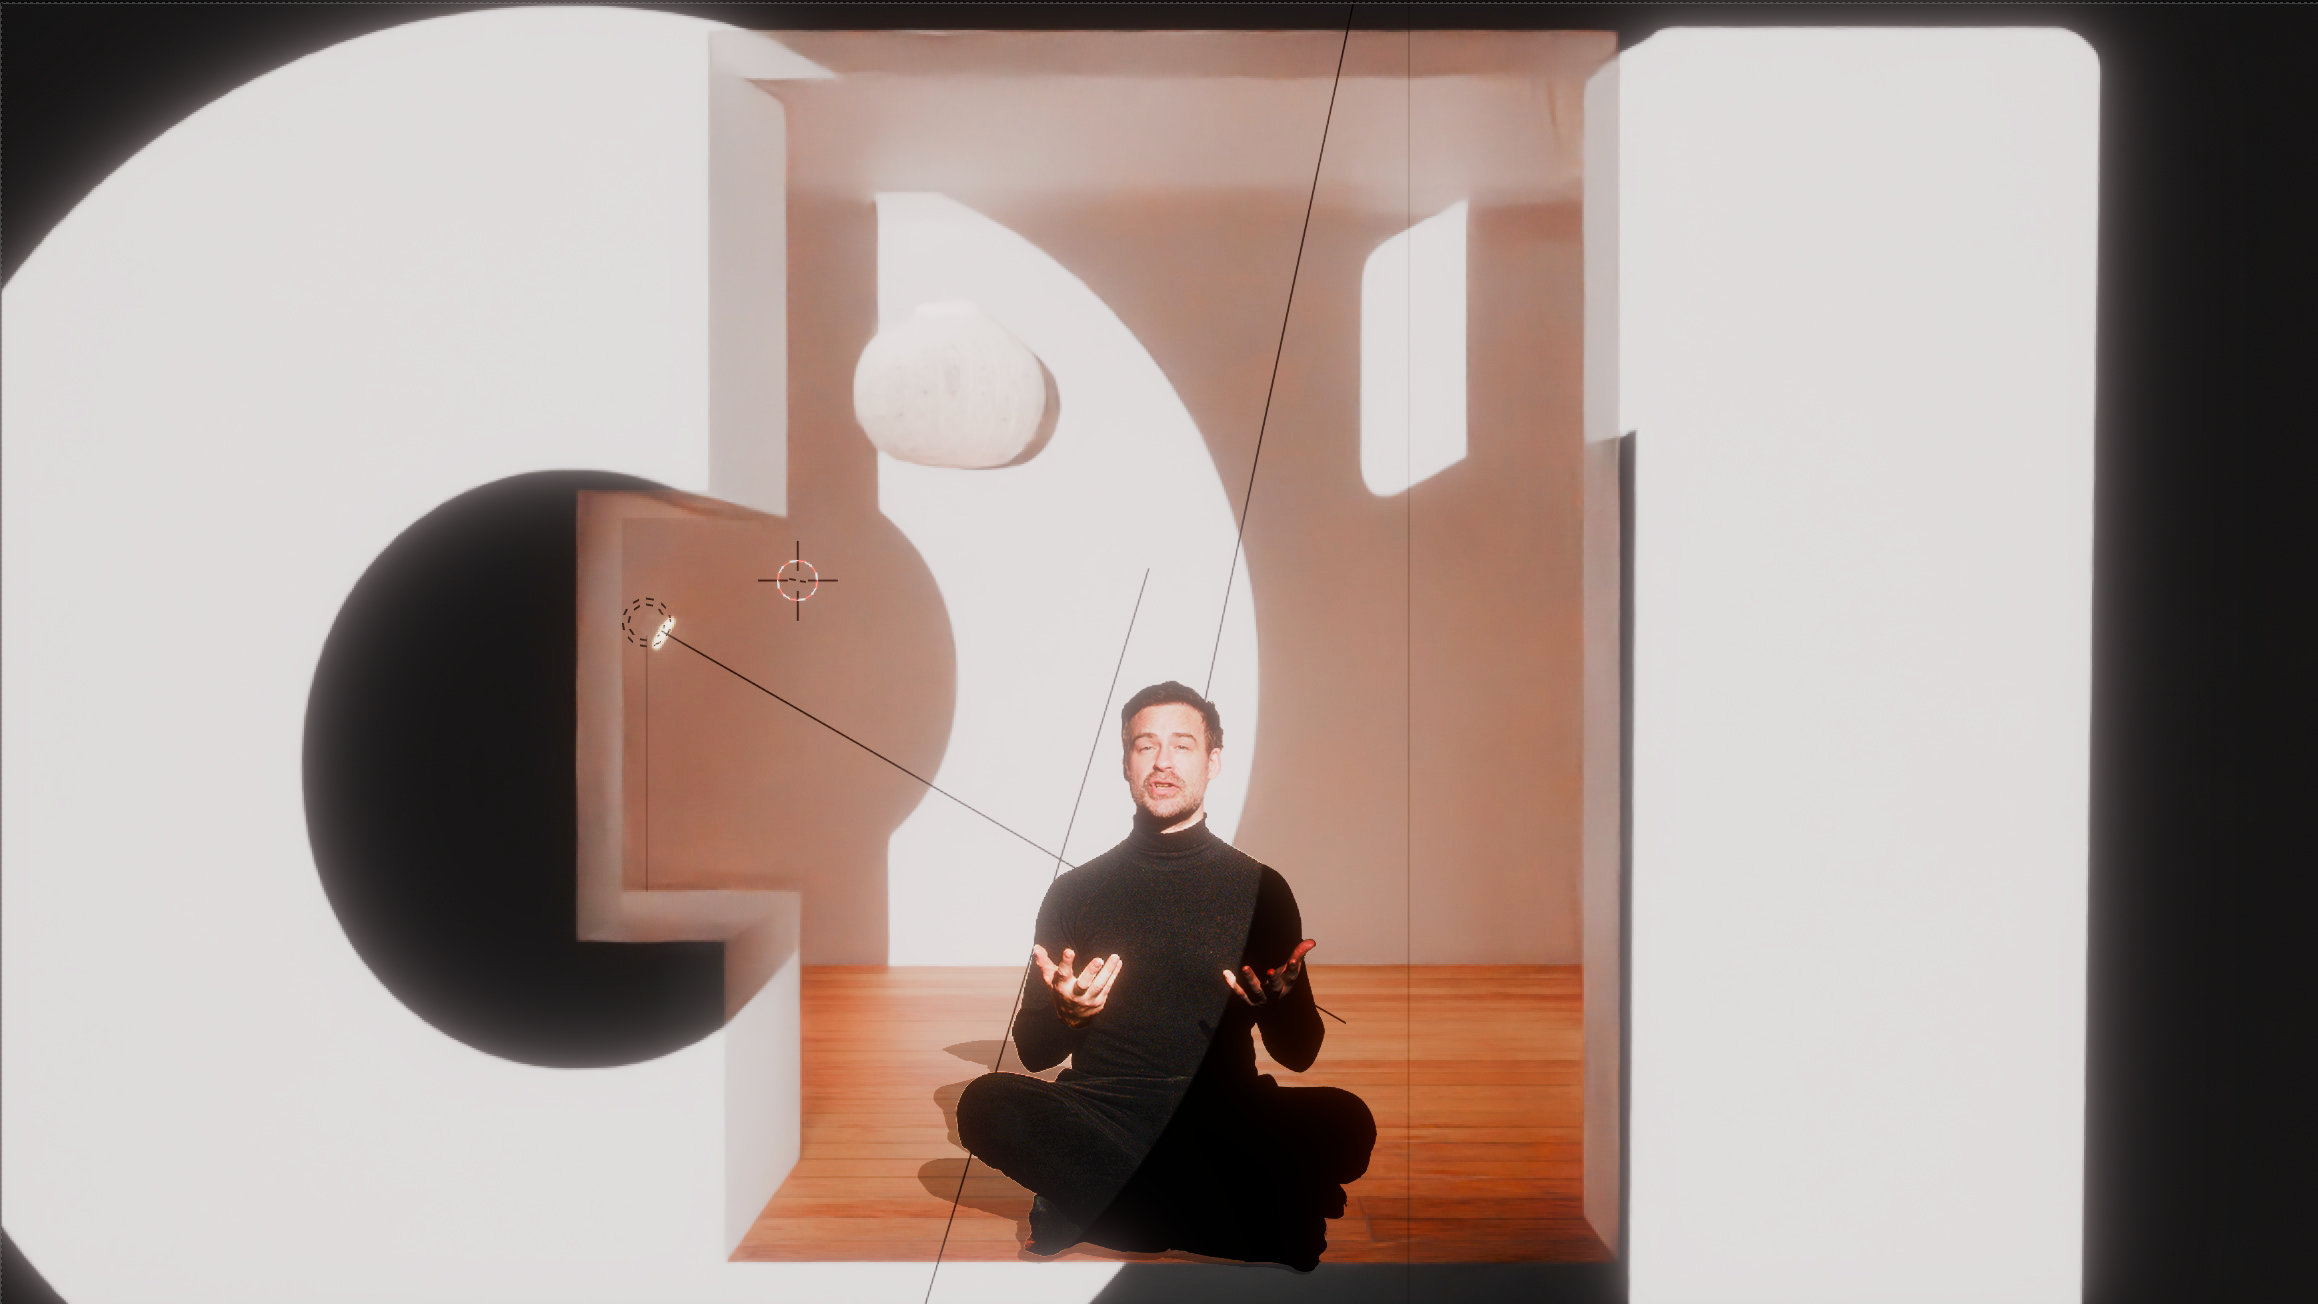
I’m currently working on a scene where a presenter is illuminated in a room by a projection along with some lights. This works quite well with the room and the different materials. The presenter will later move in a sequence of images, including an alpha channel.
Now my question is, how can I adjust his material (him) so that it (he) fits a bit better into the scene? I’ve played around with the roughness settings a bit. But somehow it doesn’t look quite right.
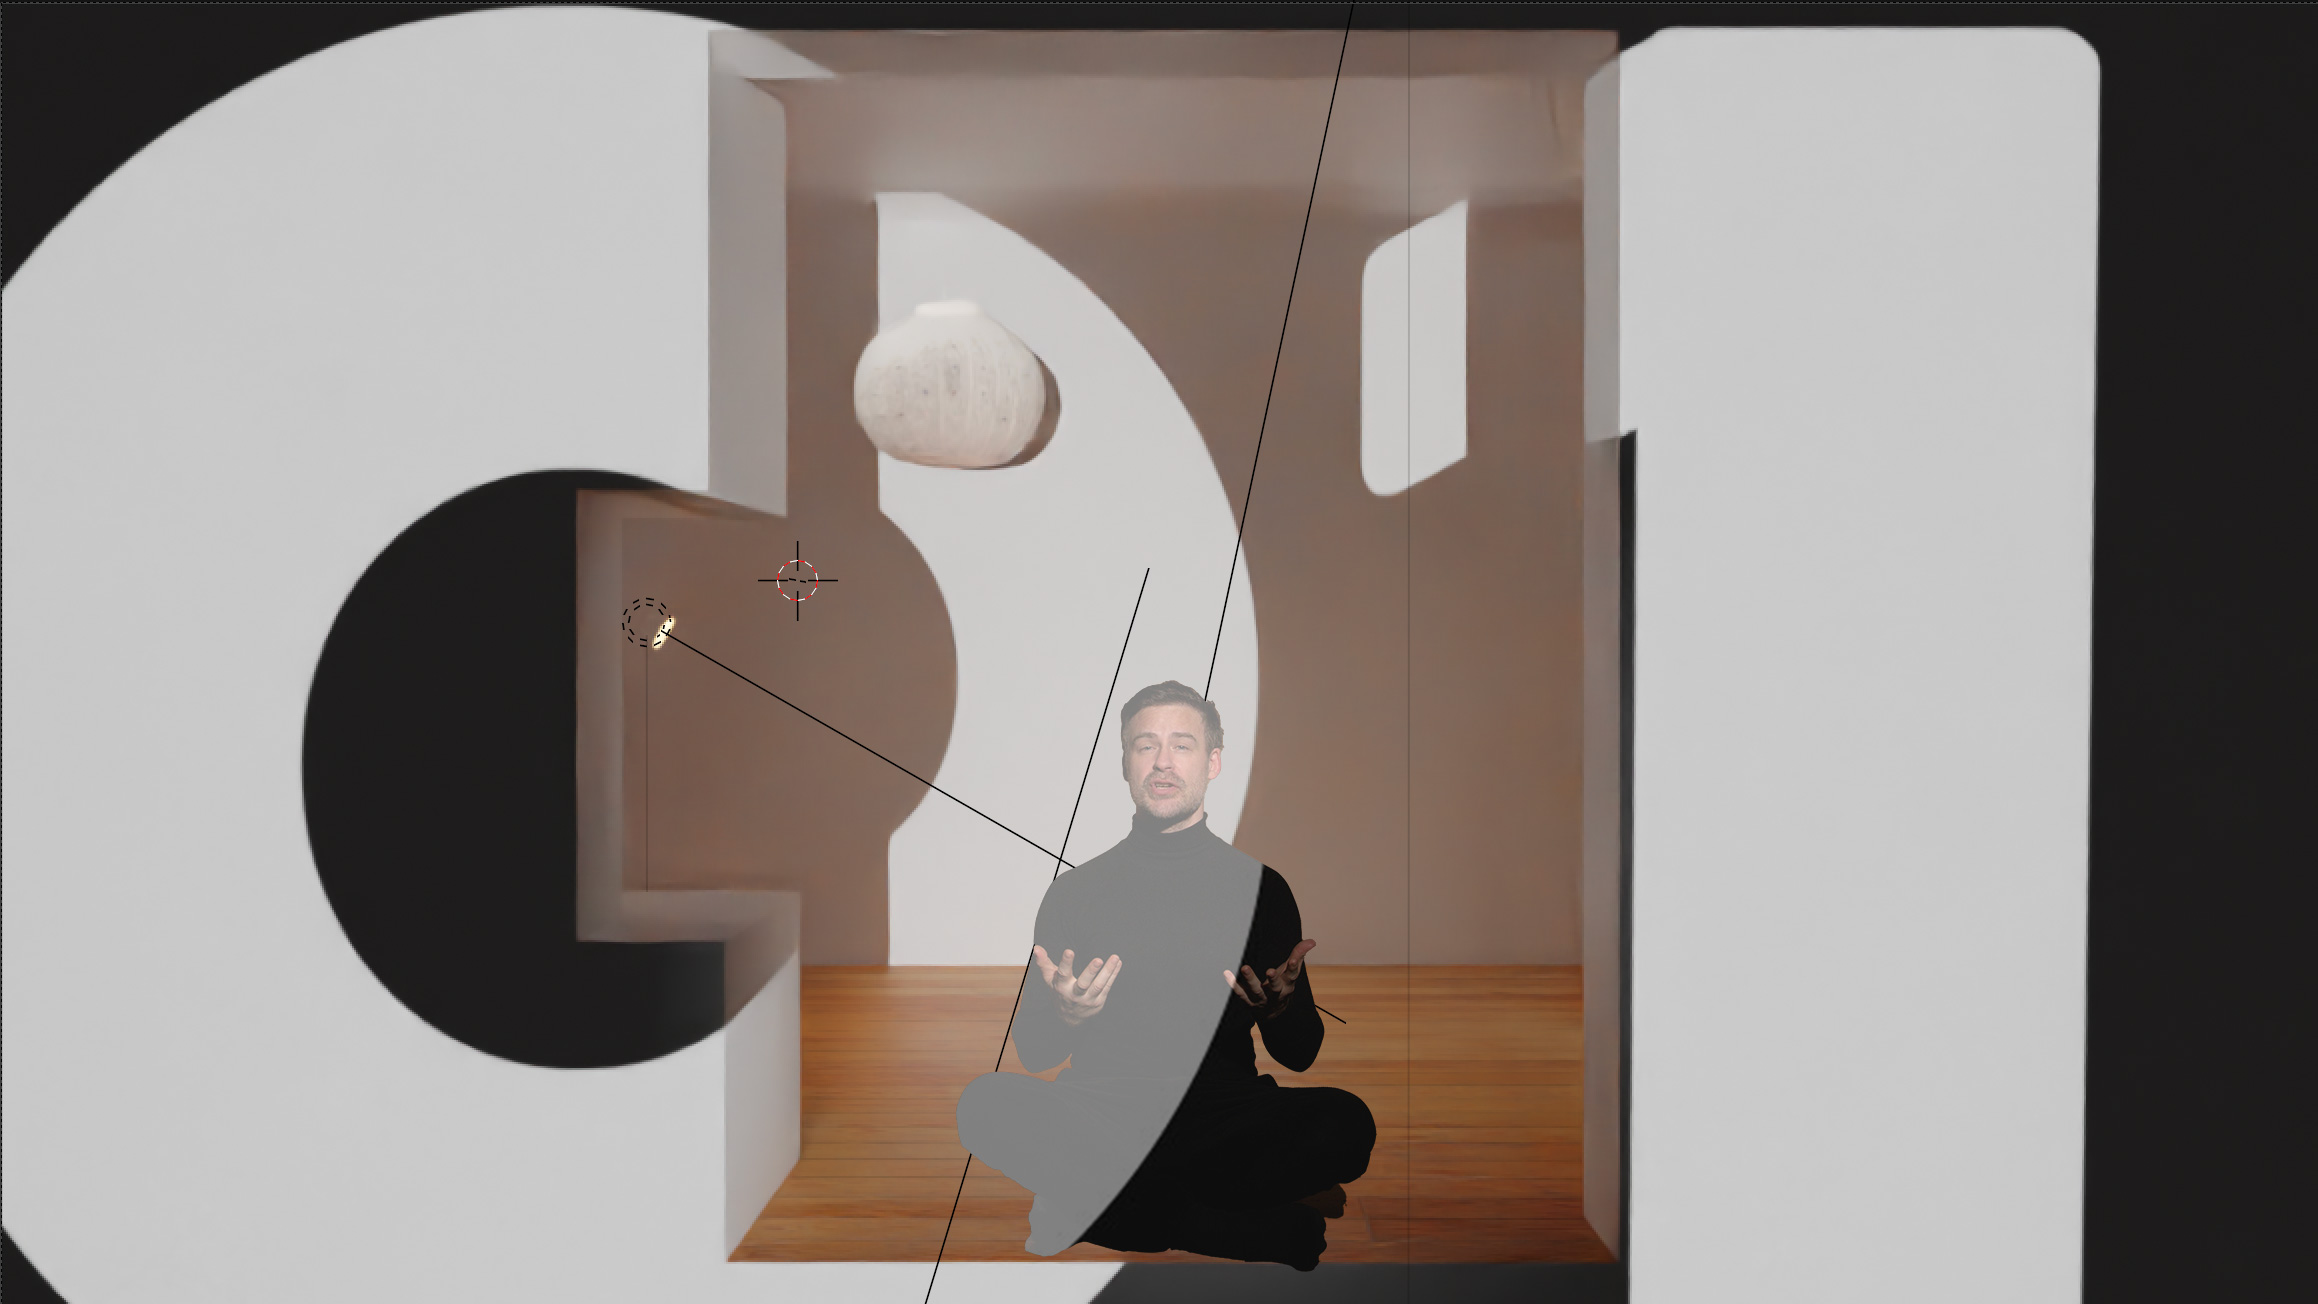
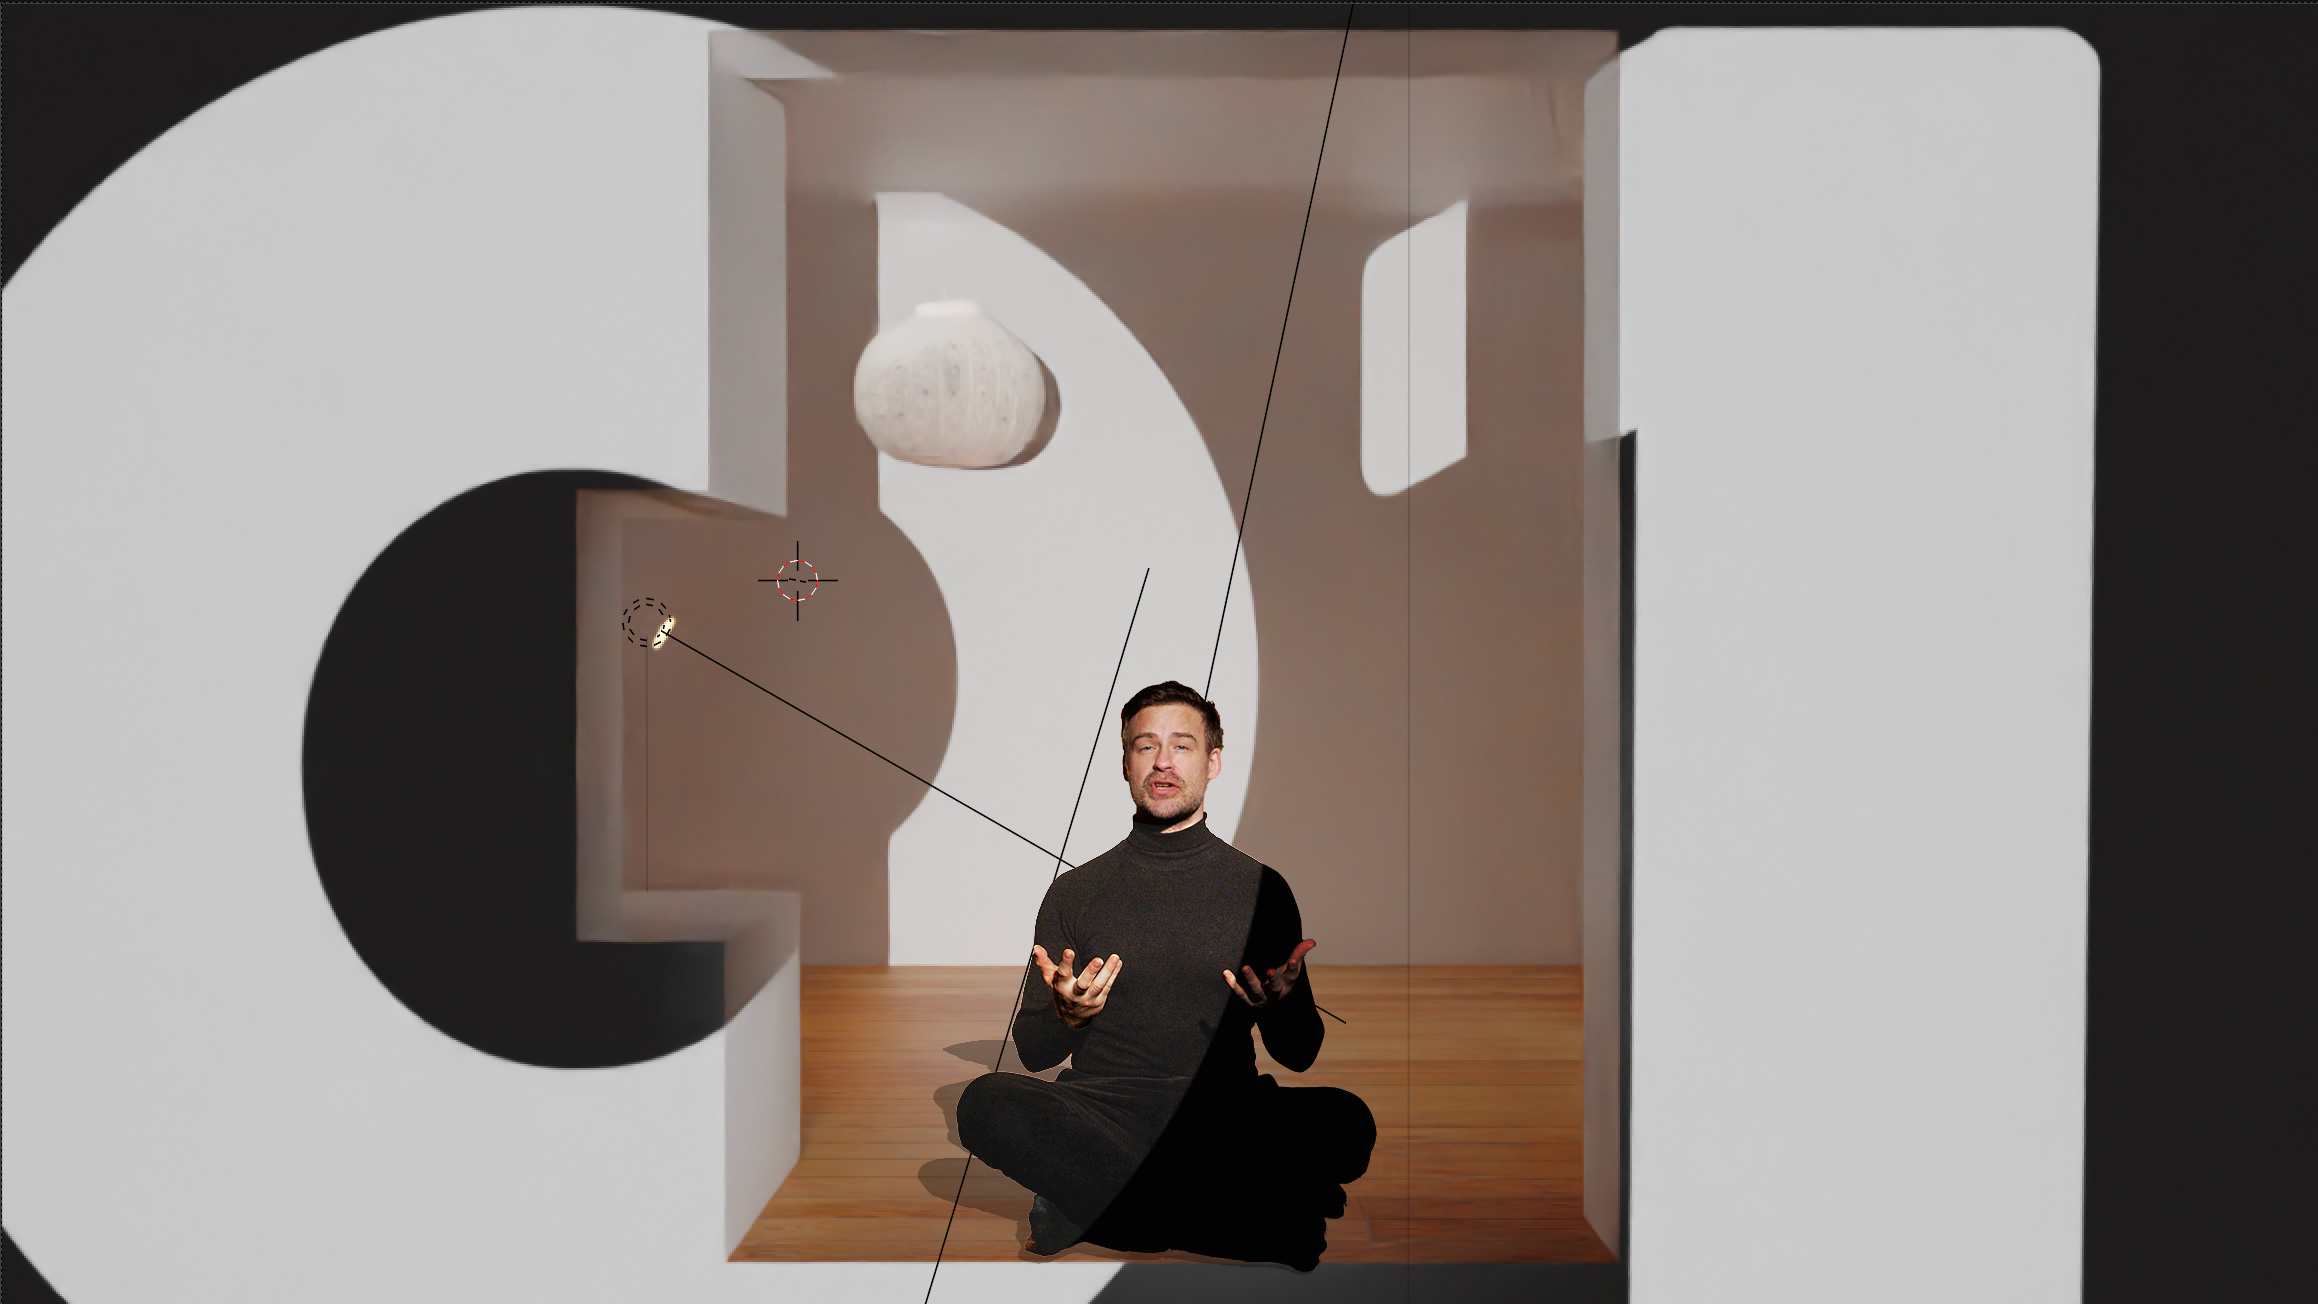
In this test example, I have a black and white of the number “01” as a projection on him. Is there a way to make the bright projections actually light him up instead of just being white? And for black to be not just dark?
Damn, I’ve never had such a sexy answer. Haha. Yeah.
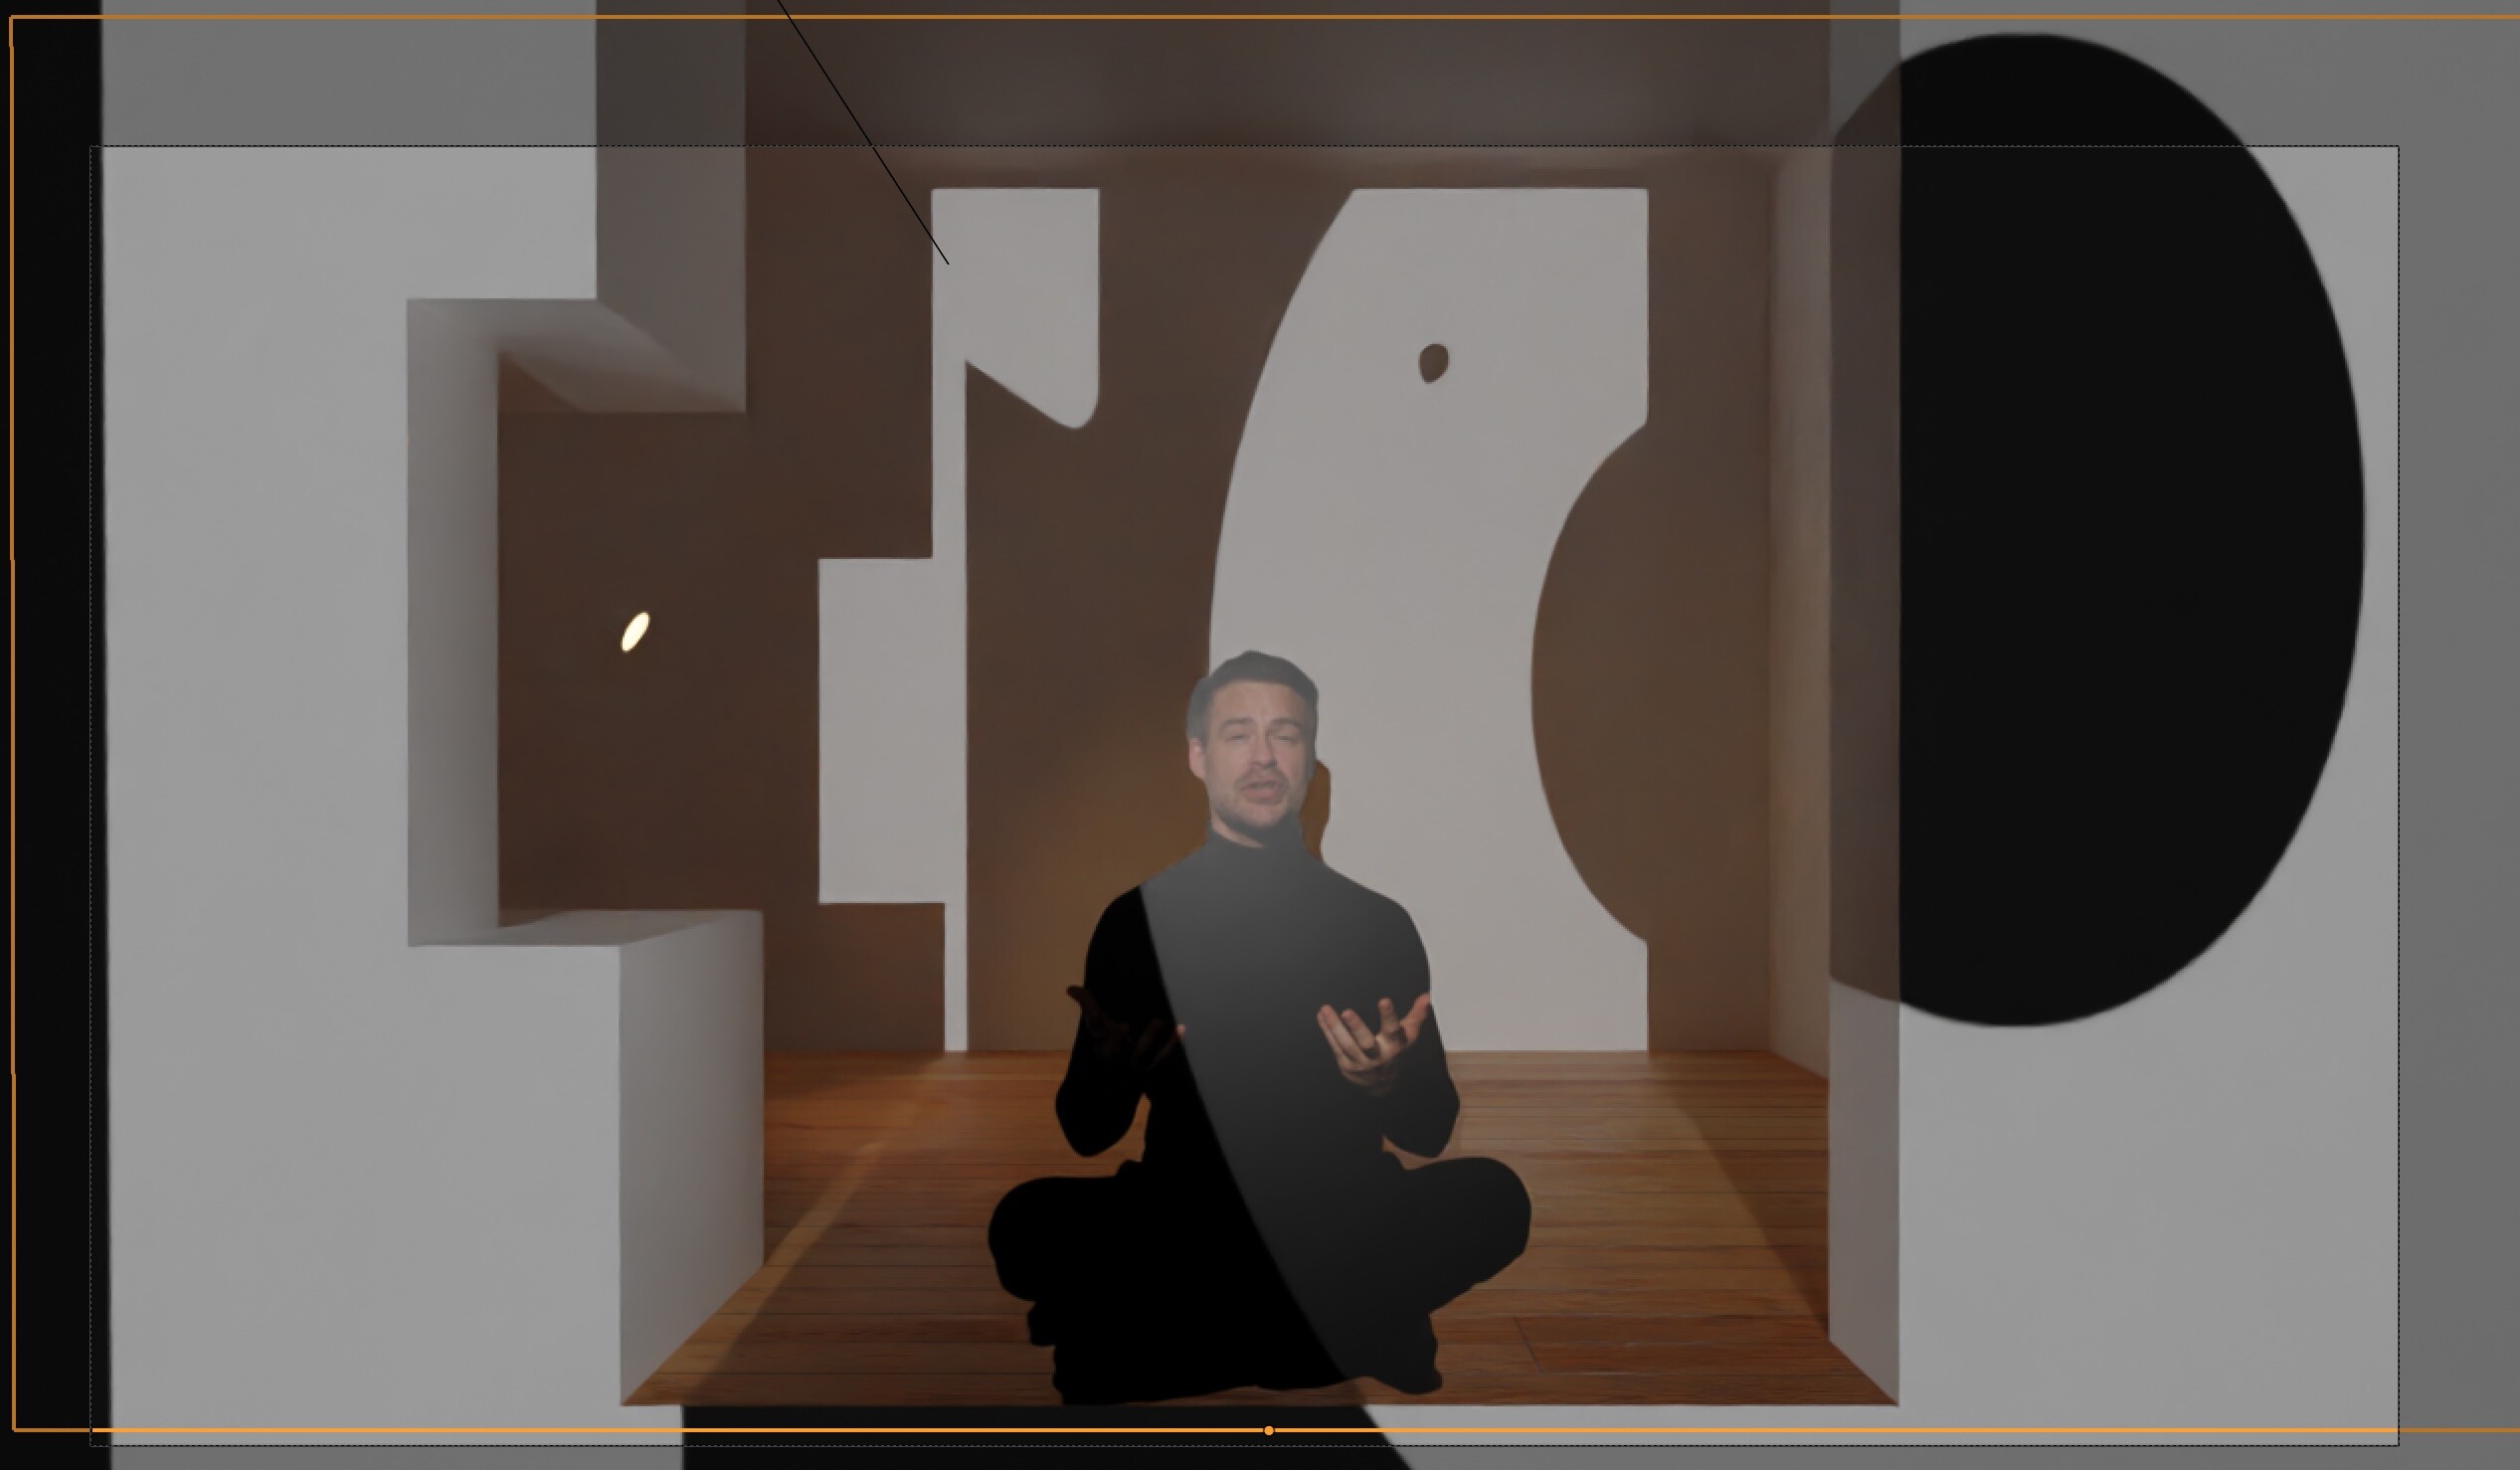
But I don’t think I’ve expressed myself properly yet. I wanted the “white” of the projection to not just be “white” on the presenter, but to create a more realistic effect like a brightening - e.g. in his sweater. Otherwise you can immediately see that it is a surface.
Let me try to clarify. On the presenter, the projection looks too unnatural because the white part of the light wouldn’t just be white on his sweater, but would make the fabric brighter, like a light. Is there a way to change the projection to only affect the presenter?
Oh wow, that’s indeed helpful in the end! I’ll remember that. Thanks!
But I think I still haven’t phrased it quite right. Maybe I should approach the question differently:
Is there a way for the light hitting the presenter to behave differently than the light affecting the rest of the scene? I know it doesn’t really make sense in Cycles since it’s a simulation that tries to be as close to reality as possible. But since the presenter is just a flat image and not a modeled character, I somehow need to fake it.
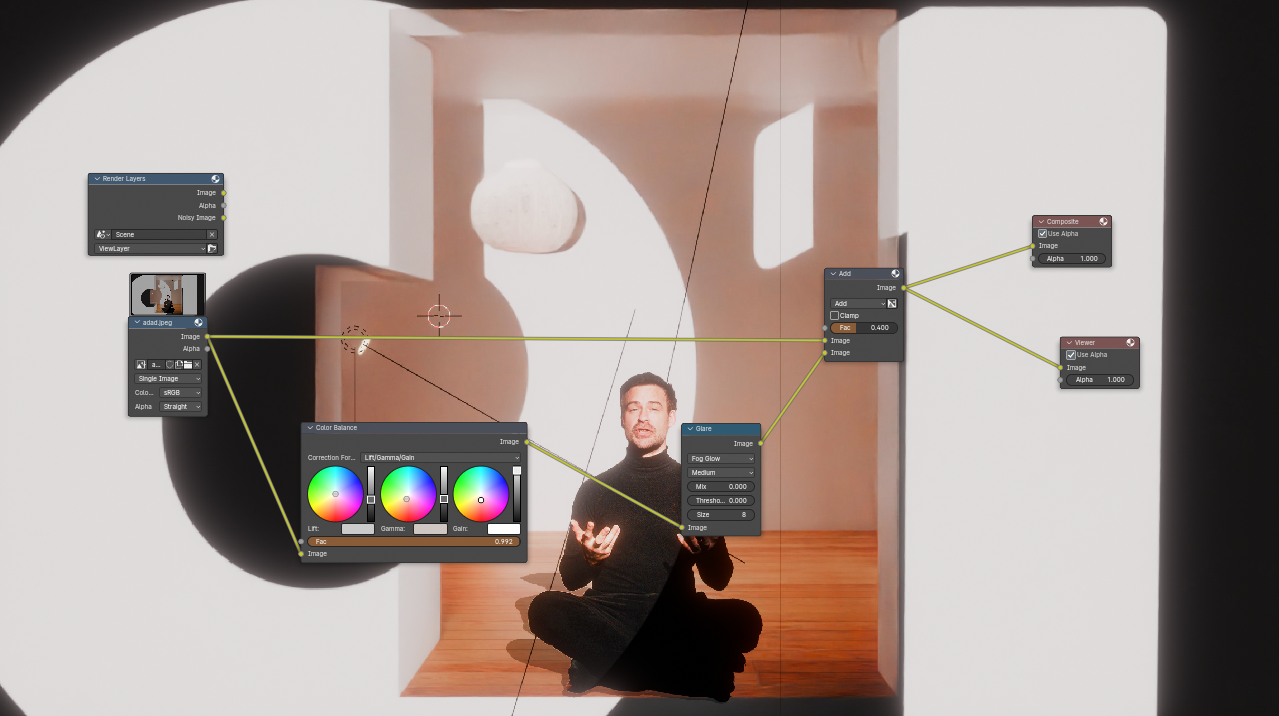
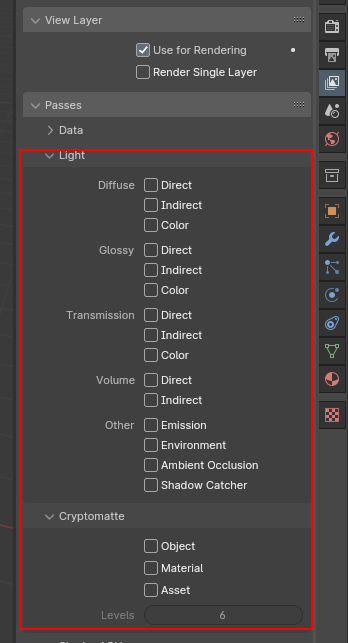
I think you can do what you want using render layers. This allows you to render objects in a collection separately and then combine them in the compositor. You would need to research the subject a little, but you should be able to render the figure separately from everything else, use the compositor to produce the slight glow effect you are after, then recombine the figure with the rest of the image.
I should stress this is something I have seen other people do, but I have not needed to it myself so I have no experience. If you do a YouTube search on “render layers in Blender” you should get some useful tips, and/or edit the title of this thread to set it to ask about how to render in layers and then recombine them.
For the image to integrate in a scene, I think color tweaking is not enough, you need the contents of the image to actually be in the scene.
For a simple cutout like that I would try to give depth to the image so (This is not a “pure” Blender solution, so my apologies in advance):
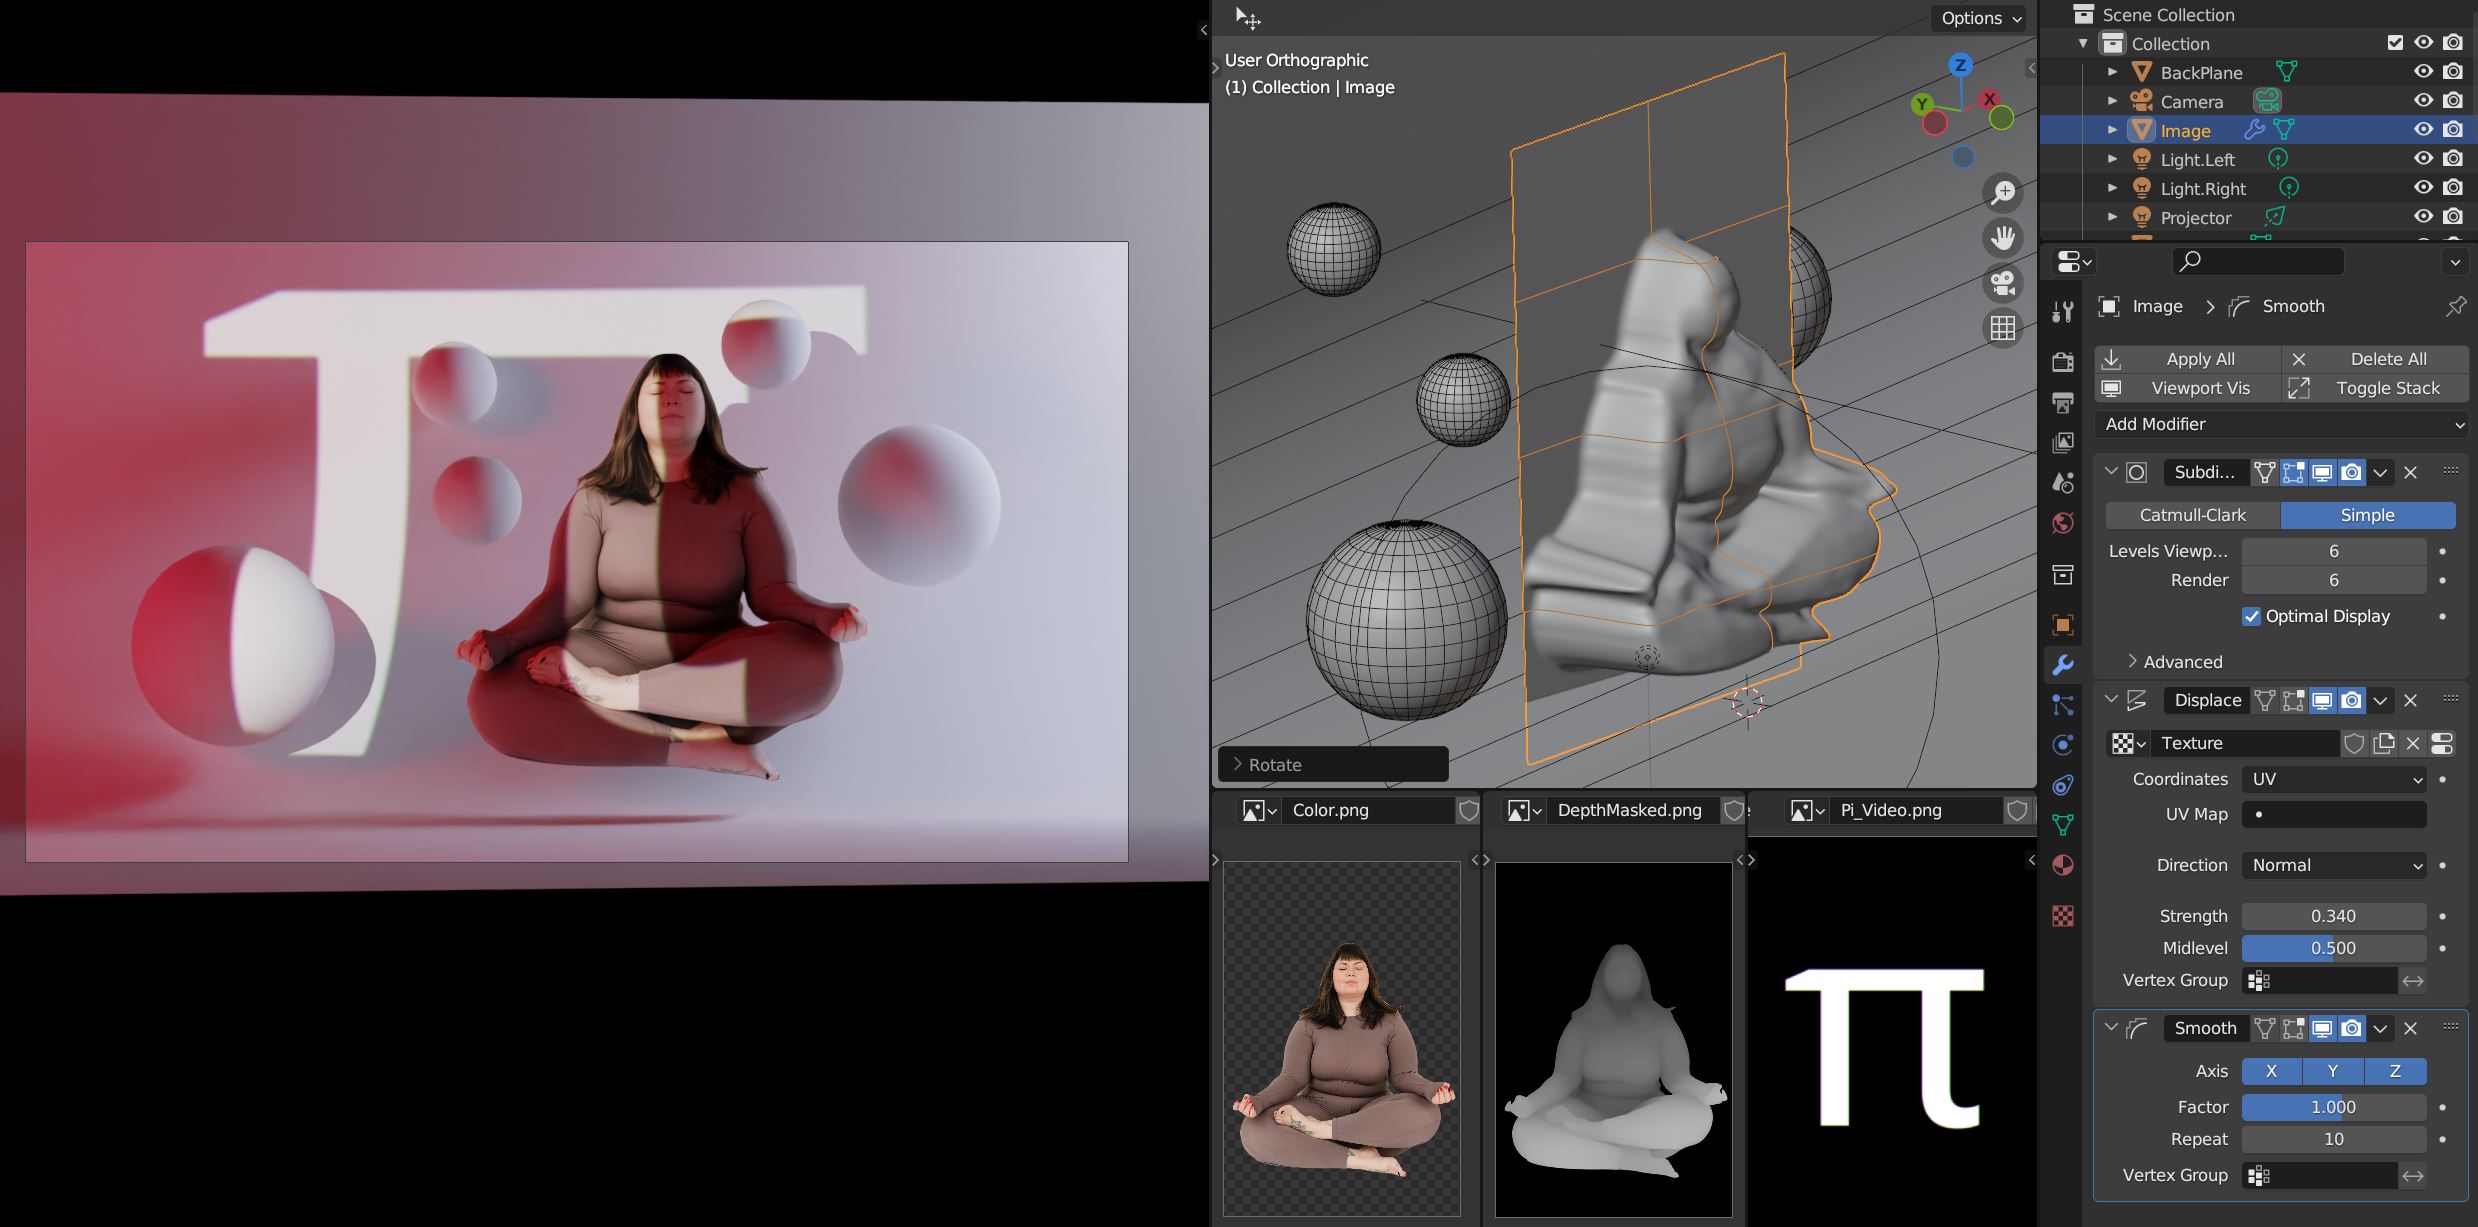
Create a depth map or use wathever available tool for that (I used Hugging Face in my example) and use that depth map in a Subdivision/Displace/Smooth modifier combo with the image. This way you can fake the presence of the original object in the scene and it can be affected by lights in a way that doesnt look planar (as in your first image).
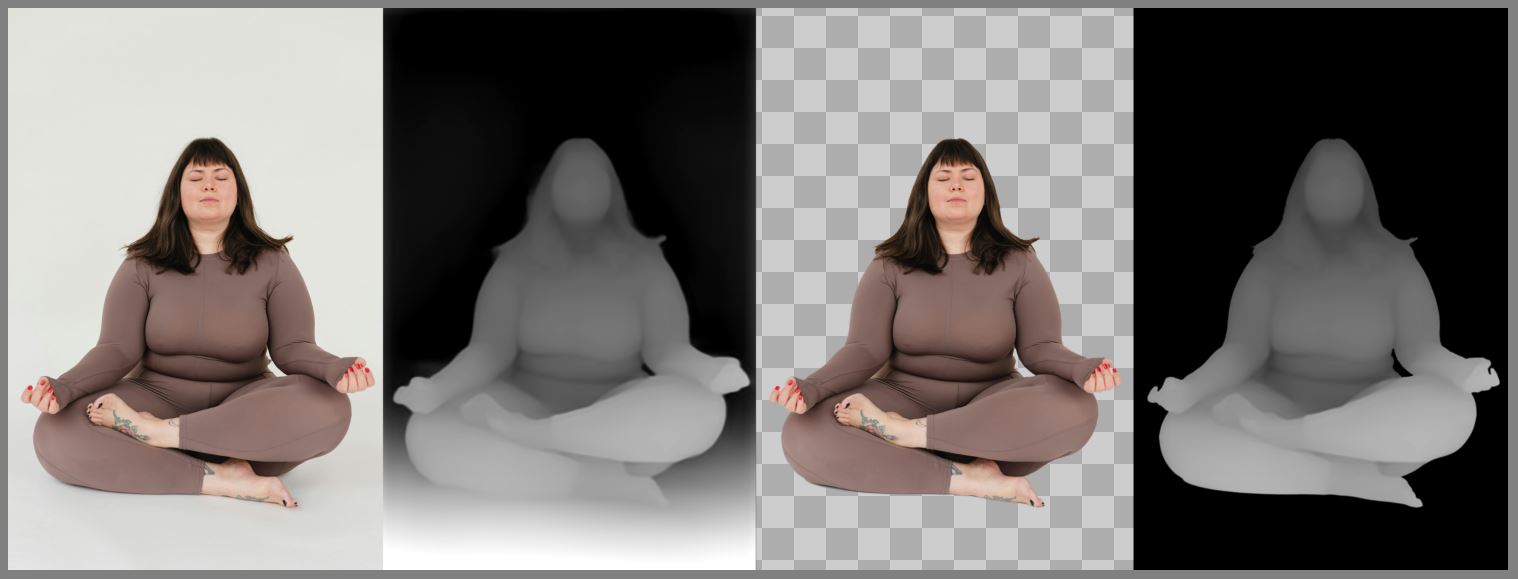
Here you can see an image from Pexels, its generated depth map and both edited in Krita to add a mask for the color image and a black background for the depth map.
In Blender, use a Subdivision Surface Modifier (Planar) in the imported color image plane and a Displace modifier using the depth map, a Smooth modifier may be needed later to remove artifacts.
Some thoughts:
You dont need a precise depth reconstruction, just a way to catch light and a sense of depth in the image.
Better use photos taken under diffuse light to avoid hard shadows that would interfere with your lighting.
I havent tested it with animations, just more laborious I suppose.
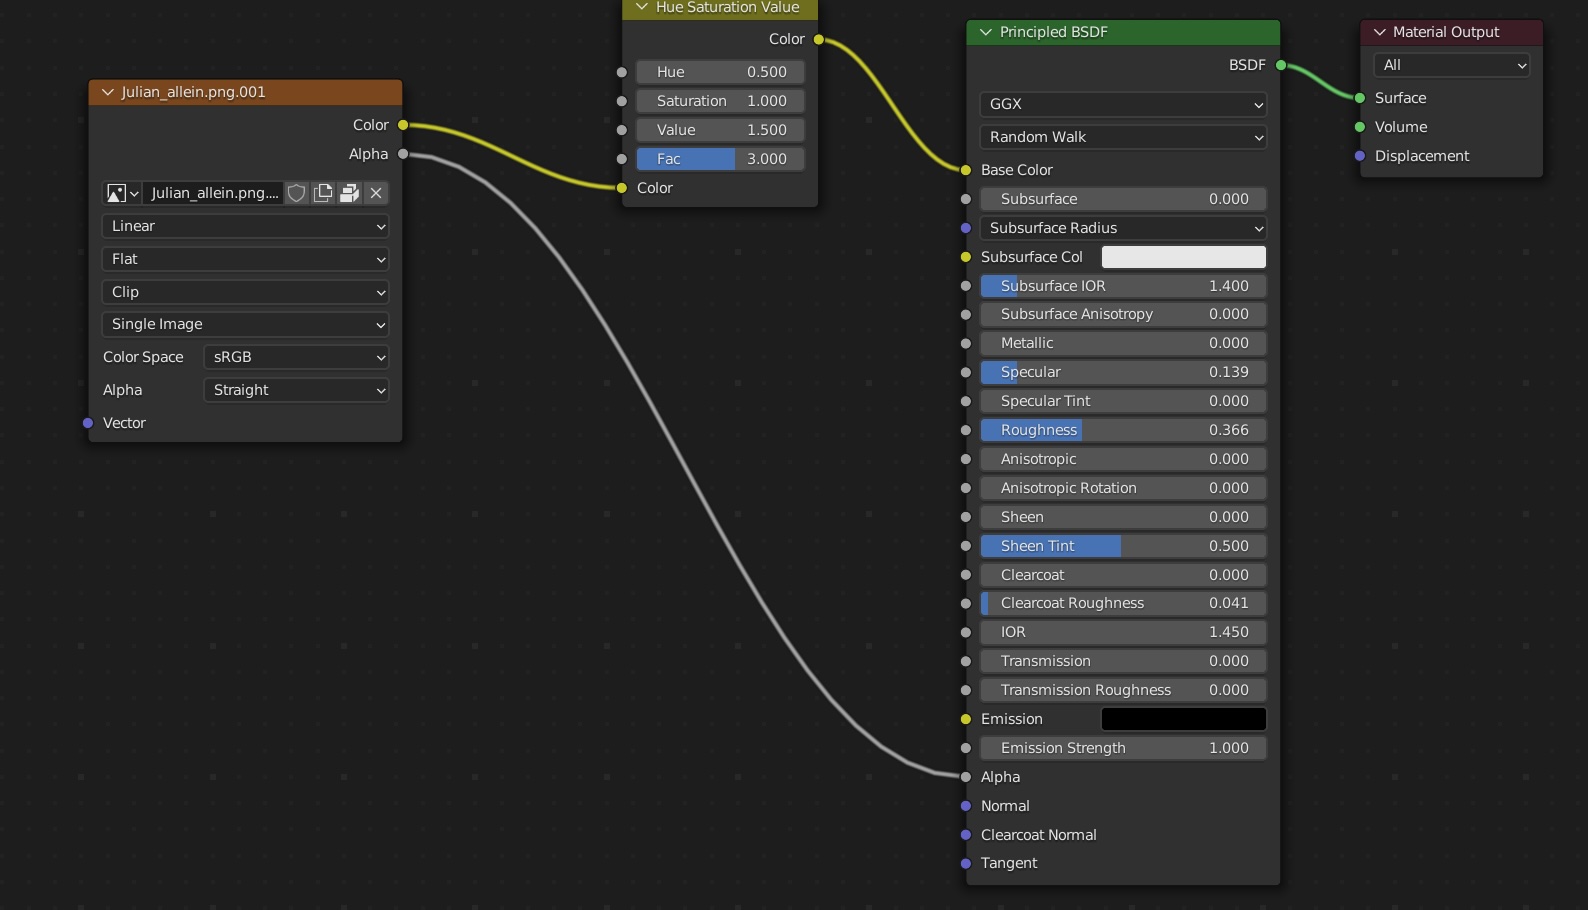
Wow, @lqppro! This is practically the holy grail of solutions. Thanks a thousand times! I got right on it. Can you tell me what settings you used for the Principled Shader as a texture on the person? All the textures I use for the presenter look too dark on my end. Is this a gamma issue due to different color spaces?
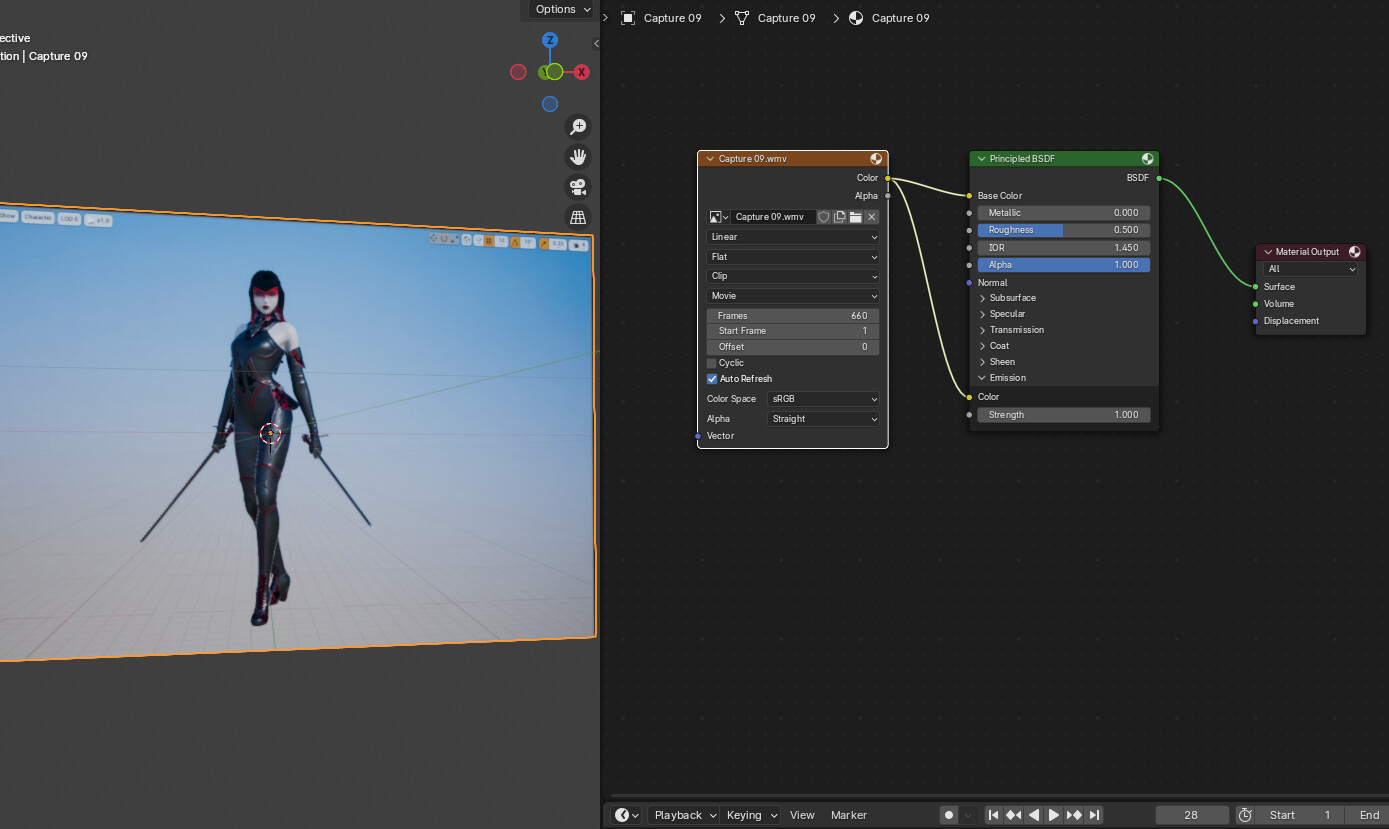
Also, I’m still looking for a solution for moving images!
I think maybe I can find a compromise where only the legs stand out because the presenter always sits cross-legged. I wanted to try generating the Depth Mask in Photoshop. But Davinci Resolve also seems like a good option, especially since the keying happens there. It would be great, then I’d have everything from one program and wouldn’t need to set up automation in Photoshop.
Do you know if there’s a GitHub link for Huggins Face that also works for moving images?
No special adjustment with materials: a plain diffusse Metallic=0, Roughness=1 in my settings, but as long as you are recreating a 3D element I guess different materials can be masked depending on surfaces (skin, cloth…).
I didnt try ai depth map generation with video, but there are many options out there. If you own a DaVinci full license the Depth Map tool may do the job. Also a quick search gave some results like this Video-Depthify.
Also it is important to add elements to help integrating the image such as same lighting for the image and the background scene and realism touches like the shadow and the slight color distortion in the projected light (take photos of the real stage projection and try to emulate it in the render).
Hm… I’m sorry, not familiar with using stuff from GitHub. Tried to find some useful tutorials but only find stuff for developers. Can you give me a hint where to turn to find out how to use something like Video-Depthify. Maybe I don’t understand the basic idea behind it. Do I need a Python environment to download the files and use them on my computer? Or is it also possible online via Googel? Sorry, maybe a bit stupid questions…
Okay, I found out after a lot of fiddling and more videos that this only works on Google Chrome with a logged in account. Safari doesn’t display the link correctly.
While it’s theoretically possible to create depth maps from videos, the calculations are too inaccurate from frame to frame, causing flickering and fluttering that ruins the immersion.
Then I tried to distort only the legs of the presenter—keeping them static but accurately distorted by hand so that at least in this area the projection looks correct since he’s sitting the whole time. This is basically possible, but when he places his arms on his legs, they start to distort weirdly. So, that doesn’t work either.
My idea is to display the presenter’s movie as usual with an alpha channel and at the same time run a second instance of the presenter with a Distortion Modifier, setting this second instance so that only the distorted light projected onto it is visible. I hope that even though the presenter himself will not be correctly distorted, at least the light projections on him won’t look so flat.
Is this possible with the “Indirect only” setting?
The “Indirect only” makes the objects to appear only in shadows and reflections, and you want to limit the visibility to projector lighted areas.
In this case better make separate renders and use the compositor to adjust the effect.
I´ve been trying another methods to generate a depth map (like rotoscoping with a human 3d model over the video) but it is no easy to get a good result.
Still better use a depth map generator. As a free option (you have to sign in) I found Runway has a video to depth map generation tool (just a suggestion: I havent tried it).
")