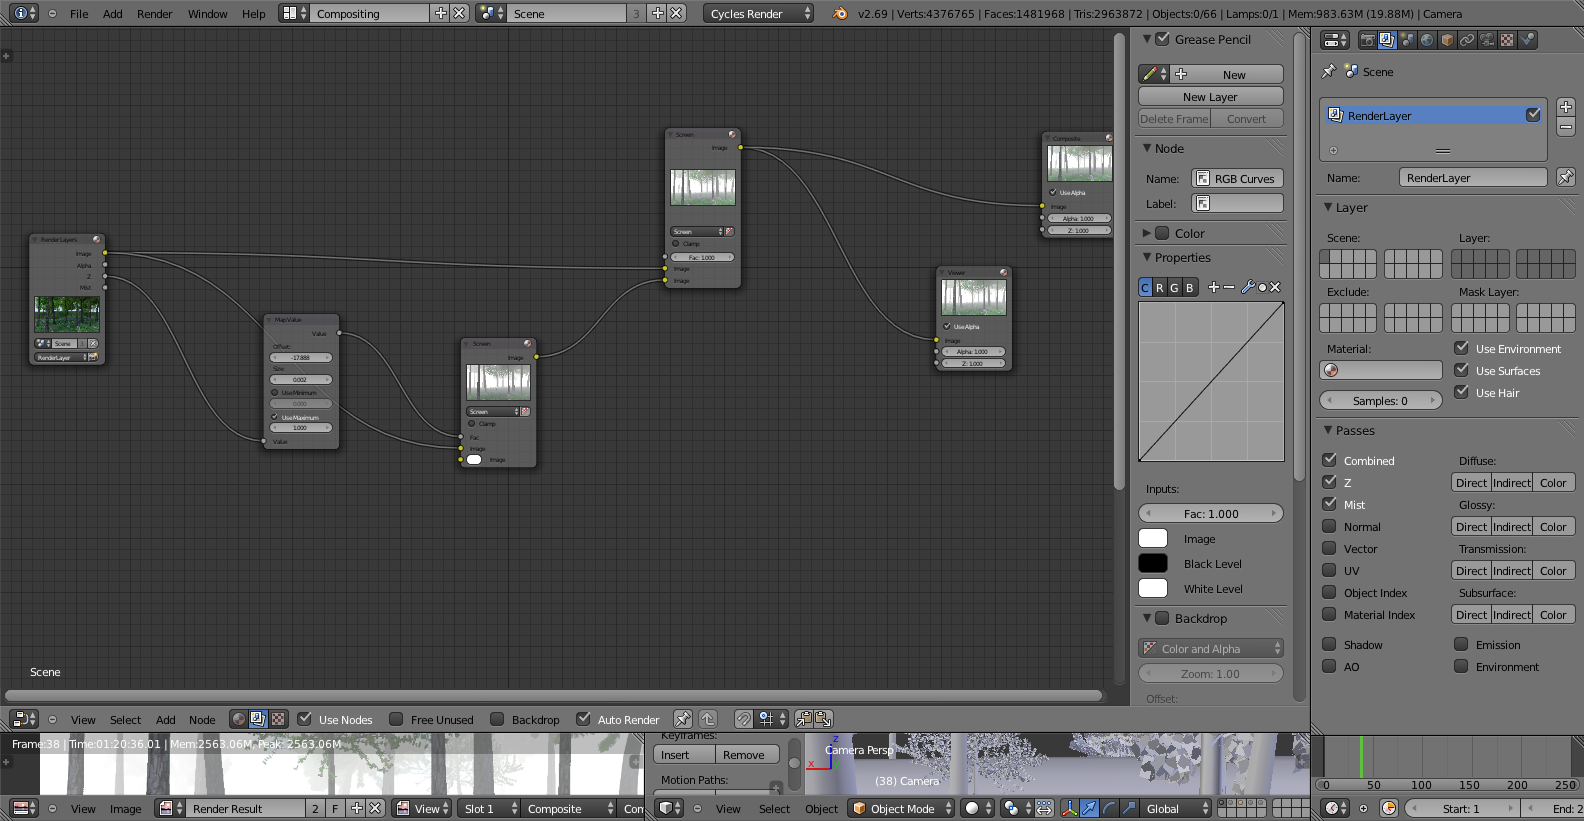
Haven’t found much on mist and z passes together so I’m going to do my best to talk about the two together. For many this is probably not new, but for others it may help. So when I was rendering my last scene I wanted to have a fog effect in the background. To do this I went with my first choice of using the z depth along with a map value node in the compositor. Which looks something like this.
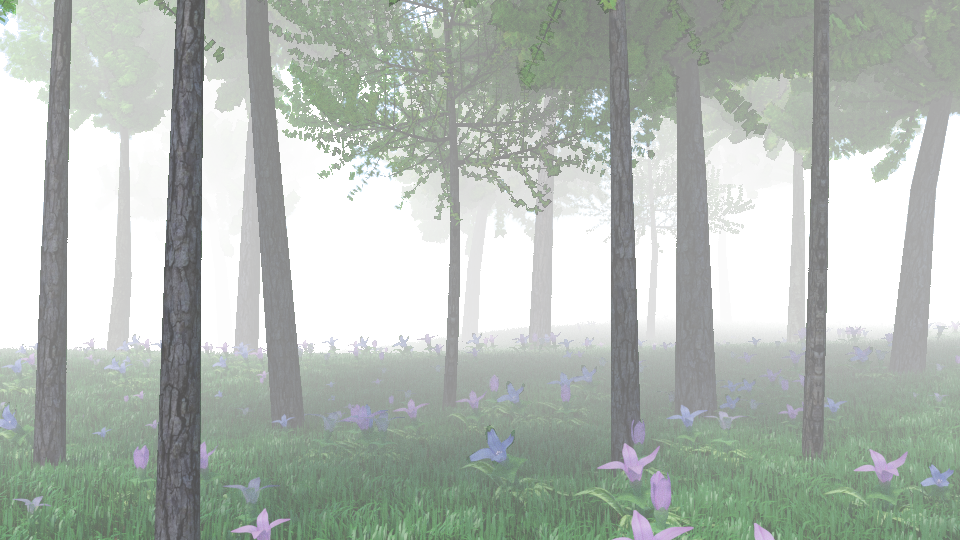
One thing I noticed with this fog method was that it started to highlight the objects within the scene, some threads say the meshes become jagged which does happen. Also with some objects with an alpha texture such as the leaves. some of the tree leaves show up with their entire plane visible, not entirely but it is no longer completely transparent. This is most visible around the right corner.
So for many outdoor scenes it is best (at least for me) to limit the use of z depth, heavy fog or mist tends to distort the image a bit too much and doesn’t quite agree with transparency. I’m sure there are more compositing tricks to lessen this effect but for this tip I’ll be sticking with the most basic compositing for fog.
There is another method for creating fog which is using a mist pass.
Once mist pass is enabled in the layer settings you can then composite the fog into the image after rendering. When entering the start and end values it’s best to enable the mist pass in the camera settings so as to allow you to visually see the depth of the fog.
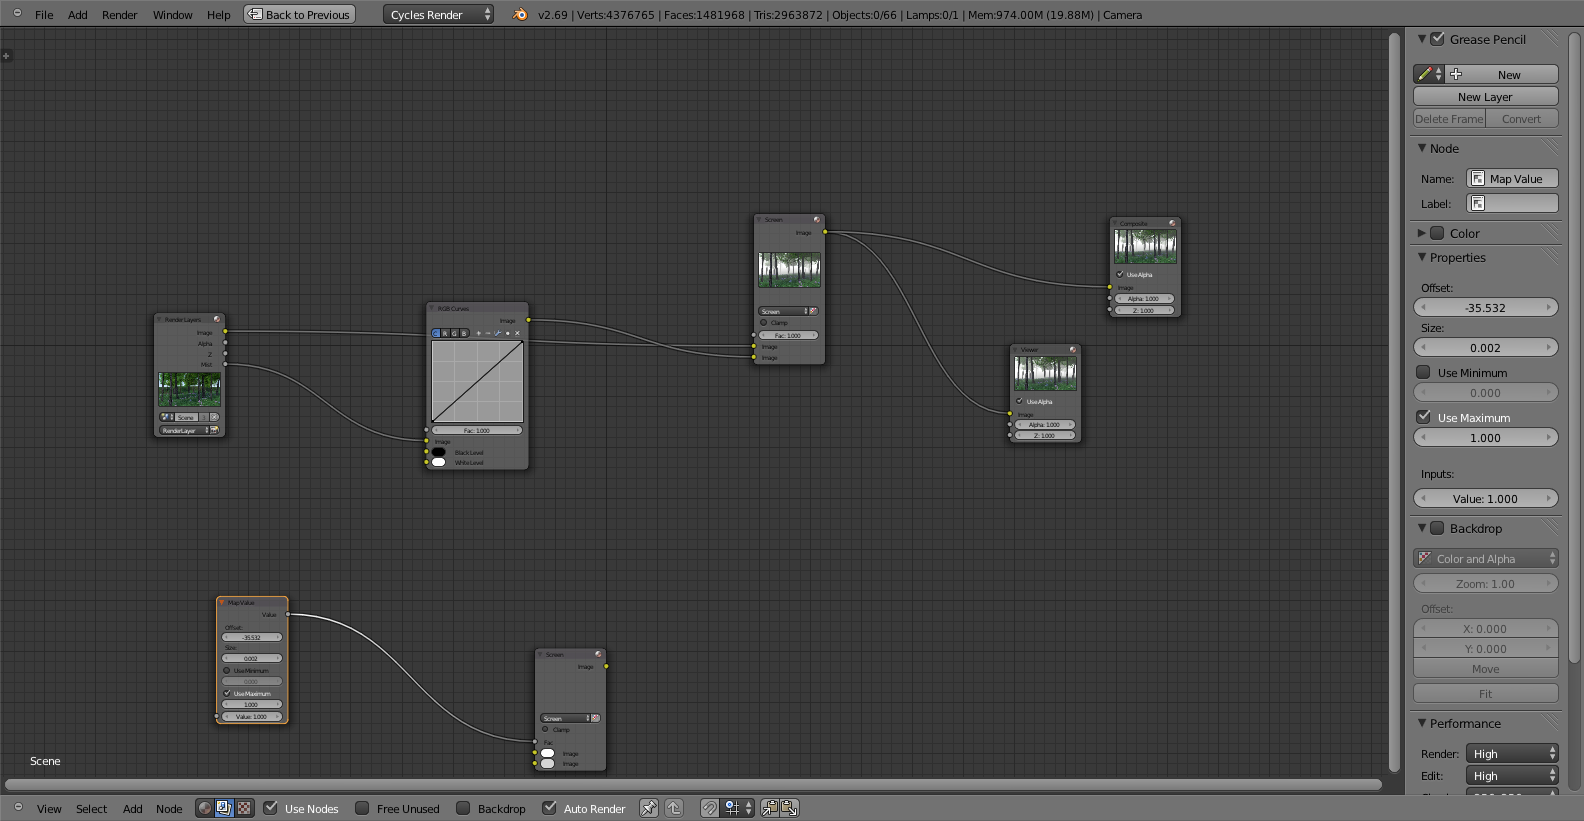
Just as with Z depth you can combine the mist pass with the scene using a mix node and setting that to screen.
For my scenes I prefer to use the RGB curve node as I feel it gives me a bit more control over the color of the fog than a color ramp as well as how heavy it is. You can lessen the effect of the fog by setting the initial curve to a more black color. If you increase the white value and make it more vertical it will increase the mist to a degree but not as much as z depth.
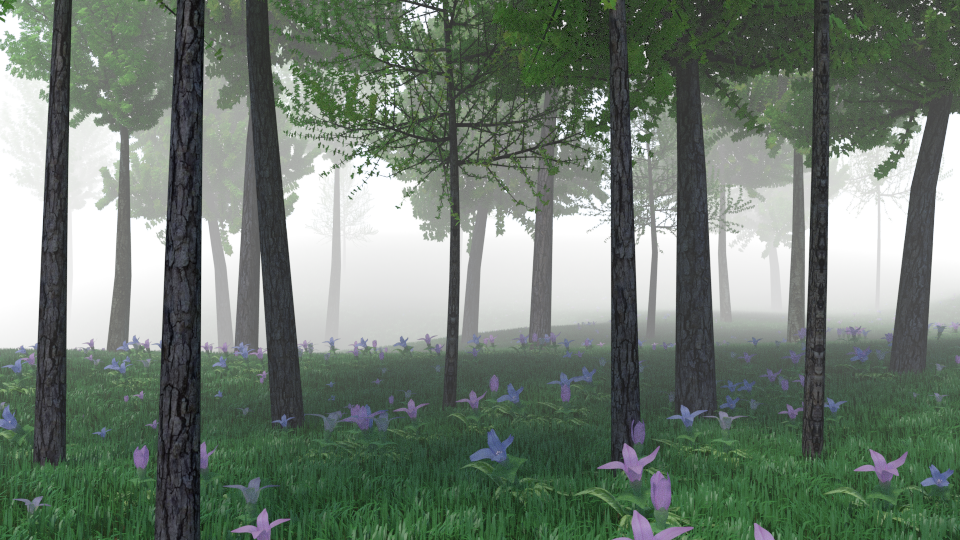
This is the final look using mist pass. Personally I prefer to use mist pass because I feel it gives a better look than z depth.
Now which one should you use? It is mostly up to you. Both have their pros and cons. If you use Z depth at high levels it won’t be as clean as using mist pass. However Z depth gives you greater control of the fog post render. You can set the fog to any distance and have great control over the thickness of the fog.
With mist pass it gives a cleaner look that is less jagged than Z depth also it doesn’t seem to effect the transparency as much as z depth. However you will not have as much control post render as Z depth. Mist is mainly controlled before you render in the world settings. You can certainly decrease the fog post render but if you want to increase it you will usually have to reset the mist pass settings and then re-render. So with mist pass you want to be sure you have the settings right before you do a final render.
That’s pretty much it in regards to a simplistic fog setup.
Yeah, Z pass is not anti-aliased while mist pass is.
There is also a third option, which is to make the depth pass yourself using material nodes (in both render engines).
Make a material that puts camera depth information to emit value, create a new render layer and then put that material as override in render layer properties.
I was checking what the difference is and came to the same conclusion. Its nice we can control the z-depth quite easy in post, yet i dont understand why its so jagered?
I saw this video by Max Puliero and was thinking of making a simple addon for
Edit the z-depth i probably jagered because its only 1 sample. This is from the blender docs
The Z pass only uses one sample. When depth values need to be blended in case of motion blur or Depth of Field, use the mist pass.