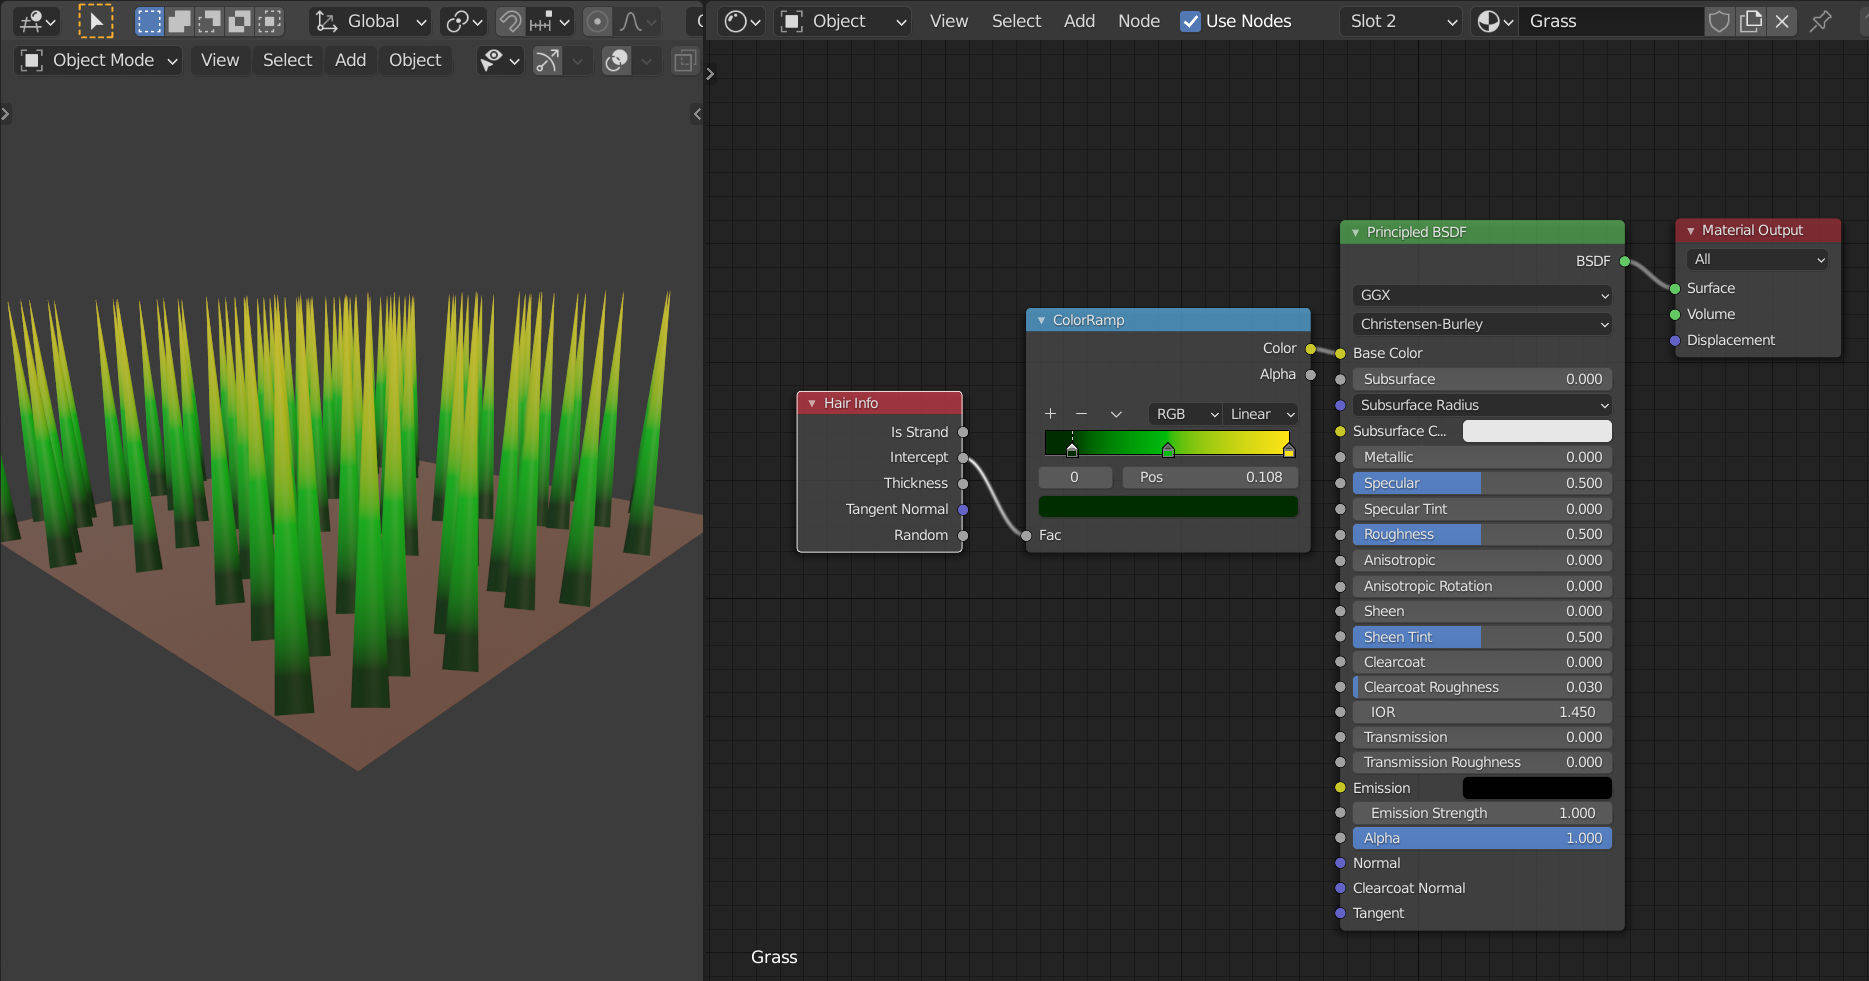
I’m creating some grass, and the material I’m using is distributing itself horizontally along the “ground object” rather than vertically, or, rather, along the vertical axis of the hair particles.
For example - I have a gradient from red to yellow.
I’d like each hair strand to be red at the bottom (ground) and yellow at the tip.
However, when I apply the material to the hair particle on a rectangle, the gradient goes from one side of the rectangle to the other.
If you want to map an image texture it will depend on how you are making your grass particles.
If you have modelled the grass stems and are using render as object or collection in your particle system, then it is easy you can use the texture coordinates of your grass models with the mapping node to rotate their texture, or rotate their UV’s if they are unwrapped. I presume this is not the case.
If you are using hair particles then one way to do it is to use the “object” texture coordinates of your plane (the emitter) and a mapping node. I used a wooden plank image because it is the first one I found! It is important to use one texture for the ground and another different one for the particles (even if they use the same image) because they will need different rotation.
Note that I have rotated the y axis 90º:
You could also use an empty and rotate-scale the empty instead of using the planes coordinates and a mapping node.
Note that I rotated the empty (Y 90º) and scaled it a bit (you can also use the location)
Hi,
don’t bother playing with the particle hair materials but ‘convert’ the hair particle modifier under the modifiers tab. Then convert the resulting hairs to curves. Extrude the curves (under the curves tab). Then convert them to ‘mesh’. You will have a good uv auto generated that you can easily map a texture onto. It’s the same way they do hair for games when trying to simplify the mesh. You can use ctrl-t to tilt multiple or individual curves before you convert them to meshes.