Hello,
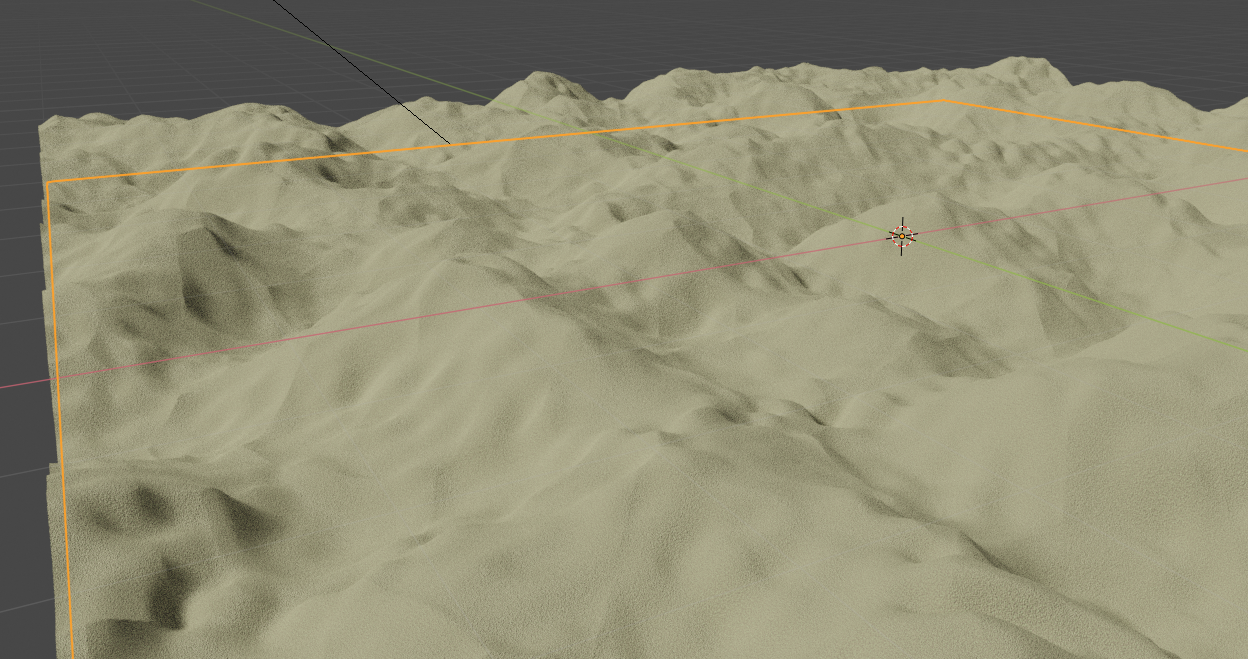
I would like to make realistic sand (I want to use it in a beach scene). My sand currenctly looks like this (note that I’m aware that the displacement forming the hills and valleys might require more tweaking, I need feedback more on the small sandgrain level):
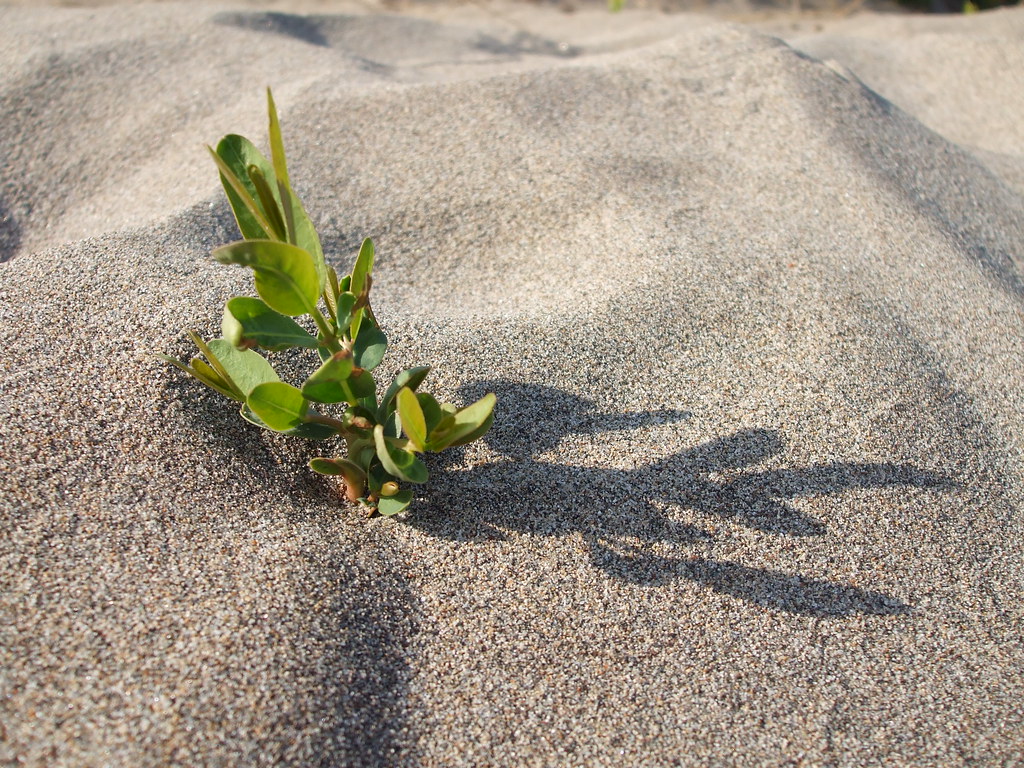
But that looks only like a rough landscape to me, not like real sand hills & valleys. It shoud like like it’s actually composed of many different grains with varying colors and sizes, like this;
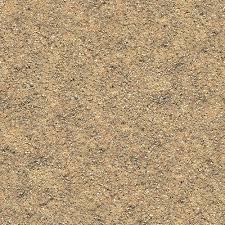
You could use an image texture like this:
for the surface, and then use a displacement map (also with variable texture. The easiest way to create that kind of variance would be to use an image texture and a displacement map… if you can find a high quality texture with roughness, color, etc maps, that will make it fast, but if not, you can improvise with images
I think Disney/Pixar’s Piper did a really good job achieving this. I recall they used both textures and surface particles for their scene.
You can find an actual sand texture online (as Josephhansen suggested), or you can use this method to make one:
Make a seamless square of ground using particles to craft a seamless sand texture. To do this, just make one tile, and instance it for the surrounding 8 tiles. Make sure the particles cover the overlap.
This will then be applied to the ground, potentially to be augmented by particles on the final surface.
Note that if you use surface particles in your final scene, you cannot use shader-based displacement as your primary means of height variation (it must be ‘real’ geometry).
Piper also separated out the ground that characters interact with and filled a deeper volume with dynamic particles there. The rest of the surface particles were static and had no simulation data.
@joseph Thanks for the input, that would be a final resort. But, if it’s possible, I would rather like to use a procedural approach. @lolwel21 Thanks. I would rather not use particles though, as the final scene will already be quite detailed, and I don’t have the best hardware.
Gotcha. If you go for a procedural approach, I’ll want to know what version of Blender you’re using, because of the new Voronoi features in 2.8
Either way, a fairly strong Voronoi bump texture, with colors picked from an image texture of sand will probably be your best bet. The details of the grain texture will probably have to be hand-tweaked, but a high strength bump and some low-roughness grains will probably look good, especially if you use 2.8’s Voronoi Crackle mode for some of the sand (adds some flat faces into the mix).
Maybe mix 2 voronois of slightly different size using Maximum depth, and use the Cell color to control the color of the sand grain.
To be honest, an image texture lookup is a lot cheaper than procedural noise computation-wise, but at the disadvantages of both a 2-dimensional surface and potential tiling artifacts (you can remove visual tiling by mixing in a translated/rotated/scaled version of the texture using some noise).
Voronoi is nice for simulating grains indeed.
I’d recommend stacking a couple of voronoi textures, each of them slightly shifted/rotated to achieve the impression of depth/layers of grains.
Use them to both displace and color the mesh (cells to color, intensity to displace). Lowest layer voronoi should give darkest range of color, make them brighter each layer up, and mix colors using the voronois’ values while clipping a bit more each layer either using a ramp or a greater/less than math node (in order to have the lower layers’ colors peak through). Vary roughness using voronoi cells too (pay attention to keep voronoi frequencies for color, displacement and roughness in sync to create the impression of discrete grains with coherent material properties instead of some blurry blob of white noise).
Add up voronoi layer values to create a displacement for the material. A higher frequency cell voronoi on top of that, either added with a fraction of overall grain displacement strength or used as normal map gives additional realism as it adds some fake “geometry” to the individual grains.
Use Cycles “experimental” featureset, adaptive subdivision and true displacement.
Here’s a sample image where I used that approach (Blender 2.79):
Should be redesigned to use object coords, as currently a long beach will end up having different sized grains as a short beach. I don’t expect sand to behave this way.
Pipe geometry/position into the map nodes instead of texture coordinate/generated and adjust the mapping and scale to your liking. Not meant to be a generic ready-to-use material for anyone and any situation, just a sample of how to chain/overlay those texture colors and displacements.
PS: I take it you want world instead of object coordinates
Doesn’t matter. It’s the scale that is important. With applied scale they should be the same.
Best would be if there was a global grain median size (in object/world scale) in mm, where changes would be correctly transferred to bump height.
Being fully prepped with wetness might also be a possible natural expansion; unsaturated (just wet) and saturated (wet and water).
Desert sand dunes may also be similar. Ok, letting my imagination go wild here
Thank you all for your help! @Helmut_S Thanks for your work. Do I have your permission to use a slightly modified version of your node tree in my (non commercial) file?