What is the best way to add a good resolution texture on an object ? ( I’m a debutant with texture and normal map etc…)
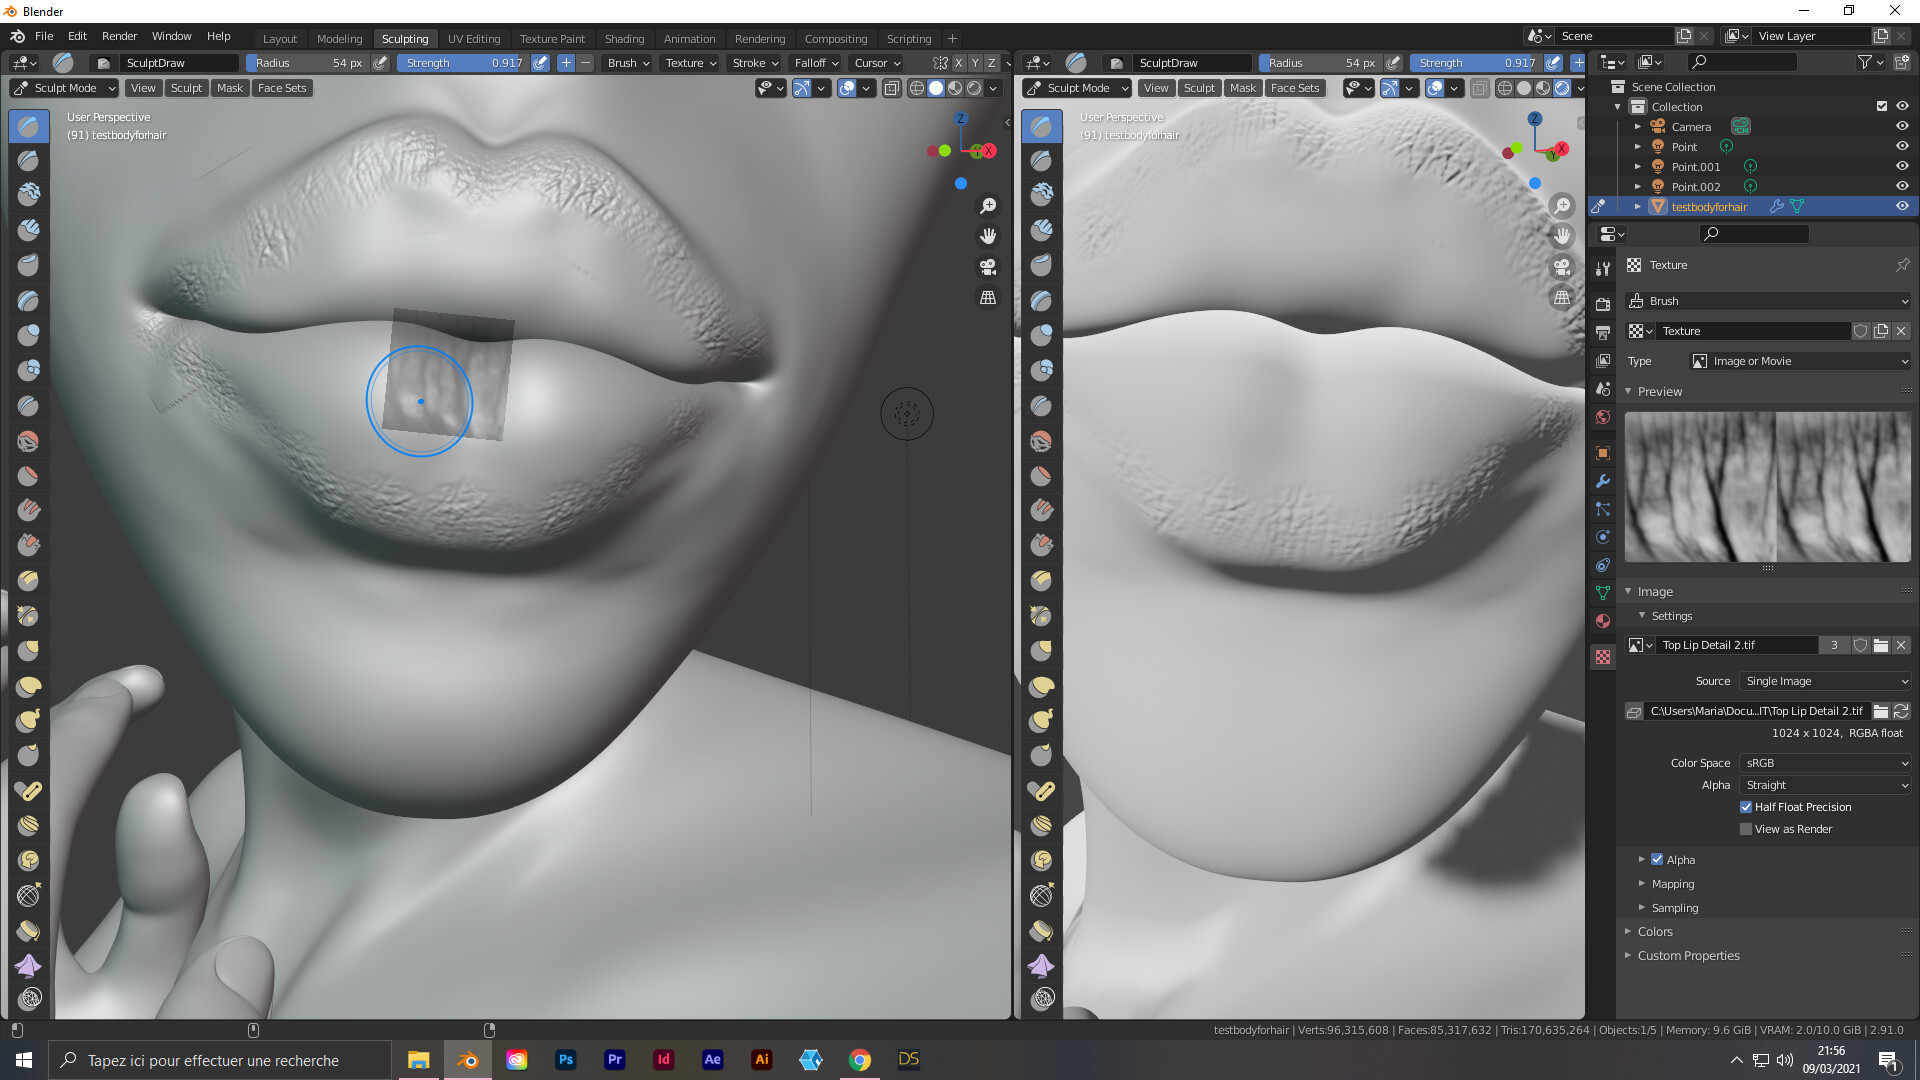
So here, I use the multiresolution and use alpha directly on the mesh but my computer doesn’t really enjoy it and the process was too slow on the viewport but the results were quite good.
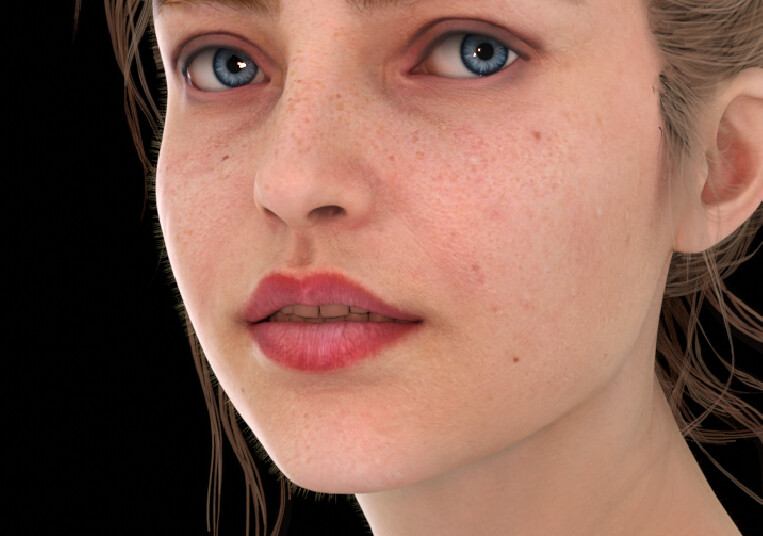
I’ve seen that apparently by using a normal map and bump it was possible to paint directly on the object ? My goal is to create (not on all the body but on lips, hand), a realistic skin on a female body with a good resolution. What should be my workflow nodes for effectuate this effect ?
I guess what you want is to sculpt a highres model with pores and wrinkles.You can do it to some degree as you PC is fast enough with increasing meshresolution.
However if your PC can handle that,then the next step would be to bake your highres model to a normal map.
This detailed normal map is loaded then on to your retopo lowpoly model,to get the details back.
I think you need to create your own MASK for those areas you want to add the normals to control them better…combine that with a bit of sculpting should get you there.
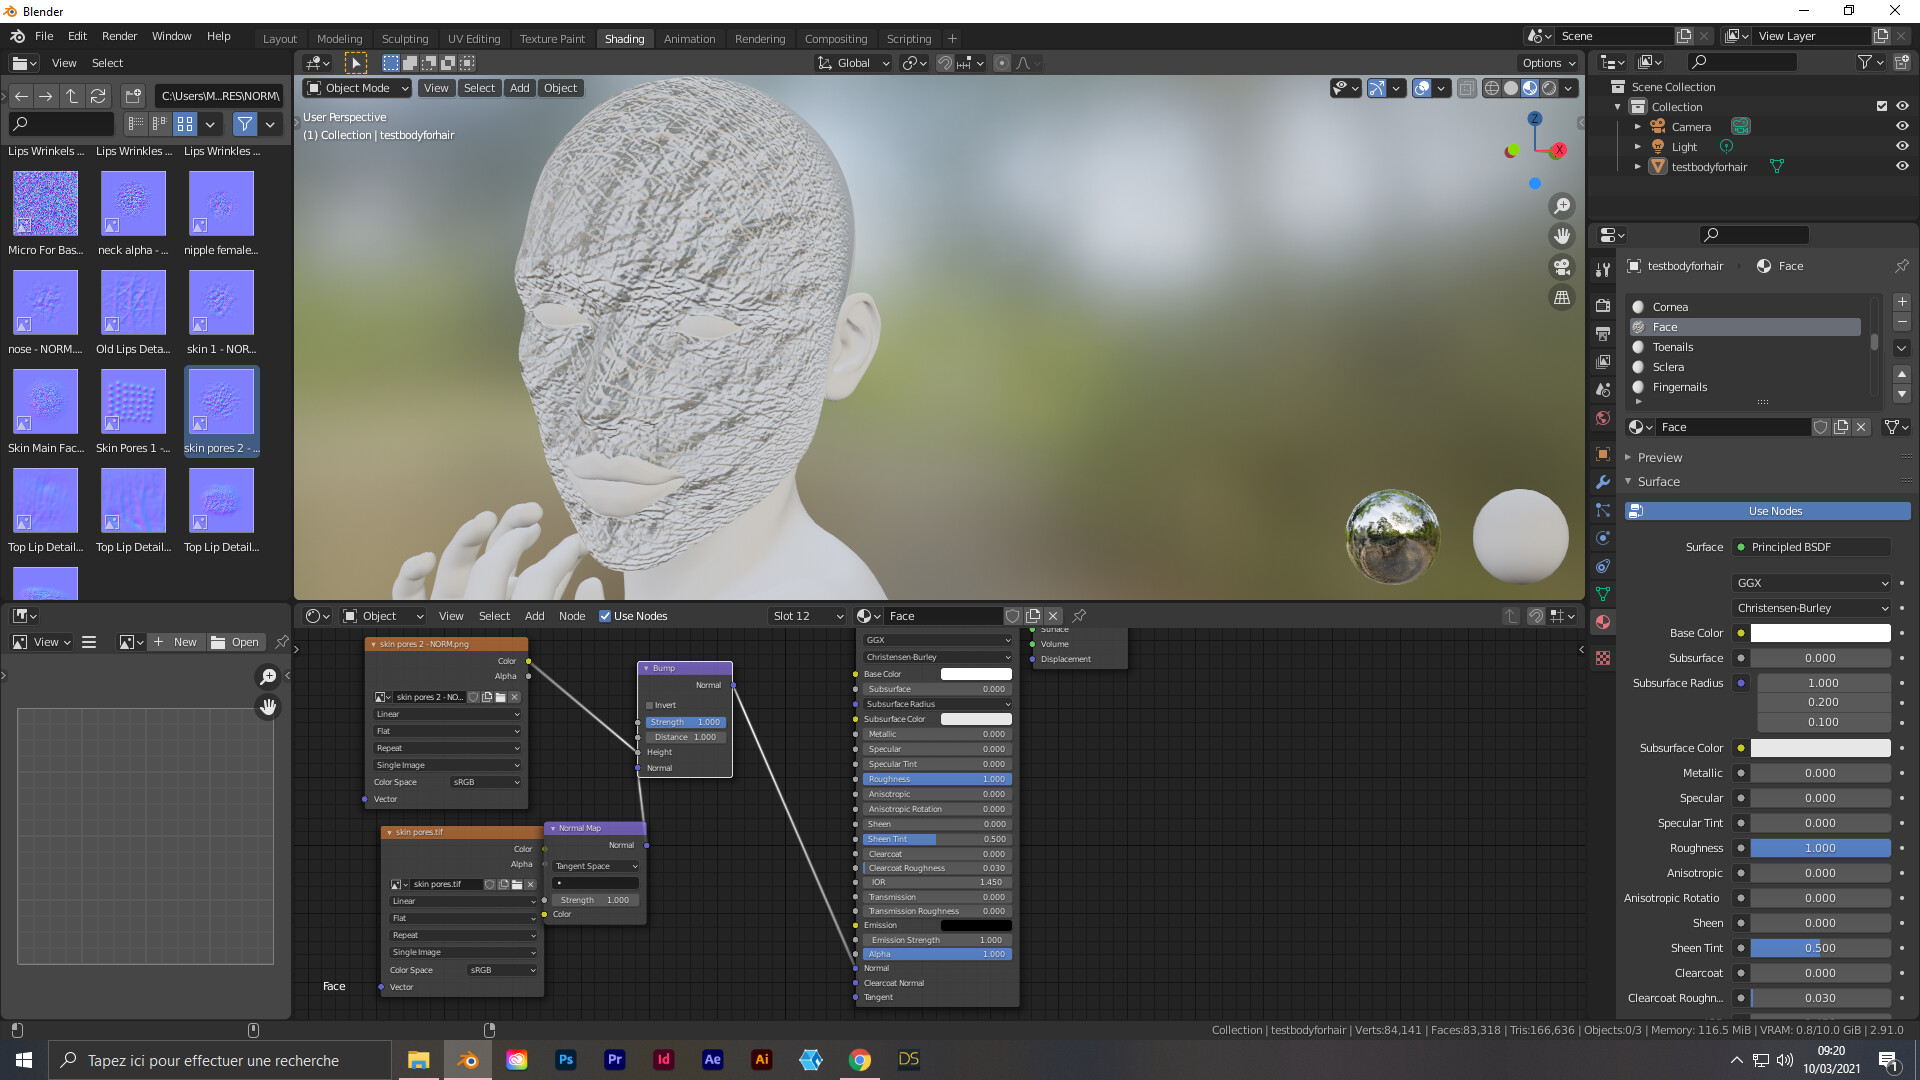
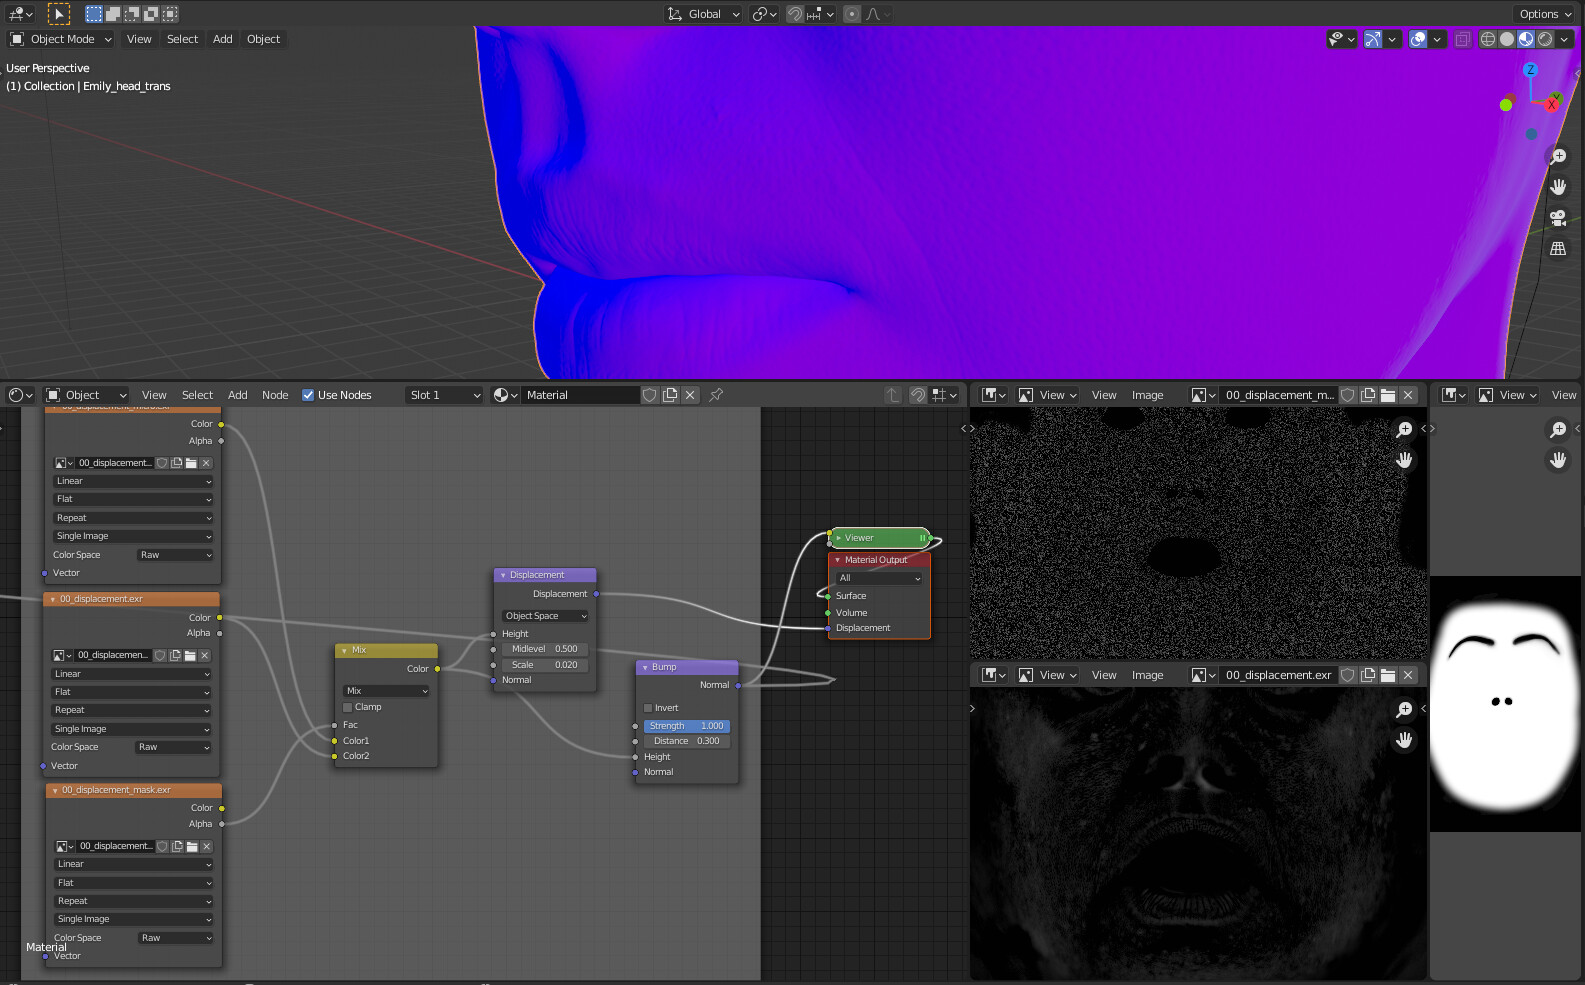
Create the mask in Texture Painting with a grey-scale W > B, white of course where you want, and Black none…It takes a bit of fiddling and tweaking to get things just the way you want… and you could use gimp or PS but I find Blender does quite well in this and you don’t have to save and switch between progs… Start with a very LOW amount in Strength and bounce between W & B, for fine control…Here is a case where I used several Height Maps, Mixed and run through a Bump>Normal with the Mask Controlling where…
and if, Like your Normals combine this technique with Normal Map Mixing as shown in this good tutorial by Decoded…
The same for LIPS add sculpting and combined Normals and or Bump and control the Factor with a B/W Mask made in Texture Paint!
Here is Part of a Micro-Normals Mask I used recently…
And one using the same ideas for Lips etc.
Thank you for your response ! I dont’ really understand how to make a mask, I’ve seen tutorials but none really explain it , did I need to unvramp my character first ? I need to learn the bases i know
Absolutely! Making a UV will help in all the texturing processes.
A texture mask is from the UV, and it is nothing more than a B/W greyscale image the Black being the Mask and the White being the new texture, the greyscale part of it blends the underlying texture with the new.
For Example…in your project doing the lips…1st you would need the UV… which is going to give you areas that you can mask…2nd …create the Mask…Using texture paint you would paint directly on the mesh a greyscale w>b on the lips the rest of the face would be black…
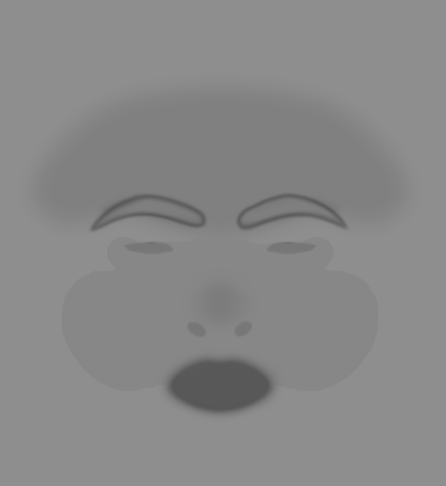
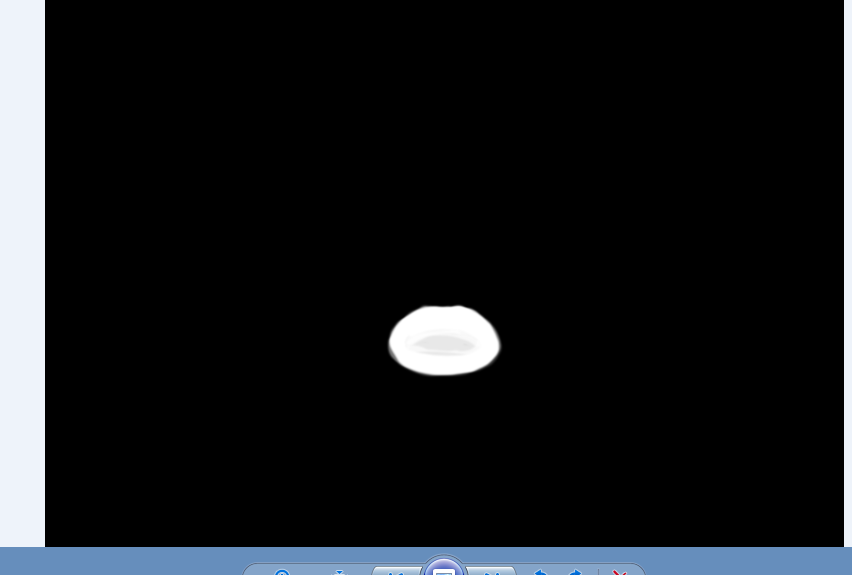
Lip Mask
You could then create a texture using just the Bump map+Normal Map and use the Mask to control the area of painting…and Texture paint using Stencil over the lips…
Take a look at this thread…even though it refers to texturing the same idea can be applied in sculpting by importing your newly made mask…