I have a compositor setup that is not rendering as it’s displayed in the viewport. I’m using Blender 4.02
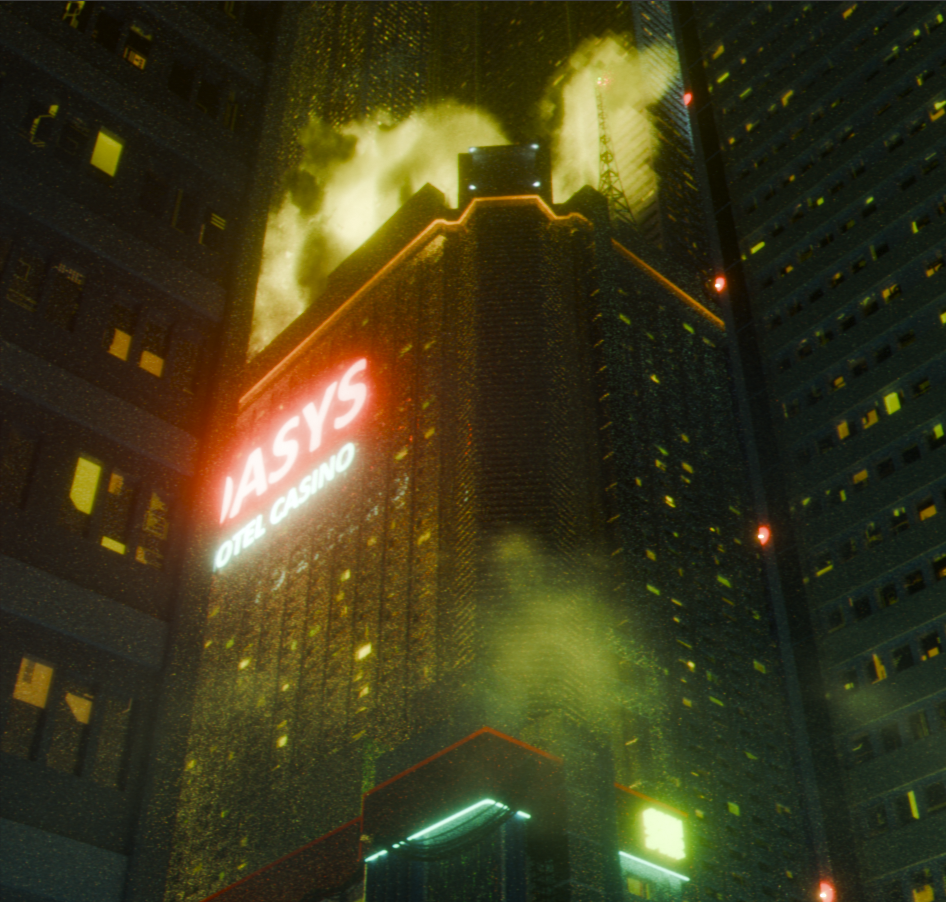
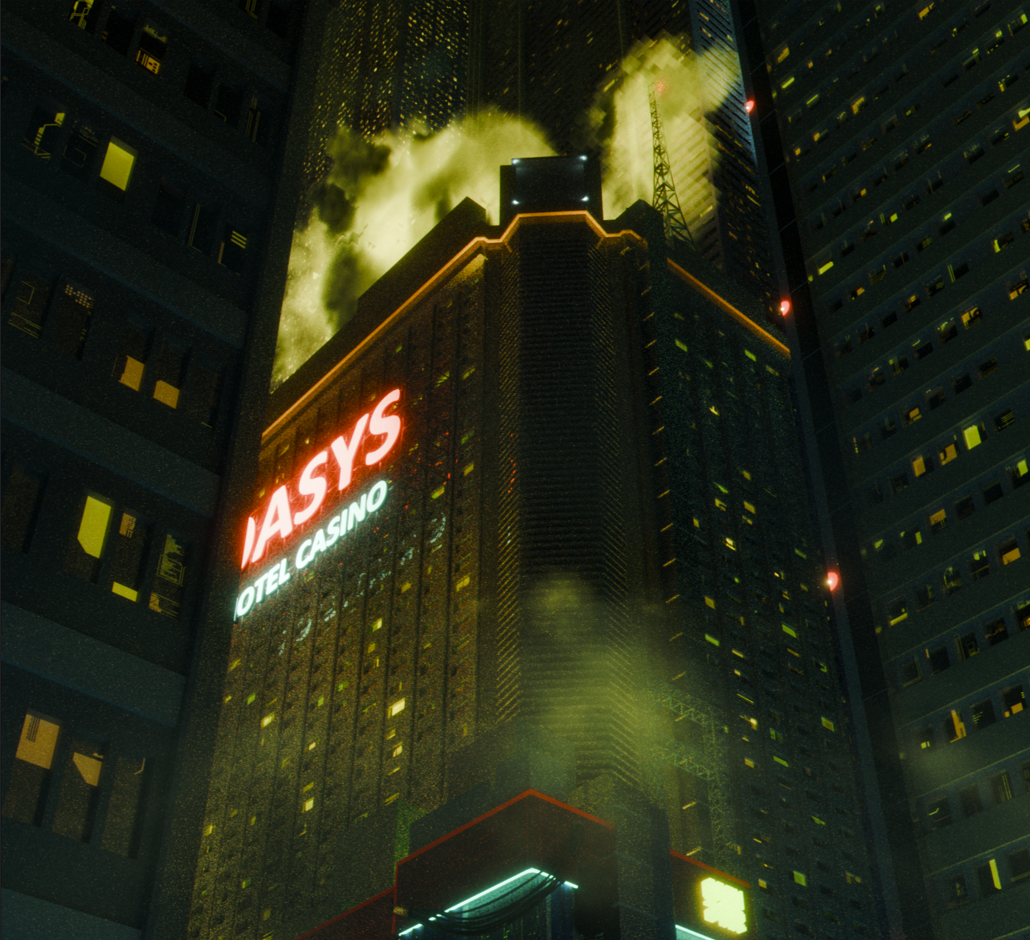
I have tried the latest Beta and Alpha and the result on both is even worst. The first image is a screenshot from the viewport, the second is a screenshot from the actual render in 4.02
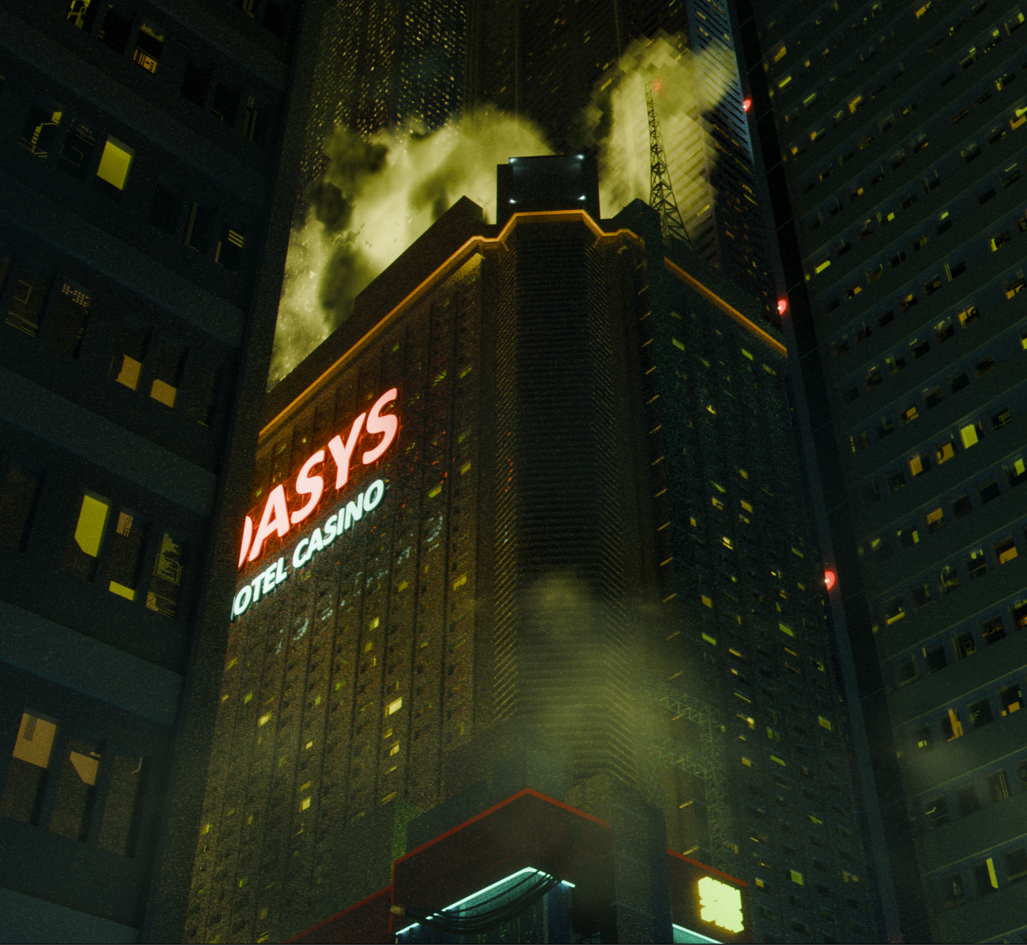
and the third is from the Beta, which is almost identical to the result from the Alpha.
I think I remember seeing the Compositor isn’t fully working in the current version, but I’m not sure I dreamt it, or I’m just missing something. I would appreciate if anyone could spare a little help. Thanks!
Hey, thanks in advance for your reply, appreciated!
did you mean you want to see the result of the compositor in the viewport?
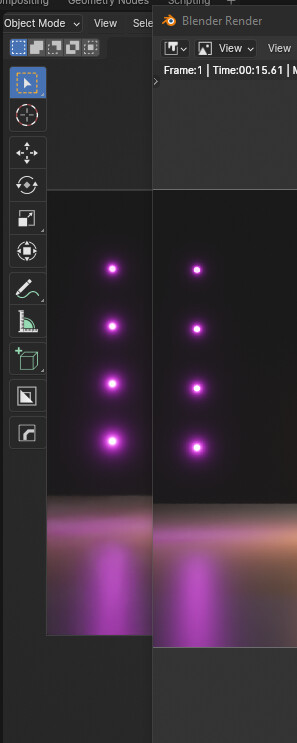
The opposite actually. I want to render what I see in the viewport, with all the grain, glare and blur, that is only shown because it’s configured in the Compositor, correct? But when I render, as you can see, the image on the right, it only glares/blurs partially.
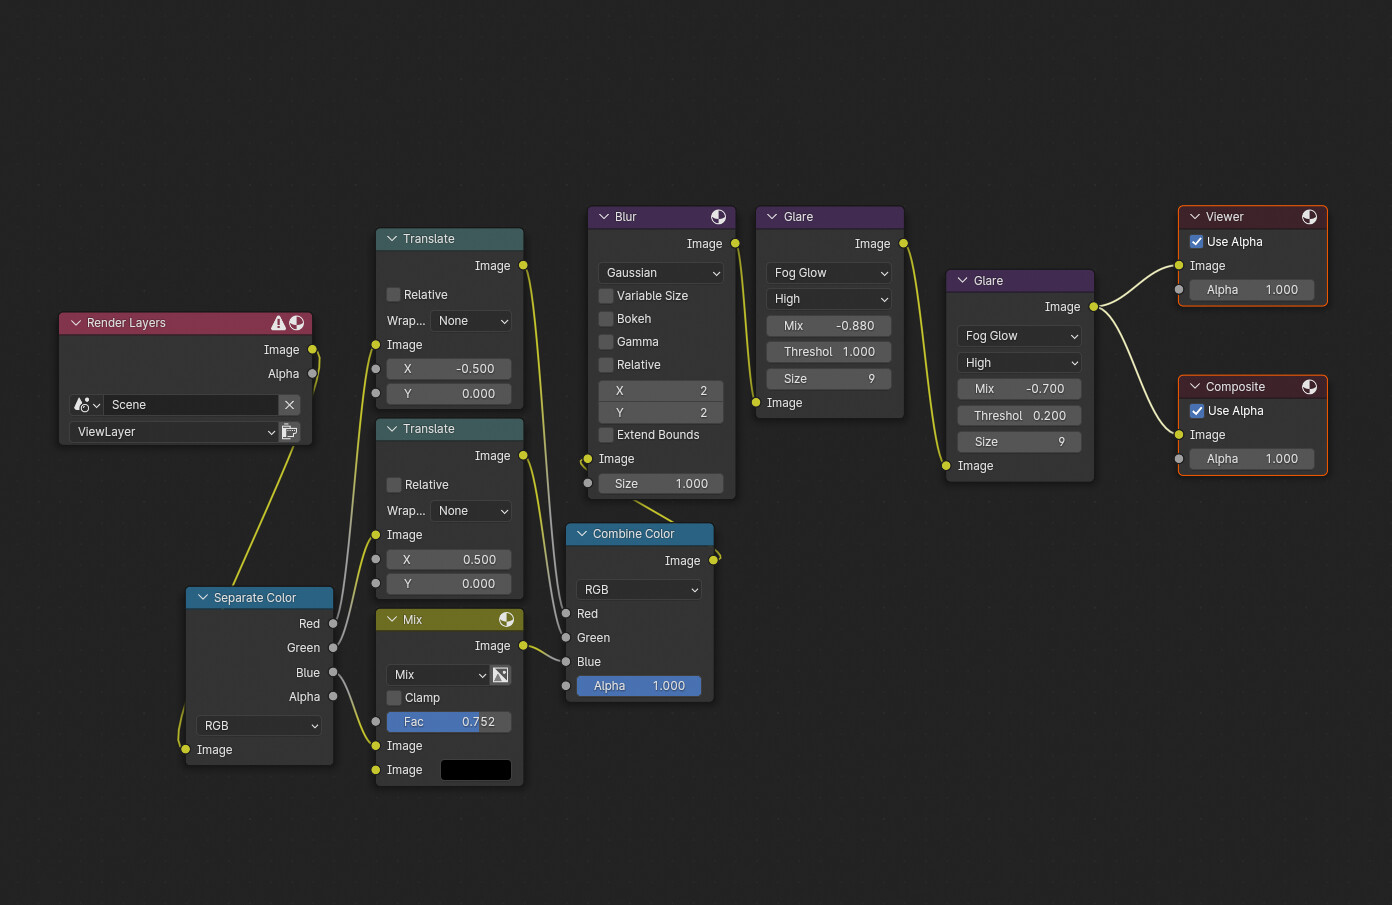
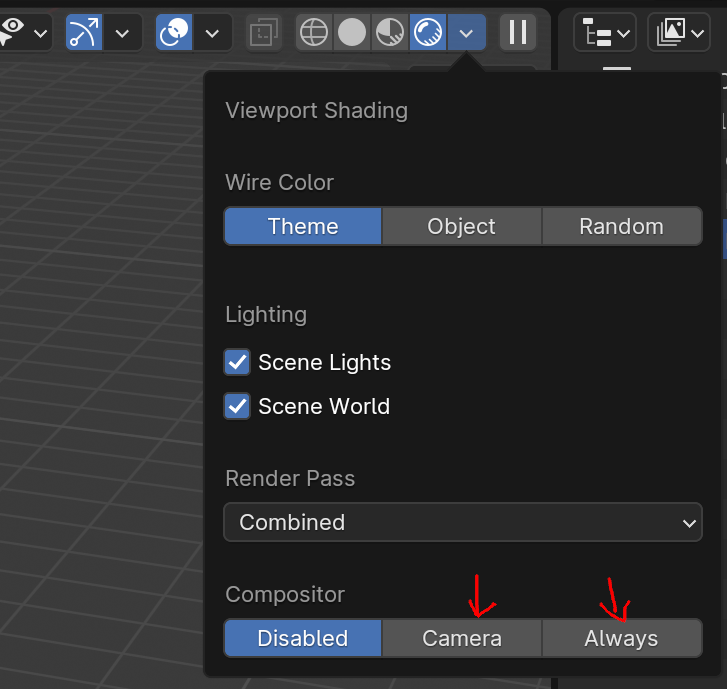
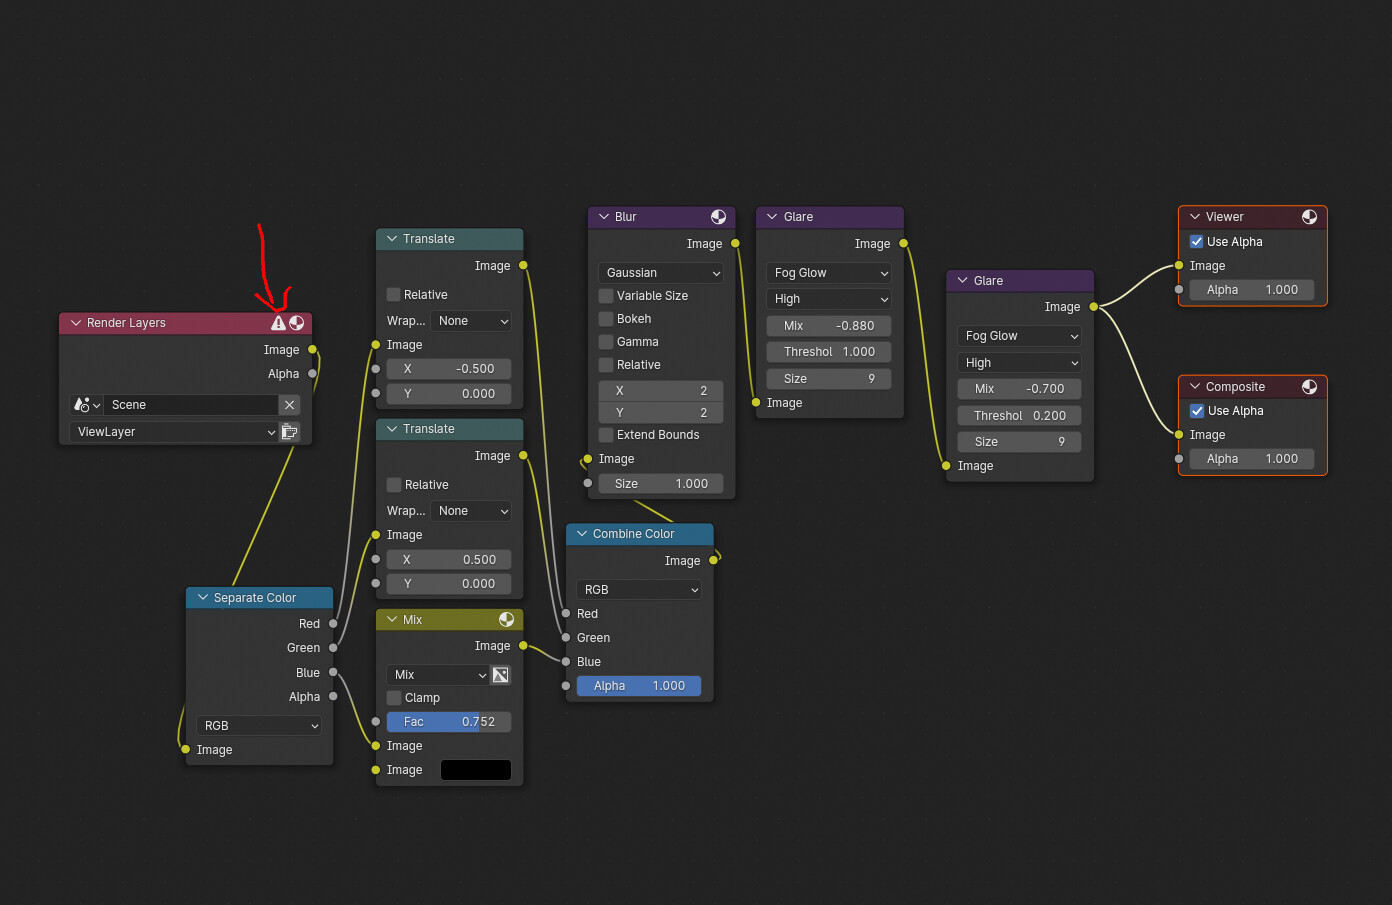
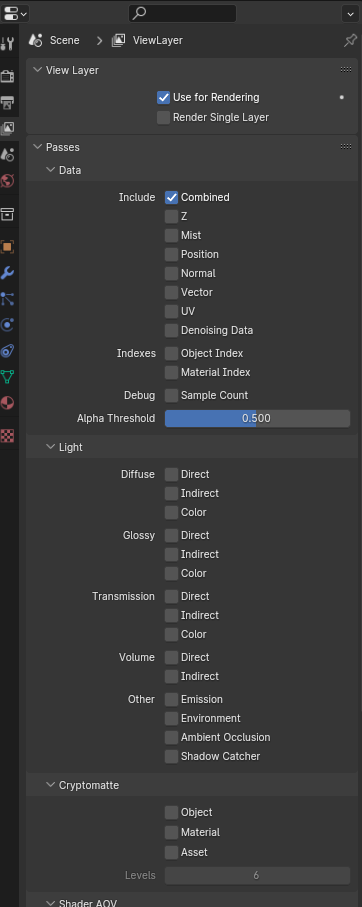
The warning on the Render Layers nodes states “Render passes not supported in Viewport Compositor”. The Compositor is set to “Always” in the Viewport and my passes are setup as in the picture below.
If i understood correctly you are having more of the effects from compositor in the viewport than the final render… Weird!
My first suspicion is you updated the nodes and cause of the warning you’re seeing an old composition in the viewport cause it’s not trying to update?!! Try hit f12 again to see if it gets rid of that warning.
In the compositor check if use node is selected on top if that’s disabled blender will skip that in final render.
And in the property panel in the tab where you define the path and format gor your render go down in post processing/pipline and see if compositor is check. (Sorry off computer to make a screenshot for u)
The two previous steps are just to check if your compositor nodes are running running!
Open an image editor windows. On top where you usualy see the image name. Click the arrow and choose “viewer node” that will show you in real time the result of your compositor.
If i understood correctly you are having more of the effects from compositor in the viewport than the final render… Weird!
Yes, precisely!
My first suspicion is you updated the nodes and cause of the warning you’re seeing an old composition in the viewport cause it’s not trying to update?!! Try hit f12 again to see if it gets rid of that warning.
Ok, I did that but I got no change.
In the compositor check if use node is selected on top if that’s disabled blender will skip that in final render.
“Use Nodes” was already ticked, and the warning sign would disappear when unticked. With “Use Nodes” ticked, I have restarted Blender and curiously the warning sign is gone, but the render still doesn’t show what is displayed on the viewport.
And in the property panel in the tab where you define the path and format gor your render go down in post processing/pipline and see if compositor is check.
Yes, it’s been on from the start.
Open an image editor windows. On top where you usualy see the image name. Click the arrow and choose “viewer node” that will show you in real time the result of your compositor.
Ok, I did this as well and still does not show as it’s displayed in the viewport.
Weird case uh?
ok. one of those cases that i want so bad to teleport and be there to see it by myself. please doesn’t hesitate if you can share the scene file.
one other thing check the visibility of your objects isn’t there an object that your effects depends on, that is active on viewport and not in render?
did you use any volume? either an object there or the world camera?
can’t remember if mentioned if it was cycles or eevee…
forgot to mention in earl;ier post nothing wrong with your passes. the default combined pass
Yes, the viewport compositor is still very much a work in progress. The algorithm used in the Glare node isn’t feasible at speed in the viewport, so the glow you see in the realtime preview is a different implementation, closer to the Eevee bloom—resulting in a mismatch between the preview and final render. The devs obviously don’t consider this ideal, and are looking into options to better unify them, but for now, you’ll have to work with the node bloom, doing test renders and adjusting your settings as needed (like adjusting the threshold, or making your materials brighter), or re-run your rendered image back through Eevee to get bloom in a second pass.
one other thing check the visibility of your objects isn’t there an object that your effects depends on, that is active on viewport and not in render?
did you use any volume? either an object there or the world camera?
can’t remember if mentioned if it was cycles or eevee…
Actually, I had the objects visibility covered as well, all set to visible in viewport and for rendering, as well as Modifiers.
I’m using a few volumes, that I disabled and and test rendered also, but the problem persisted. Goes without saying i’m in Cycles i suppose eheh
Thanks a lot for your time and support, it’s really appreciated!
Yes, the viewport compositor is still very much a work in progress. The algorithm used in the Glare node isn’t feasible at speed in the viewport, so the glow you see in the realtime preview is a different implementation, closer to the Eevee bloom—resulting in a mismatch between the preview and final render. The devs obviously don’t consider this ideal, and are looking into options to better unify them, but for now, you’ll have to work with the node bloom, doing test renders and adjusting your settings as needed (like adjusting the threshold, or making your materials brighter), or re-run your rendered image back through Eevee to get bloom in a second pass.
Ok, that’s good to know! I’ll look into the Bloom node, I wasn’t aware there’s one! Thanks a lot!
There isn’t, that’s not what I said. The realtime compositor is an in-progress attempt to mimic the functionality of the main compositor, which means cut corners, workarounds, and areas that aren’t yet complete. If you add a Glare node in the compositor, the real-time compositor will show you an approximation of what that will look like once composited, but since it can’t use the Glare node’s actual algorithm, it uses a different one, similar to the post-processing bloom Eevee uses, which is only for preview and will be replaced by the effects of the real Glare node upon rendering.
So, like I said, your options* are 1. use the glare actually produced by the Glare node, disregarding what you see in the viewport compositor and doing test renders to see how your adjustments are actually affecting the resultant glare or 2. render your shot, without glare, as an EXR and bring it back into Blender as an image plane, rendered in Eevee, with bloom toggled on, and make your final glow adjustments there.
*Assuming you’re determined to stay in Blender, and not hop over to a dedicated compositing program, which is always there as another option—but that’s a separate concern: your question was about the Blender compositor, so my answer is about the Blender compositor.
(You can also build your own exponential glow by stacking blurs (blurs of exponentially increasing sizes, added on top in exponentially decreasing amounts)—here’s a basic implementation: expoglow node.blend (1.6 MB))
Thanks a lot for all the extra information and suggestions, I really appreciate it!
Yes I want to stick with Blender. I like the idea of rendering the shot in Cycles without glare and then import the image and make the final glow adjustments in Eevee, I will try it out for sure!
On the .blend file you have provided, the glow effect in the final render is really close to what the Viewport shows, that’s awesome, thanks a lot for sharing it