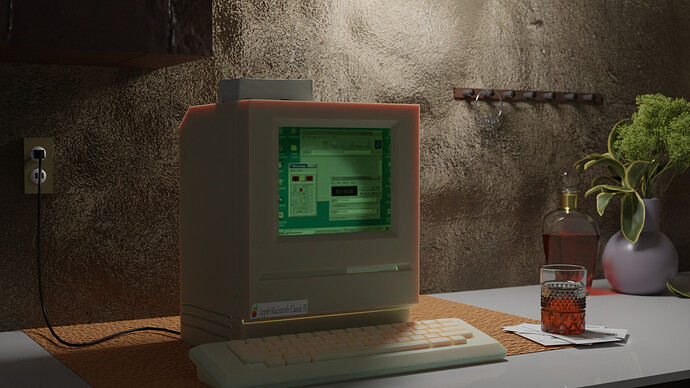
Heyy, i have been trying my hardest to learn how to nail photorealistic renders. Ive watched tons of youtube tutorials from blenderguru and Ryan King. And i still get flat looking and cartoonish textures. I don’t know what to do ? I was up all night trying to work on this and it still came out wierd.
Hello and welcome to blender artists !
It’s not that bad, but yeah a lot of little things are off.
Best in that case is to work on shading only first, because there are issues in both shading and texturing.
Try to nail down the shading first without textures. Only one principled and find bests settings there.
How each surface react to light.
The lighting may be improved a bit but seems ok-ish.
And finallly add back textures and fix issues there.
Most visible issues about shading :
The computer plastic show SSS, you should avoid it in this case, if you need some highlight contours it’s more lighting that should provide it.
Computer screen is emitting light, therefore it shouldn’t receive shadows.
The vase seems off, but hard to tell what material you’re mimicking, seems a bit too rough, did you use metallic there ? metallic should be either 0 or 1.
The wall is probably a bit too glossy, you may increase roughness.
About modeling :
Double check object proportions, the glass for instance seems a bit small compared to the keyboard.
Some objects works well together, like the bottle and the vase, the bottle and the glass. But glass and keyboard seems off to me. But I’m not 100% sure. Put an human reference in your scene and double check everything.
Some bevels will help to catch light better where you have sharp corners, like on the table, maybe on the computer. (hard to tell because the SSS give a kind of beveling effect).
About textures :
In general you have too strong bumps, that tend to ruin the shading (the wall and fabric on the table).
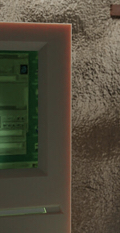
The box on the wall on the left corner of the screen show a lot less texture density than the wall :
Details are a bit too smooth , where they are ultra crisp on the wall.
Some parts are really defined like the wall, but the table/computer show no textures at all.
Try to add small details and subtle imperfections on everything.
It’s like with the scale, you need to have each objects to be coherent among each others.
Try to lower the details on that wall, even if the textures is kind of nice, but it’s too dense compared to everything else.
Last advice :
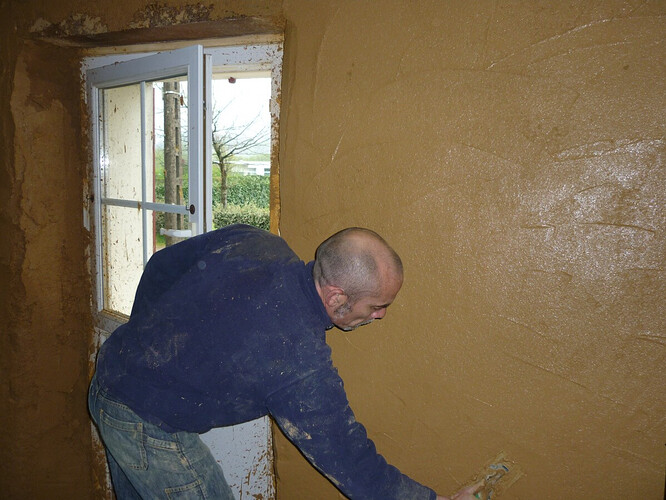
Use photo reference for materials, like with the wall : the materials is interesting, but it’s hard to tell what it is, it’s closer to wet mud rather than a modern painted wall :
You’re on the right path, but because there are many little mistakes all over they tends to add up . Giving a weird result. But on each element it’s not that off .
Good luck,
@sozap Thank you so much for taking out your time to reply me. I have thoroughly read through your advice and would research on every topic you brought up.
• From the wall texture being the most to every other texture seeming smooth and simple.
• Using photo references.
• Bevel.
• Shading ( i didn’t quite understand this and what SSS means but i’ll do my research on them).
• object porportions.
• screen is meant to emit light.
SSS means subsurface scattering. It’s when light “bleeds” through a surface, creating a partial translucency. It’s what you see if you hold a flashlight up to the thin skin between your thumb and fingers, or what you’d see if you held a flashlight behind a gummy bear. Or sun light through a leaf. Or you can see it on snow sometimes.
Hard plastics don’t have SSS, neither do metals, it’s almost exclusively organic materials that do.
This right here:

See how you can see a bit of red light bleeding through the edge of the plastic? This plastic looks like it’s made out of gummy bear. Since that SSS is the default “skin red”, I’m assuming you used a Principled BSDF for that plastic material and turned up the subsurface (maybe by accident.) towards the top of that node, there’s a field that says “Subsurface Scattering”- turn that to 0 to fix the plastic ![]()
Cool !
If you find a bit too hard to address all these, you may want to take a break from this scene and work on simpler subject first.
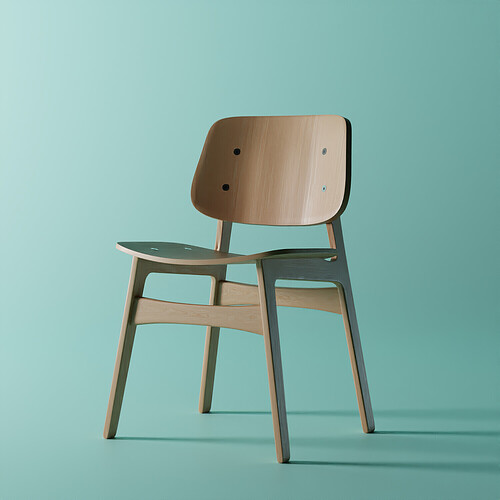
Like only the computer on a simple studio like presentation, like so :
That way you focus only on a few materials ( plastic + screen) at a time.
And do that for different props, like something metallic , some fruits, a milk bottle etc…
Pick a simple subject that covers one or two type of material with a simple modeling.
It will be simpler to get them right because you’ll focus on one or two cases at a time.
Then eventually you can look at putting everything together in a more complex scene.
More complex scene like here doesn’t make a huge difference, but it’s just more problem to solve and that can be a bit frustrating, because even when you get like 70% right, you still get these nasty 30% that may ruin the show.
Doing simpler subjects may help you to stay motivated and build confidence, you’ll get quickly a better sense of what to do to get a realistic result, and it will be easier to grow in complexity after that.
Good luck !
An important aspect of @sozap 's reply is scale. A common mistake (and heaven knows I was guilty of the same for far too long) is to eyeball relative sizes of objects. Don’t do that, build your assets to real world size and scale. It matters, and it affects almost everything else (light, materials etc.)
Research the size of your objects. For example, a whiskey glass is likely to be around 7cm tall and 5 - 6 cm diameter at the brim. Pay attention to these sizes for literally everything. Photorealism will not be achieved if the sizes and dimensions are wrong.
And whilst the advice re SSS was correct, it isn’t correct that plastic has none. It is just so insignificant that you won’t tell. But for SSS in organic objects, again, size and scale is important.
@joseph Okay like thumb and flashlight. Always felt that was blood i was seeing growing up and not light passing through:joy:![]() .
.
Yes i used the principal bsdf. I felt i could get that plastic look from it since some plastics are really basic. Just saw it my subsurface scattering was at a 1.5. Turned it down to 0.
Thank you so so much for taking out your time to reply my thread.
@joseph Okay like thumb and flashlight. Always felt that was blood i was seeing growing up and not light passing through:joy:![]() .
.
Yes i used the principal bsdf. I felt i could get that plastic look from it since some plastics are really basic. Just saw it my subsurface scattering was at a 1.5. Turned it down to 0.
Thank you for taking out your time to reply my thread.
@sozap Thank you. Because i won’t lie after 4 videos and tweaking here and there on the project i am 0% motivated. I’ll work on something else propably a toaster on a kitchen counter and get back to this when i feel that morning motivation.
@Roken Yup im guilty. used my eyes to scale the objects. I acctually even increased the whiskey glass size. Was like hmmm a whiskey cup cant be this small except this is a giant computer or a really tiny glass. I don’t even know how my eyes missed the proportions completely. I would start using real life scales from now on. I’ll add it to things i learned today. THANKS FOR SHARING YOUR PRO TIPS EVERYONE. I don’t take this for granted.


