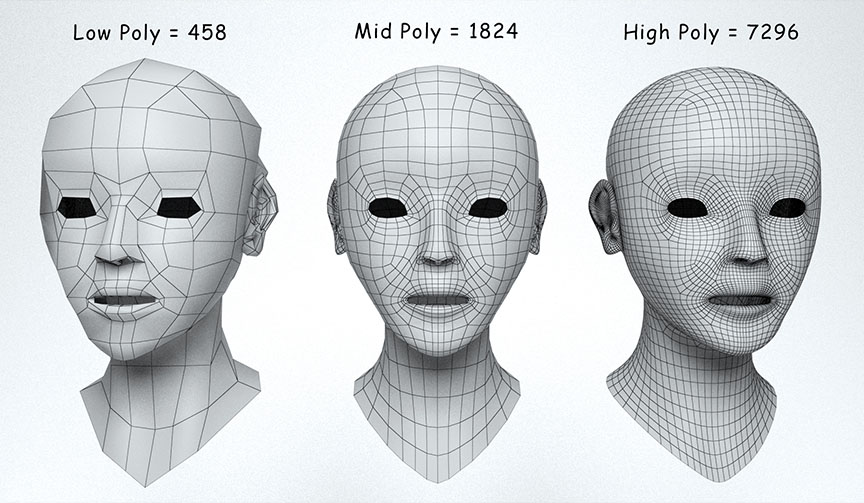
I have created a high-poly character, then made the retopo to have its low-poly version. By default the edges of the low-poly makes its shape way sharp/boxy. Could you help what can I do to keep the details of the original high poly model inthe retopologized version?
I know about two options, both using Shrinkwrap modifier, but neither of them worked for me 100%ly:
First to drop a Subd Surf. mod. over the low-poly modell, then using the Shrinkwrap modifier, while tying its shape to the high-poly model. Looking at the visual details, the result would be fine in this version, as the low-poly mesh has now enough subdivisions to have the details projected on it nicely. But to achieve it, Subdivision S. raises geometry four times, and by this, the whole figure is not really low-poly anymore (having the poly-count around 50k).
The other method uses Shrinkwrap mod. the similar way and uses Smooth Shading to get better visuals details. Poly-count doesn’t change at all, in this way, and overall it creates a quite smooth result. However Smooth shading brings up some artifacts at some points, also the mesh keeps some edges almost as sharp as previously.
Could you perhaps suggest a workflow what I can use for some better results? Thank you in advance
…without any example given the hard truth is simply:
You are responsible to make a lowpoly version which has fitting geometry to show an “unbroken” outline put making a lower poly version (subdividing the low poly version… is contradictionary to the whole idea…).
Thank you for the reply. I’ve got some advanced models, I have purchased for study reasons which are low poly meshes, and were made on the basis of a really detailed high poly original mesh. They contain about 15K polies, while their visual details would suggest poly count over 100k. I’m trying to get to know how to achieve such results.
When I’m creating a retopo version from a detailed high poly figure I sculpted, I end up with a low-poly version with good topology, which looks like any “raw” low-poly characters at around 15K poly count. “Raw” meaning no any post-processing have been made to reflect better details from the hig-poly original. Boxy-sharp edges all over the mesh.
To solve this issue, so far I have found the 2 methods I’ve described earlier, which turned out not to be the way to go. The idea you find contradictory in its logic (which I somewhat understand) was advised by one of the most popular online tutors on Youtube. If you know any better perhaps, could you advise some details of it? Thank you
Thank you again, that was the process I’ve been doing. Making a high poly sculpt, then made a retopology to have a low poly version of it. As you mentioned Shrinkwrap, that was also what I tried to use to transfer the high-poly details unto the low-poly, but as I said, it didn’t give good results. This is why I turned to the community, whether someone could perhaps advise how to move ahead from here. But thank you again.
Hi, I think that inevitably when you reduce the polygon count you will lose some details from the original sculpting. You might be able to reproduce some fine details with textures?
Yes, as said, of course you lose details going high to low poly- this is the inherent nature of resolution. To maintain details, you need to bake those details to images such as a normal map, a color map, a height map, etc.
Thank you both for your reply.Tomorrow I’ll post some pictures,because I think, without it the situation doesn’t really get through. But briefly it’s not that I get a huge amount of details from the high-poly which I find still lacking.It’s that shrinkwrap doesn’t give a whole lot of difference itself to the low-poly,without further use of Subdiv.surf., or shade smooth. And even with the latters,there are few areas where low poly details remain totally unchanged.
Thank you for your answer. I am aware that by default a mesh should bend only if it has enough topology (vertices) that allows it. But as I said, I tried to use some more advanced characters as samples, which I have purchased to learn from them. These samples with similar poly count and face arrangement do give a look as a high-poly, detailed character has. If I try to recreate that look, by making a low poly retopo (with similar topology), using a shrinkwrap over the model would not provide results any close to the samples.
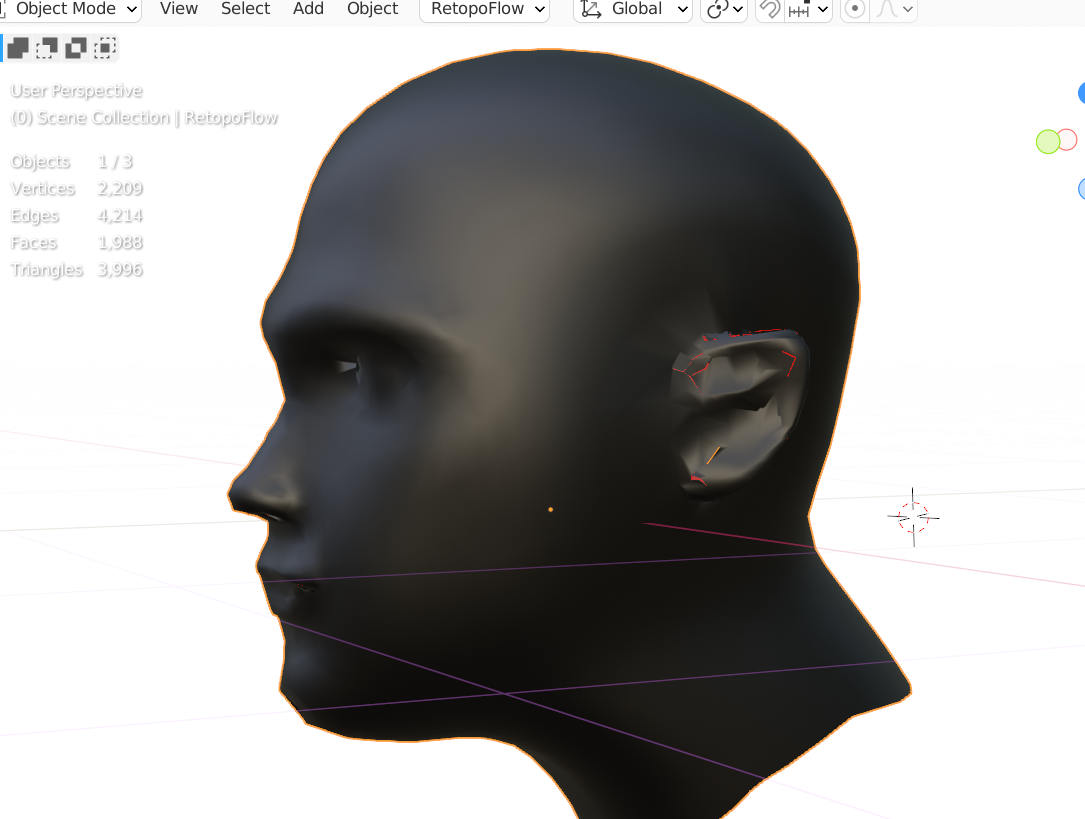
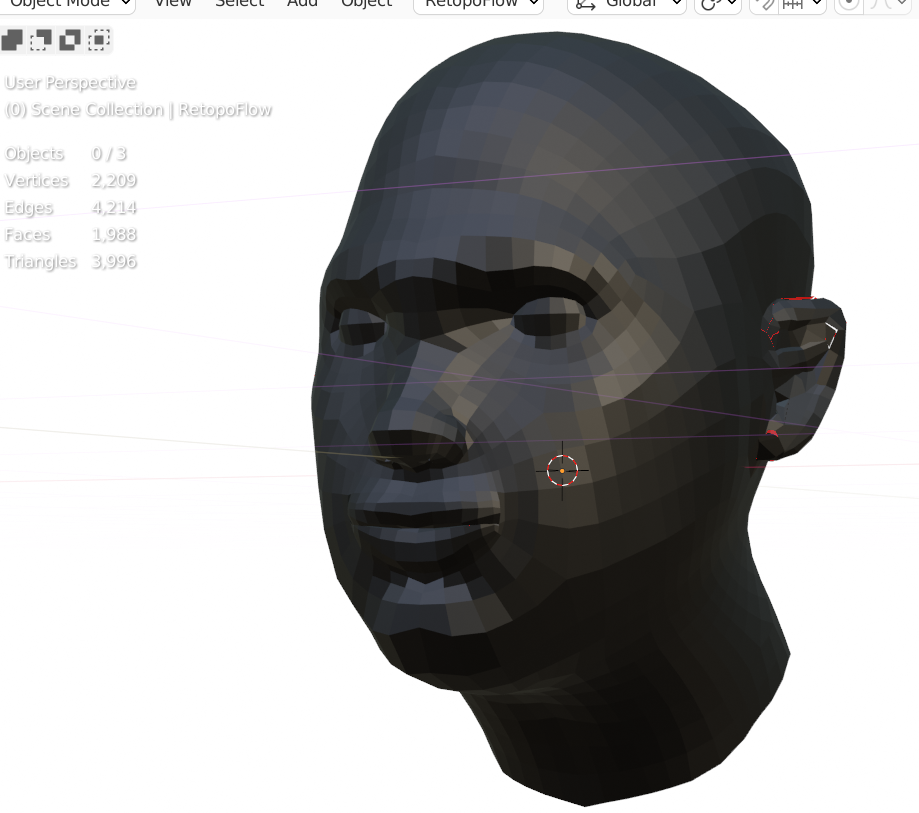
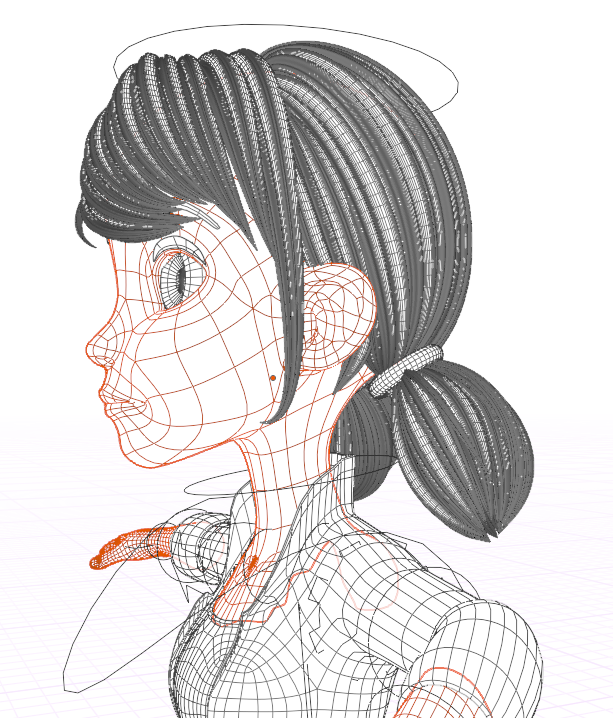
I’m uploading some pictures, perhaps it helps to describe the situation. One picture is about a cartoony girl I used as a sample. The other four is the retopo I made (please don’t mind the sculpting “quality”, it’s a first attempt at a head sculpt and retopo). Two pictures show the “raw” retopo, as poly-modelling was closed, while the other two is where I used the shrinkwrap on it (with and without smooth shading).
As you can see the sample has a look close to a high-poly detailed character (smoothly bending faces, no sharp edges, etc.). While when I try to project the high-poly details from my original sculpt to my retopo with a shrinkwrap, there are areas where the low-poly details remain quite the same as in their raw state (like you see the chin from sideview).
Could you please help what can I do differently, to level up the visual details of the retopo/LP version? The sample character doesn’t have normal maps for skin texture, its creator used something else, I’m trying to find a possible solution for that.
First solution is to make low poly and high poly as parallel. You should have be able to adjust modifers as non destructive editing and disable/adjust bevel, subdivide and remesh to get low poly version you need.
Other solution is to use my favourite tool for this using software called “instant meshes”.
So I import high poly there and retopology to desired polygon density to get low poly quad version. After that I bake high poly mesh details to normal maps to use on low poly version.
Third option would be to use decimate and shrinkwrapping.
It is important to know that polycount doesn’t matter. Polygon density at target screen resolution matters. I’ve found that about 8x8 texel normal map can be used in one quad and that doesn’t affect much visually if texel size about target resolution pixel size in screen space. To keep rendering fast, triangle area should be above 10 pixels.
So basicly one asset geometry + textures work optimally quite narrow distance from camera. You can of course have higher resolution textures without issues as long as total amount of data transferred isn’t too big for memory bandwidth or storage space while having lower resolution geometry, but you can also have nicely two or three LOD levels to geometry dynamically and even more to some closeups.
If there isn’t good source files to adjust modifiers to get low poly version out and having some complex CAD-asset with holes or something, I don’t have yet find good solution to adjust geometry nicely.
I believe I found solution to complex objects too. In sculpting mode there is dynamic topology that allows adjust manually desired resolution to mesh. End result would be triangles.
Hi Grunt, thank you for the advise, but dyntopo would not be a solution for this current issue,as the project would need both low poly count, and a good topology for animation. Triangulated topology would not work in animation.
You mentioned you use shrinkwrap in similar issues.Do you know perhaps a workflow which projects high-poly details to the low poly retopo? It would be a great deal of help,if you could share it. Thank you
Hi,that’s right, I did not include a picture of the high-poly sculpt I created,and what the basis was to do the retopo.
What I included was a picture about a low poly cartoony girl character,which I used as a sample.It is a LP mesh,but it does havea look of a high poly character.This is the visual I try to recreate,like by projecting HP details from the original modell to the LP retopo.
The other pictures were all about my LP retopo,as in their raw state,plus with the use of a shrinkwrap.Unfortunatelly, the shrinkwrap did not do the job,to transfer the HP details to the retopo model.
Do you know perhaps a method I should try for this result? Thank you
BTW the girls head image is deceiving because the lines represent the low poly but the face actually has a subdivision modifier on it but lines not showing it.
I will post an example soon.
