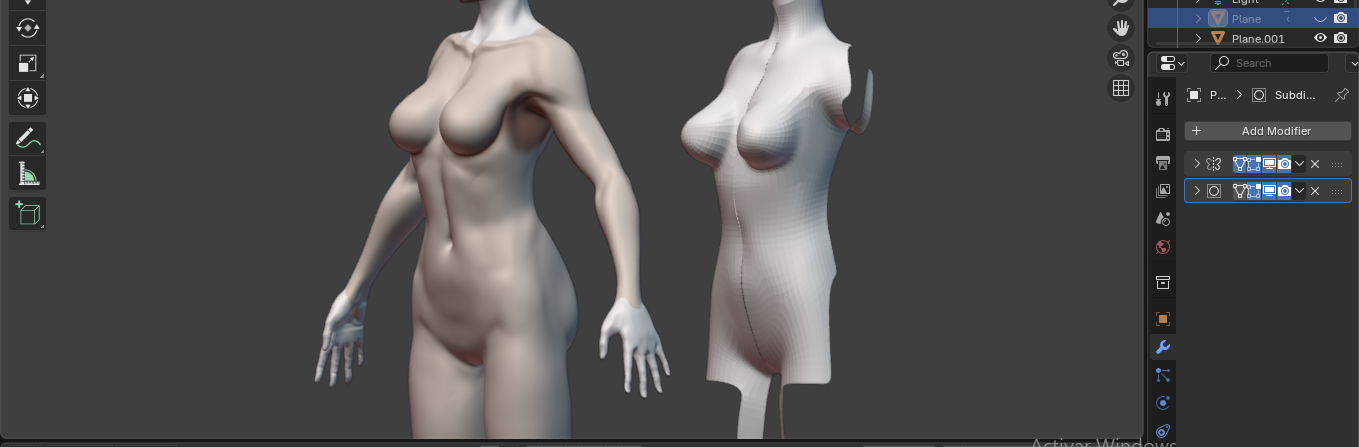
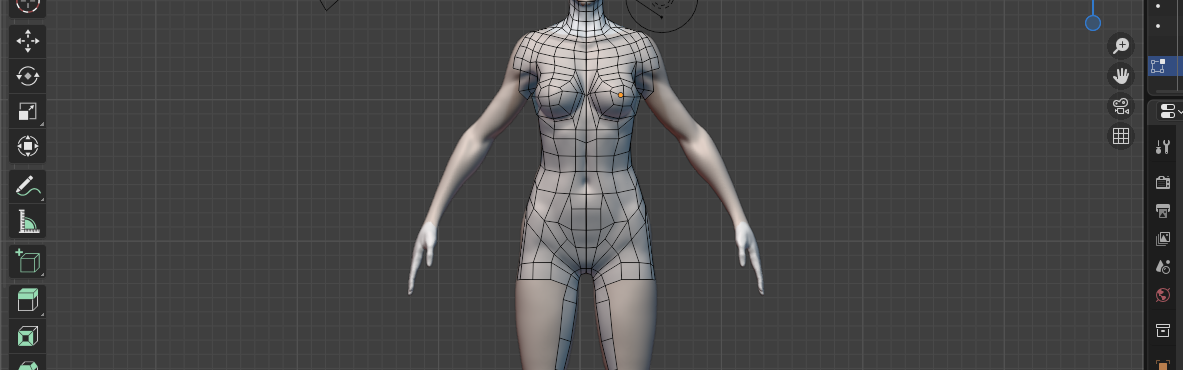
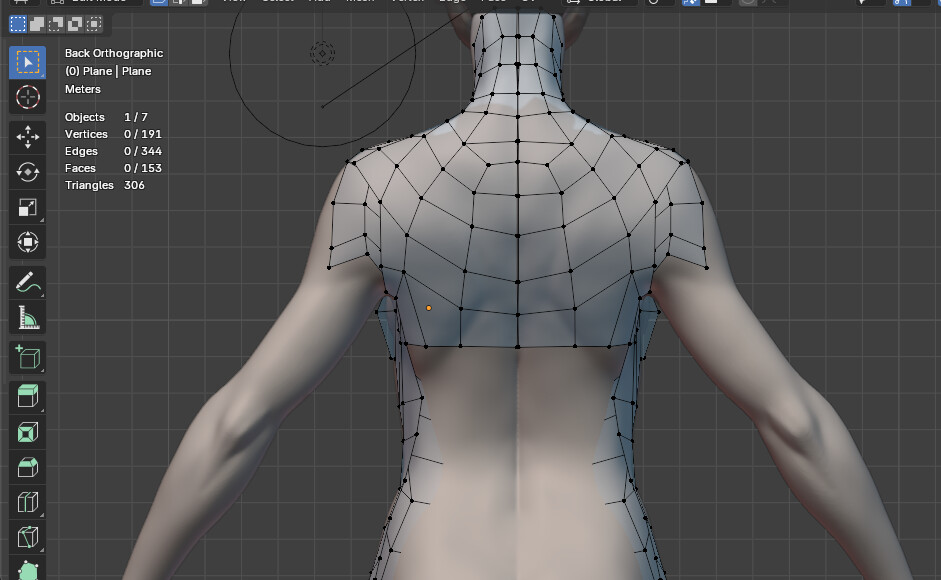
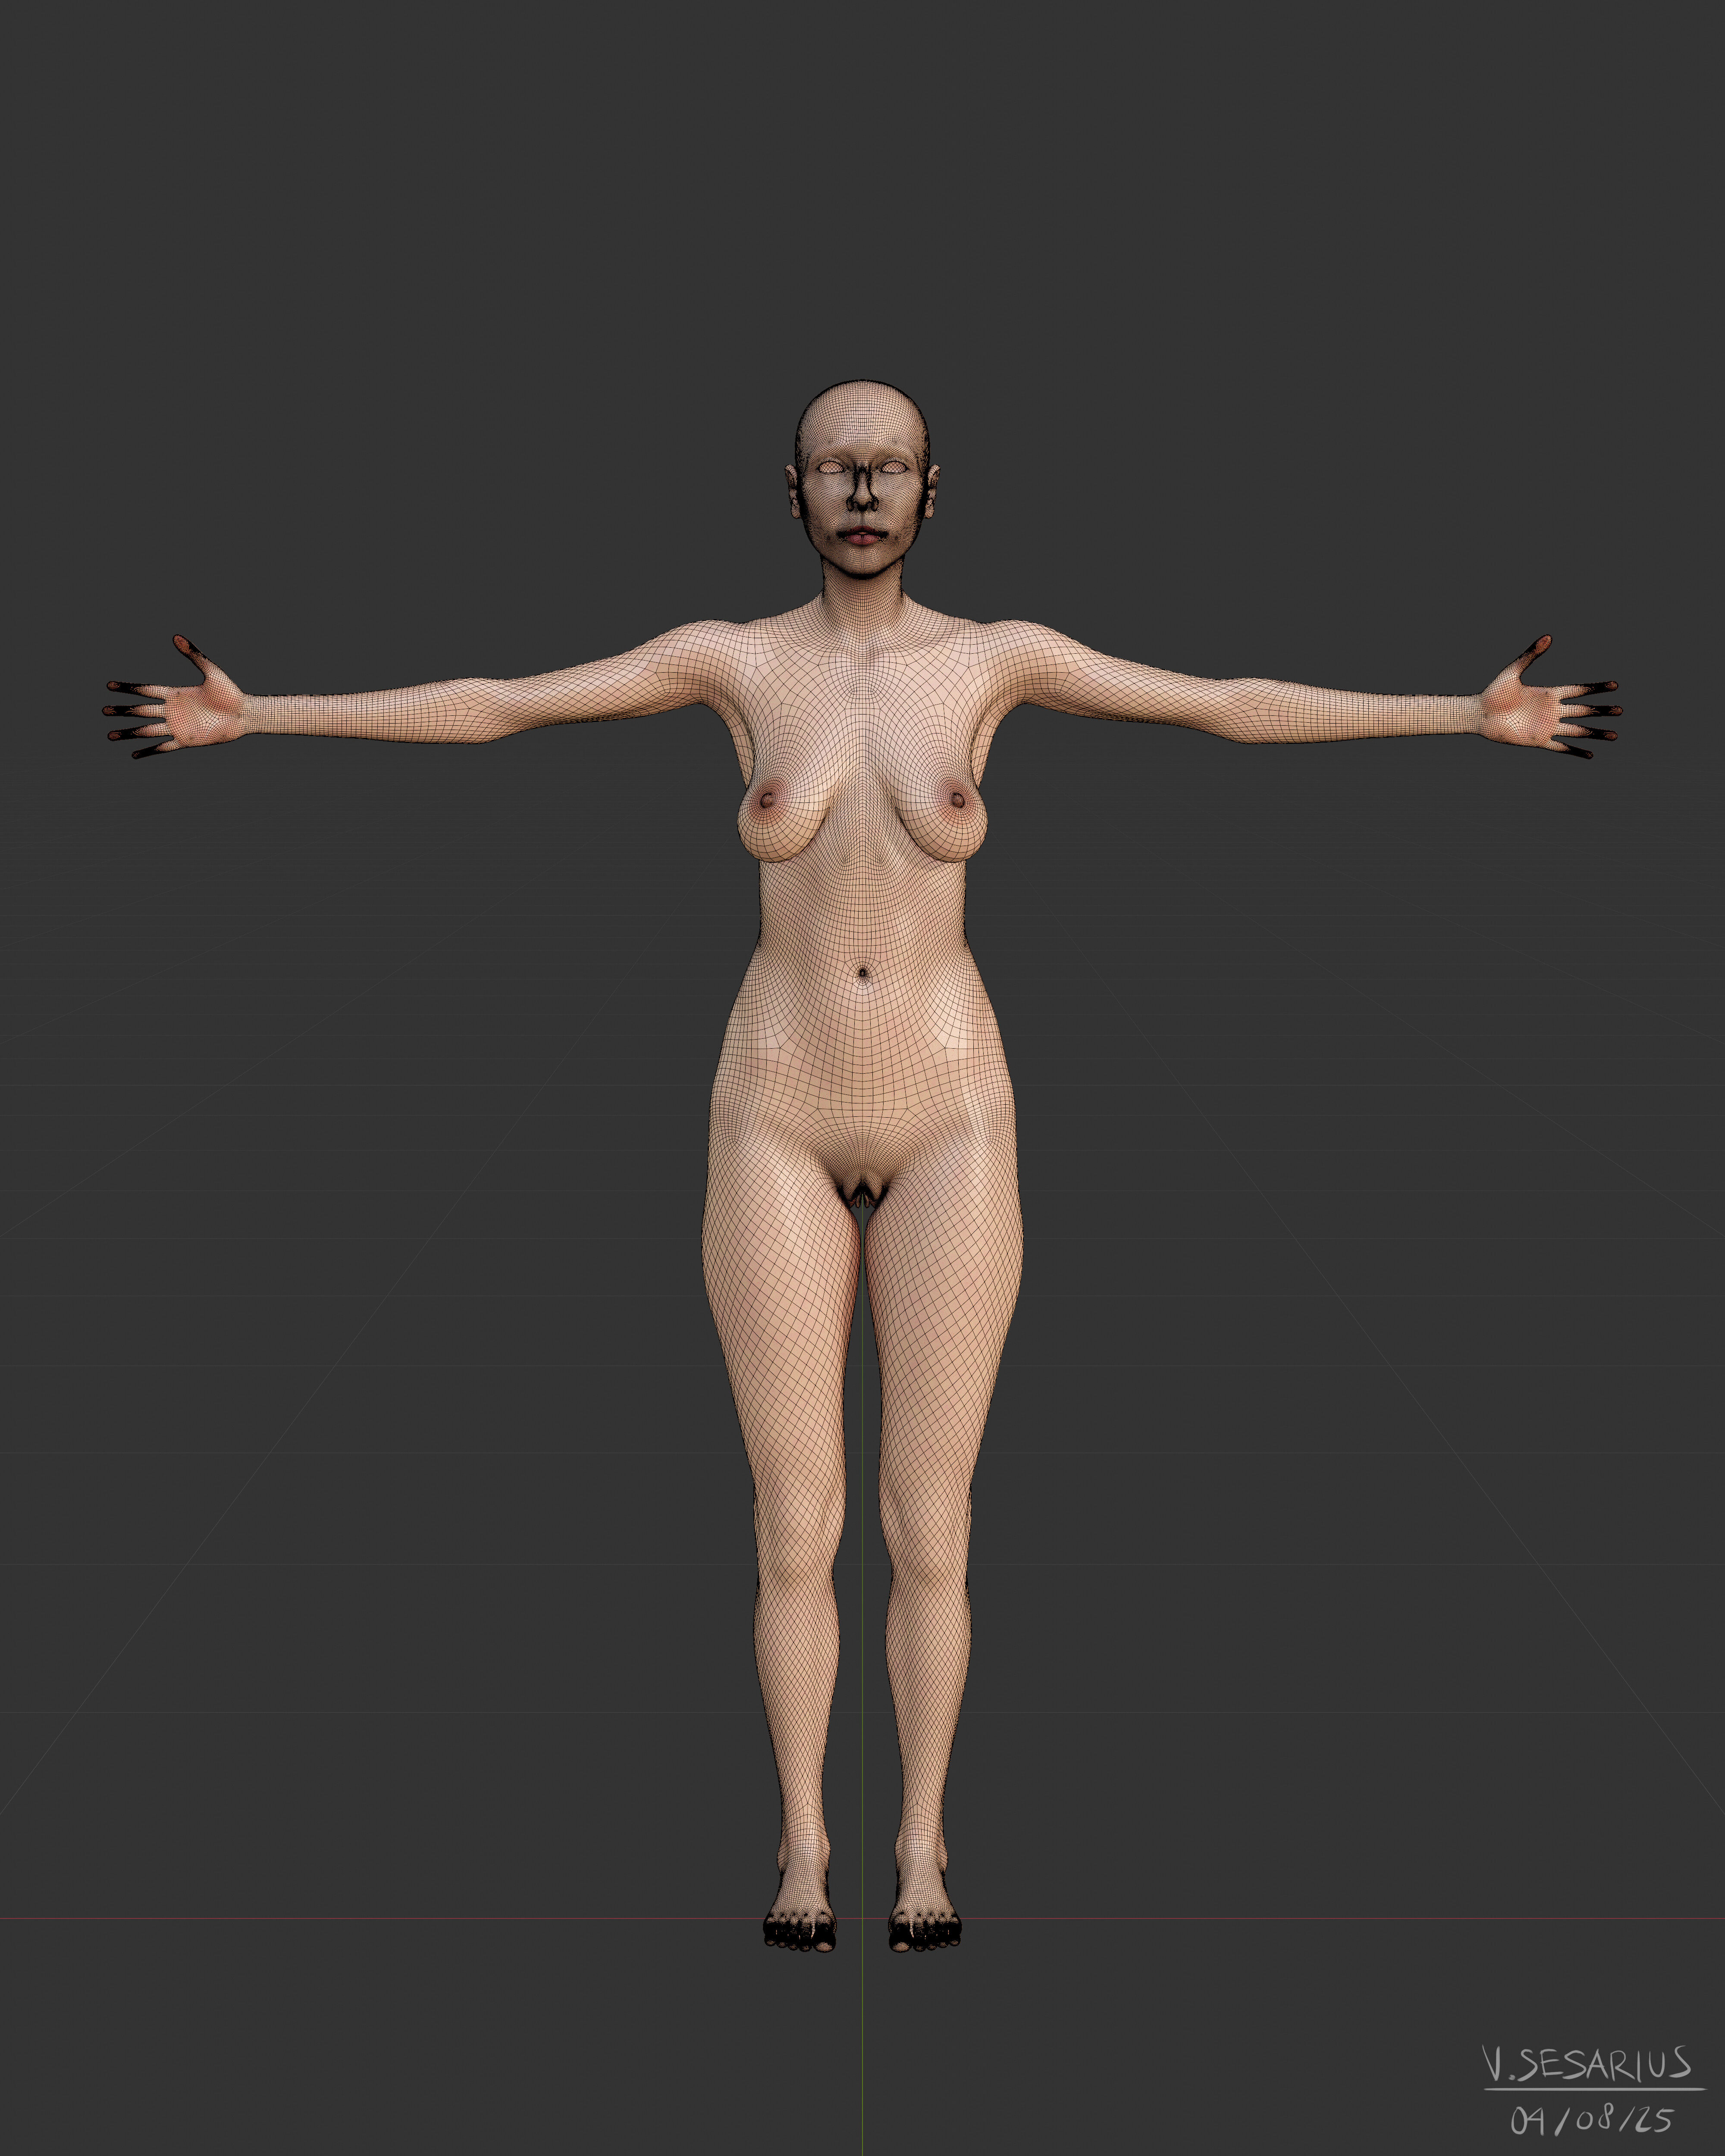
Hi everyone, I don’t really know how to proceed with retopology, I’m pretty lost, to be honest. The topology looks really weird from my perspective.
If there’s someone who can give me a hand with this i’ll apprieciate it.
For the most part, this seems pretty good. The main areas that could be improved in my opinion:

There are some really long and stretched faces between the breasts. But maybe using only 8 sides is a bit small of a number compared with the general polygon density of the rest? Though this might be fine, as long as you don’t need to sculpt in that area.
The area between the hip an thigh has some rather stretched faces. Maybe move the loops a bit to get more even density.
The base of the arm. It’s hard to tell what’s going on from this angle, but the edge flow seems mismatched for the shape. Maybe the edge loops should follow the direction and lines of the muscles a bit more?
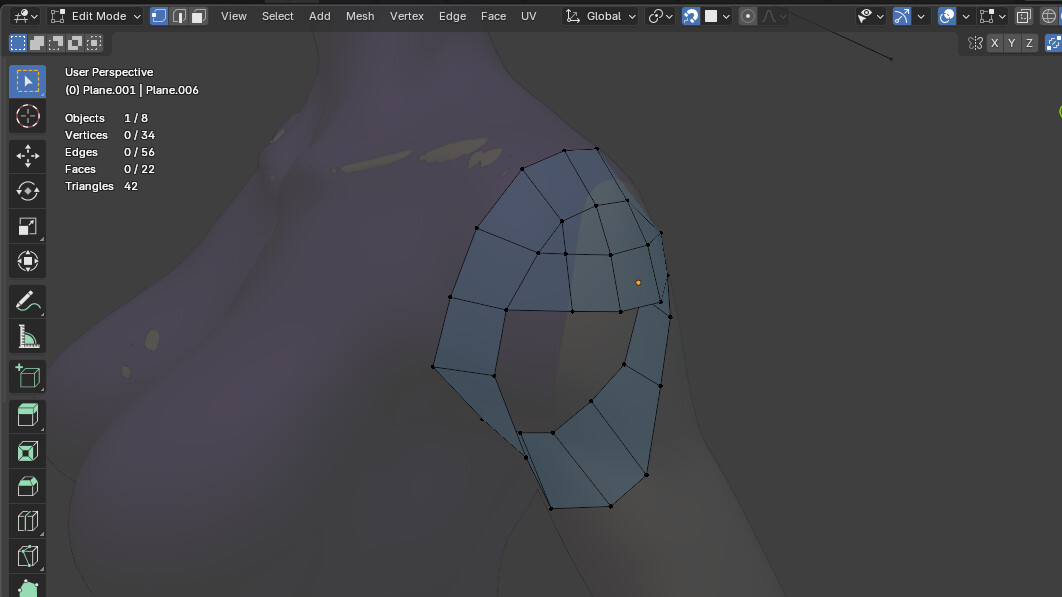
That’s a start, though the shoulder seems a bit chaotic. I would probably start by putting some clean edge loops that go all the way around the shoulder, then fill the spaces between those loops.
Here is how I would do a shoulder cleanly.
1- Start by wrapping some loops around the top of the shoulder and around the edge of the muscle. You may need to leave some space between the shoulder and the body at first to do this.
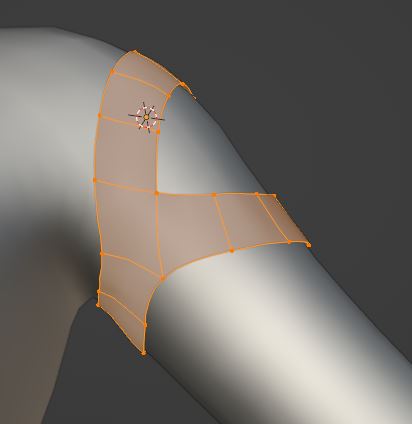
2- Fill the corner of the shoulder with the most even pattern possible.

3- Extrude the edge to make the arm.

I would first make this pattern, then see how I can connect it to the body. It’s often easier in retopology to first lay the important loops, then connect them by filling the spaces in between, rather than starting from a single point and extruding everything outward.
I’ll give it a shot, by the way, Should i use Face Project or Face Nearest?
When i duplicate the mesh to see how it was going, it looked more like a 59’s deformed Barbie. At least in the breasts.
I usually prefer project, with both positive and negative checked. Nearest can move your vertices around a bit more, but they are probably exactly where you want them if you used snapping to place them.
I like to apply the shrinkrap modifier and re-create it from time to time, it ensures what you see is really where the geometry truly is.
Sorry, thought you were talking about the shrinkrap modifier. But snapping has the same settings too and should have similar logic.
I see more than one triangle.
You could remove them by either collapsing all the edges in front of the triangle until you reach the border, or by adding an extra loop cut to split one edge of the triangle into an additional corner. In both cases, the solution is basically to change the number of sides to the arm.
Since you already have an object to work from, my first advice would be to not start with polygons and instead draw out a plan.
It’s much easier and faster to draw and erase lines at first then deleting and re-creating faces.
I made a video that shows this, starting at around the half way mark if you don’t care about all the initial info.

Try to keep quads in your topology, not rectangles, and ensure the topology flows around the characteristic muscle elements of the body. I recommend checking out this Pinterest board for inspiration: https://br.pinterest.com/baejjura/anatomy/retopology-retopoflow/. I love using colorful guidelines from Pinterest and have my own board that I refer to when needed.
Once you’ve created an element like a hand, leg, or head, save it as an asset. In future projects, reuse these ready-made elements. Some things will likely need to be redone, but many can be reused effectively.
You could try using a higher resolution: for example, start with two larger faces, then apply Subdivision and Shrinkwrap to match the original model. I think it’s often better to begin with larger faces and add new edge loops rather than creating a detailed topology from scratch right away. But it really depends on what works best for you. These are just my loose thoughts—don’t take them as gospel!
Ideally yes, but at the same time the muscle groups tend to define form more, which can then not always actually deform the best. While something totally focused on good deformation, then doesn’t always look right from an anatomy point of view.
Without something like a full muscle simulation system underneath, it’s very much a balancing act between the two.
I totally rebuilt my base mesh, using everything I learned from making my first character and I then spent a lot of time pose testing, just to make sure it all looked and worked right.
While that body image is OK, I’d personally have a few issues with it and would very much question just how well it would deform in some cases.
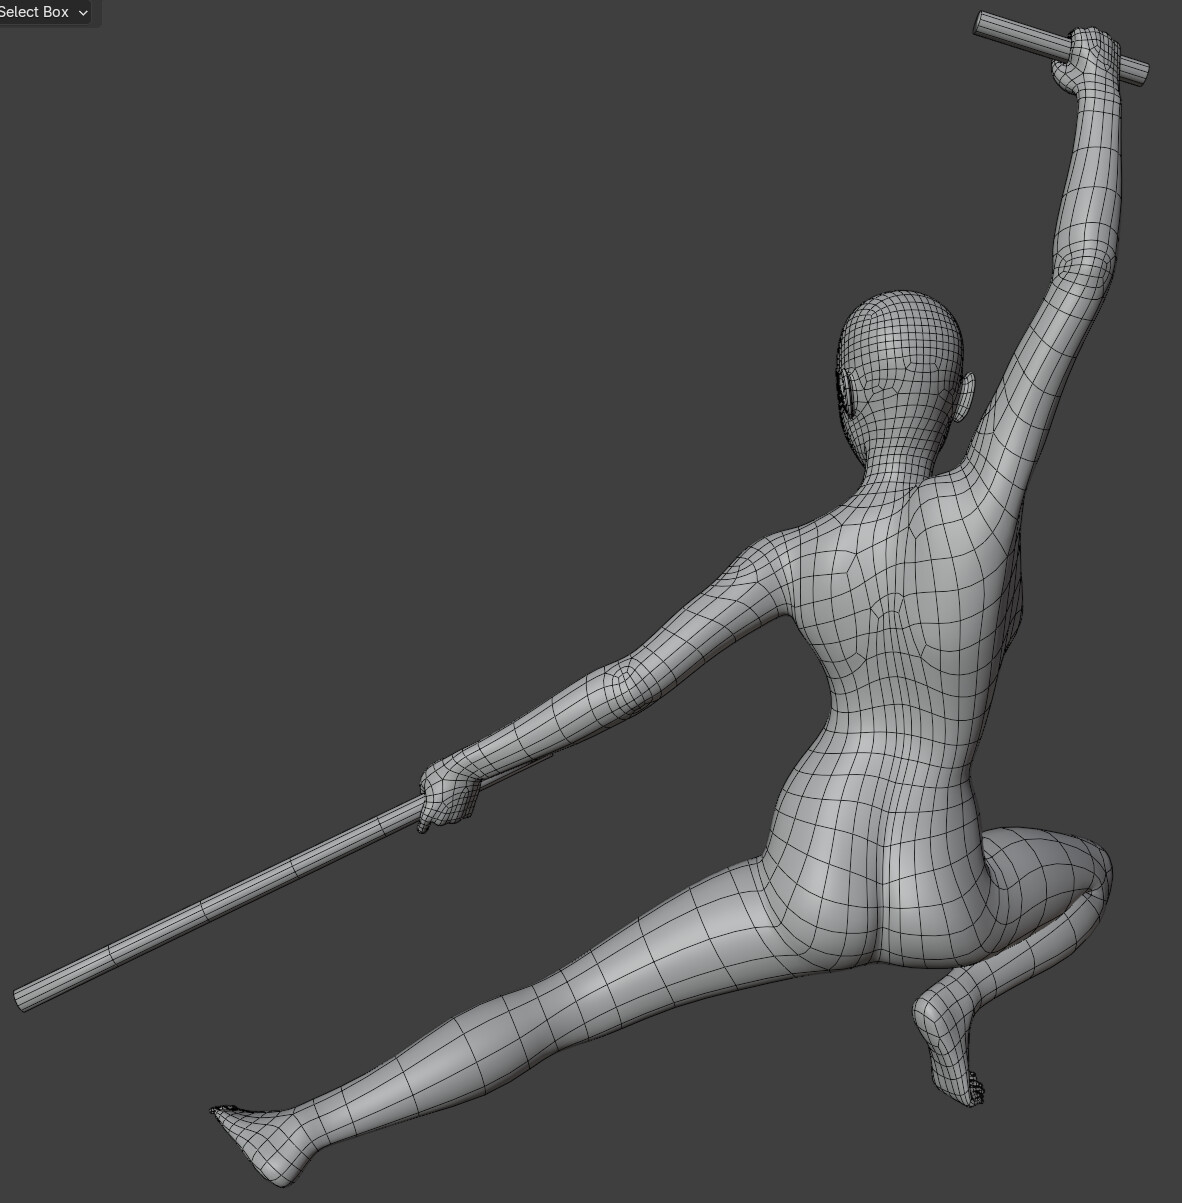
Here’s a wireframe image of one of my test poses for my base mesh.
Not saying its perfect, but I feel it has a good balance between form and function. One thing to note is that there are no shapekeys/drivers in the model. It’s all topology and rig, with some preserve volume and a corrective smooth modifier.
I’ve been looking for hours good guides in Pinterest, i couldn’t find them, specially for arms and legs, u know, with this saves me a lot for real :‘’')
Human Body Topology has always been a pain, especially without a reference you can trace with. And the thing is, there’s not a lot of resources out there that provide such definitive reference, especially for more of a realistic and natural kind.
So here’s the most recent human body topology that I’m working on.
It is a little bit dense (138k faces), and it’s kind of a radical approach compared to most base meshes, especially for the limbs.
I always find normal limbs are kind of problematic because they’re usually made like a tube. So I figured, and it turns out to be true, that it’s better to make the limbs more like a fishnet, in that it’s mostly diagonal.
Though it makes everything much more complex, it’s worth it if you’re looking for a way to make your model look more natural, and less stiff.
138k?? Damn that’s rough, I would stress out if I had to work with 138k polys.
The mesh I’m working on is only for small animations, but indeed, my topology isn’t the great thing. I can use as reference yours because it looks good to be honest, I’m pretty lost right now with my mesh.
If that’s a ‘final’ mesh, then its massively dense. It would be a nightmare to rig, weight paint and UV unwrap, slow as hell to animate and I’d have serious concerns about deformation. As all the mesh would pinch and collapse or balloon out on itself.
I’m sure it would have a fair amount of details and if the plan is to then bake most of that down to normal, etc maps then that’s fine, but as a general base mesh it seems a little extreme.
Yeah, that’s probably why I mentioned about 138k thing, because I thought that might be an issue  .
.
By the way, what is the final goal for this 3D model of yours? And we haven’t talked about style yet actually. Is it going to be more of realism, or more of cartoony?
Well, once i finish my model, i wanna try to animate it and try out with different styles except for realism, my pc is good but i don’t wanna take it to it’s limits xD
Maybe something like Arcane or something like that.
Did you know that Blender Studio has an official free base mesh bundle? You can download it here. There’s a ‘realistic’ and ‘stylized’ version inside for
Honestly, it is a pretty good base mesh to start with.