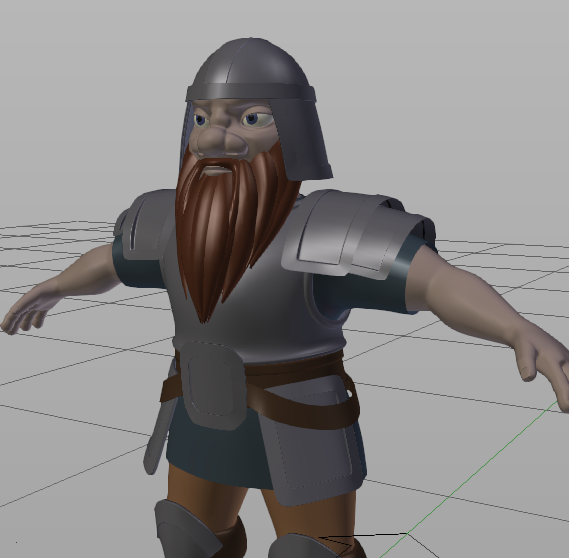
I’m working on my second character rig. This character has a beard made from geometry, not particles to help reduce render times. I’m trying to figure out the best way to rig the beard where it appears to follow the face but appears to apply to the laws of physics - basically hangs from the face. I am also hoping to not use blender physics - I think this is where my biggest challenge is.
So far I have tried using bones - IK with a “track to” constraint pointing to a bone located in the center of the chest. I have also looked into the jiggle armature addon http://www.blendernation.com/2016/04/28/jigglearmature-add-on/ but did not really give the result i was looking for.
Any ideas how to rig a mesh beard with relatively realistic movement? Or and I going to need to use physics on this one?
An Armature seems the way to go as the sections of the beard are rather thick for the most part, but it would also allow for small motion in the finer ends. I assume you are looking for some sort of a cyclic animation? Rather than relying on automated or semi-automated methods, you could simply keyframe the motion into the beard’s armature, giving you 100% control over the effect and allowing you to create a looped sequence for situations like walking or running.
Not exactly the same, but look at the paint bucket used by the character in my 2012 Show Reel (in my sig). All the “physics” of the bucket swinging in her hand is really keyframes. I needed absolute control over the timing of this motion and had that using the traditional approach.
Yeah, I could do it all key frame, I was hoping to get at least a partial automated system. Thinking about it I could use action constraints for simple head movements and key frame anything more complex.
does anyone know if it is possible to use vertex parenting along with parenting and weighted to bones? The above is good for general motions of the head, but I also need to think about the subtle motions of lip syncing as well.
Lip synch is generally accomplished with either control-driven shape keys or a facial rig. Not sure how vertex parenting would be useful in that context, but please elucidate, always open to new ideas.
BTW, for semi-automation of reactions in the beard to something like head motions, consider also using Transformation constraints, which permit using one bone’s Transform to control another bone’s Transform even if they are of a different nature, such as Scale controlling Location or Rotation. Whether setting these up is more efficient than straight keyframing is something you’d have to evaluate.
OK, here is a thought - and I will try the next chance I get - But I would appreciate any input and additional suggestions before I try it.
1 - vertex parent each mesh that makes up the beard. This would solve for the movements of the mouth and any other facial posing.
2 - mesh deform the beard as a whole. The deform mesh would be parented to the head (possibly). This would make keying or simple action constraint animation easier for general head movement.
Does this make any sense or is it an absurd approach?
Chimpmasque - I think you were posting at the same time I was… yes, lip syncing is done with shape keys or a facial rig. The vertex parenting would only come into play as a means for the beard mesh to move as I animate the face. So any adjustments to the face mesh from the animating would affect the beard mesh.
I’ll take a look at the transform constraint. I have not use it before, so I don’t know a lot about it.
My apologies, I was assuming face & beard are a unit mesh. In any case, it seems to me that an Armature solution is simplest. Remember that a mesh can be influenced by more than one Armature, so something like a face rig could affect the beard during any lip-synch sequences, could even contain “beard bones” for that purpose if necessary. In fact a rig incorporating both facial motion and beard motion sounds like a good way to go, but then, I really like all-bone face rigs.
Also keep in mind that a mesh can be influenced by both an Armature & physics, so in combination with beard bones, a little cloth sim could introduce the reactive motion that head turns produce. I did that with the Soft Body sim to introduce jiggle in portions of my muscle system meshes so they would react to the walking motion of the armature.
Thanks again Chimpmasque. Never knew you could use two separate armatures for the same mesh. Learning something new every day.
Well, I have a couple things I can try.
Once Armatures became an entry in the Modifier stack, it became a lot easier to implement. I’m currently using three on my figures, overall body, face and a specialty rig to control certain portions of the mesh that kept trying to go rogue on me
Come to think of it, my face rig is actually two rigs, one for facial motion and one for eye control. Rigs R Us!
'Cause I’m crazy? Well, aside from that, my project at that time was the beginning of a Universal Figures concept, a pair of fully-rigged generic human models that could be modified as needed to create different characters, with an emphasis on naturalism – not cartoony and not slavishly trying for absolute physical reality, just well-proportioned and suitable for modification, expressly designed to be animated.
Shape keys are a very good method for character expressions, but they are limited to 1) that particular character and 2) the library of shapes that is developed prior to animation. My goals for Universal Figures was to have a mechanism for expressive faces that could span a range of characters and be near-infinitely malleable, as is the human face. Rigs can be reshaped as needed, and if well-designed, can offer both broad and fine control over facial surfaces. Shape keys are fixed and apply to only one topology and face shape.
I had already started modifying the Sintel rig with constraints to help with muscle definition and deformation, and my success there suggested a similar approach to a facial rig. So, I built the Othello face rig, and have been using it ever since. It is not a perfect solution, but it works well enough for my purposes, and, if needed, can be combined with Shape Keys.
Using two armature has it’s place and it can be very useful. For what you are doing, I would not recommend it. Two armatures means two separate actions and that will just complicate things unnecessarily for you. Add new bones to your rig to control the beard.
If you want to use two armatures there is a checkbox for multi armature use in the armature modifier.
Using two armature used to be a necessity for making things like IK spline rigs work. The new dependency graph changes should have made this unnecessary.
Anyhoo… I would just add some simple bone chains and use curved bones for each section of the beard. Action constraints or drivers could be set up easily to move the mustache up when the lip moves up, in or out. Curved bones have a nice even deformation that would be perfect for the beard and mustache.
Setting up each bone chain with IK could be an option. Having a “master” control for the beard where several IK targets are parented to that master control. You would still have control over every IK chain target as well.
Just some thoughts. Keep it simple to start. You can always complicate things later.
Good luck!
One last piece of advice: Make a new copy (or several) of your file and try a few things out and test a few different ideas before changing your main file or rig.
The overall body armature is top of the list. It has a neck bone that deforms the entire head as a unit at about weight 0.50. The Face Armature is a child of this bone as well, so when the head turns the Face Armature follows. The Face Armature root bone has the Eye Armature as a child, and this controls eye rotations. The reason for this Russian dolls approach is to keep each armature from becoming too complex and to divide the influences into “specialties.” It also makes adjusting the rigs to account for character difference easier, important for my Universal Figures concept.
In general the bones controlled by one armature don’t share any influence with those of one of the others, making weight painting much easier, but it is possible. I do not use Auto-Normalize, since that would mess up such shared influences.
For example, in my female rig I had to develop another specialty Armature, only three bones, a Root & 2 deformers. Because I use Shrinkwrap to conform the breasts to Soft Body objects in the muscle system, it tends to flatten the nipples completely, looking a bit odd, so I reduced the Shrinkwrap weight in those two small areas, but then the nipples don’t follow the Soft Body motion well, looking even more odd. The specialty armature uses Envelopes rather than Vertex Weights, and its 2 bones are constrained to follow two empties vertex parented to the SB breast objects at the nipple region. Thus I get the Soft Body motion without needing the same Shrinkwrap weight for that small number of vertices. A little extra work, yes, but it solved the problem. BTW, using bones in the main body Armature to do the same thing led to cyclic dependencies that messed up everything, so a separate Armature was a necessity.
Having two armatures in the stack means you have to establish the proper hierarchy, with one being the “master” and any others subservient to it somehow, through parenting in most cases (the nipples armature is parented to a spine bone in the main body armature). Can’t parent the same mesh to two armatures, so instead you pass the parenting “down the chain” so to speak, and keep vertex weight influences separate whenever possible.
PS. Just read DanPro’s comment & I agree 110%, maybe even 115%. Multiple armatures are possible but not always a good idea. For me it provides adaptable solutions but that doesn’t mean it is optimal for every rigging problem.
Thanks to both of you again.
So if I use bones for the beard, does that automatically imply I need to use a bone based facial rig (at least around them mouth)? I was originally going to use shapekeys (I have found several videos tuts on that method and feel I understand it). Doing a quick search for bone based face rigs are coming up short - I’ll keep looking though.
Can it be done with shapekeys and bones for beard? I have been trying but have not found a good way that looks good.
The reason I asked about using two armatures is I already have my character rigged using the rigify addon. To utilize a bone face rig I was thinking of using the face portion of the Pichipoy rig and combining it with what I already have. I did a quick test of that face rig and it worked pretty well and I think I could just join it to the rig I already have. I’ll test it and see what I get.
I do like the idea of a bone based face rig as a means of adding it to several characters (and I have several more to make) and then supplementing it with corrective shape keys if necessary.
@chimpmasque - you said you use your othello face rig. I checked it out and looks pretty good. I’ll take a closer look later and, if you are OK with it, maybe use it for this character. Any suggestions on workflow for adapting it to my character?
Hey stop monkeyin’ around wit’ my handle! Lose that “m”!
Yes, I published the Othello face rig for anyone to use, abuse and improve as they see fit, so go nuts. Adaptation should be as simple as making the face rig a child of whatever bone in the body rig controls the entire head, and then careful weight painting. Auto-weighting will need some massaging, I’m sure, if you use that option.
Keep in mind that the rig is intended to imitate human muscles of the face, so there may not be as much one-to-one correspondence between bones and areas of influence as in a regular rig.
Facial mesh topology has a big influence on how successful any method, rig or shape keys, can work, so optimize that as much as you can.
Facial rigs can be all shapekey based, all bone based or a hybrid of the two. Each has it’s strengths and weaknesses.
I feel like I am entering dangerous territory by giving you any further advice about which to use. I think either way, you are in for some extra work that you had not planned for.
I think you need to weigh the pros and cons for each method.
Shapekeys: You’ll need to create each facial rig and all shapes from scratch. With several characters this could be a long process. If your final facial rig needs 30 shapekeys, you’ll need to make 30 times the number of characters to get everyone up and running. Then there are bones and drivers to make the rig work. Also, custom bone shapes should be made to make everything look nice.
Bones: You could use the pitchipoy facial rig for all new characters. It would be easy to set up. It’s already part of the rigify system that you are using. Bone driven rigs can take a bit to get used to. Weight painting is a skill you will need to rely on. Also, as Chip mentioned, topology will play a big factor on how well everything deforms. Corrective shapekeys for problem areas are always an option.
I’m not recommending the pitchipoy facial rig over Chip’s Othello rig. I just think It will be easier to setup initially.
If you decide to go with the pitchipoy rig, you’ll need to decide how to finish the two characters you already have time invested in. Two armatures would work, but there is the problem of having to manage both. Combining the facial rig with a current rig could work, but there will definitely be challenges to get everything working together. Generating a new rig with the facial rig would work, but you’d lose any customization you’ve added to the rig up to this point…
I’m not sure any of this helped…Rigging can be frustrating at times.
I know what I would do, but that does not make it right for your situation.
@ chipmasque - Sorry about the handle.
@ Danpro - Yeah, Got a lot of playing around and testing to find which method works for me. I have some thoughts of what I want to do.
By the way, my last Character turned out pretty well and am pleased with it. I found a simple method for the skirt portion that works for my needs and is pretty simple.
Thank again to you both. It has been a great help. I will see what works and post some results. Can’t say how soon that will be though.