Rigging an exagerated mouth

Hi,

How would i go about rigging an over exaggerated face/mouth like in the picture below? I’ve tried rigging the traditional way but obviously it breaks once it reaches a certain part. I’ve tried bendy bones but I cant get good results either.

The only tutorials I can find on youtube are normal proportion face rigging.

2 Likes

use shape keys+drivers+bone (or any object) controls…https://www.youtube.com/watch?v=cc3uoHMo7pA&t

Yes, as Michael said the best bet would be a combination of shapekeys + bone deformation, for cartoony-stylized animation is better to use both as the shapekeys allow you to get specific shapes, while the bone deformation can give you extra control over the deformation.
Also, for more exaggerated deformations you will need a denser mesh and a lot of corrective shapekeys.

1 Like

it seems like a work for bendy bones and perhaps clean the undesired wrinkles with a corrective smooth

also you can add a lattice deforming an specific vertex group for extra control

1 Like

Thanks guys, ill have a go at shape keys

1 Like

I have to say that reading answers like “with bones and morph targets” for a question such as this feels a little bit like answering a question on how to paint by saying you should use a brush.

Yes, those are the tools of the trade but they explain nothing in the way of techniques. Heck, even the video linked on how to drive a single morph target with a bone is miles removed from the example tyko referenced in his question.

I share in the frustration of tyko. Most rigging tutorials are either very basic and deal with really limited and simple deformations or they make use of autoriggers like rigify, blenrig or autorig pro which are hard to reverse engineer.

Even when I look at the blender foundation open movies I don’t think characters with the extreme range of deformation for facial expressions as those in Cloudy with a chance of meatballs (the character in tyko’s example is Brent) were ever created/used.

The reason is that its not at all intuitive or easy to pull of. The shot that tyko used is: https://youtu.be/1epCXLpyzM8?t=30

You can see how the face keeps its shape/contour perfectly and the mesh almost seems to slide along the face. You will never achieve this with a simple linear morph let alone when you start trying to mix them.

The truth is I don’t know how to achieve it either. I have some idea’s of the techniques used but I haven’t been able to build anything remotely working myself (yet).

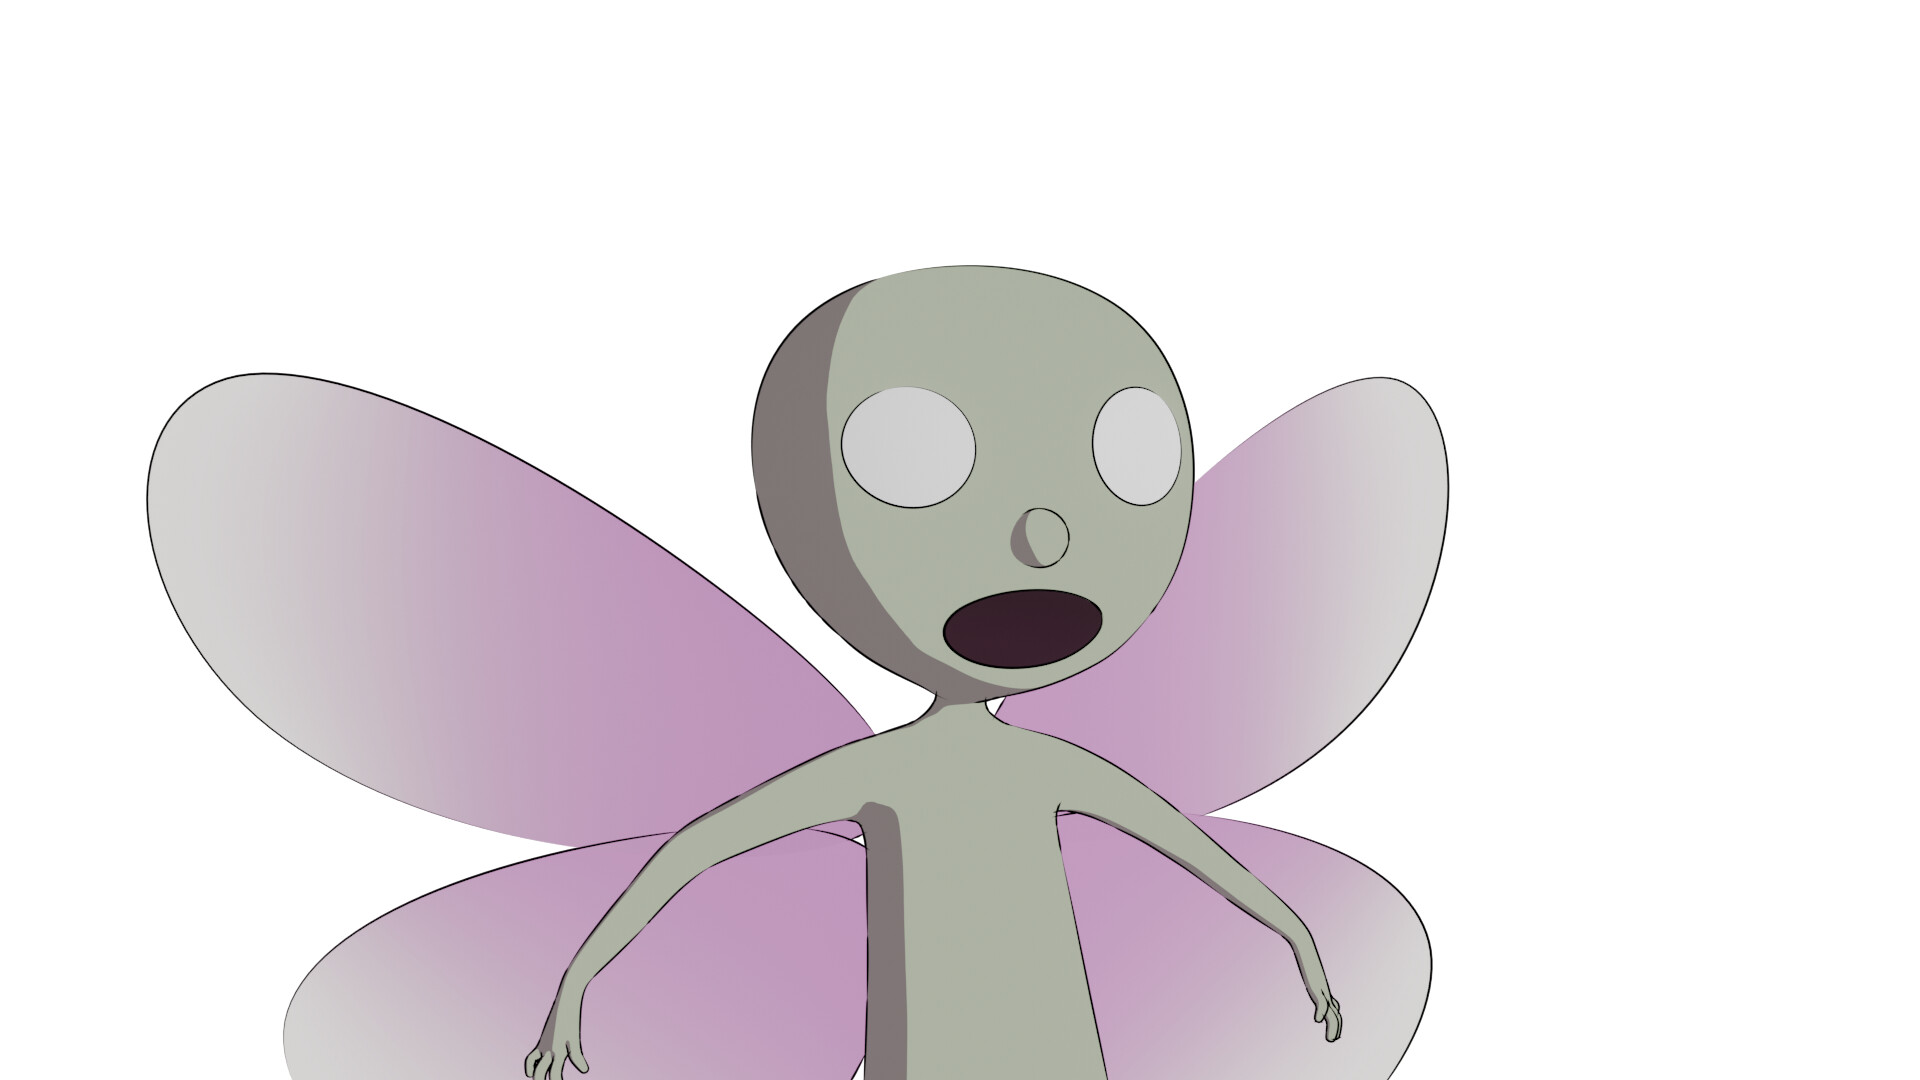
Thankfully the next blender open movie called “Sprite Fright” has a style that is incredibly similar to the style you (and me) are interested in! I don’t know if you have a subscription to blender cloud but if you do you can follow every step in the creation process. From the very first starts/experiments with rigging all the way up to the end where you can download the final files.

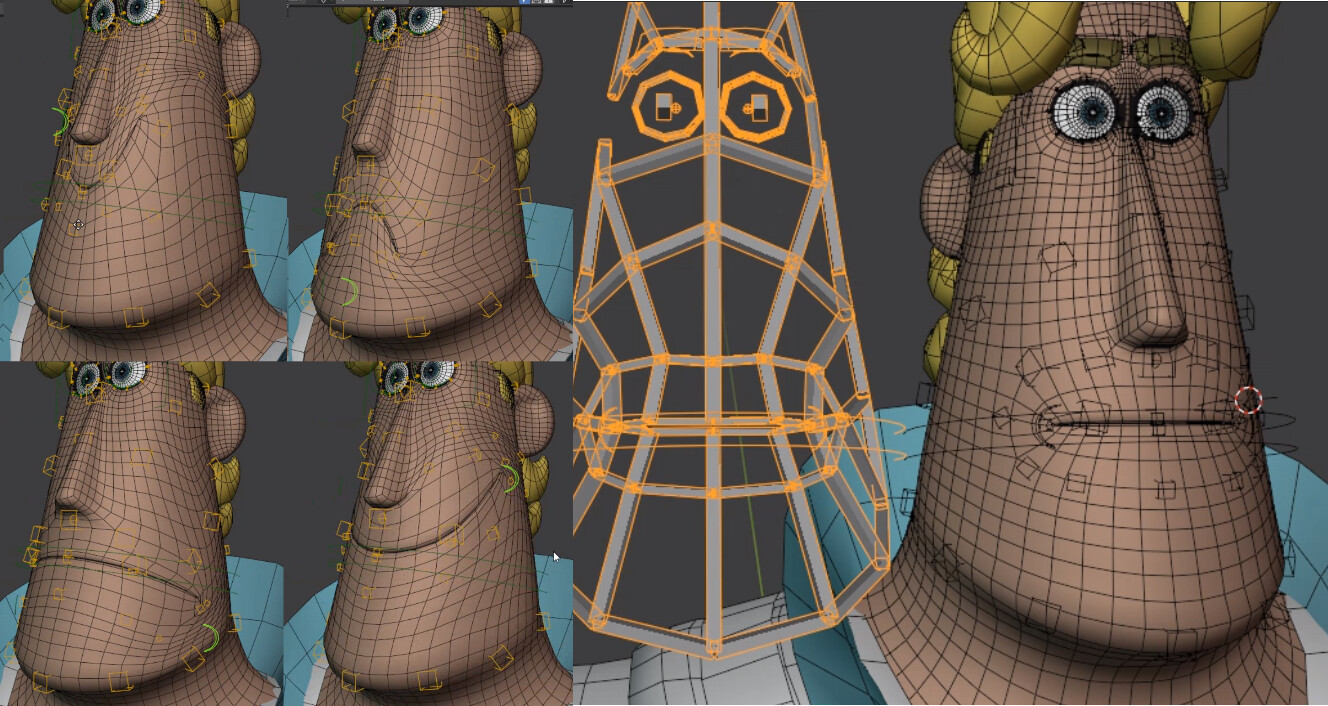
There is even a character that has a somewhat similar face shape to Brent. I don’t think this material is free right now (all the files will be available when its finished though) but I hope the BF won’t mind I share a few screencaps from some of the very early rig test they have on there:

These are extremes for testing but you can see this is pretty close to the range you refer to in your examples. I can tell you that in motion it looks very similar too with the mesh seeming to slide over the face.

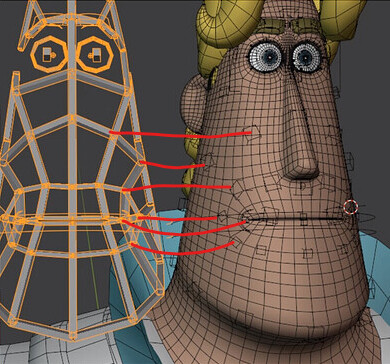
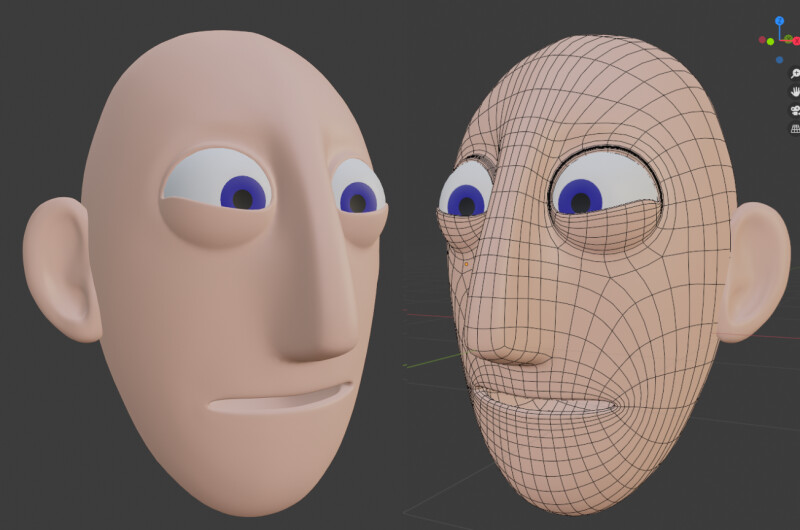
I have the feeling (there isn’t much info accompanying these tests yet) that its essentially a network of bendy bones (see shot on the right). These are not directly manipulated but instead driven together by the crescent shaped control. This means there are actions for, for example the wide mouth shape (what you could use a morph for with simpler rigs).

You can see an action as a small contained animation. So the wide mouth action is not just a linear movement from small to wide. Its actually all the node points of the face network being animated at the same time along the surface to create a smooth transition where the face keeps its shape.

On top of this the rigger who made this uses “corrective actions” for mixing actions. From how I understand it this is used when you mix two actions. Say wide + smile. While these actions may give clean results by themselves they could still distort badly when mixed. So to counter that a “corrective action” is created to smooth the wide + smile actions. So you have an action that is driven by the combination of two other actions who are driven by a single controller on the face. :sweat_smile:

On top of all this you can then have tweak bones. So the little squares you see can be manipulated too if you want to fine tune the results you get with the more global mouth controller. And underneath all that you may have bigger deformers to squash and stretch or bend and twist the entire face.

The rabbit hole goes pretty deep. While I am in no way an expert or even good at this stuff I hope this gives you a little insight in how you would/could use those rigging tools. :slightly_smiling_face:

5 Likes

Yeah you got the nail on the head there.
I need the shapes extreme but also to follow the shape of the head. I’ve been experimenting with duplicating the head and using shrinkwrap mod over it then setting shape keys.

This works to some degree but not great. I need it as smooth as possible because I’m using freestyle lines and any “dimple” produces ugly lines where they shouldn’t be.

I need to improve the topology I think too as the current mesh doesn’t seem to flow well for these movements.

I’ve made some progress but nothing quite like I wanted. I haven’t got a blender cloud sub. I don’t really like the monthly subscription models it was the same as blender cookie, great when you were using it but when you don’t need to use it, it’s just throwing away money.

1 Like

Well… yes, the answers are pretty simple but they do answer the question.

I don’t mean to sound condescending or rude here, but I think it’s a bit naive to expect an in-depth explanation for such a question in a forum because that could easily be a full course of the topic, not only about rigging but also about modeling and topology…
This type of deformation/setup is probably the most complex thing you can attempt to do in rigging, along with full realism. So, if with that answer you still don’t know where to start, then the problem is that you probably don’t understand enough about rigging in the first place.

Now, having said that here’s a VERY simplified summary of one possible way to do it:

  • First, make sure you have a topology that supports the deformation you want to get; the more extreme you go, the more geometry you need.

  • Second, do a simple “muscle” bone layout on top of your character’s face, just like in the image posted above, it’s a structure that covers all the face, and, when set up to roughly mimic the facial muscles it will allow to get quite a bit of shapes and deformations before even adding shapekeys.
    Those “muscle” bones are controlled by the smaller cube controllers you see in the image, look how they correspond to the points where the bigger bones meet.
    image
    These bones are probably parented to the controllers through “Stretch to” constraints.
    (Based on the image, I’d say that rig isn’t using any shapekeys for the bigger mouth shapes, it seems to be all bone-based, look how the geometry starts to look weird on the most extreme poses).

  • Third, create the corrective shapekeys; basically you pose the character however you want and then create one or several shapekeys to fix any weird deformations for each pose, then setup drivers for each shapekey. Something like, if bone_mouthCorner.L moves beyond 10 in Z then activate shape_mouthCorner.L

At this point, if you have painted good weights for the bone deformations and have all the shapekeys you need properly setup, is probably enough to get good deformations on the character.

  • Fourth, if you still need extra control and deformation then you can create tweak bones, which will be parented to the main controllers but can be moved independently to deform smaller sections of the face.

Note that this is just one of the ways you can go about it, is the one I’ve used the most before and based on the image shared by @3dioot it seems to be the type of rig that character has.

The topic is really, really complex, so if such a rig seems too daunting or confusing to do, then is probably better to do studies creating simpler stuff, just to understand the basics first.
Also, Stop Staring by Jason Osipa is a great resource, a bit old but IMO is still one of the best books about facial rigging out there, is for Maya but all the techniques can be ported to Blender.

2 Likes

Thanks for the info. Lots to think about here.

2 Likes

Also, some resources specific to Blender that I’d recommend:
Humane Rigging, old but still pretty solid. Good (or bad?) thing is Blender rigging tools haven’t changed much between versions, so everything is still applicable.
This is probably on youtube too.

The Art Of Effective Rigging In Blender This one avoids the use of rigging addons so it’s pretty in-depth, worth checking out.

DanPro’s youtube channel, also a bit older but it makes everything pretty clear.

Level Pixel Level, also a pretty good set of tutorials.

3 Likes

Look I’m not here to argue but at the same time lets not pull the wool over each others eyes. There is a huge gap between the answers originally supplied in this thread and a full course on the topic. You are honestly proving that point for me with your last reply.

What you responded with was not a course but it was somewhat of a general outline to the approach you would use. As far as answers goes its much more valuable (than the initial answers) since it provides a starting point to work from. So thank you for sharing your time and knowledge in this matter.

I see you just added some additional resources. :slight_smile:

I have done humane rigging and am going through The art of effective Riggin in Blender right now. This means I have a decent grasp of the various rigging components. While I agree that is required for the more advanced setups it does not automatically follow that after finishing that course I can recreate every rig I see. This is where the experience of other people like yourself come in.

I also don’t feel that being new/inexperienced at something should be a reason to shy away from trying. You don’t know what you don’t know until you try.

You seem like a smart guy so I’m certain you see why I made my original point. I am delighted to see this thread take a turn for the better where some more substantial information is being shared. I have been breaking my head over how to approach facial rigs such as this for quite a while and I am excited to see a thread on it.

I plan to post some early working examples soon and hope that tyko and me (and possibly others) can learn as we go. :+1:

1 Like

I wouldn’t bother with combinations of bones, drivers and shapekeys. I agree with @davidrodriguez. You can do it with bendy bones alone (and solid skinning ofc) followed by a little bit of corrective smooth.

I dont even bother creating whole face cages anymore (as in the picture posted by 3dioot). I used to but i hated it. Who likes to skin 200 facial bones right? Check out my WIP thread.

As for the meatball and minion characters as well, they used something like a face plane, following the overall shape of the face (or body in case of minions) and constraint the facial bones to it. Take a look at shrinkwrap for bones.

3 Likes

Ok, I made a little progress that better fits the style im after. It’s FAR from perfect but it’s got promise. I’m using a load of Booleans which I hate doing but its has a nice effect of not deforming anything.

2 Likes

@SidV Interesting approach with the cast modifiers. That is a very light rig from the looks of it and you certainly can’t argue with the results. :slight_smile: Super interesting; I have done nothing with cast modifiers before, I’ll definately look into them. Funny you should mention the shrinkwrap modifier for bones; the current rigger for Sprite Fright (Demeter Dzadik) is experimenting with that as well to get the face cage to slide over the surface of the face correctly. Lots of new idea’s here!

@tyko Good to see you found an approach that works for you! It reminds me a lot of the Settlers project on blender cloud. Its actually completely free; you don’t even need to be registered at blender cloud. It has a somewhat similar style with 2d shapes for mouth and eyes. You can download all the (finished) rigs but there is an actual movie on how to set it up as well.

Settlers project: https://cloud.blender.org/films/settlers/gallery
Set up a spline mouth rig: https://cloud.blender.org/films/settlers/5e7e34049978dd55ffdbd993?asset=2648#comment-7087

In regards to my own project. I’ve been working on a face to figure this stuff out. Its just taking longer then I expected (what else is new). Plus I decided to do the eyes first since Ive always wanted to know how to do “cartoony” eyes with lots of control over the individual eyelids. Its progressing slowly but steady I would say. The mouth is next and I’m very curious what the “simple” approach is going to give me out of the box.

Here is a little progress shot of where I am at with my experiments:

2 Likes