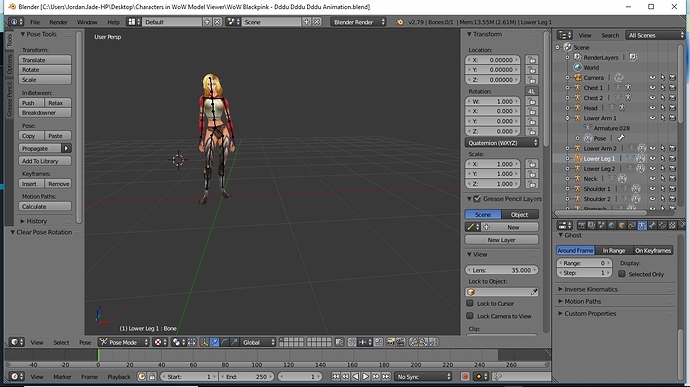
I’m having trouble with the rotation of the bones in Pose Mode of the current version of Blender. I checked everything and it still won’t move. Is it the program that’s the problem?
It would help to post a blend for rigging questions as there are too many variables to just guess. Since you are new, you can use this to post it and after you post to the site, copy and post the link so we can see where you are at. Then I or someone else will help you.
If it makes it much easier: https://drive.google.com/file/d/1CYXomWLlcg2-jzSUIF7eA0c3ofr6T_Vz/view?usp=sharing
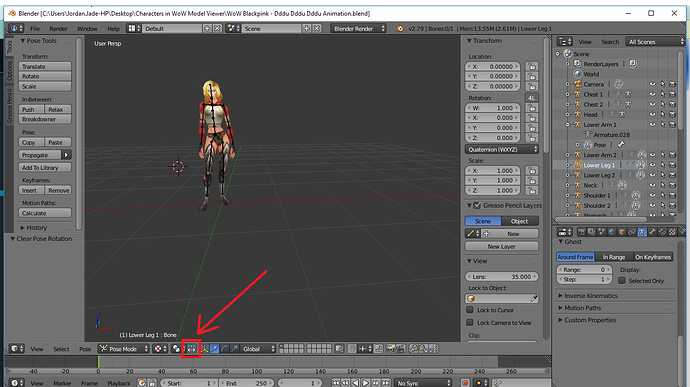
Keep this disabled. For more info google ‘Blender Manipulate Center Points’
But that’s not the biggest problem, the bones are all separated objects and the meshes are not weighted to the bones. Watch beginner tutorials about rigging and skinning 'cause you clearly don’t have a clue what you’re doing.
My guess is that this was automatically converted from some other format. The export from that tool to a blend file didn’t covert things properly and caused this. Jelda, where did you get this blend file? If you converted this from another format, you’ll have to either do it again, or spend the time manually rigging everything yourself in blender.
Also, make sure to pack your textures into the blend file next time (File > External Data > Pack all into Blend). It didn’t matter in this case, but next time you might need help with materials or something else where we’ll need the textures to see the proper result.
This looks like a bad attempt at importing a game character or something similar. But no issue.
On to the good parts.
Start here and go through the rigging tutorial.
Here is what I saw:
Unselect center points as above.
Delete all your existing armatures.
Your mesh has unapplied rotations and scale. You need to Control A and rotation and scale for all mesh parts before you even think about rigging if they are positioned how you want. Typically, you want your character in a A pose or T pose to rig it with mesh centered on Y axis so your x mirror will work. It makes it so much easier.
Normally you want all mesh parts representing the main object as one mesh instead of multiple meshes. That way you can get better deformations for the movements in weight painting your mesh to your armature.
Your mesh has triangles in it so it won’t deform correctly, sometimes. Or, you can’t get it to shade correctly almost all the time. For Blender or any other 3d package, you want your mesh to be all quads as much as practical.
One armature per character is a good rule. There are some instances you may want a second armature for your rig like IK Spline control, but normally you just want one.
That said here is what you can try.
Join all part of your mesh together (except the hair and ear rings. Hair is easier normally as a separate object. Control J. Select everything, but Hair and etc. and tab to edit. Remove doubles.
Select everything and Alt J to do triangle to quads. This left you with still over a 1000, not good at all. You need to go through and clean it up. make sure you have joined all parts together and eliminate your triangles in your topology.
Your mesh will be very hard to rig. You really need it in an A pose or T pose lined up so you can use mirrors on your bones and save yourself a ton of work.
I think if you are good at modeling, you can maybe get this mesh straightened out, but I would pursue a better mesh because your topology is bad and the model won’t deform well even if you can rig it.You can get better models at blendswap.com. You can also try Make Human, Bastioni’s add on, or model a character yourself.
If you want to use built in armatures, go here and follow Dan’s tutorials.
Almost all of us have tried this at one time. It’s called learning. Take a little time to educate yourself and then try again. I hope this is helpful.

