Hey Blenderartists, I’ve been working with Blender for awhile, had a small project team working on a game for awhile but ended up having to scrap it. I’m now working on a new game which I’m currently developing; though it does not use Blender for the engine, it is using the animations/modeling.
Anywho; I’ve completed most of a character I’ve been working on, put in a rig, excluding facials and I’m looking to now attach cloth to the character. I have the mesh set to cloth and the proper properties set so far (to my knowledge) for the cloth objects. I have them as a seperate mesh from the character and armor.
The questions I have are to do with the cloth and armor.
I have one file where I have all the armor built as a seperate mesh just in case; the main rigged file has the mesh of the armor “joined” to the skin. What would be more effecient? I was going to add the vertex groups for the armor manually, for example the elbow and shoulder joints would be attached to specific bones to morph properly.
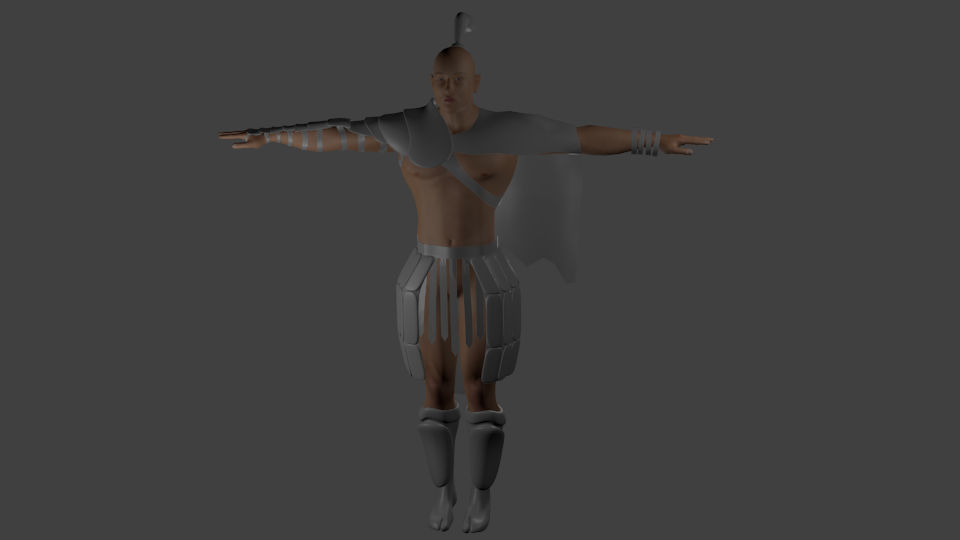
The cloth objects are the cape on his shoulder, the straps between his legs and another peice of cloth coming from his waist.
I also need the cloth to react with the mesh, otherwise I’ll just have to rig all the cloth to try and create a look of movement. Mhich will be hard for the cloak I’m sure.
Any help on this would be great, I’ll post a picture of the guy so far to show an example.
nice skin tone. Can’t help w the cloth though.
If you weight paint, given the location of the cloth draped to the mid arm, any major action with the left arm moving to the fore of the body will almost certainly result in clipping. however if the character is planned to incorporate only moderate movement of the left arm, like a simple walk cycle, you could get by with weight painting.
I had the same dilemma with a couple of characters and haven’t really solved it. I looked to using chains of small bones to weight not only cloth but as well parts of hair. I saw a tutorial on it awhile back. It looked good for gear carried on the back as well like ponytails and cloaks.
Sorry, not a lot of help. But like I said, the skin and form look good.
First, check your game engine specs and see if they include any kind of cloth physics – many do nowadays, in a limited fashion. But it certainly won’t recognize Blender’s cloth sim with its data caches and all, so you’ll need to convert your cloth animation to shape keys and then see if there’s a way to use those with your character import.
The alternative is using a bone rig and hand-animating the cloth, which is difficult to do convincingly and may require a fairly complex rig.
In terms of rigging and animating the cloth portions of your character, that should be the last step in the animation process, since the cloth has to react to all the other portions of the animated mesh. But to simplify matters, I recommend creating a special collision mesh for the cloth parts, that animates along with the “beauty” character mesh (the one you actually see), but does not render and is there solely to provide collision for the cloth meshes. One of the advantages of this approach is that the custom collision mesh can be re-shaped as needed to make sure that clipping is minimized or eliminated. Often such a special mesh can be made by duping the character mesh and trimming it down to only the collision faces needed. It’s probably best to wait until your character motion animations are finalized to do this.
The other issue with game characters and cloth (if you don’t use game engine physics) is that many animations like walking, running, etc. are looped, so you’ll have to create a cloth animation loop as well,. The Blender sim cannot do this, so you’ll have to convert it to shapes and manually create the loop using various shape key blending tricks.
Thanks, the model is unfinnished of course, there is still a lot of stuff I’m adding for details such as fur… but I’m still wondering whether or not I should make particles or texture/bump maps.
As for the animating, he would not be doing many actions with the left hand (cape hand) so I hope it will work well. That hand only uses magic, ie. the long range attacks. so all he really does is point his hand towards the direction you are shooting.
As for the game engine, my brother is creating the engine to be programmed with XNA so that we can release the game on the 360s arcade or indie game section. I’m using blender for the animating and rendering only. So the character animations will not be looped, but use the same technique for smooth animations, ie. mirroring a reverse of the animation. Or for another example, transitioning from a slash to standing position.
I don’t claim to be professional at animating but I have animated quite a few scenes for practice, ie. stick fighting style clips using pre-built rigs. I also did an “emotions” skit using the facial animations and cycling through several emotions for practice. That being said I have not done too much rigging on my own and still wonder whether or not I should join the armor mesh to the body mesh before I start animating… as for the cloth I’m sure I’ll be able to make a decent “cloth rig” using the same technique we used to make a dynamic rope in the last game I was making. I would just make several “ropes” connected to eachother via IK chains, but what I’m wondering is whether or not I should make it a dynamic object and render it within the game engine but export PNGAs for each frame or render it all with Blender Render.
Also I’m not familiar with the new Cycles rendering system so if anyone knows much about this new feature please mention if it might be better to render the frames with.
If you are going to be rendering frames that will be used as the animations in your game (as opposed to importing the character model itself into the game), then the question of converting the cloth animation to some other form is moot, just render it in Blender, which is what you seem to have planned. My comments still apply – do the cloth last, after all your animations are completed and tested in your game environment. This will save you a great deal of time, since any change in the underlying character animation will probably require re-doing the cloth sims. If your animations are done and final, you can then concentrate on the issues using the cloth sim can present.
From what you’ve described so far (if I interpret it right), you’re probably better off making the armor part of the character, in order to reduce the incidence of the underlying body clipping through the armor. This may require some remodeling and re-texturing, depending on how far along you are at this point. This will also simplify vertex groups management and vertex weighting issues, as you will be weighting only a single surface instead of two surface with different topology that need to move together perfectly (such the arm with its plated armor).
This assumes the the character will never change his/her apparel, though. If costume changes are required, then keeping the armor separate might be more efficient, but also more complex in terms of getting the entire model moving well as one, without mesh breakthroughs.
Your comment about “mirroring a reverse of the animation” to do something like a walk cycle (an example of a looped animation) puzzles me a bit – care to elaborate? I always like to learn about new ways to do stuff.
Hi there. I was working on a game project not a long time ago and i had the same thing - couldn’t transfer cloth animation from blender to a game engine. The thing was, that the game engine, couldn’t understand vertex animation… I found a way to transfer animation of the point to the bone and then to transfer whole animation to game engine. If you want a better example, how it works, i can try to prepare a blend file for you, from where you can learn the way it works. Minus of this method, more polygons on the model you have and you want to export good looking cloth animation, you have to create bones for each vertex on the mesh.
It is actually the first and only way I learned to do walk cycles. I download a lot of resources when I started Blender, so yeah. The Tutorial is from Lydia.com and is to do with animating. They also provided a kinda cool almost robot looking character for you to practice along with the animations (one of the characters in the stick fighting movie).
As for the tecnique, after you keyframe to the middle of your walk cycle, you can copy and past a “mirrored” version of the keyframes. After you’ve applied the mirror to it, the character will have a completely cyclical and smooth walk cycle…
I’f I still had all the information on my other computer I would upload you an example of the .blend and some screens… but my computer with EVERYTHING I did before was stolen…
Anywho, I still need to know how to connect the cloth to the objects, that is actually pretty much my only concern… also what you said about clipping and mesh breakthroughs… I’m thinking that will happen with the cape, but connecting the cape via, the shoulder is the only real part I need help with. The “dynamic” part of the cloth will only be from the shoulder backwards, none on the arm and chest. Either that or I just make the weights on those parts of the cape extra high.
I’m taking a step back from my character here for a day or two, I’m going to make something else for animating purposes.
Also Chekolian; The character will not be using Blender for anything but the animating/rendering part to the whole thing, I won’t even be exporting the mesh or cloth objects out into another game engine.
Well technically it would be before he moves, when I rig him. But yeah essentially I am just not sure if I NEED to have a texture for it too attach too or if it is attached another way… and whether or not I can attach the same piece of cloth to different materials/textures i. the arm skin and the strapping of his armor.
OK, now the mirroring sounds more plausible. You said “reverse” as well at first, and I couldn’t figure that out. Not sure how you’re going to do walk cycles without looping, either, but that’s in your ballpark, not mine
Connecting cloth to an object uses Cloth Pinning. The Vertex group that is specified as the Cloth Pinning group in the sim is used to determine how much a mesh responds to the sim physics. You adjust vertex weights just as you do for weighting to an armature, either with Weight Painting or the manual tools. A weight of 1.0 on any vertex in the Cloth Pinning group means that vertex will not respond to the cloth sim at all. A weight of zero means the vertex will respond fully to the cloth sim. Intermediate weights provide for partial response.
The vertices that are not weight zero (fully cloth) can have other influences, such as an armature modifier and its bones. So if you make a bone the parent of your cloth mesh, and give some of its vertices weight 1.0 in the pinning group, those vertices will follow that bone completely, and not be part of the cloth sim. This is often done at collars, belt lines, parts of sleeves, etc, to make it possible to have both armature control and cloth physics on the same mesh.
Vertices with intermediate weights can be influenced by both the armature and cloth physics. This can be very useful though it requires carefully balancing the weighting of the vertex groups. In the case of your cape, it might be good to have the armature control the upper part around the neck and shoulders (with the neckline probably fully pinned), then have the cloth influence get stronger down the length of the cape until at some point (usually determined by testing) you have the pinning weight at zero and it acts completely like cloth.
NOTE: When using more than one influencing factor on the cloth mesh (such as Cloth and an Armature), the order the modifiers appear in the stack is critical. Generally you want your Armature above Cloth, so the mesh’s current position as determined by the Armature is calculated before the Cloth physics.
If you’re using a collision object, position of the Collision modifier on its stack can be critical if there are other modifiers such as an armature that influence the position or shape of the collision object.
Wow, thank you so much, you just answered the entirety of the question I had right there!
On a seperate note; I am working on a robotic character for something else and even though I apply the vertex groups of each plate to the bone it is still using envelopes, even after I turn off envelopes…
So I want each bone to manipulate only the plate, but one bone will manipulate other plates using envelopes… Unno what is wrong LOL
edit
Also I had watched a bunch of your videos after I seen your first post. Nice work!
For rigid parts animation with an armature, it’s often better to not use vertex groups or envelopes, but rather to parent the object (the “plate” or other rigid part) directly to the bone. Put your armature in Pose Mode, select the “parts” object, then select the bone to control it, use CTRL+P, and in the dialog choose “Bone”.
Vertex groups are most often used for meshes that don’t deform as a unit like rigid plates – the different vertex weights you can apply make this possible, but it’s redundant for rigid parts, because then the weight of each vertex would be 1.0 for the controlling bone.
And thanks for the compliment!
EDIT: Also, if your model is set up for it, you don’t need an armature at all for rigid-part animation. Most “robot” animations are rotations and translations, and you can use hierarchical or “chained” parenting in combination with properly-placed object centers to create “no-armature” rigs.
For example, an arm has the upper arm, forearm and hand as its three basic parts, with joints (places for rotation) at shoulder, elbow and wrist. The hand is a child of the forearm, and the forearm is a child of the upper arm (this is the parenting “chain”). If the hand has its object center at the wrist, you can rotate it around that “joint.” Same for the forearm (centered at the elbow joint) and upper arm (centered at the shoulder joint). This is basically how all computer animation was done before skeletal systems (armatures) were invented.