Just downloaded Blender 2.8, I am proficient on Rhino 6, but find Blender a bit difficult.
I am a sculptor who uses the 3D I do on Rhino 6 .
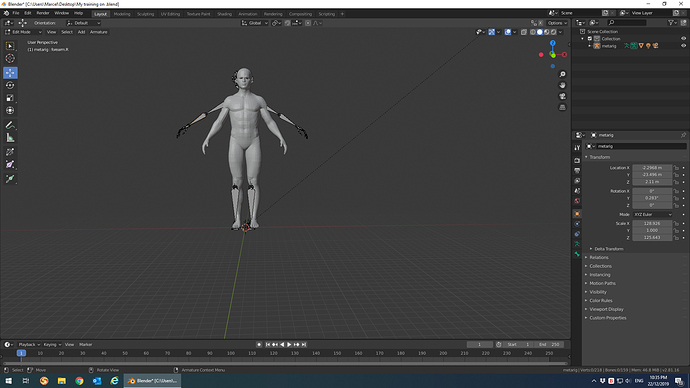
I am trying to add on Armature on a mesh I bought on turbosquid, to manipulate arms and legs positions but to no avail.The “bones” do not appear on the mesh, Can you help please? .
Thanks
Marcel
Hi Marcel!
Hard to say what’s going on without more information. Do you have some screenshots perhaps?
I don’t really get if you can’t see the armature or if you can’t see the mesh deformation. Do you have any tutorial to follow for the setup?
I dont know if it’s in the blender latest build. But if you are looking for posing your sculptures without animating, it ll suite more your goals?
If you google “blender latest build” you ll find the download link.
Hi
I thank you for your reply, I looked it up as you as you suggested, Is this a new update to Blender 2.8?
My goal is to manipulate a mesh (man or woman body bought on a 3D website like Turbosquid) and save it into Rhino5 or 6 and engineer it into steel to be laser cut and assembled by TIG welding. This is what I do now but I found that Blender would be very practical for me as the mesh I get are rigid , arms apart …etc. I need to give them a pose.
I thought Blender would allow me to do this without further animation.
Yes. I understand very well the production methods. Creating a bone system is not so complicated but it seem that you don’t know ble der interface very well for the moment.
That s why I ve suggested this new feature not included in the 2.8 at the moment.
But you can download latest development build of blender. Actually 2.82
It should be not so stable but why don’t give it a try?
I gonna open my laptop and check it for you.
Hold the line.
Thank you for your prompt response.Please find attached a screenshot. I am not able to "parent the skeleton to the mesh. Can you help. I saw some tutorials about rigging but I am slow and the tutor is not very clear on each move to make to do what I want.
I’m preparing you a video on how to build and skin a skeleton.
I’ve tried the blender 2.82 pose brush in sculpt mode, but, for the moment i’m not convinced about it.
so i have decided to make a video for you.
Thank you so much ! You’re really great help.
Marcel
I am looking forward to your video. Many thanks again.
Marcel
Here is the link to the first part of the character skeleton creation process. how i build a standard skeleton.
this video is not edited for the moment. i will make an update with displayed comments to explain more deeply the concepts. but as i imagine you need to progress quickly, i send you the preview. you ll notice the keyboard shortcuts used, in the screen left down corner. I use the 2.79 keyboard layout. Because really often the Key pressed is the first letter of the function you use.
Next video will be for the skinning process.
see you soon.
Link
Thank you so much for your effort to help me out.
It is very much appreciated. Now I am going to slowly learn the whole process.
You’re the man!
Thanks
Marcel
Had a look at your video. It’s excellent. I can stop and start it to learn the process.
Looking forward to the next part (I guess “parent” …etc
Thank you.
You ll notice that’s important to place and orient bones. And that I rotate bones chain’s poles in pose mode to reach my orientations instead of using edit mode. You can do that in edit mode.but this manner is more efficient.
This squeleton is not the most physically correct one. But it is a kind of standard in video game industry. I mean that for the hands , for example there is no carps. But you can reach special poses by animating the location of the finger chain because they are not connected to the hand directly. That s a kind of compromise. Reducing drastically the number of items.
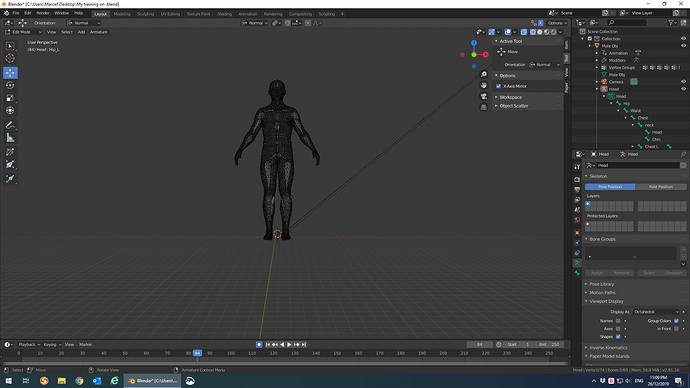
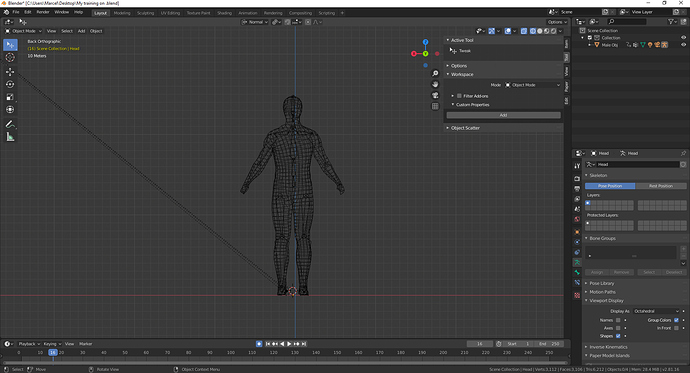
SO I have worked on your instructions and I am attaching what I did for you to comment Please. I ahve been following tutorial on how to parent the skeleton to the mesh but I am not able to do it. I have a feeling some of my settings are not correct. Also i have tried to name each bones, Is it so important to name them?
looking forward to your comments.
Marcel
Currently uploading the base of skinning to this link.
link
if you have already an armature modifier… kill it
If you have already vertex groups in your mesh parameters menu. you can delete them all with the arrow on the right of the group’s names.
you 'll find useful to name your bones before, to manage correctly this groups.
It’s also important to have clear naming convention when it comes to rigging / constraints/ export…
i’ll push the skinning’s subject further away, there is a lot of tricks when you paint your bone’s influences.
You 'll understand also in this video, why i use roll bones.
It seems that you didn’t delete the two bones who connect the legs to the hips.
it ll work. but you use 2 bone for nothing in my point of view.
a bientôt
Edit: It seems that your model is triangulated. If you want to get ride of those triangles. Go in edit mode for your mesh (TAB). then Deselect Select all (A) twice, assuming everything is selected in your mesh press (ALT + J) . it ll trys make quads everywhere
I managed to change the triangular meshing to quads but every time I "Parents), first mesh then skeleton as to indicated, I get an error message : “Loop in parents”.
I also deleted the 2 extra unnecessary bones. I still have to study your last video, but I am truly struggling with this.
I’ll let you know how I am doing after a few further attempts.
Marcel
You have to clear the existing parent’s links you have done before. Select your 2 objects then ALT+P clear parent and keep transformation.
It seems that you have parented it before in the wrong order.
Edit:
When you parent an object in blender. It’s always from the son to the father. So you select first the constrained object.
(Assuming that your parents are a constraint to you.)
Edit 2:
A link to one of the stuff I do with blender. I’m sure you ll find it interesting. Artistically talking.
I ll move to Roma today for one of this Art piece. I ll try to push those teaching’s videos further away. But I can’t give you any guarantee that I’ll have time.
I did all this and it does not work. something is wrong with the way I do things! I deleted everything and I will try again in a while. I am getting extremely frustrated. I cannot understand some of the terms like “skinning”. I am surprised that I am so hopeless with Blender when actually I am so good on Rhino and Clayoo! I will try in the new year again. Thank you anyway for your efforts.
Skinning is the fact that you attach vertices to something with weight.


