Hi there! I’m trying to animate a robot arm I modeled to practice. My professor told me about the inverse kinematic but he could not explain it to me. I started to follow some tutorials but I start to have some problems and honestly I don’t know how to proceed. I have combined all the meshes but some pieces remain still. I hope I explained myself well between words and images. For now I wanted to adjust the movement of the arm, making sure that all the meshes move properly and that every single element does not become deformed since it is a robot. Later Then I will focus on the hand that also seems complicated to me! Thank you very much for your attention
about the ik system it looks like it functions alright, the parts remains in place seem to be the problem.
ik is about moving 1 part of bone (usually the end tip) and have natural effect on the rest of the set.
if you need more info about the ik you can google it.
as for robot parts you dont want deforms,
so you don’t really have to combine all parts into 1 mesh.
(1 big mesh bind to multiple bones => you need to setup “weights” where different bones affect the mesh in different amounts = pull and stretch = the standard behaviour of muscles etc.)
you can simply stick every part onto their corresponding bone (set parent -> bone)
so they only move with that bone.
for example the lower arm parented to the elbow,
the upper arm parented to the shoulder.
I did it, thanks a lot! I related the parts that didn’t follow to the right bones and fixed that problem. Later in the weight painting I made sure that no part was deformed.
I also started to fix the hand. Unfortunately I realized that from the engineering and practical point of view this hand is very bad, I believe that it cannot catch anything. However, there are no problems because the animation I have in mind is very simple. Through body constraint - copy rotation, I made finger movements easier. I would like, however, to be able to close all the fingers simultaneously by moving a single element, I can’t figure out how to proceed.
Below I put an explanatory gif, I hope you understand.
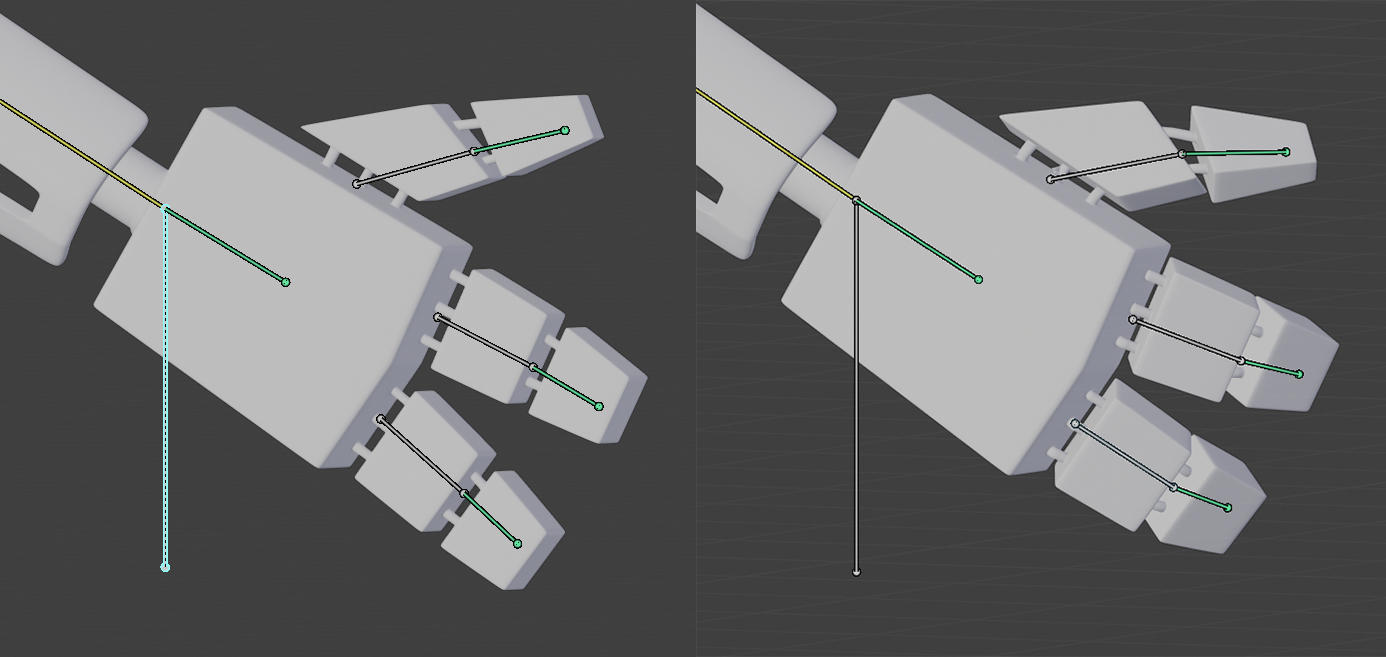
There’s more than one way to do this, so I put together a scene with two different setups.
The one on the left uses Copy Rotation constraints, so that rotating a single control bone closes/opens all fingers. It’s simpler to set up than the second option.
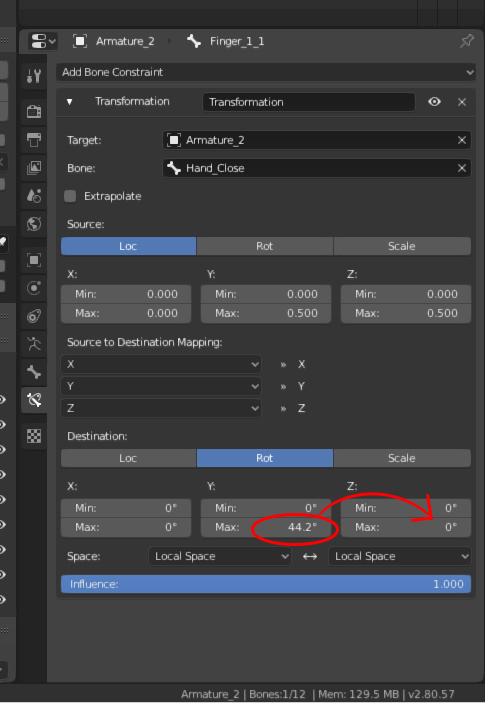
The second method uses Transformation Constraints, so that moving a single control bone closes/opens all fingers. It’s harder to set up, but is similar to the example you provided.
Btw, it’s generally best to keep these controls within the Armature as bones. Otherwise, you can use a Mesh object as in your example (or better yet, an Empty) when putting them outside of the Armature.
Thanks a lot for the answer! I followed the second method and partly succeeded, but i could not fix the thumb. I leave you the file because i don’t know how to proceed.
You just need to transfer the value from the Y-axis ‘Max’ field to the Z-axis ‘Max’ field in the Destination section of the Transformation constraint for the thumb (Finger_1_1) to get it working.
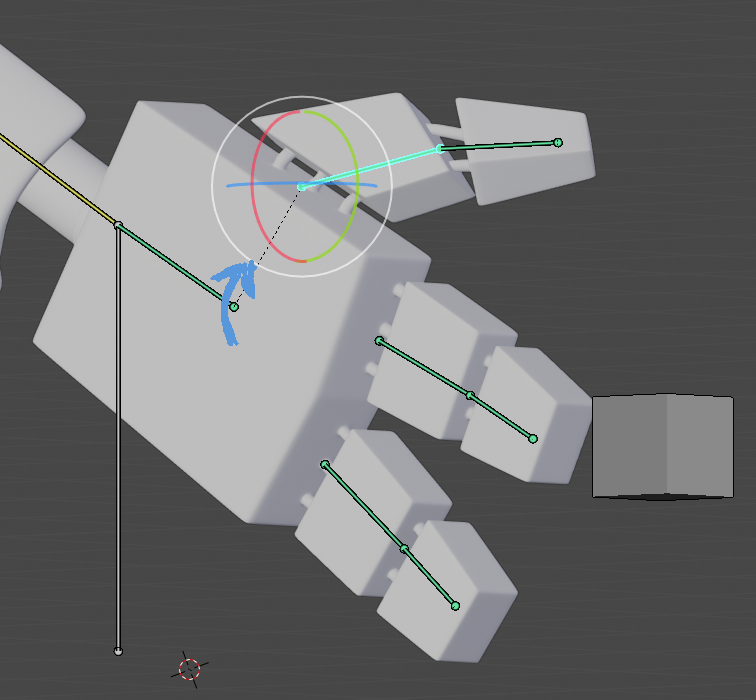
I tried but moving only on the z axis does not come out the right movement, I tried to move other parameters. Can we change the position of the rotation axes of the bone?
To fix that, you just need to reorient the main thumb bone so that it aligns with the desired rotation axis, as in the modified version of your file attached here.
Note: this requires ‘disconnecting’ the secondary thumb bone, but is not a problem as it is still parented + constrained as before.
Also, you’ll need to redo the weighting for the connecting ‘rods’ between the finger sections, since this change distorts the deformations there.
Has the workflow changed in 2.8 for rigging things like robot arms? I used to follow the methods of this 2.7 video https://youtu.be/eF4CuIX40XE which parented via ctrl P/parent to “empty groups.” Next you designate a vertex group for each bone. In 2.8 I haven’t found a way to replicate this. I make vertex groups but have not found the place to parent them.
Great results on the IK arm!
I don’t know precisely what you’re talking about, in my case I selected the armature first, then the mesh and then ctrl + p, with automatic weights. then I fixed the weight painting of each individual bone
There was a way in 2.79 and probably in 2.8 - I just haven’t found it yet. No weight painting is necessary (just like in the video) with this method, since all the arm parts are assigned a specificic weight. Watch the video from11:30 - 13 min. To see it. Maybe I will start a thread on this. You can still parent to empty groups in 2.8.
Oh… I just figured it out. Silly me. With your mesh in edit mode and the vertex groups menu open, select all the vertices of one arm part (click one and then push L). Next click on the bone vertex group you want to assign and click “assign.” That arm part (vertext group) will now be fully red in weight paint mode. You need to assign a group for each bone. It is very exact. I like to only weight paint on things that will deform, like a cable for the robot arm.