1 i can’t copy it around because it breaks and stops behaving the same way it does when it’s centered at world origin. This is a major problem because i need many of these engines working correctly at the same time
2 i have no idea how, and where to parent a root bone so i could move the whole thing with one controller. I tried parenting everything together but i can’t figure out how to make it work without breaking the rig
3 this is just a bonus. if someone could take a look at this rig and tell me what i did wrong and how to do it the right way, i would greatly appreciate it Blend file below
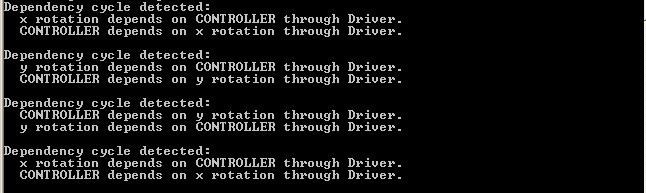
There are a few problems. The first that you have to deal with is the dependency loop (which I didn’t investigate, just noticed.) Open a console window and look at the dependency cycle warning to start to figure it out, and fix it, if after everything else, you don’t want to just start from scratch.
Your other issue here is that you have a bunch of constraints that are limiting rotation in world space, and drivers that are reading world space rotation. Don’t use world space stuff unless you’re really sure that’s what you want-- you should basically never be using world-space rotation for anything, not for any driver or constraint. If something feels like it should be using world-space, it should probably be parented to a root and using local space instead. This world space stuff is mixed throughout the mesh and will give you a lot of trouble as you start trying to parent your controllers to something like a root controller.
Finally, everything is hard to play with, because you’re using a bunch of unparented objects as your controllers, and the behavior of these objects is going to change as you parent them to anything. The easiest way to handle a rig in Blender is to use an armature. Yes, even if you just bone parent things. Don’t use non-bone controllers unless you need to (some reasons do exist.)
I would recommend starting from scratch, using a single armature as your controller. Treat what you have so far as a fun experiment that didn’t quite turn out.
Thanks for a thorough look at my mess It was my first attempt at rigging mechanical objects and without using premade rigs. I will happily start from scratch. I didn’t realize the significance of using world space as opposed to local or custom space. Now that i think about it, it all makes sense. In theory at least. I’m gonna have to see if i can take your input, and turn into something that works. My lack of knowledge and experience in regards to rigging might be an obstacle, but i’m going to try and follow your advice as closely as i can. This time with a heavy emphasis on using armature
Hey, here is the depCyc if your interested, but as B said it needs a bit of armature love. Keep in mind , it is 1 armature object that contains multiple bones - not the other way - you only ever see object mode on an armature when you create it, after that it is ‘EDIT’ or ‘POSE’ mode. Careful parenting goes a very long way when animating - plan accordingly. Bones have their own constraints - you added them to the armature object itself. Post back with your progress
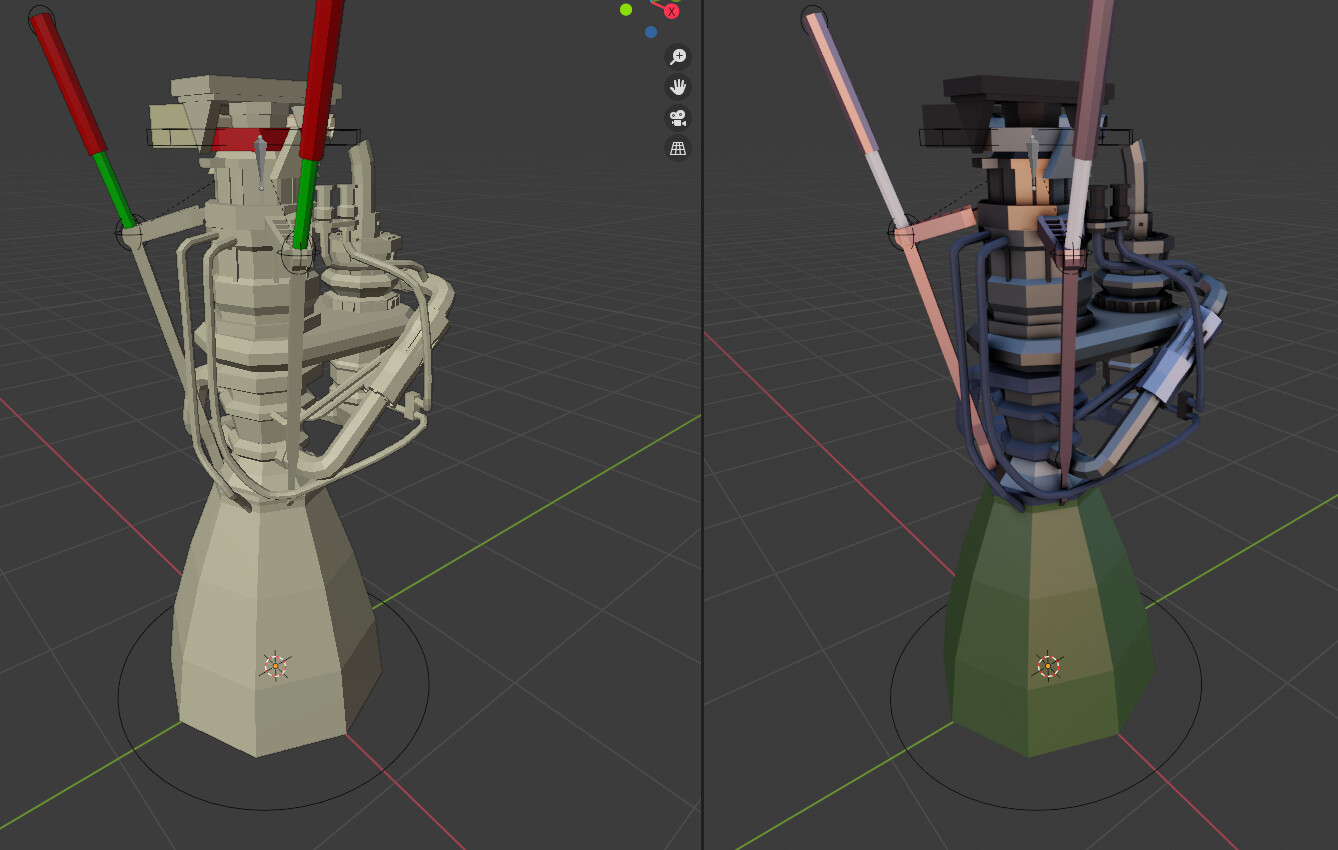
Forgot to mention: Always turn on bone axis display
I still feel like something’s not quite right, but i can’t tell what it is. I managed to make it movable with a root bone but i couldn’t get it to rotate without breaking. Let me know if you can think of anything else that still needs improving
BTW any idea what i can do with that blue piece of pipe? It needs to be connected at both ends, but doing it will be a little tricky
First, try not to use constraints when regular parenting will do. Your main body is moving only via constraints, that don’t necessarily make much sense, when regular parenting will work fine.
Second, I generally recommend against using limit rotation and copy rotation, because the way that these work is not immediately obvious to people starting out. I recommend much more use of damped track and locked track to acquire (or limit) rotation. If you’re sure that you want to be messing with Euler angle numbers, then you should think about changing the bones to use an Euler rotation mode instead and use drivers for them-- there are fewer gotchas when doing that.
When I look at the bones that are copying rotation, they don’t exist in the same axes as each other-- their tails are pointing in different directions, for example. That means that when you copy local->local rotation on these bones, you’re remapping the rotation. Make sure that’s something you want to do.
I can’t tell you what to do with the blue pipe until you demonstrate what you want to with either end of it. Right now, neither end ever moves in relationship to each other, so the blue section doesn’t have to do anything either.
Hey, The ‘somethings off’ part is its still not rigged effectively, your using ‘child of’ constraints when regular parenting is whats needed. You parent your mesh objects directly to a bone - this is the main reason for using an armature. Parent parts: select bone in pose mode > select object > SHIFT+Select Bone again > CTRL + P = Bone - thats it, no need for an armature modifier.
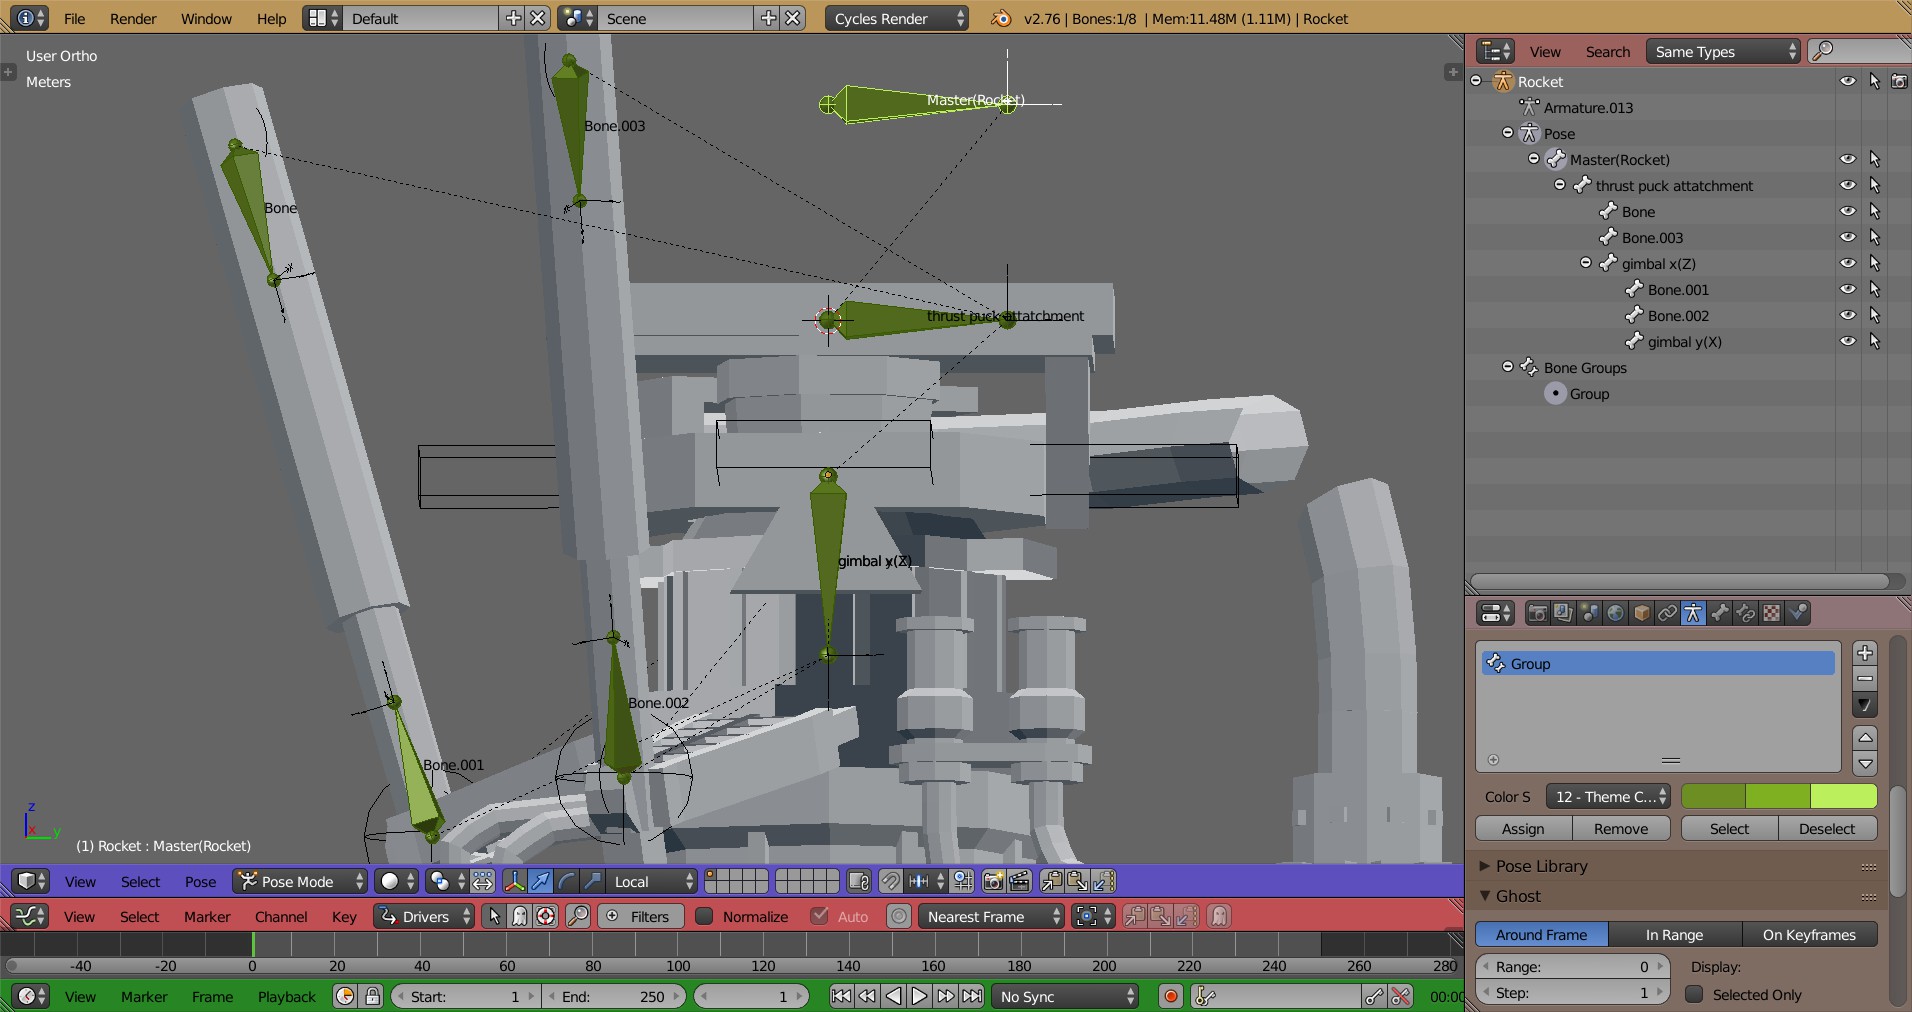
Here is how I rigged your original file - you can see the parenting in the outliner.I started by CTRL + J all the armature objects into 1. The parts are parented as follows: thrust puck attachment to its bone name - PIVOT to gimbal x(Z) - engine to gimbal y(X) - prop inject forgot it, the other stuff I did not mess with… gimbal x(Z) now rotates on its local ‘Z’ axis, gimbal y(X) now rotates on its local ‘X’ axis.
as far as the blue hose goes, either ‘spline IK’ or ‘Hook’ a curve object to both ends of the mesh or use a curve for the hose, and you can always rig it with a deforming armature/bones with an armature modifier.
@ajcdfin@bandages Thank you for the feedback. I’m going to start over, again, and try to do it (hopefully) right this time. I will report back on Sunday
@bandages@ajcdfin I think i understand it now. I tried my best to follow your instructions. All that’s left to do is set up master controllers and make that pipe bendable with spline ik. Now that i have an understanding of what i can do with it, it should be easy enough. Thanks
Hey, sorry for the delay, getting much closer. You parented the ‘engine’ to the Armature object itself but your using an armature modifier with bone weights assigned, you can do away with the parenting since your using the armature modifier on the engine. You have 2 engine ‘Vertex Groups’ and 1 has no weight assigned - delete that group. On the bones that are going to control rotation - change the rotation mode to ‘XYZ’ and use the ‘transform locks’ to lock the axis that are not used, then you can just hit ‘R’ when you want to rotate and it will be the correct axis. Since you used an armature mod on the engine, you can just add a bone chain for that pipe piece and weight it accordingly. Good job
 It was my first attempt at rigging mechanical objects and without using premade rigs. I will happily start from scratch. I didn’t realize the significance of using world space as opposed to local or custom space. Now that i think about it, it all makes sense. In theory at least. I’m gonna have to see if i can take your input, and turn into something that works. My lack of knowledge and experience in regards to rigging might be an obstacle, but i’m going to try and follow your advice as closely as i can. This time with a heavy emphasis on using armature