Hey Guys,
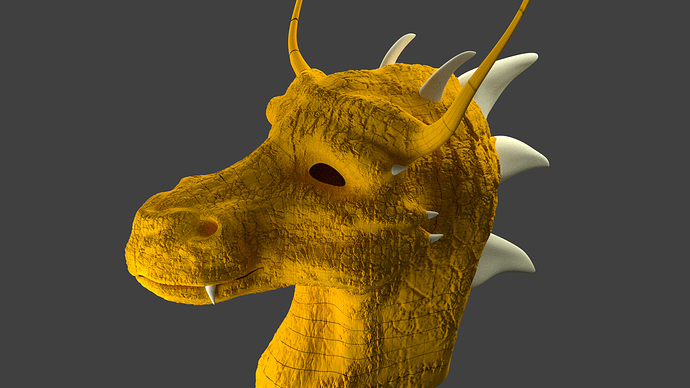
after some time i decided to remodel my first sculped thingy ever named Saphira from the books Eragon.
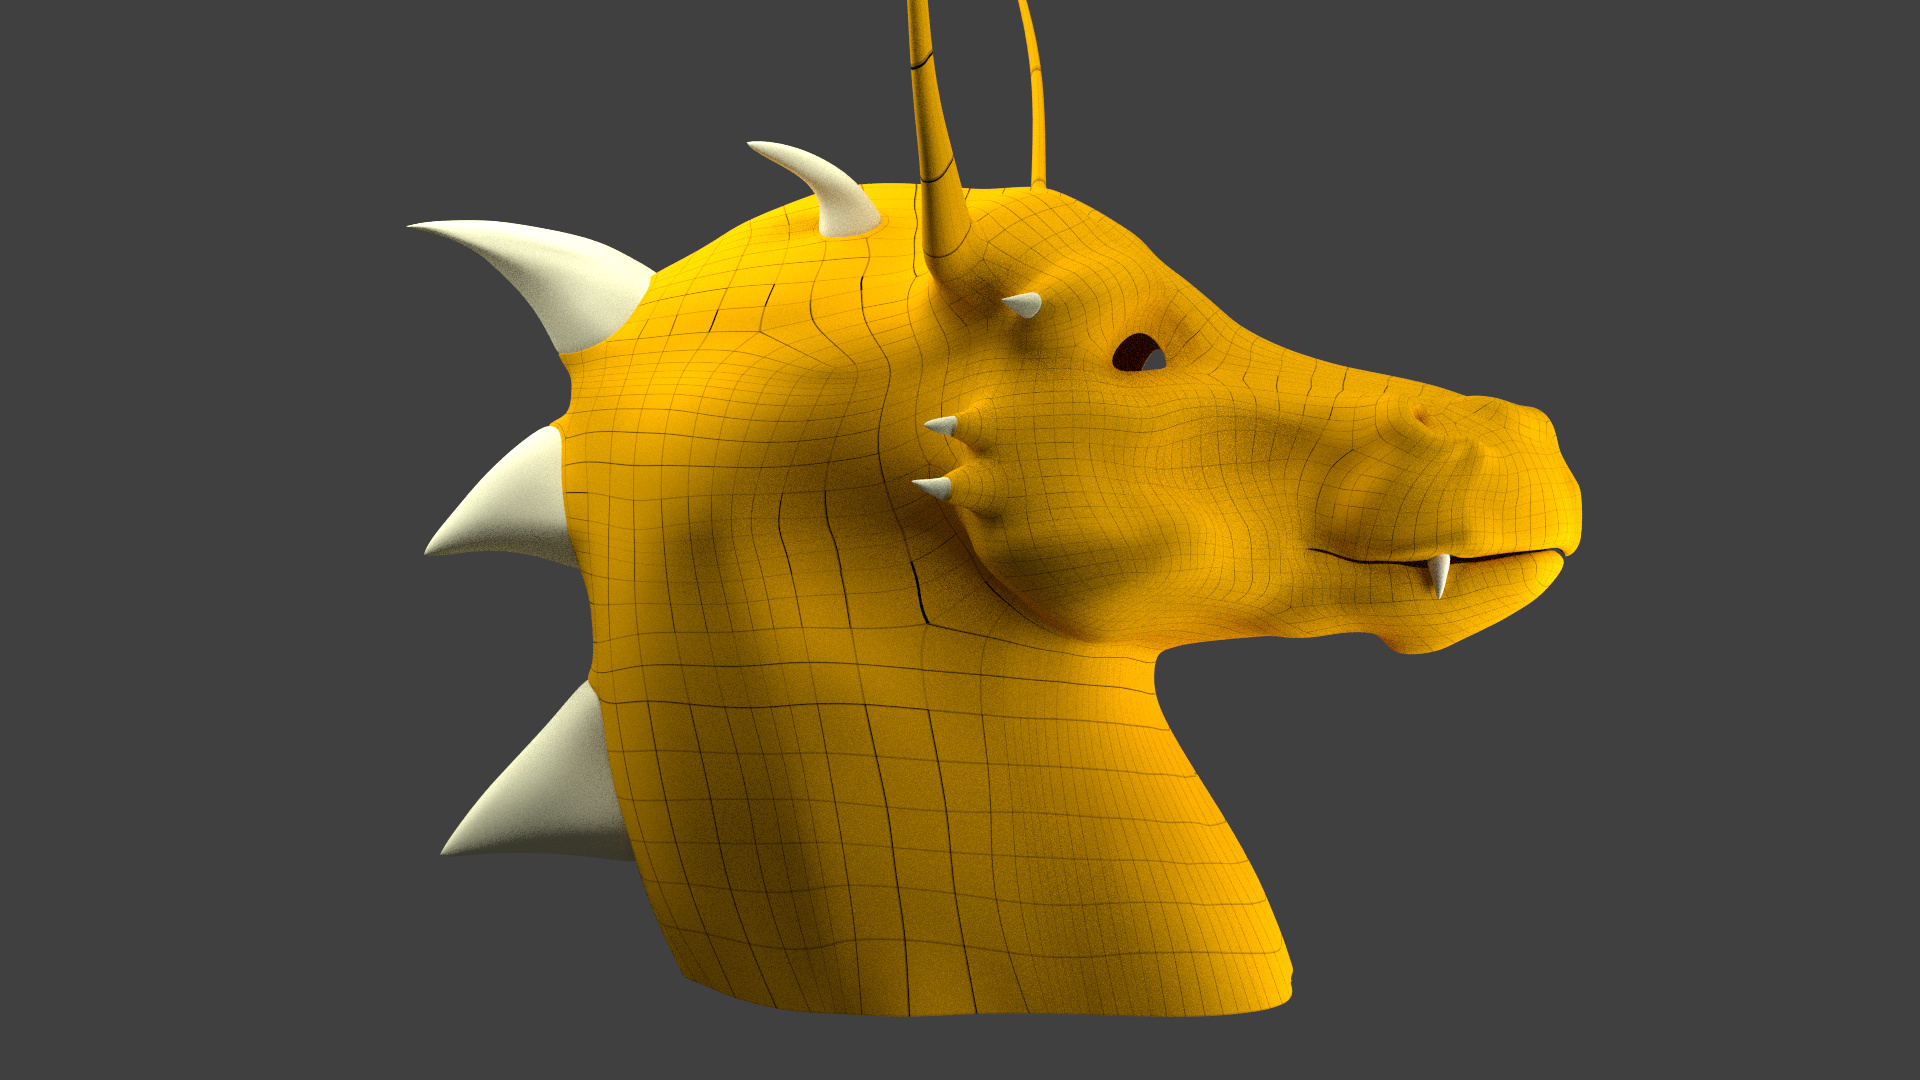
My intention was to texture her with Dragon scales ect. and that was impossible with my sculpted Model. So i did following remodelling that lowered my polycount from about 950K tris to somewhat of 16K (with Subsurf @ 3):D.
Im quite happy with it right now but maybe you have some ideas about improving the edge flow ect. (in case please tell me!).
I also have a question about Texturing… so can i do this in Blender with some Kind of Stencil Map like in Mudbox or should i add some Textures with Displacement ? I´m not sure about what will work better. If theres another good way you could tell me, too. Im quite a noob @ Blender and Especially at texturing.
I´m looking forward to your critics and tips and try to texture it in some way : D
Well I’m the wrong one to answer your questions, because I’ve never done any sculpting, but your dragon looks like a good start, but he definitely needs scales. I’m guessing you could use a stencil map or alpha brush or whatever blender calls it. But getting the direction and flow of the scales right might be a challenge. Hopefully someone can answer your questions on what would be the best way.
The things I notice right away is that the neck and parts of the head look a bit stocky and fat for a Dragon, and scales are usually anything but square (unless the ‘scale’ design now is a placeholder).
As for the scales, one thing that can be done is to wrap a scales texture to the body along with perhaps sculpting in some of the ones that might give away the fact that it’s a 2D texture on a surface. If you decide to sculpt in some of the scales for say, the head, then the way to do that would be drawing recessed lines into the head and then pinching it to give the final scaled look.
Hey Topper, the shape is looking good. Did you retopo that from the sculpted version or did you model it from scratch? The topology is quite dense at the moment. You could surely reduce some of the edges at the throat by using junctions.
It’s funny that I stumbled upon this video the other day: Jonathan Williamson is covering scales with sculpting. It’s based on 2.5. Some things have changed in 2.6, but you should be able to follow it.
Yes Harley i agree it will be a very fiddly work but i am a patient guy. If i don´t get it the right way im going to watch your video, that you postet on your “harley hotel and casino thread” and will be motivated as twice as much than before (i really love it!)
And Ace Dragon i´m not sure about what exactly you ment with squarish scales. I dont have scales on th emodel yet maybe you have been cheated by my wireframe Render. Of course the scales won´t be squarish I hope i will achieve a natural looking Dragon-Lady. I´ll look what can i do to her Neck parts… mabe i could get that part a little more thinner. Well i think i should do it thinner.
@minoribus: I did a retopo of my previous model. Thats why the mesh is sometimes a bit dense (to get more information of the form out of my sculped Saphira), but maybe i should relax the mesh at some points around the throat you´re right.
Haha that´s really funny cause thats exactly what i was searching for! I´m sure you knew that someone could use this soon Thx for that!
Can you recommend a tutorial or something like that for baking maps ? (I´m not really good at cooking without a receip, could use some practice )
Thanks for your comments. I´ll post some progress as soon as can.
Little Update, by the way … resculpted critical points as neck, throat, mouse and nose. I find it looks more like she has some muscles and bones under her skin and it looks much better than before. More detail would probably not come out with her dragon scales so i let it be.
Definitely a nice improvement on the neck and other area you worked on. I’m not familiar with the reference you are using, but should his horns ( the yellow ones I’m refering to) be that flat?
Damn Topper… your fortunate to be a good sketch artist… I would think that would be so helpful in sculpting. Unfortunately I can’t sketch or draw… but I do make one heck of an awesome stickman
Your right… that reference shows clearly this dragon had thin horns.
Haha thx again. Sketching is somehow in my family`s genes. But well actually i started drawing with 100th of stickmans which fought a war on a piece of paper again and again So maybe it´s not to late
Stickmans can be really awesome if made the right way !
And yes i guess its quite helpful, especially sculpting feels pretty much the same as drawing with my digital painting board ( i do both drawing and sculpting on it). Sketching gives you the right feeling how a model should look like.
But in the end we all know that nobody can achieve the master in everything
Dont know exactly whether it´s looking good… i think no ! At some places the scales are quite crisp but at others they´re more like crap.
So i think now i need some real advice of people that have knowledge about sculpting!
I used a png-greyscale Image of real-life scales as texture brush and sculpted with the draw brush.
So should i use a higher resolution Image or maybe just another one with clearer scales ?
Or should i give my multiresolution modifier another subdivide ? It´s actually at 4 and i have about 4 million tri´s. Sculpting´s still fluid but if i rotate my model its a pain.
Hey Topper, does the yellow image show the sculpted version with scales or does it show the version with a normal map, that you baked from the sculpted version? For the rotation you can check mark “fast navigation” in the sculpting menu (“T”-Key") under options. That should solve the problem with rotating. Don’t forget to make a backup before you subdivide again. Because sometimes this one additional subdivision make the whole computer busy for a really long time.
Hey Minoribus, it does show the sculpted version … normal baking isn´t possible to me bacuase if a try to scale a second mesh about the sculpted one, all my proportions get loose. But if the second model on wich i want the normals baked isn´t exactly scaled it doesnt bake me a whole texture but just some places of the texture!
I don´t know how to handle with this to be honest. if i have time i´ll upload an image of my problem.
That “fast navogation” did the right thing, thx for that. Now if i rotate the model it´s all smooth.
Another problem is that my Computer doesnt bake the normal map if i turn up “multi-res” to 4 (16 mil. Tris). Thought 4 GB of video Memory where enough
Next Step is to Choose the right Mats. Maybe i´ll give Texture painting a try, if i have the patience.


 So maybe it´s not to late
