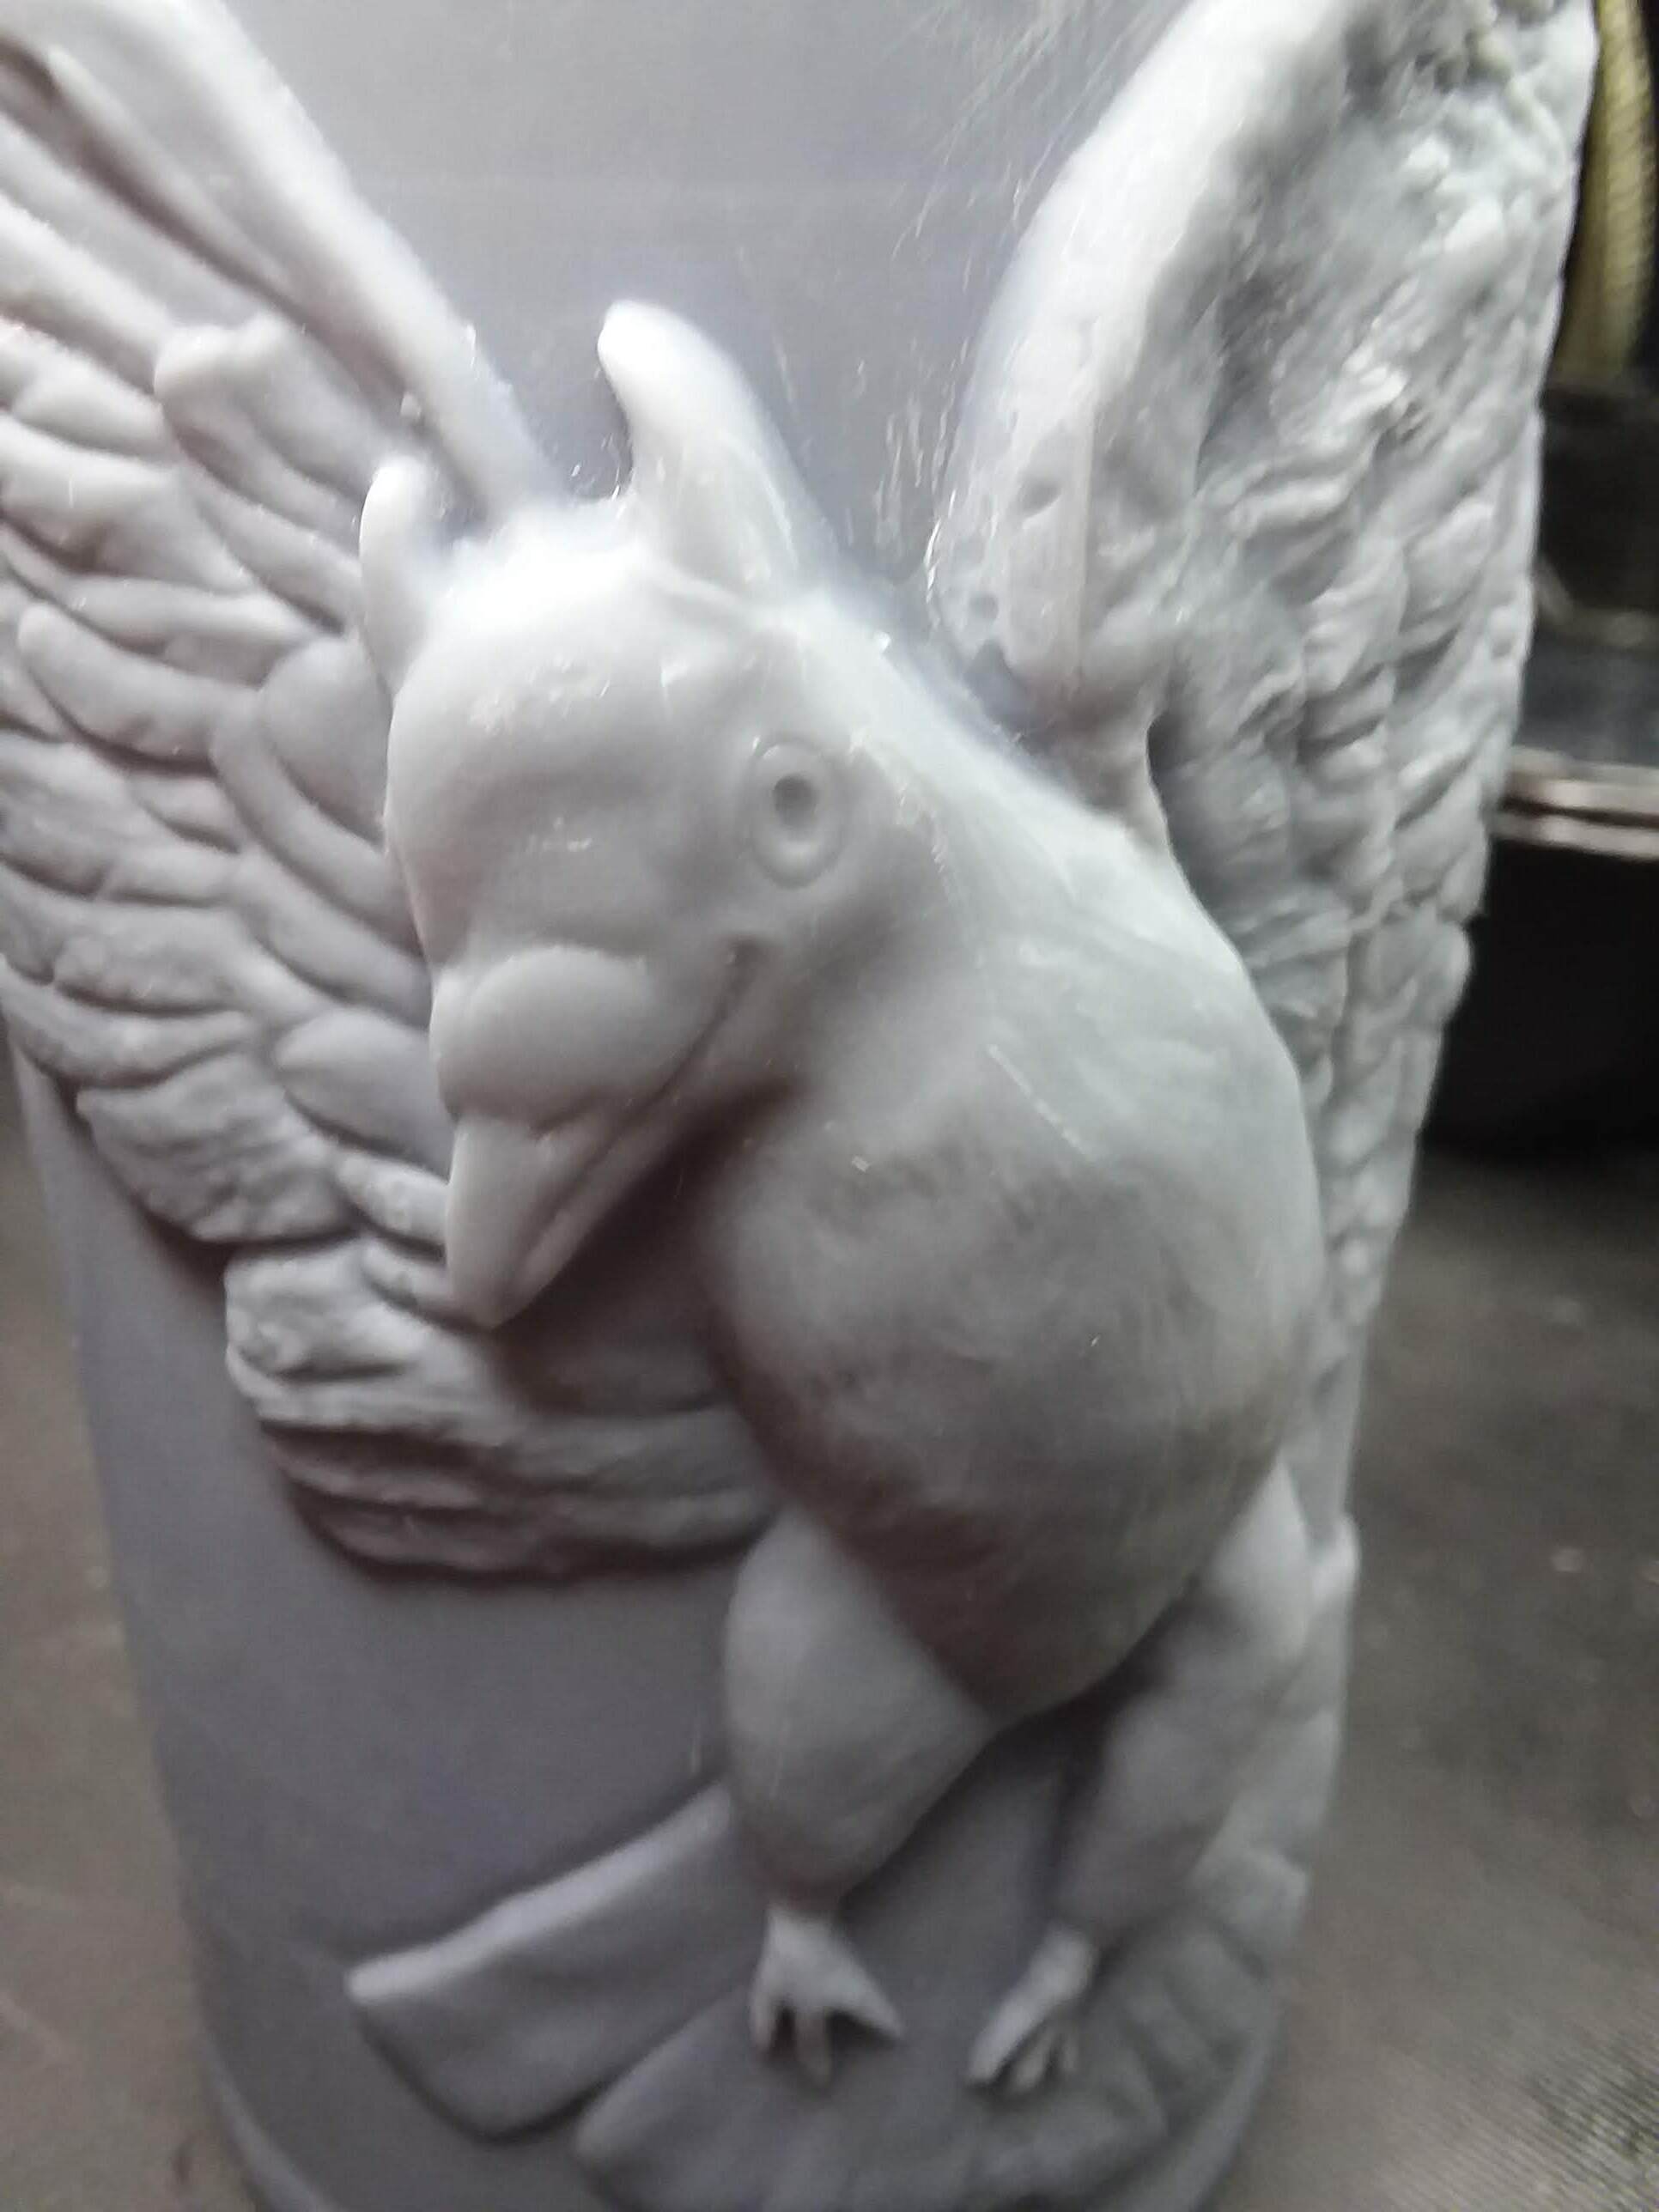
I’m working on making a ceramic mug for a local band. Not really a tiki, but similar idea.
I’m sculpting a low relief for the side of the mug and I was hoping to get some feedback on it, and some advice on a few things. I am sculpting it onto a flat plane. I started out modeling a three dimensional character. I posed it and rendered a depth map for displacement.
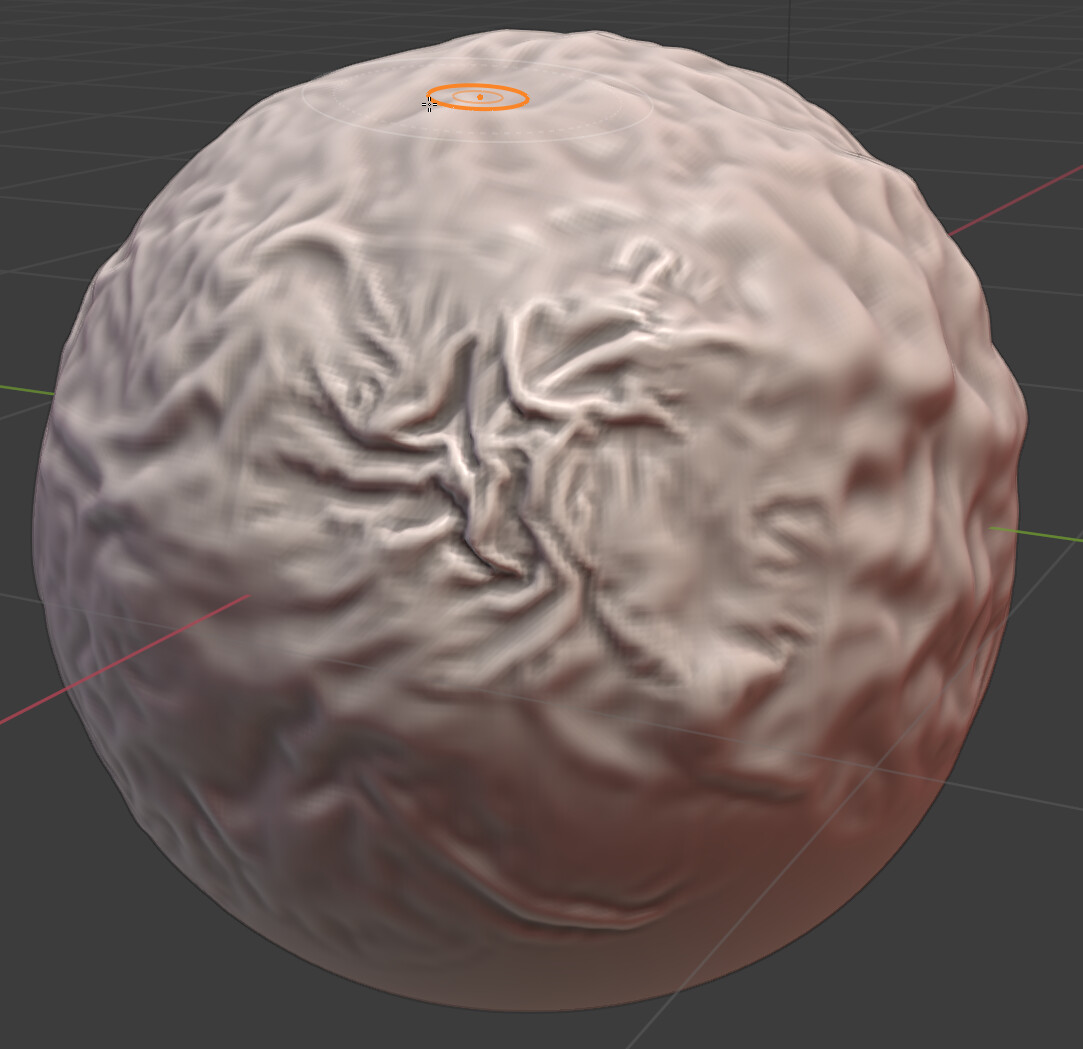
I used the image with a sculpting brush to put it on the flat plane. Then I used another image for displacing the wings and body. Now I’m working on sculpting it. The extreme amount of faces in this model is really slowing down my computer, which is an HP Z600 workstation with two Xeon processors. I’ve tried to reduce the number of faces where they aren’t needed. I’m wondering if there’s a better way to do this. Sculpting is really lagging and not responsive. I’m having some issues with the sculpting tools not working as expected. Sometimes they don’t do anything, then the next stroke will work and surprise me with extreme results. Today at some point + and - reversed functionality. Plus is supposed to raise up geometry, and minus carves in, right? Now, the opposite is true, no idea why.
The other thing is, I want to wrap it into a cylinder and 3D print it for making a plaster mold for ceramic mugs. I made a circle and used a curve modifier to do this, but it ends up lying on it’s side for some reason. I can’t figure out how to change this except to rotate my plane. What’s the trick with that?
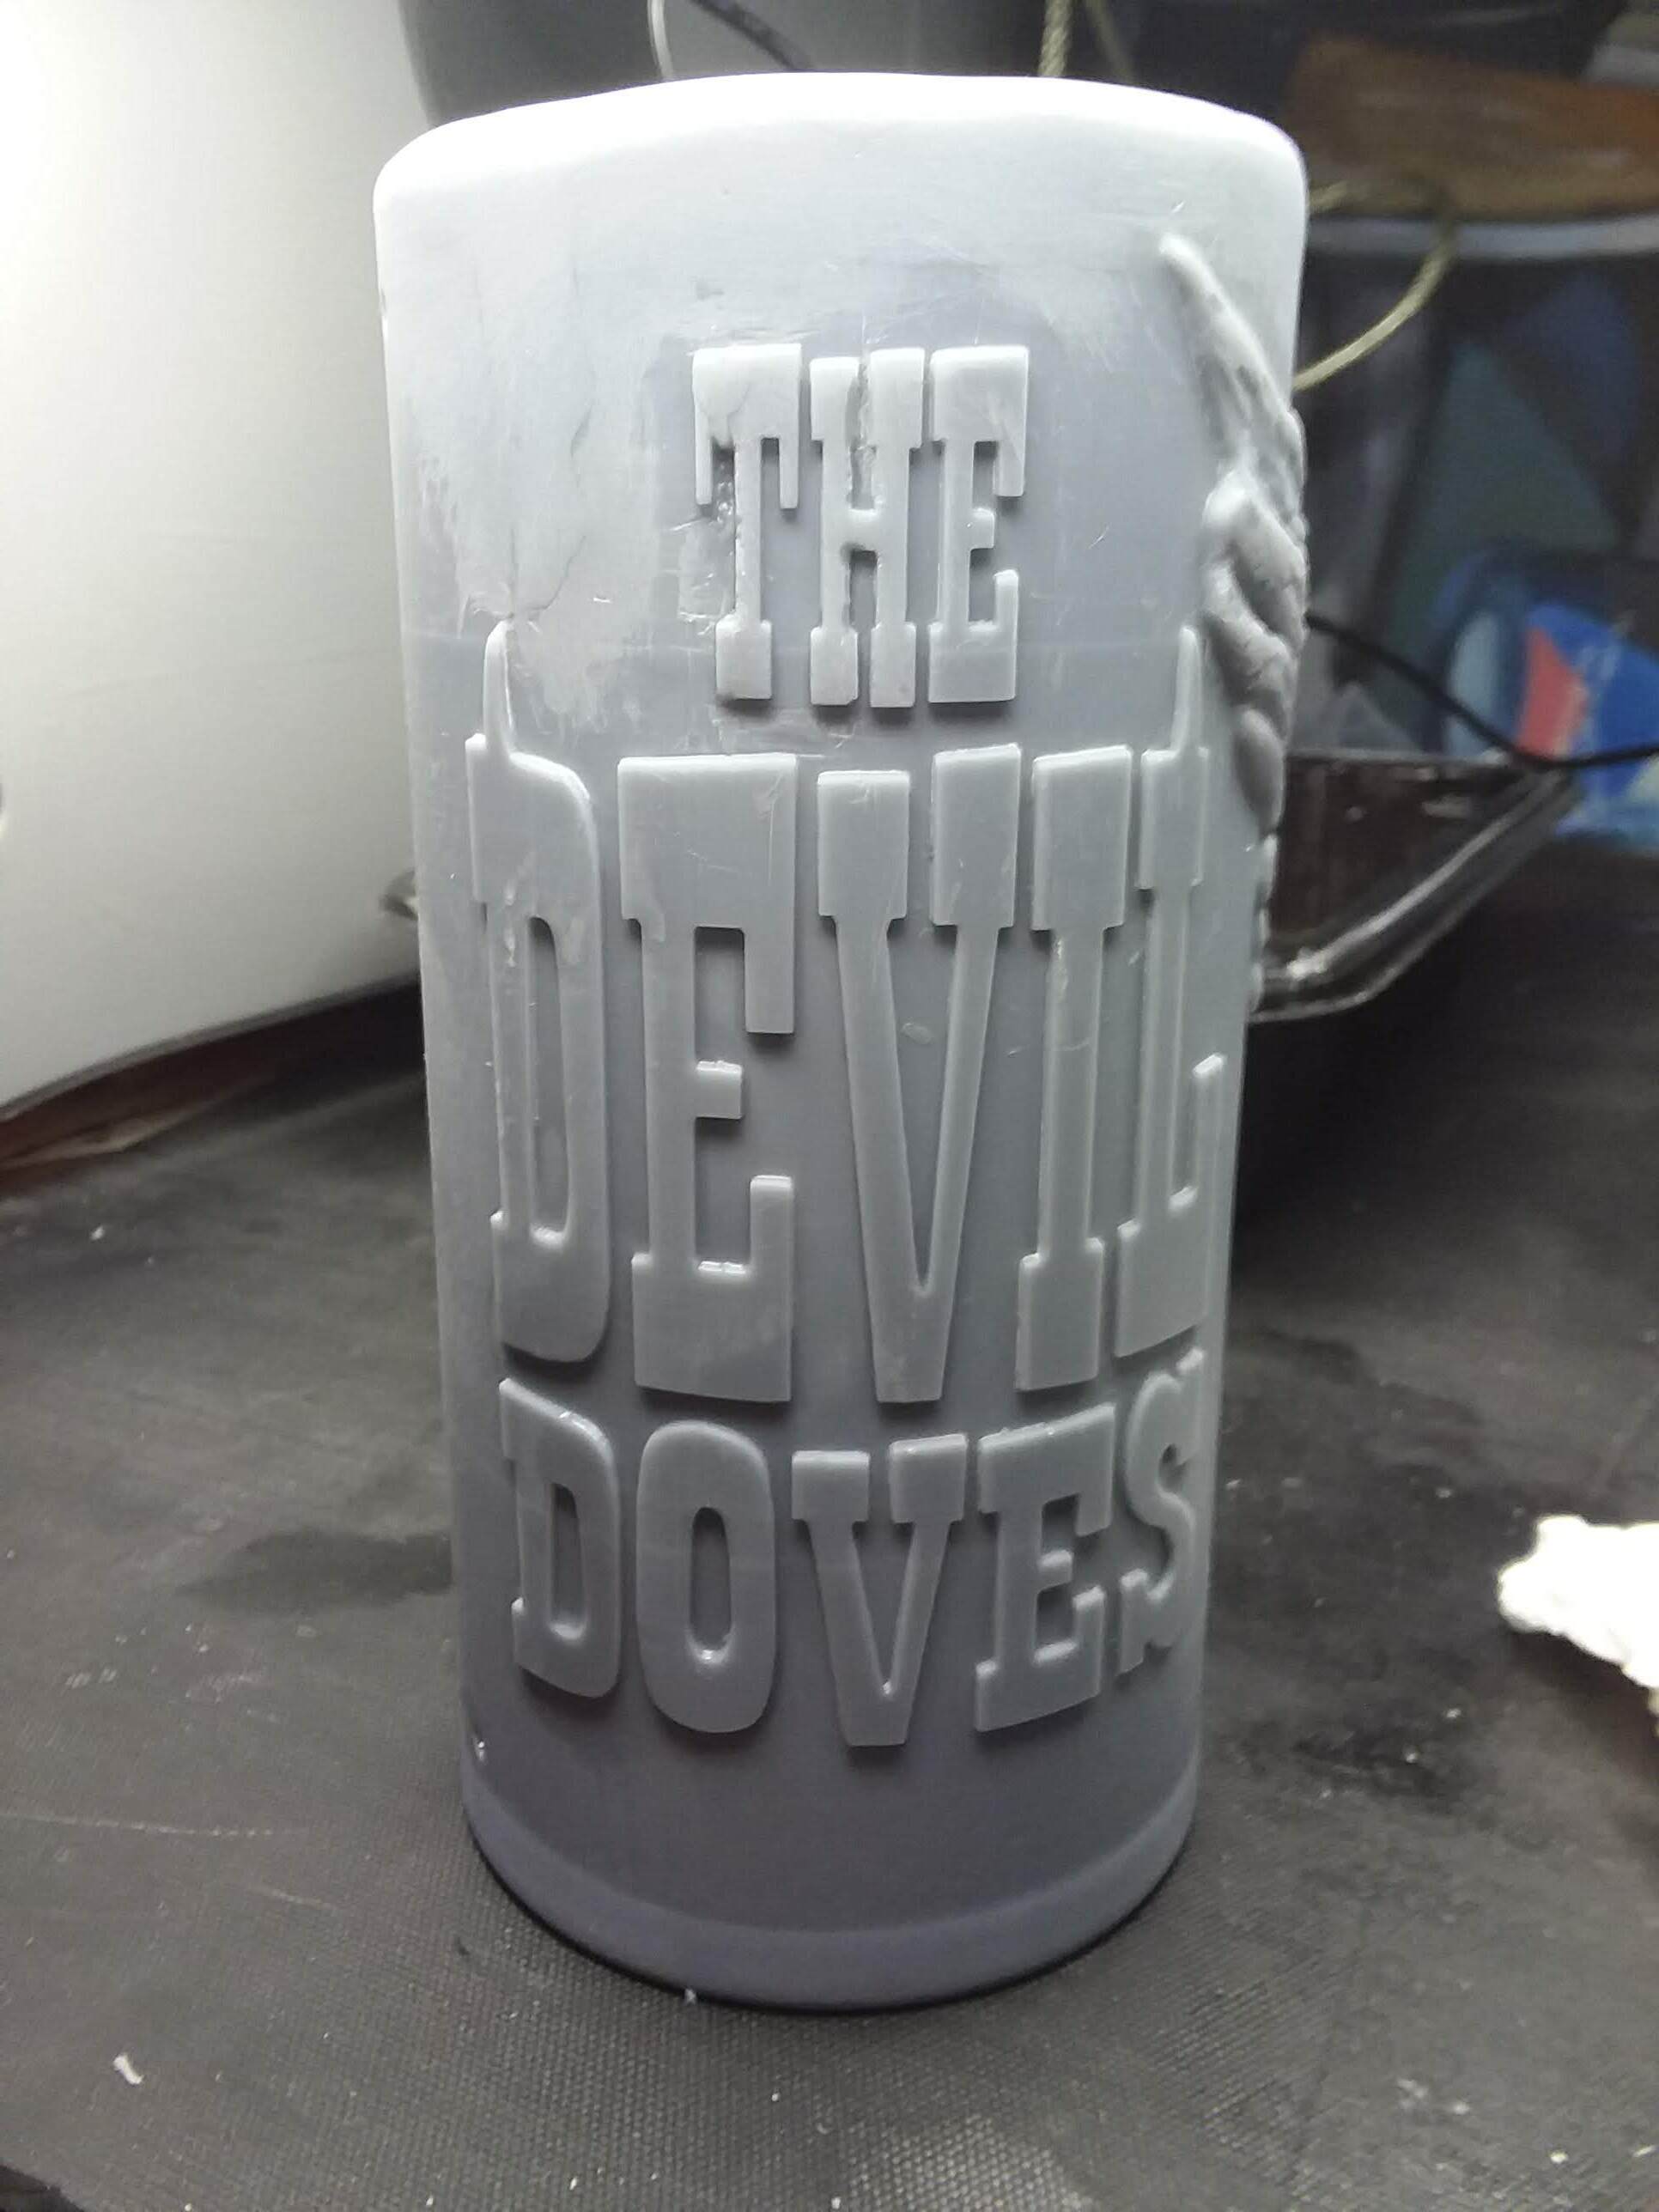
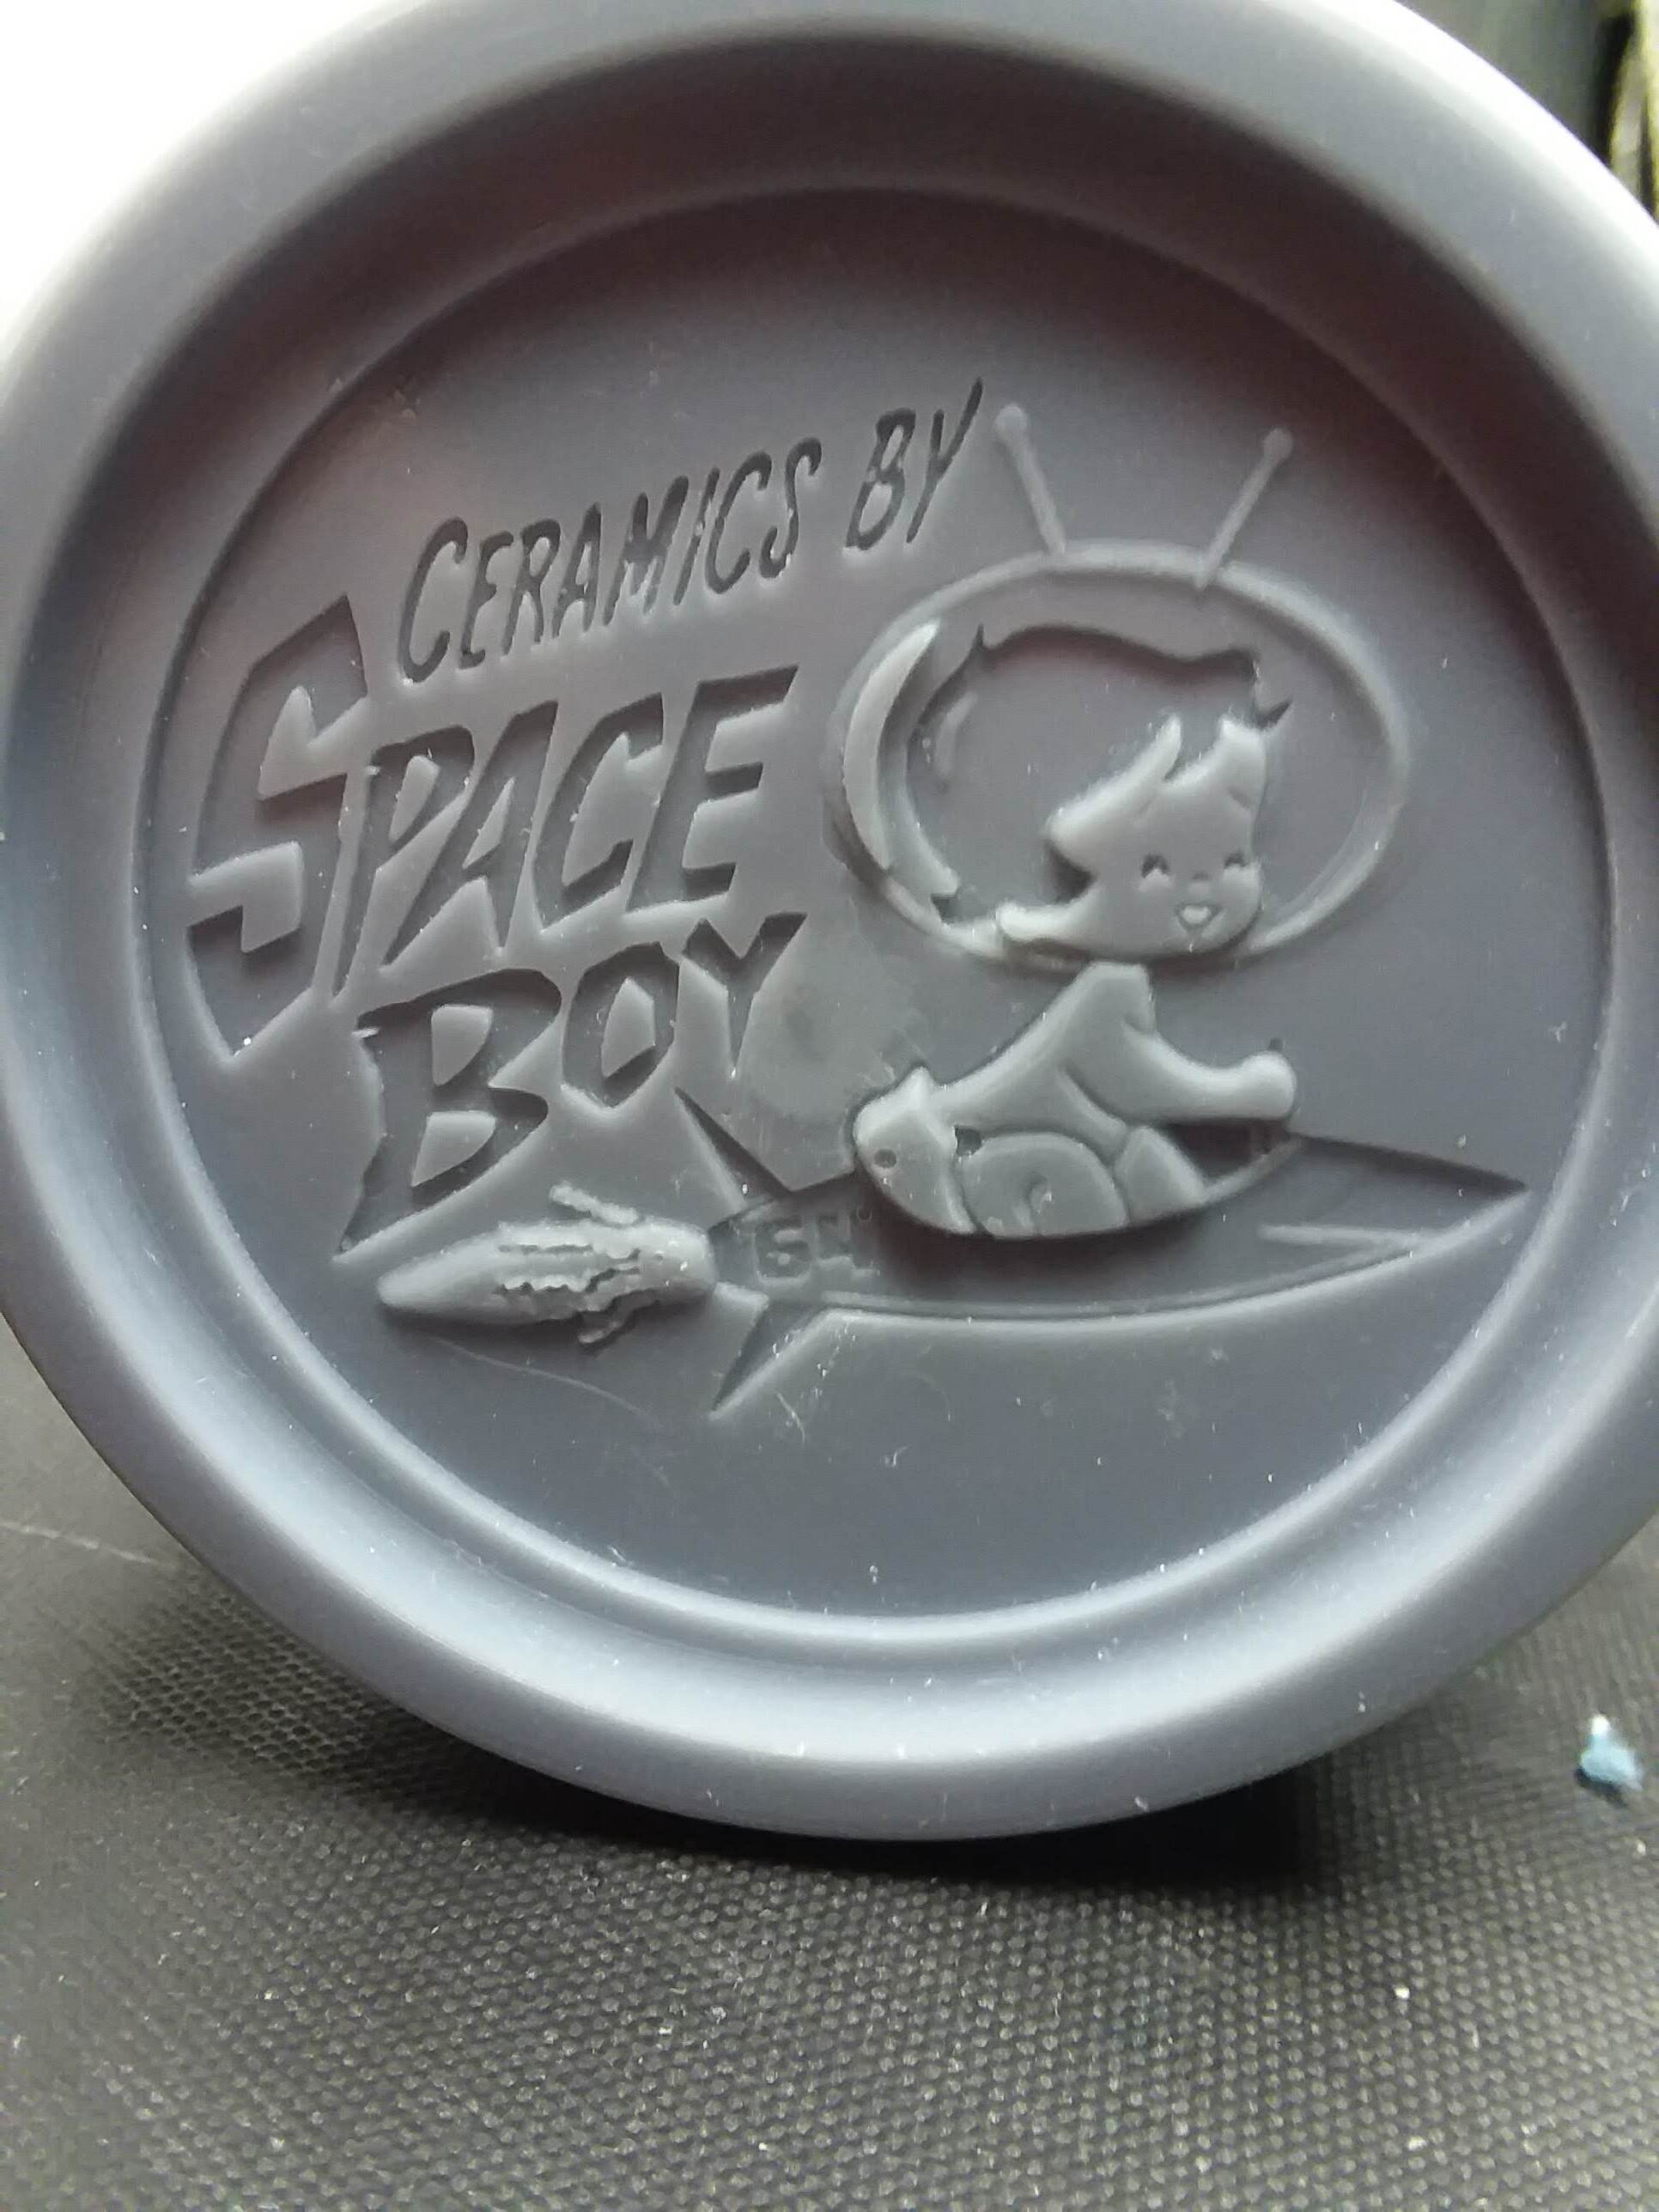
Also, this logo is a curve object brought in from Inkscape. What’s the best way to engrave this? Do I have to convert it to a mesh?
Normally, the problems using curves to deform a mesh come from the origin points and the orientation of the deformation. Personally, in this case I would prefer to use a simple deform modifier, that takes in account the perfect size of the mesh and its simpler to get good results than using curves. But it depends on your taste or your patience.
Thanks! No, I’m not using multi resolution modifier. Should I be? I am using Dyntopo. Does that make it possible to sculpt in low res, and yet have a high res model at the end? I haven’t used it much. I need to be able to 3D print this in the end. I will use the 3D print to make a plaster mold for making ceramic mugs.
I will try the simple deform modifier instead. I will need the cylinder to be 8 cm in diameter, so it might take some re-scaling to make it fit with the logo on the other side.
Well, dyntopo and multirresolution are two different ways to work with sculpting and yes, at the end you can have a high resolution model with multirresolution. In some cases multirresolutions works better and in other cases its better to use dyntopo.
The difference is that dyntopo really gives faces to your mesh, while multirresolution works on a subdivision level where the polygons are not real and it gives the possibility to use the optimal display, that makes the sculpting process more fluid even with more subdivisions.
The point where multirresolution “loses” from dyntopo is that multirres dont make subdivisions on specific areas. When you subdivide it is applied to all the mesh. But you should make a test to see if it doesn’t satisfy your needs.
Thanks. That’s why Dyntopo seemed like the best choice to me. Multi-res seems like something I’d use if I needed several levels of detail in an animation, so I didn’t think to use it here. You say its “polygons aren’t real” and thus the computer can work more smoothly? How does that work? I mean, if I’m using a subdivision surface modifier, it’s still subdivides the faces, even though I can turn it off.
My computer was getting really laggy to the point of not being usable until I started simplifying the flat areas and did a decimate overall to bring the face count down. This brings me to another question about sculpting. I’d like to set a “floor level” to the relief sculpture, so that I can make the points that aren’t sculpted with anything zero on that plane. Can I do this? For instance when I’m sculpting with a negative draw brush, the deapest it can go is 0 on that axis. Right now, I’m pushing in with the draw brush, and it’s going too deep, and I have to use the smooth brush to bring it back, which is a pain, and doesn’t work very well. I’ve found that where the subdivision level is high, smooth doesn’t work as well and I can’t manipulate the surface as easily.
Also, I confirmed that plus and minus functionality switched for awhile. I reloaded the blend file, and everything was back to normal. And I really like the nudge tool, when it works, but it wasn’t working consistently today. Is there a trick to that?
Did you try to hide the faces you are not working with to have better performance on the sculpting?
Subdivision modifier will eat up your memory and the performance of your computer.
I made a test here and to have dyntopo subdivided after is really terrible. If you have enough geometry it should not be necessary subdivisions to smooth the sculpt. Did you try a smooth modifier instead?
Thanks. No, I haven’t tried that. Maybe that would help. Since I have been using Dyntopo, I’ve haven’t put a subdivision surface modifier on it. You’re right, it’s not really necessary, at least on the sculpted part. The flat parts aren’t subdivided enough, but I can fix that. I will try a smooth modifier.
I’ve been working on this some more. I think it’s getting better. I finally figured out how to get the boolean to work with the logo. I couldn’t really find the cause of the problem, but certain letters weren’t cutting through, or just cutting a hole without any inside polygons. I changed the tolerance setting, and finally they all work. I’m still trying to figure out a way to make all of the flat parts flat. the Smooth brush averages out the levels, but not really flat. The flatten brush, which I would think would flatten areas, doesn’t work the way I would expect it to. Neither does the scrape brush. Why don’t they work right? Sometimes I find the smooth brush just gives up at a certain point and refuses to smooth things any further. It functions worse the higher the point count.
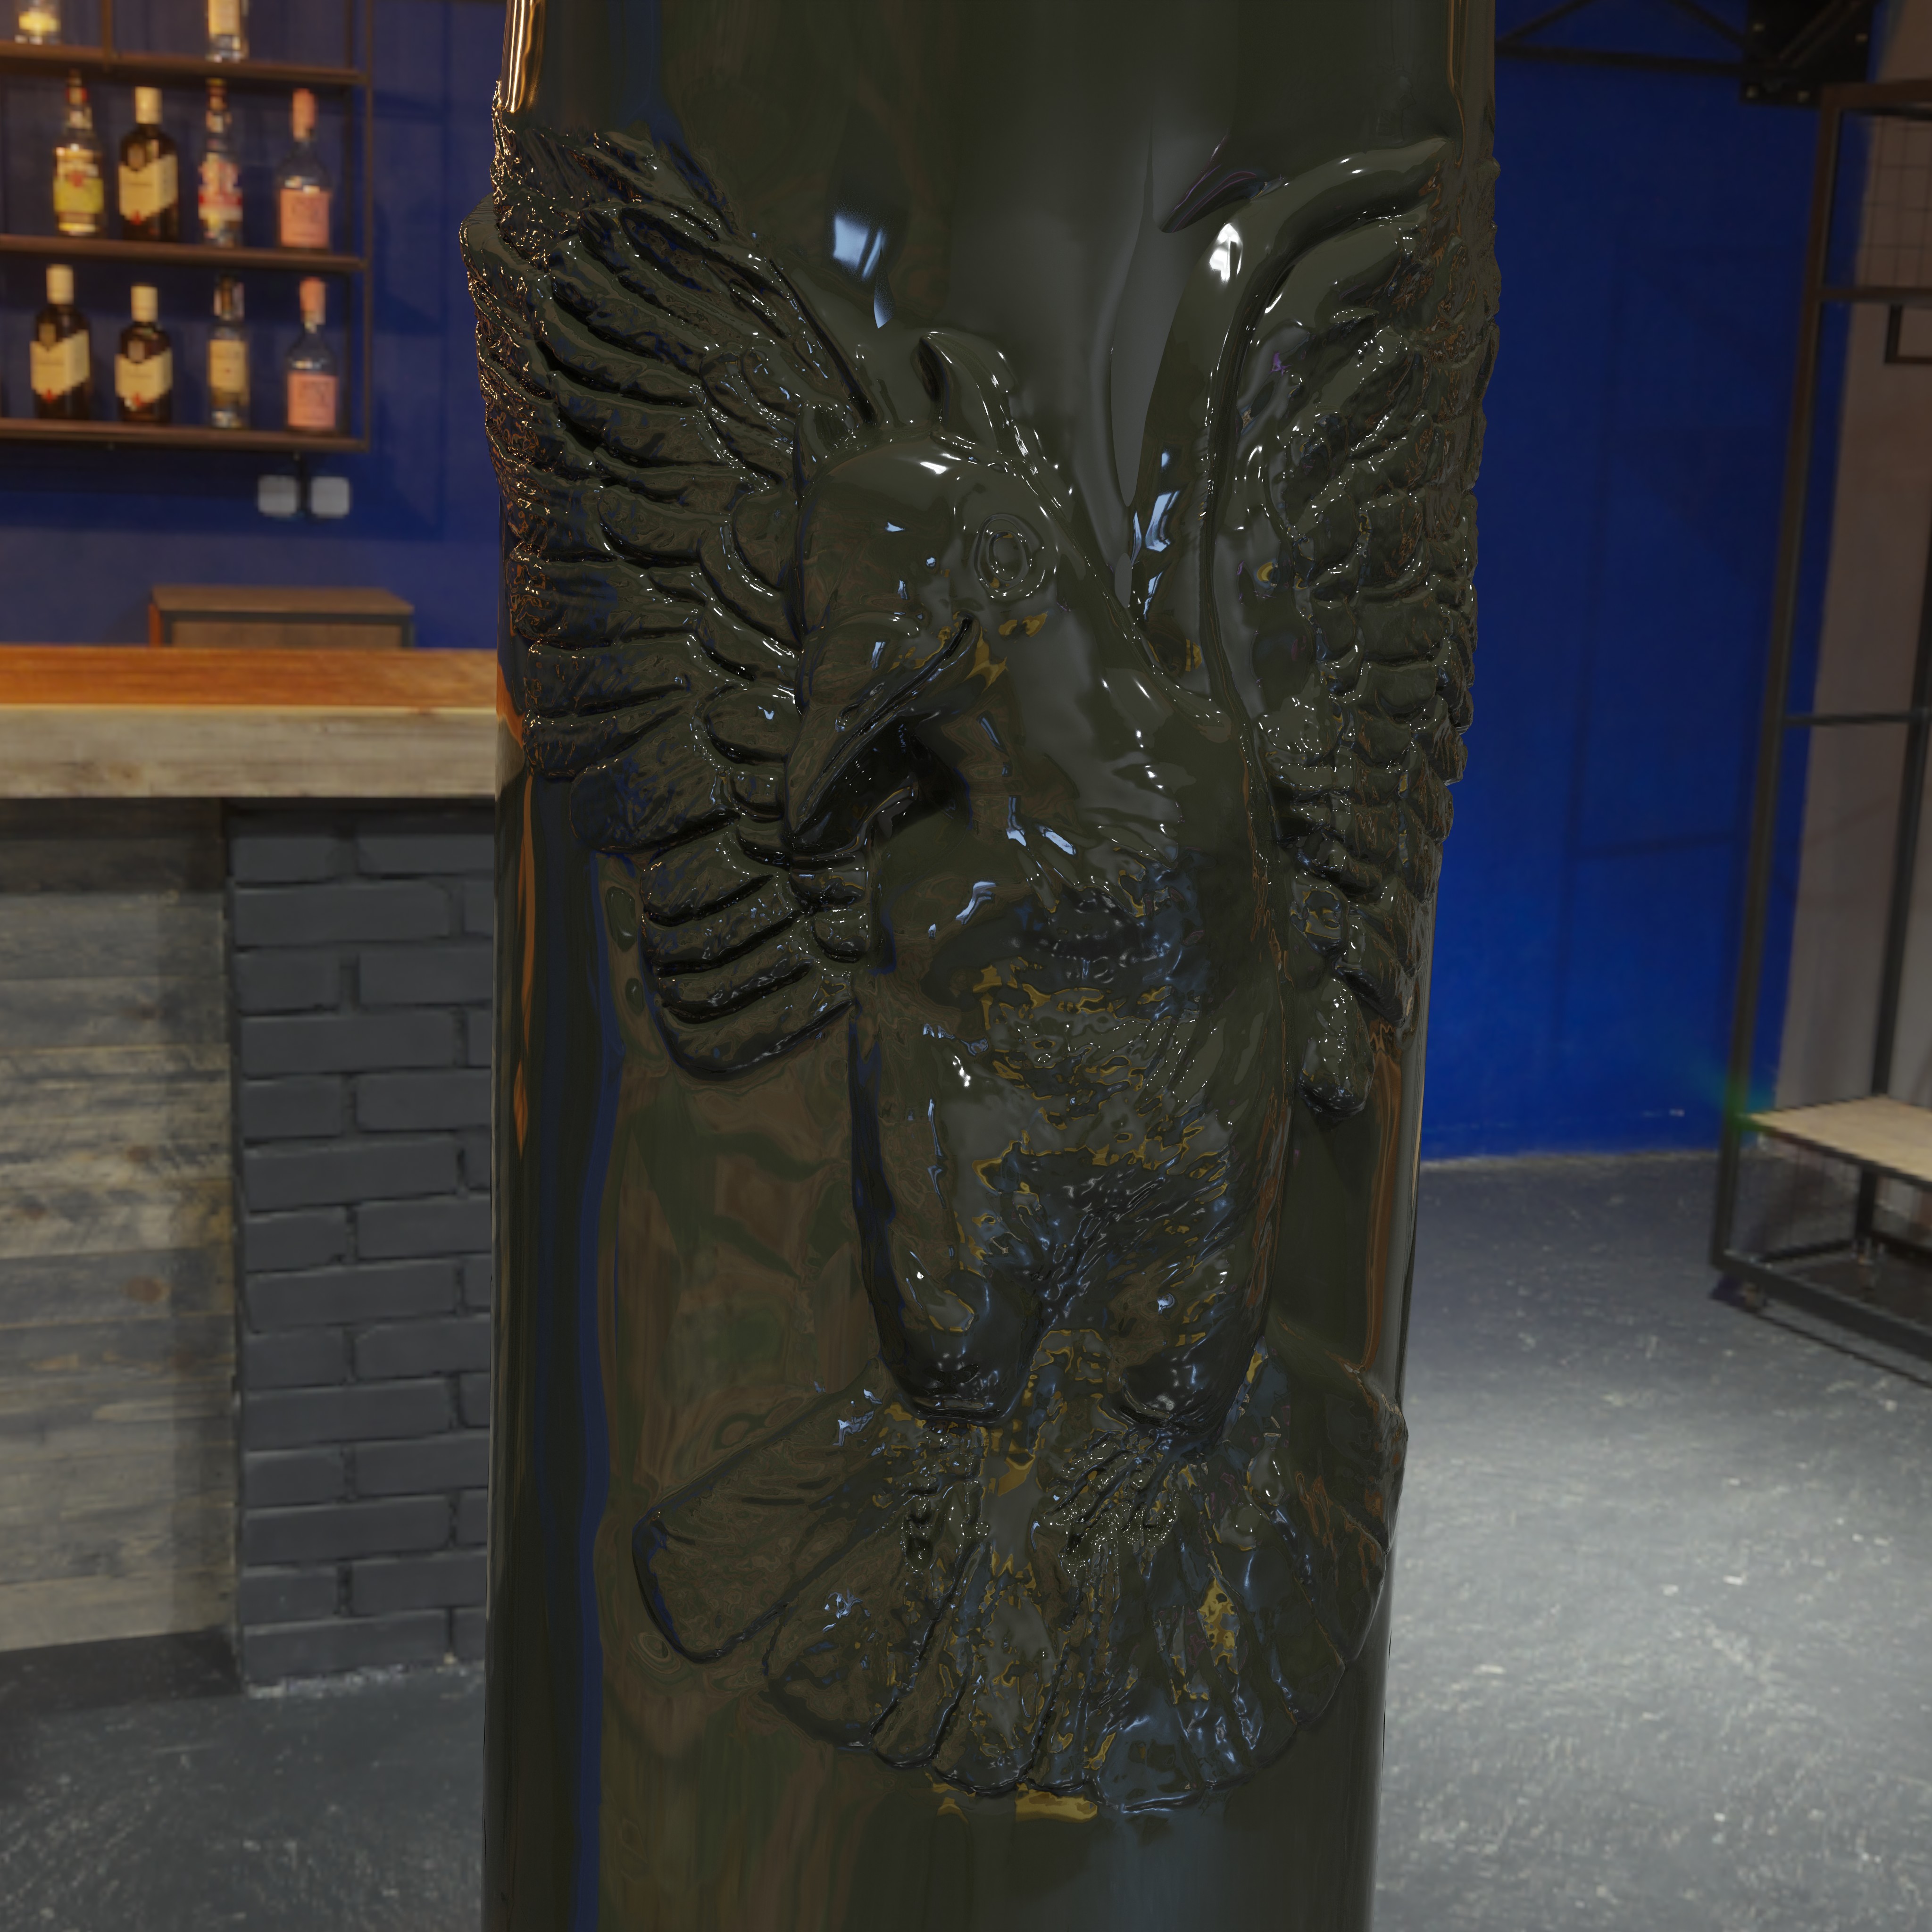
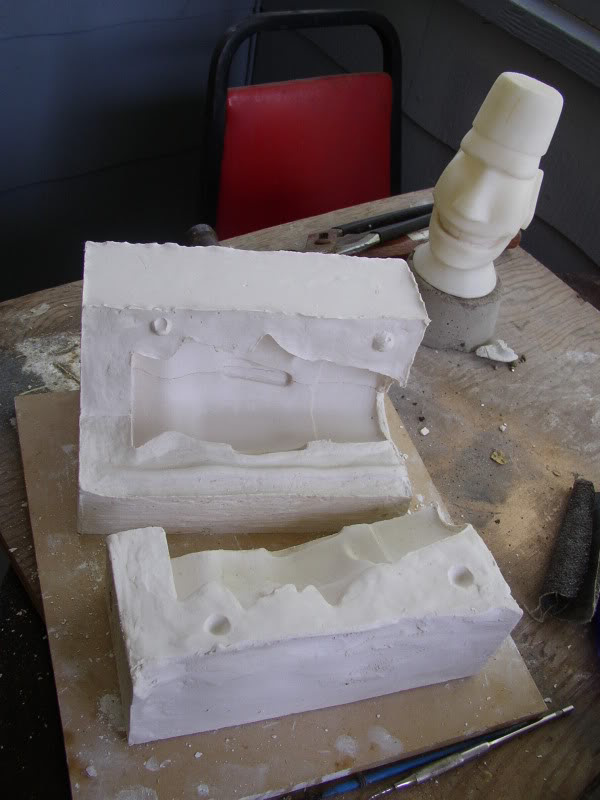
Anyway, I’d appreciate any feedback on this. The next step once I get the sculpt finalized is wrapping it into a cylinder, putting top and bottom on it with a pour spout and get it 3D printed. I’m excited about trying this. It would be great to go from computer to real ceramic mugs.
And just out of curiosity, I’d like to know how to make this material look more like putting a dark wash on a real ceramic mug. This is just using ambient occlusion, but a black wash would cover more. Here’s what it looks like on another mug I made:
To make the parts that are supposed to be flat you select a point on the height the surface should be and snap the cursor to that point.
Then you select all the faces that need to be flatten, with a small space from the parts that need to stay untouched, change your transform pivot point to the 3d cursor and activate the proportional edit with a small radius just to have a soft change from flat to relief and scale down the selected faces on that axis to 0.
Well, I was able to figure out some things with those tools. Using “Use original normal”, and plane, allowed me to flatten like I wanted. I had to tweak the settings. The defaults aren’t very good.
I assume you’re talking about editing in Edit mode. I did some of that too. My edges kept getting messed up. Finally I made some face sets to keep the edges in place.
I still cannot figure out why the plus and minus functionality has reversed on this file. Positive is supposed to build up, and negative carve down, but it’s reversed.
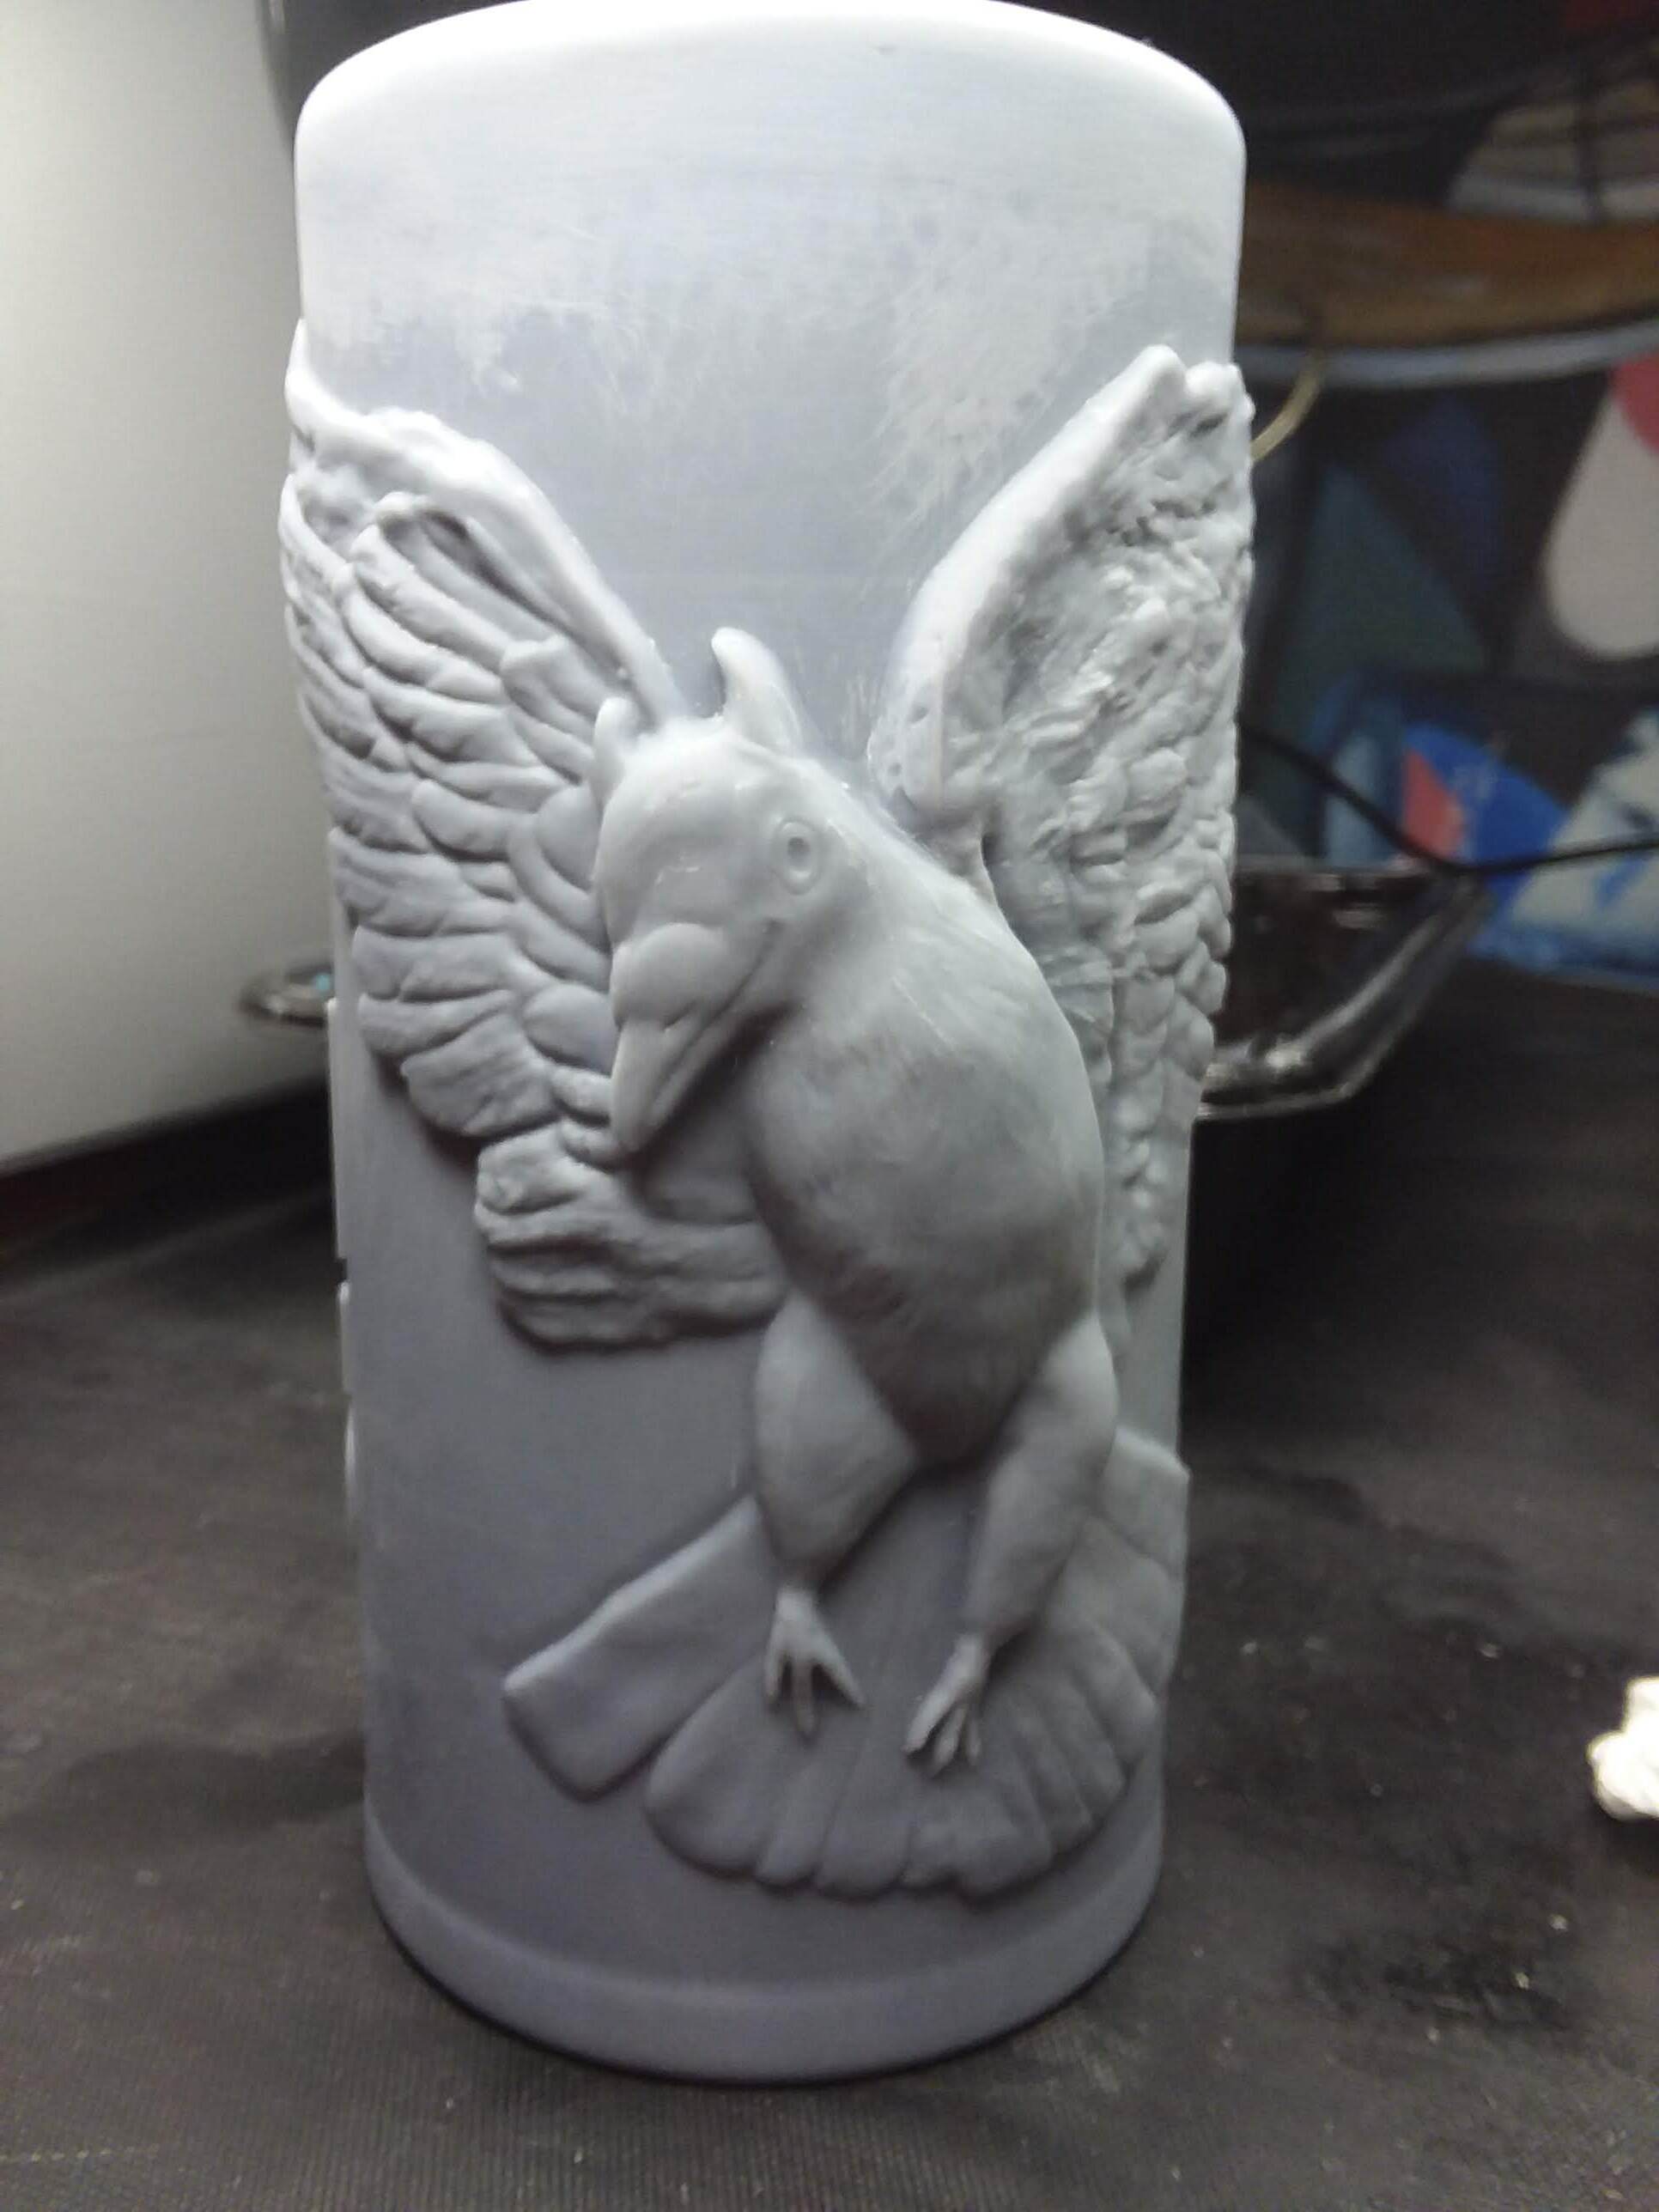
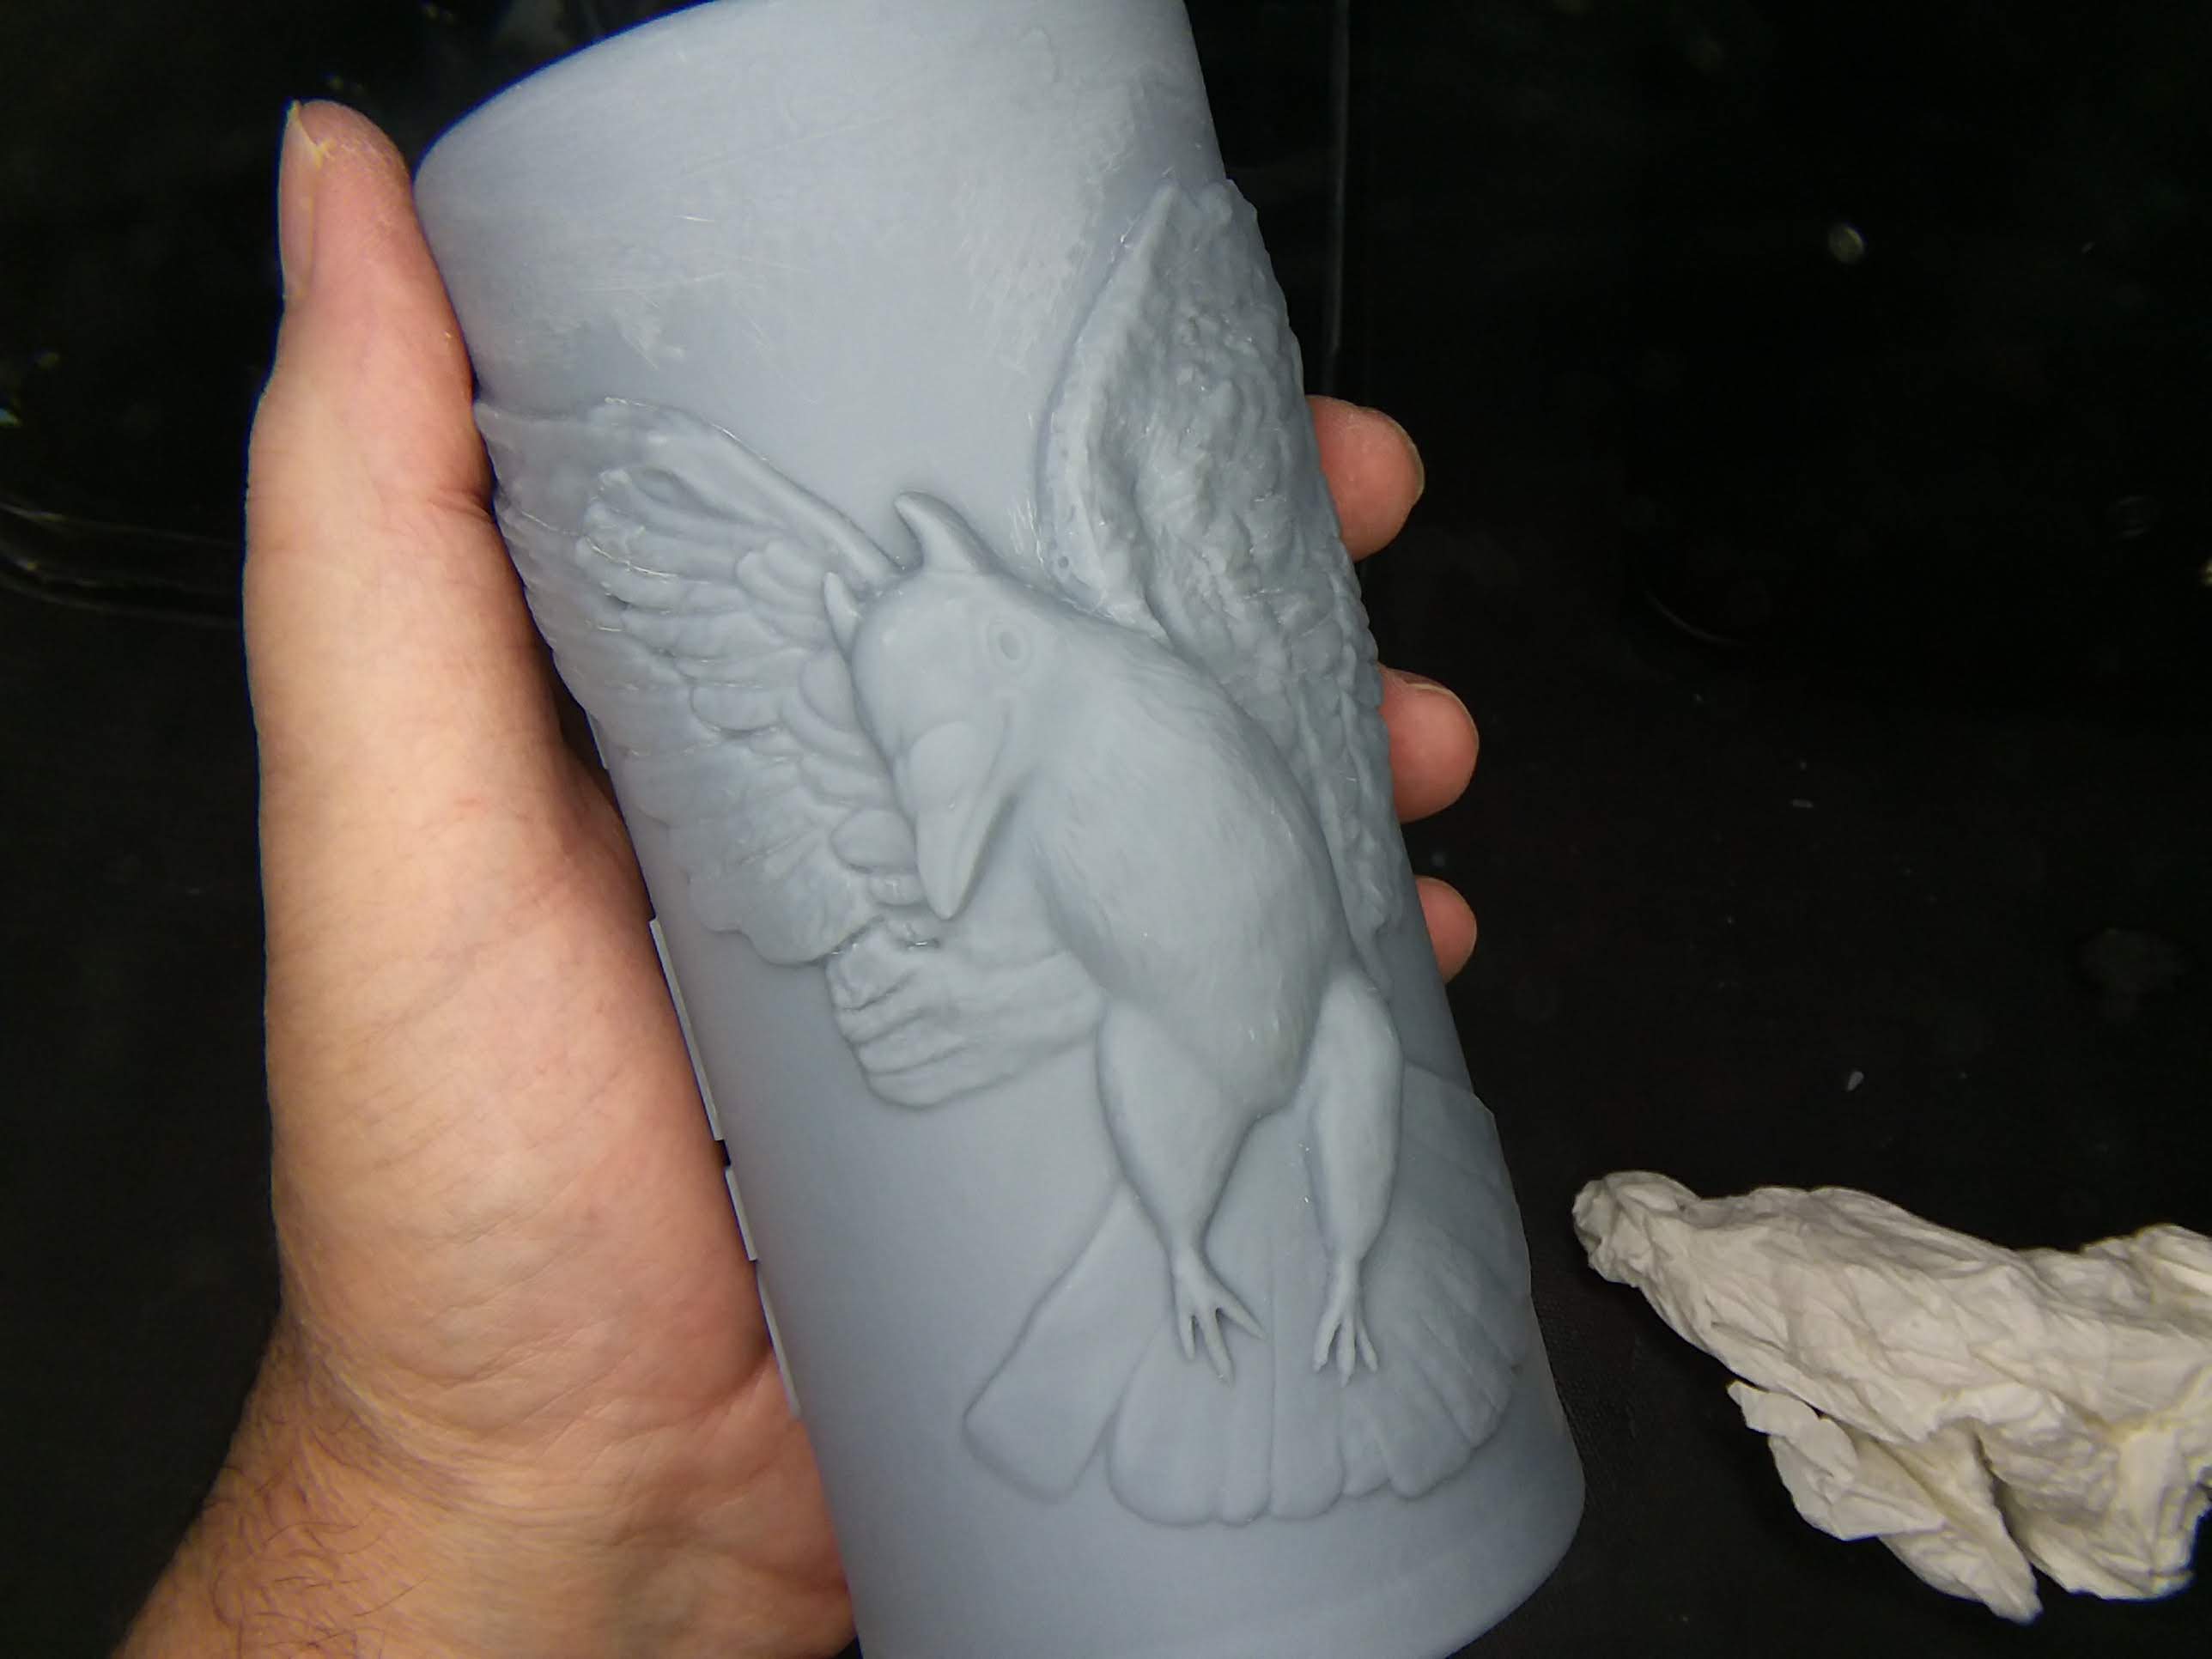
After many months and lots of frustration, I finally was able to 3D print my mug design. I learned a lot along the way, in Blender, and 3D printing. I found out this low relief detail probably doesn’t need any supports. I added way too many, and some of them merged with the sculpture. Fortunately I was able to repair it. Also, it’s supposed to be 3" in diameter, and I even made it a bit larger, according to Chitubox, but it came out just shy of 2.75". It’s not terrible, but by the time it becomes a real ceramic mug, it’s going to be even smaller, and I wanted it to hold a full pint, like the glass mug I based it on. Let me know what you think.
Thanks.


 | LIVE from The Rambling House")