Hi guy’s, i am almost baffled to revert to asking these simple questions here since after 2 hr searching i didn’t found anything that fix my issues.
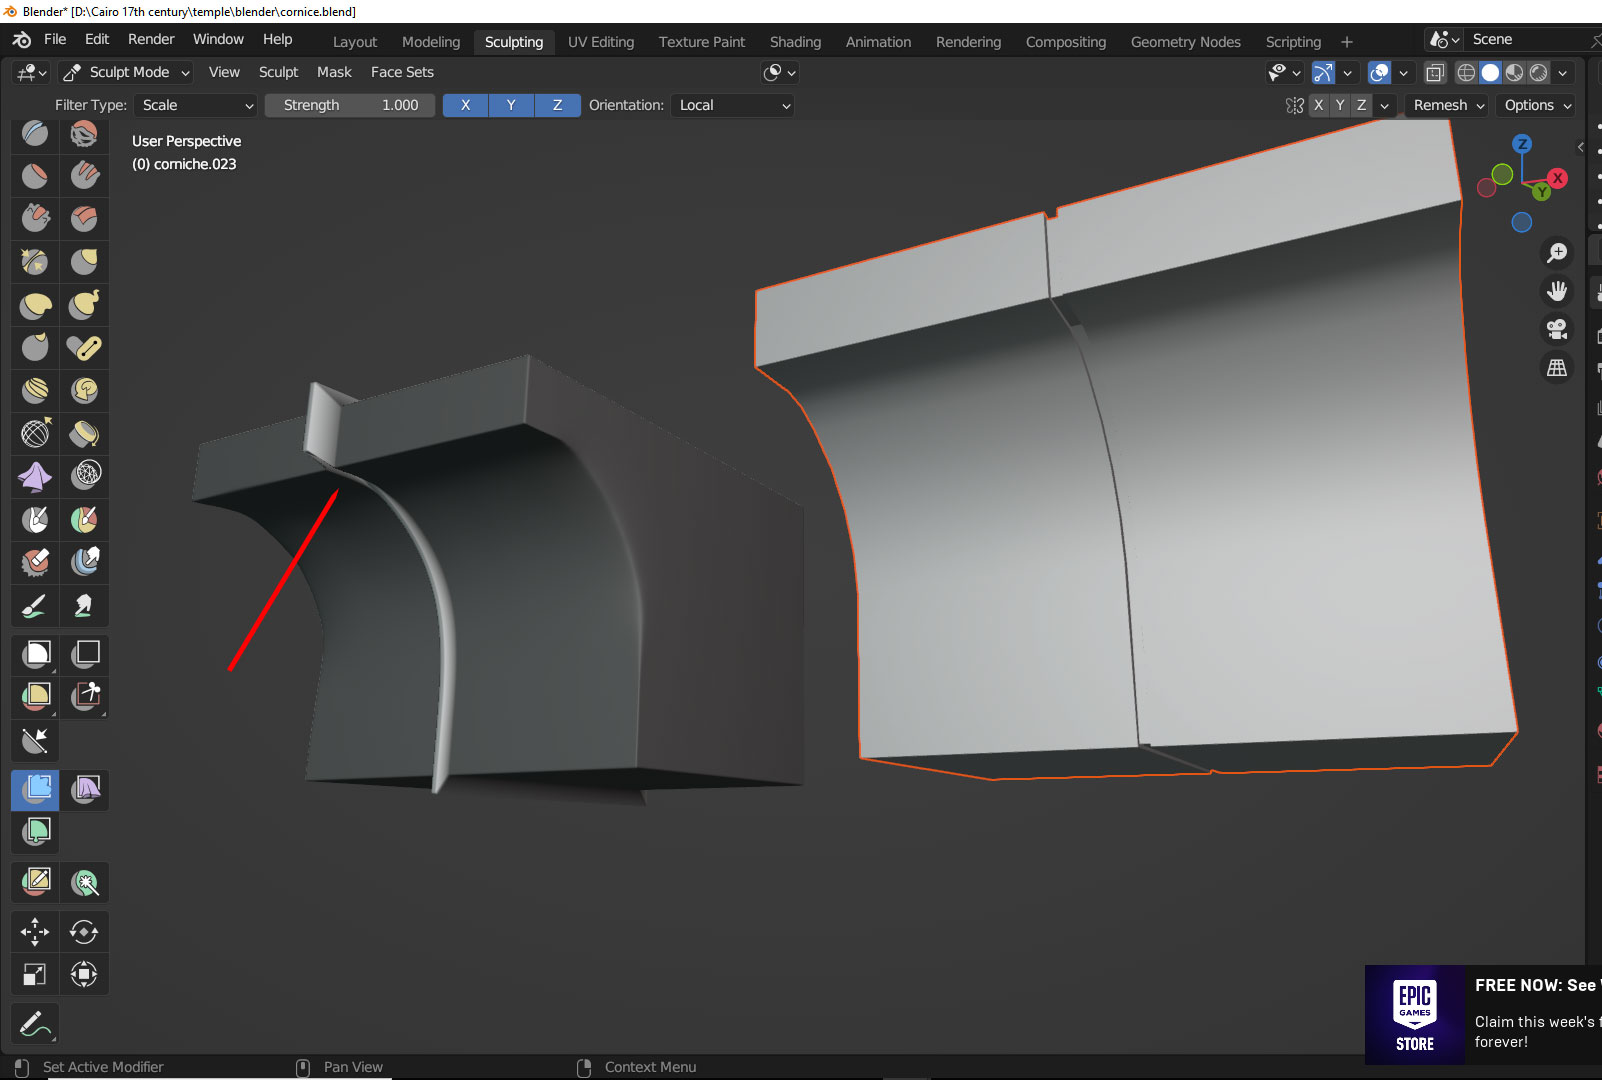
I have a piece of cornice here where i want to make a simple inward joint and so far the only solution i have found was to use mesh filter ‘‘scale’’ with mask and push it inward but it doesn’t work correctly under the ledge where the red line is pointing. World coordinates is set to normal and i didn’t found any better option with other sculpt tools so if there is one please share it here.
I could have easily made the inward joint prior to voxel remeshing but it was giving me too much issues with shade smooth, i have tried many ways and the faceted faces were always leaving artifacts when using smooth brush around them. Regarding these faceted faces i tried many ways to fix them but none was satisfying, i did manually with smooth brush, mask it and using the mesh filter ‘‘smooth’’ and finally the smooth modifier. I also tried with subdivision but again it was giving me faceted faces just like voxel remesh.
If you can share any tips regarding both these issues i will appreciated very much.
Yes i mention that it could be done easily in modeling mode but i need to do it in sculpt mode since it was giving me too much issues to fix the faceted faces. I am really surprise they are no easy ways to make this in sculpt mode.
Maybe I didn’t understand it well, but modeling modification is easy.
I don’t know what the end purpose is and what are the problems, but I think if Sculpture tries to solve the modeling problems, it will create more problems.
Add…
I think this feature will help.
Press the Shift key to give the axis limit.
I need to do it in sculpt since i need to add damage to it for a modular kit that is going to work as nanite mesh in UE5. Voxel remesh is required because i need even square polygon to use special stencils made for the cornice.
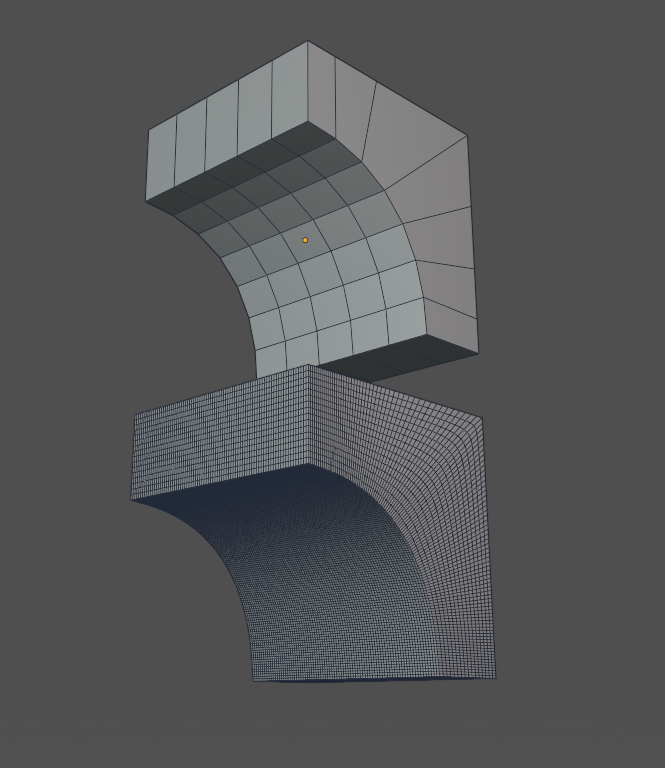
My issue is the faceted faces showed in second picture but just imagine the cornice with those small inward joints and trying to fix them with all the techniques i have mention and it is next to impossible and very tedious work.
Voxel remesh are only for concept modeling
I use multires in combo with Layer brush set persistent base + Mask
and this is the moment where Quad remesher comes handy
Voxel remesh is going to faced no matter how you do it.
Creating the curve around the cornice in a straight line would be pretty hard i think but i can give it a try tomorrow since it’s time for me to go to bed and thank for helping.
The reason i need voxel remesher is because of the even square polygon since i have special stencils and with multires i get distortion since polygon are rectangular in some area.
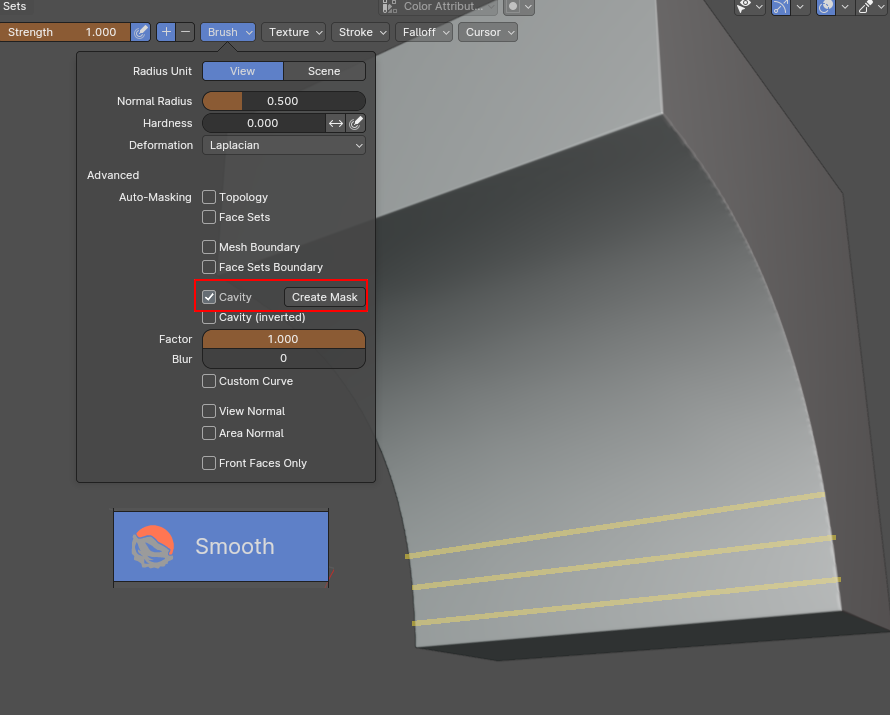
Great tip kim i was not aware of this option in smooth brush and it make it a lot easier to smooth the surface without affecting the surrounding vertices.
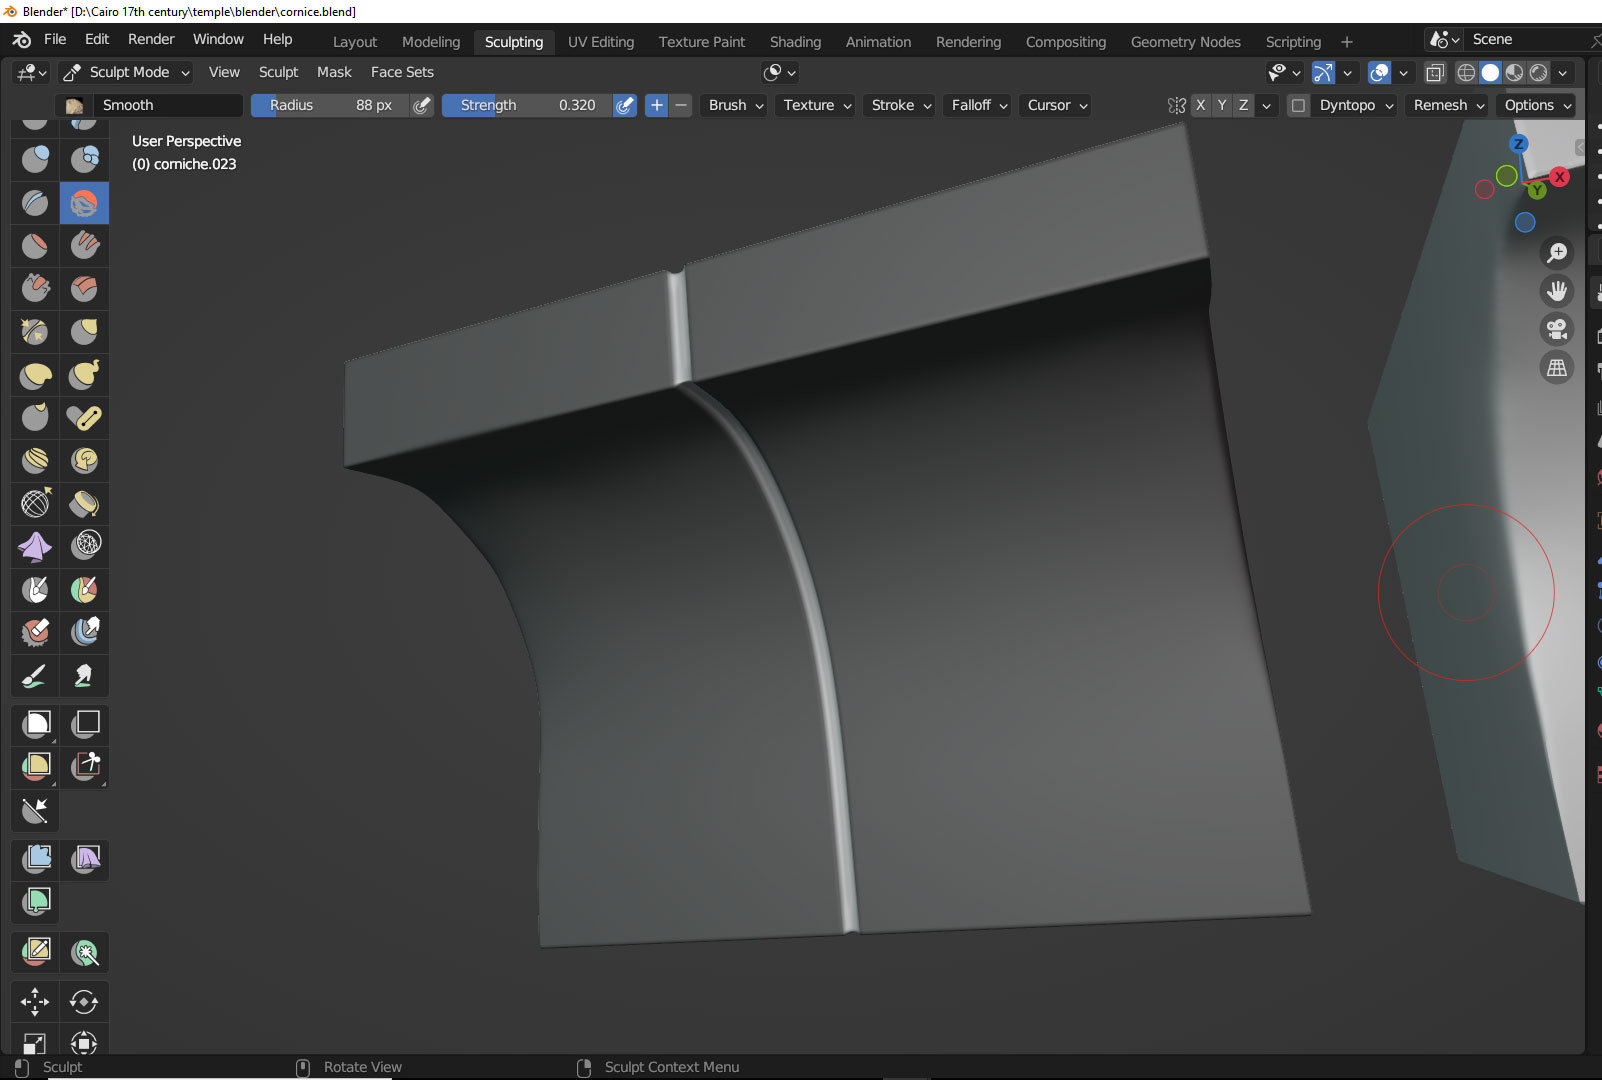
I found a way to do it with mesh filter ‘‘inflate’’ since i didn’t know ctrl key also work with mesh filter, the only remaining issue is cleaning the deflate inward but it is easy to fix with smooth brush at low strength settings.
But i would really like to know why inflate filter work correctly since scale filter does not work correctly.
*Inflate move out by normal of geometry.
*scale move out by object pivot . (area closer to pivot less scale it gets)
Yes Quad Remesher is very expensive but often time In my case I have like 20~50 parts of the objects
and manually fixing topo and smoothing out a lot of faced area is really taking up time . So this just have to depend on your situation.
OK thank Nick i was curious why it didn’t work with scale, i have tried changing coordinate to normal in the gizmo menu but it doesn’t seem to have any effect.