Hello Blender artists, I just started using blender 3 days ago and I’ve run into a little roadblock. I’m modeling a pair of lungs for a school project and need to texture the inside of my lung differently from the outside. However, I am unable to select just one side of the face. Even if I go into solid mode and select an outside face, then attempt to hide it, the inside face is also hidden. Going into wireframe view shows that when I select a face, edge, or vertice, the other side of the mesh is also selected.

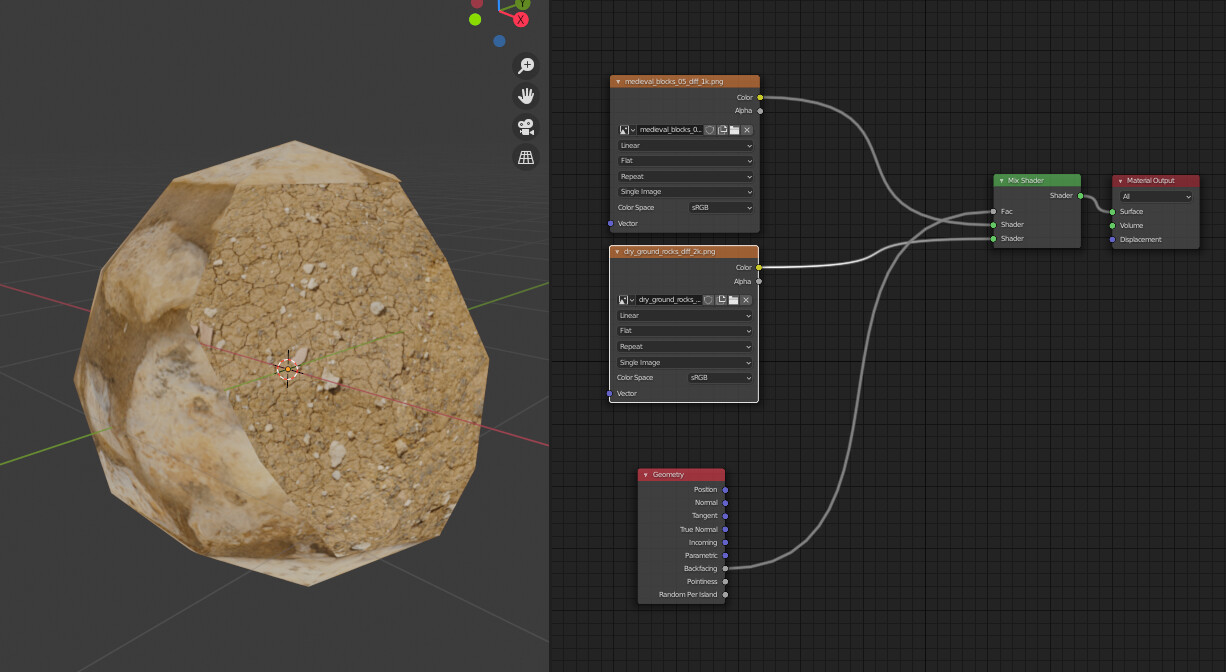
There is a simpler way …Just use a geometry Node to drive the Factor on a Mix RGB Node…( this could be a complete PBR set-up for each material)
Make sure your Normals are all facing the right way!
I think you are misunderstanding meshes a bit.The thing is there is no such thing as a separate outside face and inside face who share the same vertices. It is just one face. A face has a defined side that is meant to be the outside, indicated byits normal. A normal is a vector that is perpendicular to the face it belongs to and points into one or the other way of the the two perpendicular possibilities for a face, normally its orientation is defined implicitly. The side to which the normal targets is called frontface and the opposite is called backfacing. But its just one face.
For your problem you have two options, you might give your mesh thickness, (what increases the amount of faces) and texture the inner ones different then or you make use of the faces orientation ( based on if a faces normal is pointing towards the viewer or not) and shade it differently based on that dynamically. The latter you would do within a shader setup, like @RSEhlers demonstrated. If you are going to give it thickness, then there is a solidify modifier that gives meshes thickness. If you apply the modifier all faces of your solidified mesh is individually editable again. In case have a look here:
https://docs.blender.org/manual/en/latest/modeling/modifiers/generate/solidify.html
The only issue with this technique is that there is no human anatomy with 0 thickness.
I would personally opt for adding thickness for a little more realism. This would give you two sides to surface. As in the above post.
Face/Solidify
Or add and apply a Solidify Modifier.
I did solidify it with a thickness of 0.01m, idk if it makes a difference whether it’s simple or complex. When viewed through face orientation, the inside and outside of my mesh is blue. from what I understand that means my normals are correct. I guess a better way to phrase my earlier question is that when viewed in wireframe faces, I am able to see the dots on the outside and the one created by the solidify modifier on the inside. But when one face is selected, whether it be the front-facing or back-facing face, the other one is also selected, almost like they are linked. I can tell they are separate vertices because multiple vertex are displayed. I am unaware of how to select only one so that I may edit my front and back-facing faces separately.
1 Like
The display is somewhat misleading - the outside and inside faces are one-and-the-same until the solidify modifier is applied, at which point the “potential” faces on the other side will become real, independently editable geometry.
1 Like
I am punching my self in the face for not realizing it earlier. Thank you for solving my headache of the past 5 hours
Complex mode is for geometry where simple will fail. In your case simple should be enough. Some cases should be described in the manual.
Beside that, did you apply the modifier? Its located in the dropdown menu at the right end of the Solidify header text.
I just did it fixed my problem instantly. Thanks for all of your help.
1 Like
I was looking at my phone over coffee and could not see the image clearly. Good you finally got the answer. Sorry for being redundant… lol