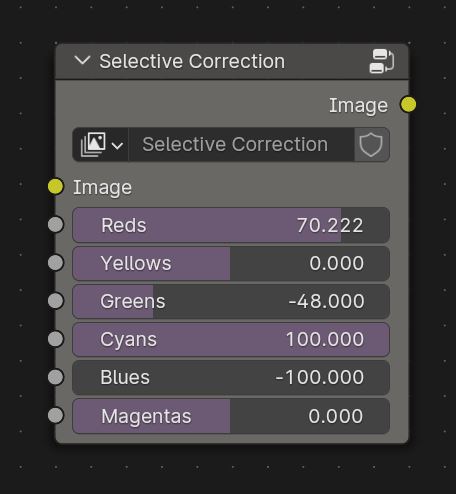
I’m trying to make a general purposes “Selective Color Correction” node group in the Compositor to selectively change the hue value of the Reds, Yellows, Greens, Cyans, Blues, Magentas, respectively.
Like in Photoshop, I want to be able to push sliders instead of messing with curves from the “Hue Correct” node, which is very unintuitive in my opinion.
So my idea was to isolate with a B&W mask the range of each of these 6 colors and then feed that mask to a “Mix Color” node.
Problem is, no matter how I try to tweak those curves, there are ranges of greens that do not get taken into account, the mask isn’t smooth either and the results are pretty nasty.
This isn’t going to work, you’re trying to combine precise numbers with the eyeballed values of that curve, which is why you’re having problems. However, one thing that will help significantly is changing your curve handles to non-Bezier- select them and click that second button, the sharp angle one
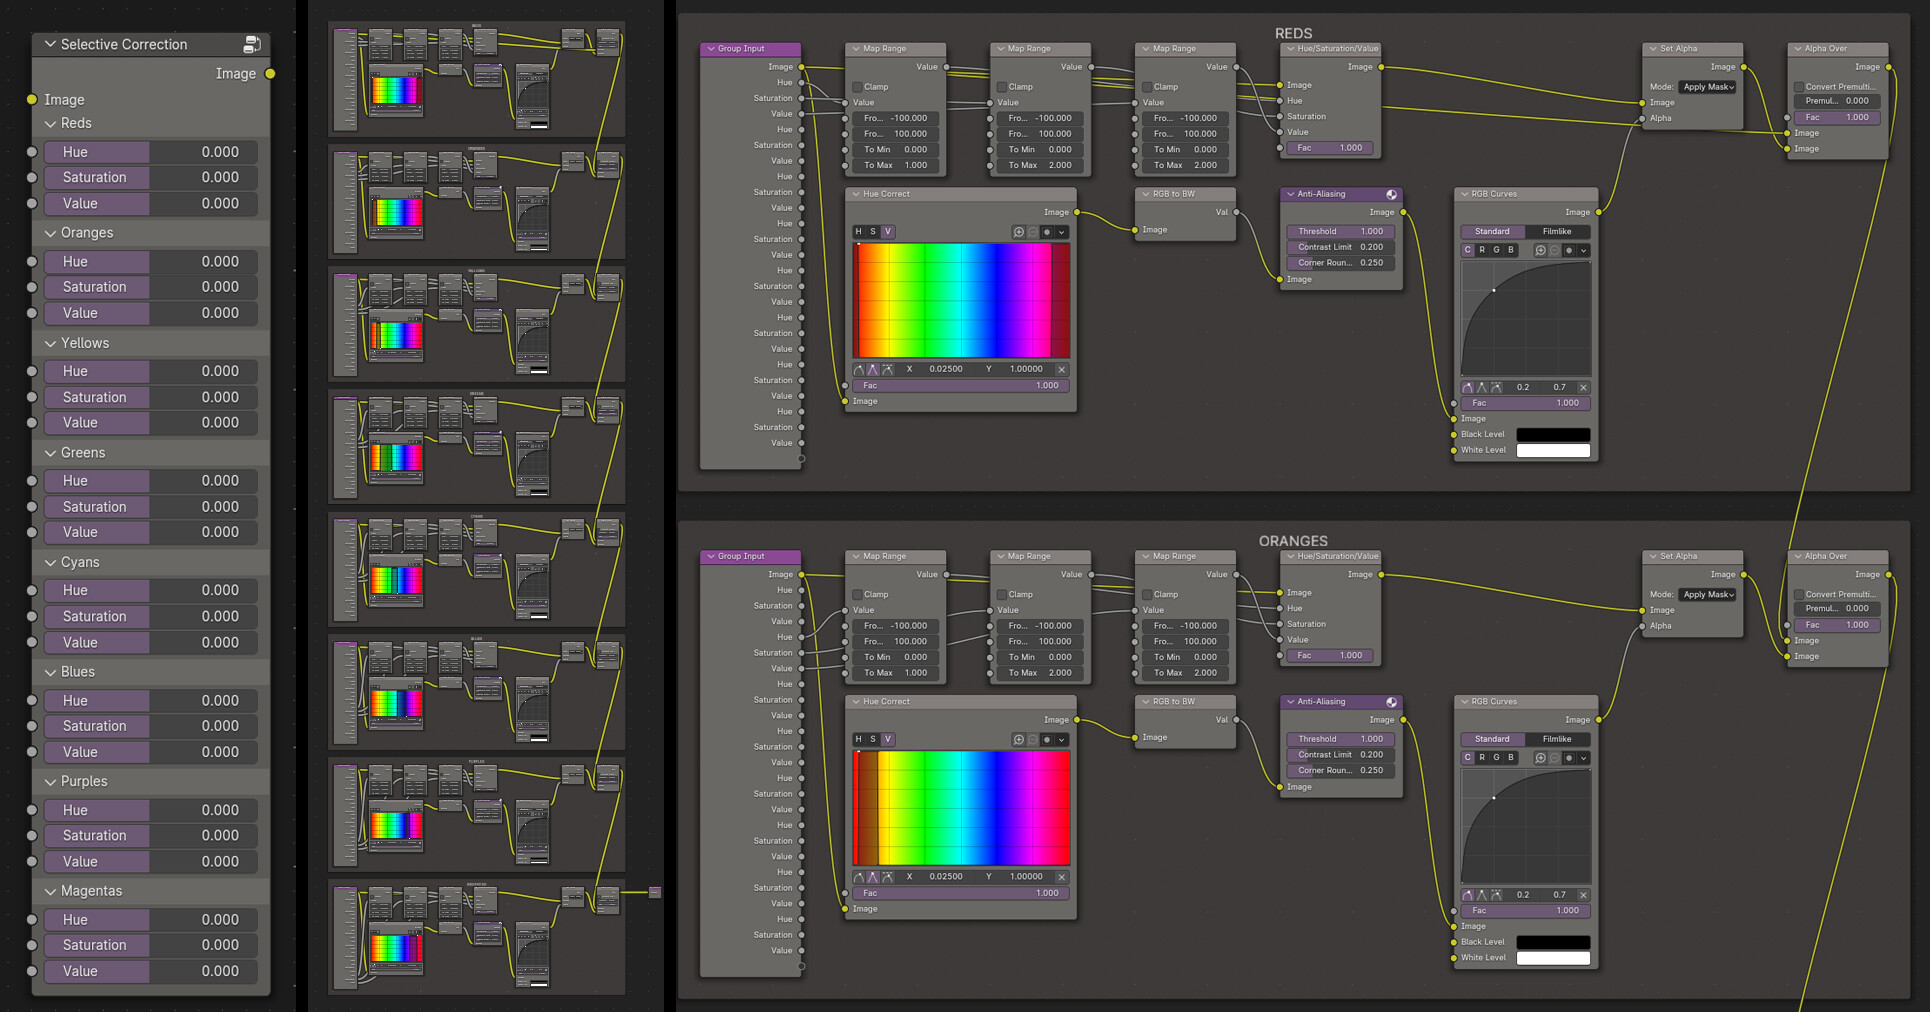
I’ve made some progress, here you can see the full node group (left), the full node setup (middle) and close up of the first two (right).
What I’ve done is that I made a range of each color (I added oranges and purples) in the Hue Correct node. Each color range ends exactly where the next one starts. Then B&W mask, then Anti-Aliasing gives slightly better contours, and then I crushed the whites with the RGB Curves node to strengthen the mask. Then set an Alpha with that mask, then layered it over the base image with Alpha Over.
It works slightly better but I’m very far from the smoothness I get in Photoshop. It’s still very rigid pixel wise. For example if I start changing the hue of the reds, then I will have to adjust slightly the oranges too, but to a lesser value than the reds, so that the hue follows and doesn’t make too much deviation.
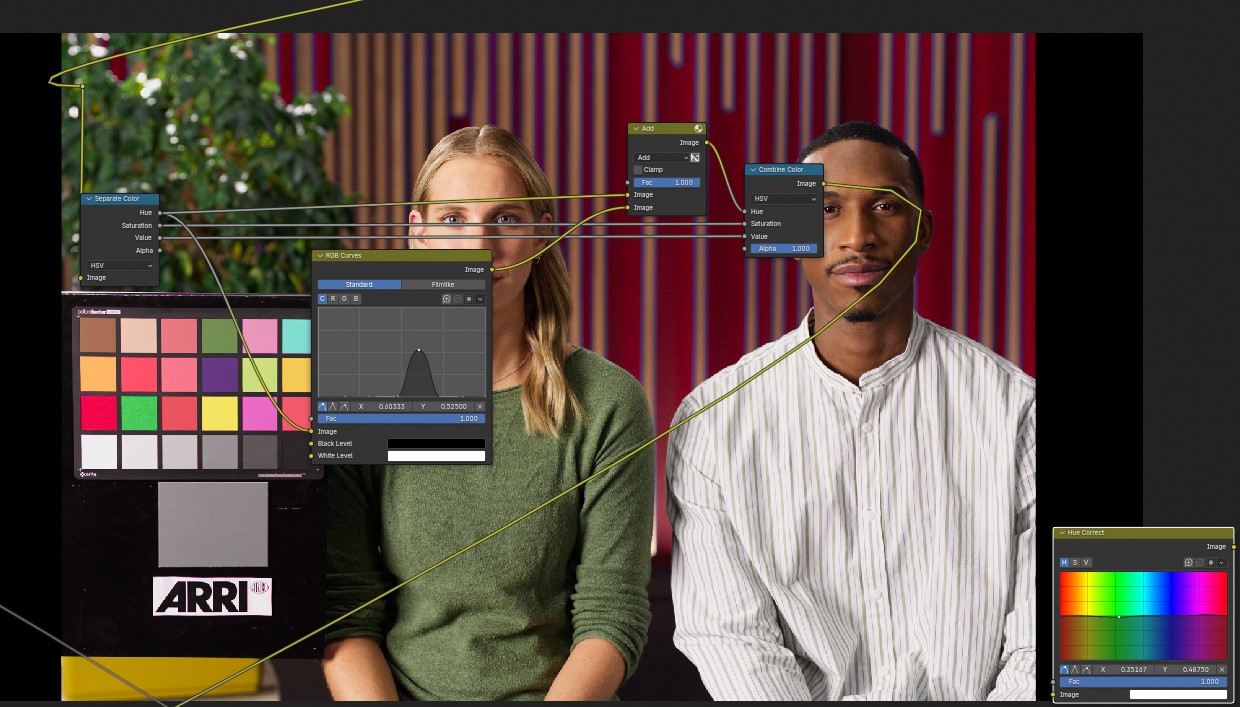
I have started something similar a few days ago.Have not tested that much with my build.However,you need to change to HSV colorspace mode.
The H give you the hue angle.S saturation.And the Brightness V.
S and V not important here unless you want to make changes here.
What you want is a hue vs hue change.This means you read your H input and you make changes at the position of the H angle of your choice.
Tbh i have not find a solution for a easy and precise changeing yet.
I have seen videos from resolves dctl where you can select a radius of the primary colors angles and you can narrow or widen the effected area of the color.In example you select the green primary color and you can widen the angle near yellow and cyan.
And then you can make your colorshift to this area.
Example video.hue shift at 10:49 min
fwiw,here my first try with hue vs hue.i changed the blue hue to red by adding curve value to the hue in that area.
All other points are set to 0 so no values are added in the other areas.
same would work with subtract.the hue shift would change the rotation direction then.
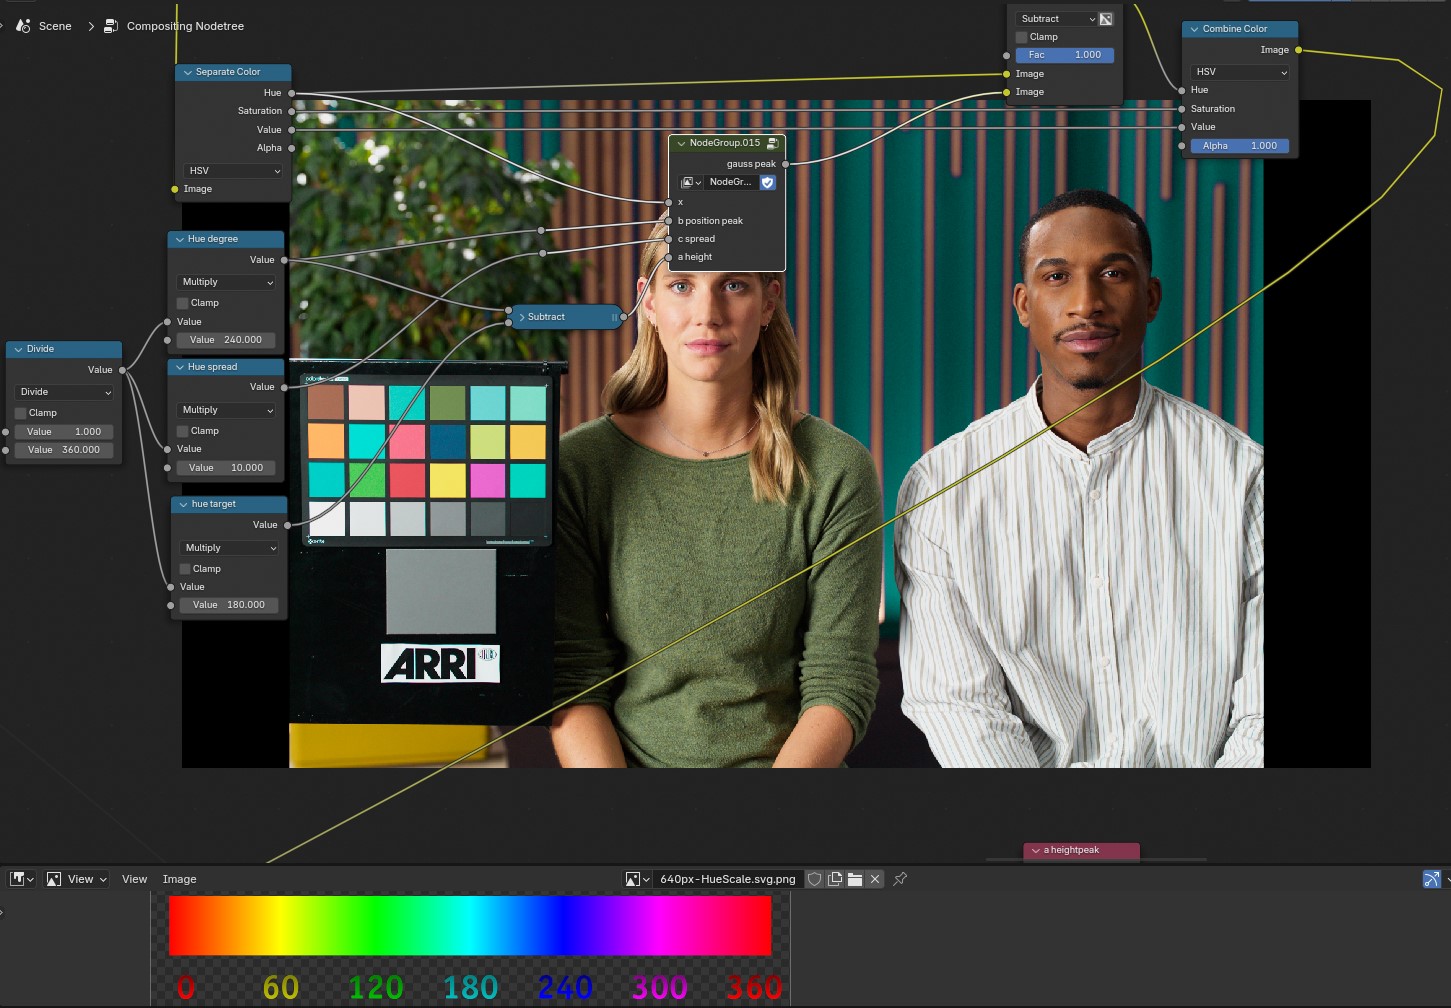
edit,small update.I added a gauss distribution function.(The function replace the curve node).This way i can select every hue angle with a spread how wide the distribution should be.
Here a example.120 degree (green) should be changed.in a spread wide of 10 degree.
In this case i subtracted 0.1 from this hue to get a more yellowish green.