Juggler: Thanks hey. Hehe, no my little one is not quite that clever yet, she just directed me while I did what she asked, like: “Daddy make the lips yellow” … and I’m like “WHaat??!” She’s getting quite clever with The Gimp and other paint programs though.
Nebular: I spied at you through your webcam :evilgrin:
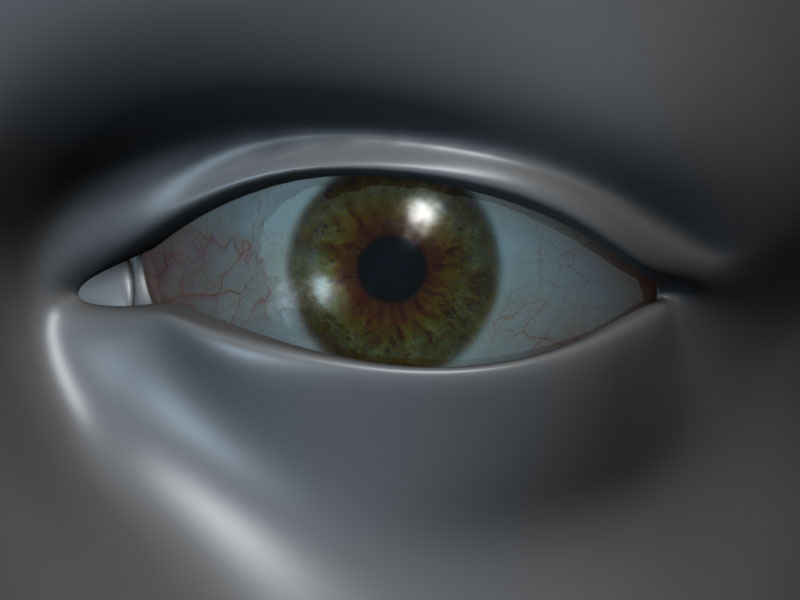
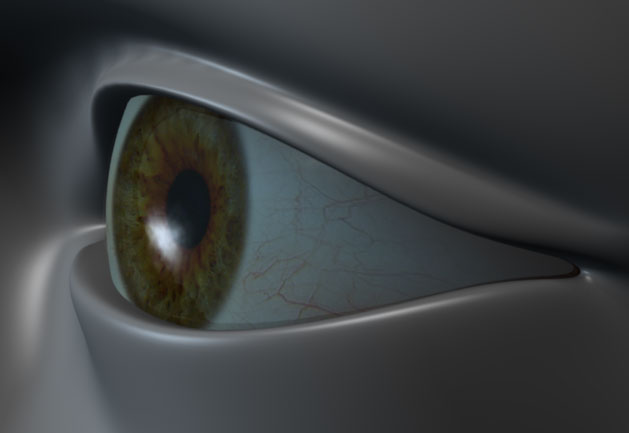
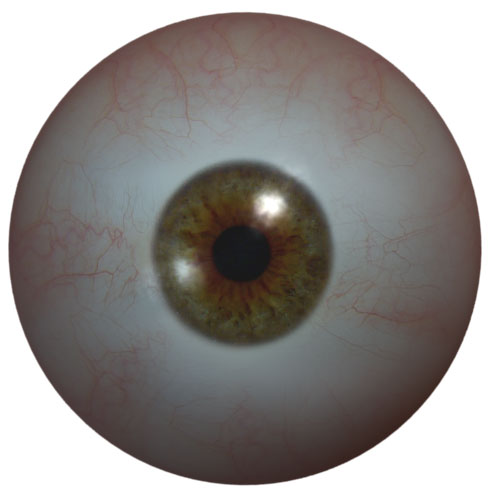
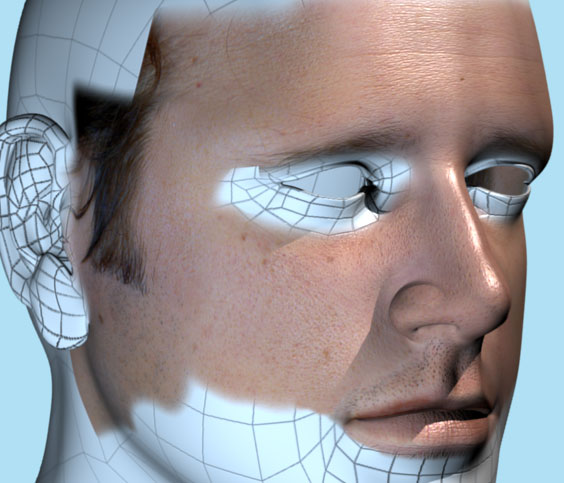
I textured the eyeball last night. I’ll still work on the reflections etc later though, I want to get some nice refections in there, I don’t dig the fuzzy highlight thingy. The Iris is too light I think, will also adjust that later when I’ve done the rest of texturing.
BTW: Be carefull when you take close-up photos of your Iris! The flash hurts :eek: I would NOT reccomend doing it repeatedly!
I find somehow mean to make crits, but maybe they can help you. So, providing the overall result is great…
the eyes are a tad too close. This might be a result of mirroring; this technique overlooks the fact that human faces are not exactly simmetrical. The rule of thumb is average eye distance should allow the interpolation of another eye in the middle. Try that on photoshop: your photo allows that perfectly, but the model doesnt.
the forefront (? the part over the eyebrows) seems to be too rounded, in your side wiew it shows a more complex shape.
-the ears are a bit protruding, they seem to hide more (specially in the lower areas) beneath the chin.
-the mug shots are incomplete. there’s no state prison and prisoner id number
good portrait though, i’m looking forward to see it textured (texturized?)
sorry i didnt read the thread, i see you know about the eyes… i found the problem is the reference photo: you lean a bit to one side, so the actual distances are modified. If you load it in photoshop and set some guides you can see it: on one side theres a fairly good vertical relationship between the outside of the lip and the inside of the eye; in the other side, though, that proportions test fails…
Damn you got me! I should’ve done a better job at cloning those numbers out. Darn-it! :o
Thanks nf3, I’ll have another look at the things you mentioned tonight, but I can tell you it’s been messing with my head (my real one:D), especially them eyes, so I might just go ahead with it as is, dunno yet.
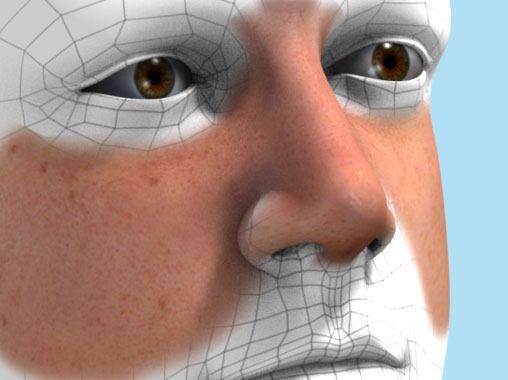
Finally I got it to a point where I can do some proper texturing, I had to pin some more verts around the nose and retake all the photos for texturing, the first ones I took was crap.
Did this last night and gave it quick render just to see if I’m on the right track. It’s still very rough guys! Need to colour match, blend and match etc a lot more and the specular you see on there (tip of the nose etc) is on the diffuse texture and I have to take it out.
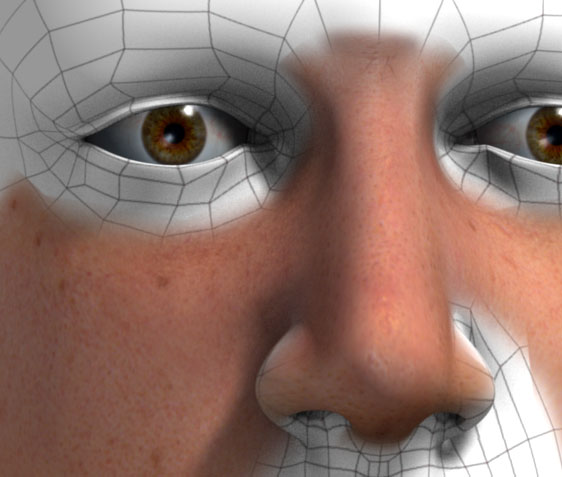
Ignore the lighting on the eyes.
Textures from 8 different photos make the skin so far. Diffuse map only.
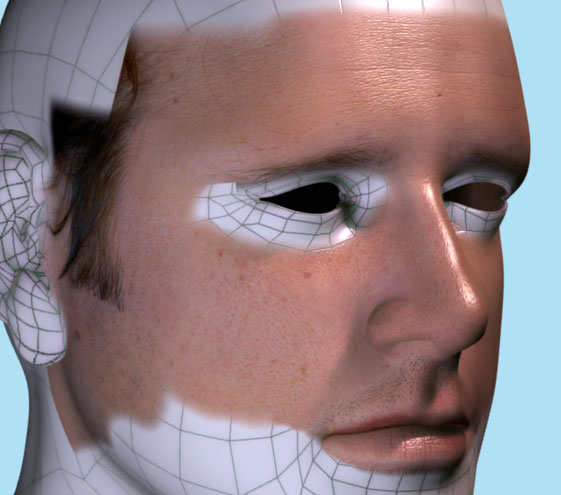
Also, I tweaked the model some more after applying the mirror mod, it’s less symetrical now.
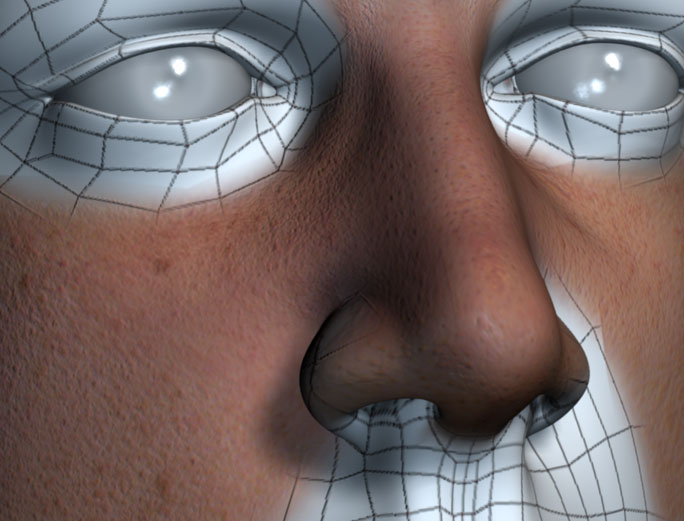
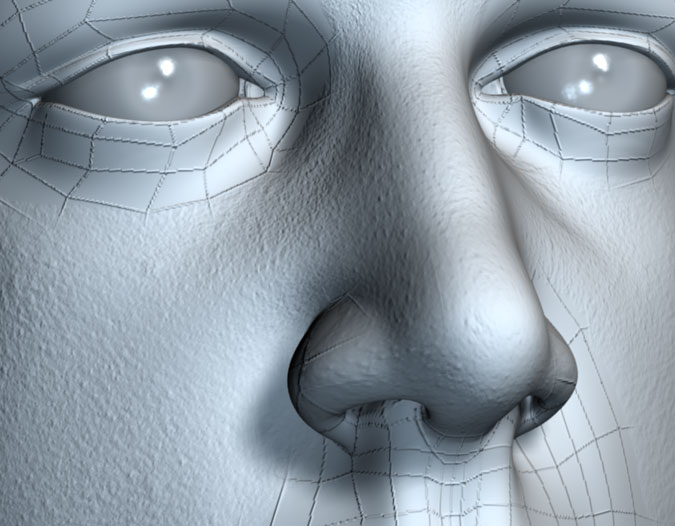
I quickly did a few more renders on the sly here at work:cool: The render in my post before this one had only one spotlight with ambient occlusion enabled.
This one: two spotlights without AO, added bumpmap, enabled SSS. I also attached a render without SSS for comparison, and one with only the bump map.
Sorry for posting such minor updates guys, but hey who knows maybe it could benefit other newbies like myself to see the whole process etc.
I’ll agree, at does look very nice. Now I’m not sure, though, but I think–if your bump map is black for the bottom and white for the top–that you’ll have to invert it. Blender’s b/w normal map handling is a little strange.
Also, as an experiment. If you’re using SSS, make the texture map itself a lot more sallow and a little paler–more like the colour of skin when it’s not laid against anything–and make the SSS colour a bloody reddish colour, like muscle and veins. Get the tones (paler and yellow vs. redder and darker) balanced and see what the scattering does for you, though. It should work. Also, if you haven’t, make the specular colour very faintly blueish, for the surface oils.
Thanks BlacBoe, I’ll do as you suggested. Will add specular as well at a later stage, at the moment everything is still too messy, I have to take the spec (from the photos) out of the diffuse as well. Thanks for the tips hey!
JohnsonGetDown: Thanks hey! If you can get hold of Mr. Bomb’s female face dvd he’ll get you modelling like this in no time. :yes: You’re right the skin are photos, so far I’ve used textures from 8 different angled photos, but in the end I’ll probably use a lot more maybe up to 20 or more.
I’d love to see a tutorial on how to take pics of a face or a not flat surface and make it flat then back on a model aggain…You know any site? :eyebrowlift2:
please don’t crit on texturing yet, :spin: it’s still too heavy WIP and very raw – just trying to get a general shape of things at this point, plenty of sections aren’t positioned right.
Me too Texturing specific tutorials are very scarce, I couldn’t find any except for a new book and DVD that was just released by Ballistic Publishing “Essence: The Face” (advertised on CGsociety), it’s way too expensive for me though. There’s a few UV mapping tuts here and there but none that I found really specific on the actual job of texturing. When I get a moment I’ll post a pic roughly indicating the different sections of texturing.