Hi. I am building an infographic material and I am trying to show 5 modules simulating the ocean.
I am trying to use the new sky node and have some doubts:
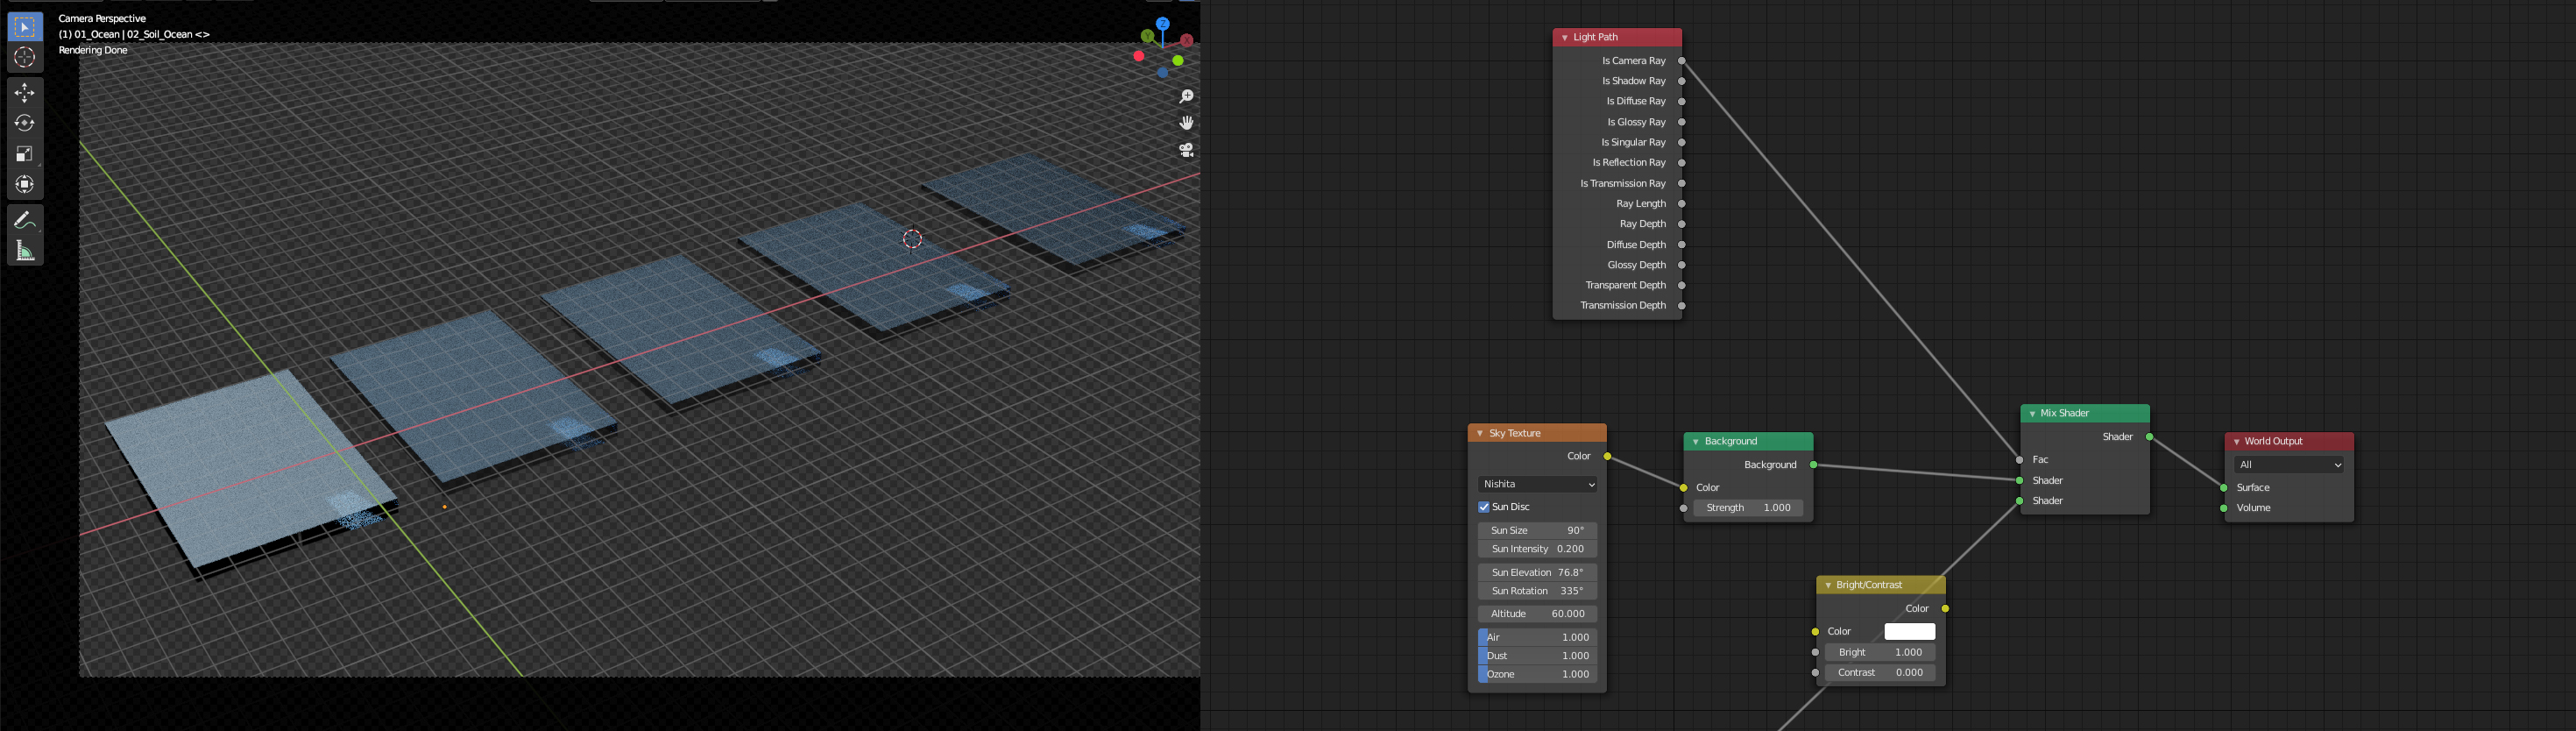
The modules seem to reflect a different light depending on their location. Further away from the camera they become darker. Since this is for an infographic piece I am trying to light evenly to each module. I need them to be exactly the same and not to show that depth. I have been exploring the new node and looks like the sun size should be the one that could help me to achieve this. It can only be set to 90 degrees…so that road its not working…
Do you know if the node needs to have a sun light in my scene? or I can use it without adding a sun ?
Hi, @Bruno! There might be some conflicts in your requirements, but let’s see if we can work through them.
You want to build an infographic showing 5 modules simulating the ocean, so you chose the Sky Texture to give you realistic lighting on your ocean modules. Sounds good.
You also want the modules lit the same or at least to appear to have the same lighting regardless of their distance from the camera. Got it.
What we don’t know:
This is an infographic, but you didn’t say if this is just a still image, an animated scene, or animated motion graphic-style infographic.
What scale are you using? How big are these patches of ocean? Are you going for photorealism?
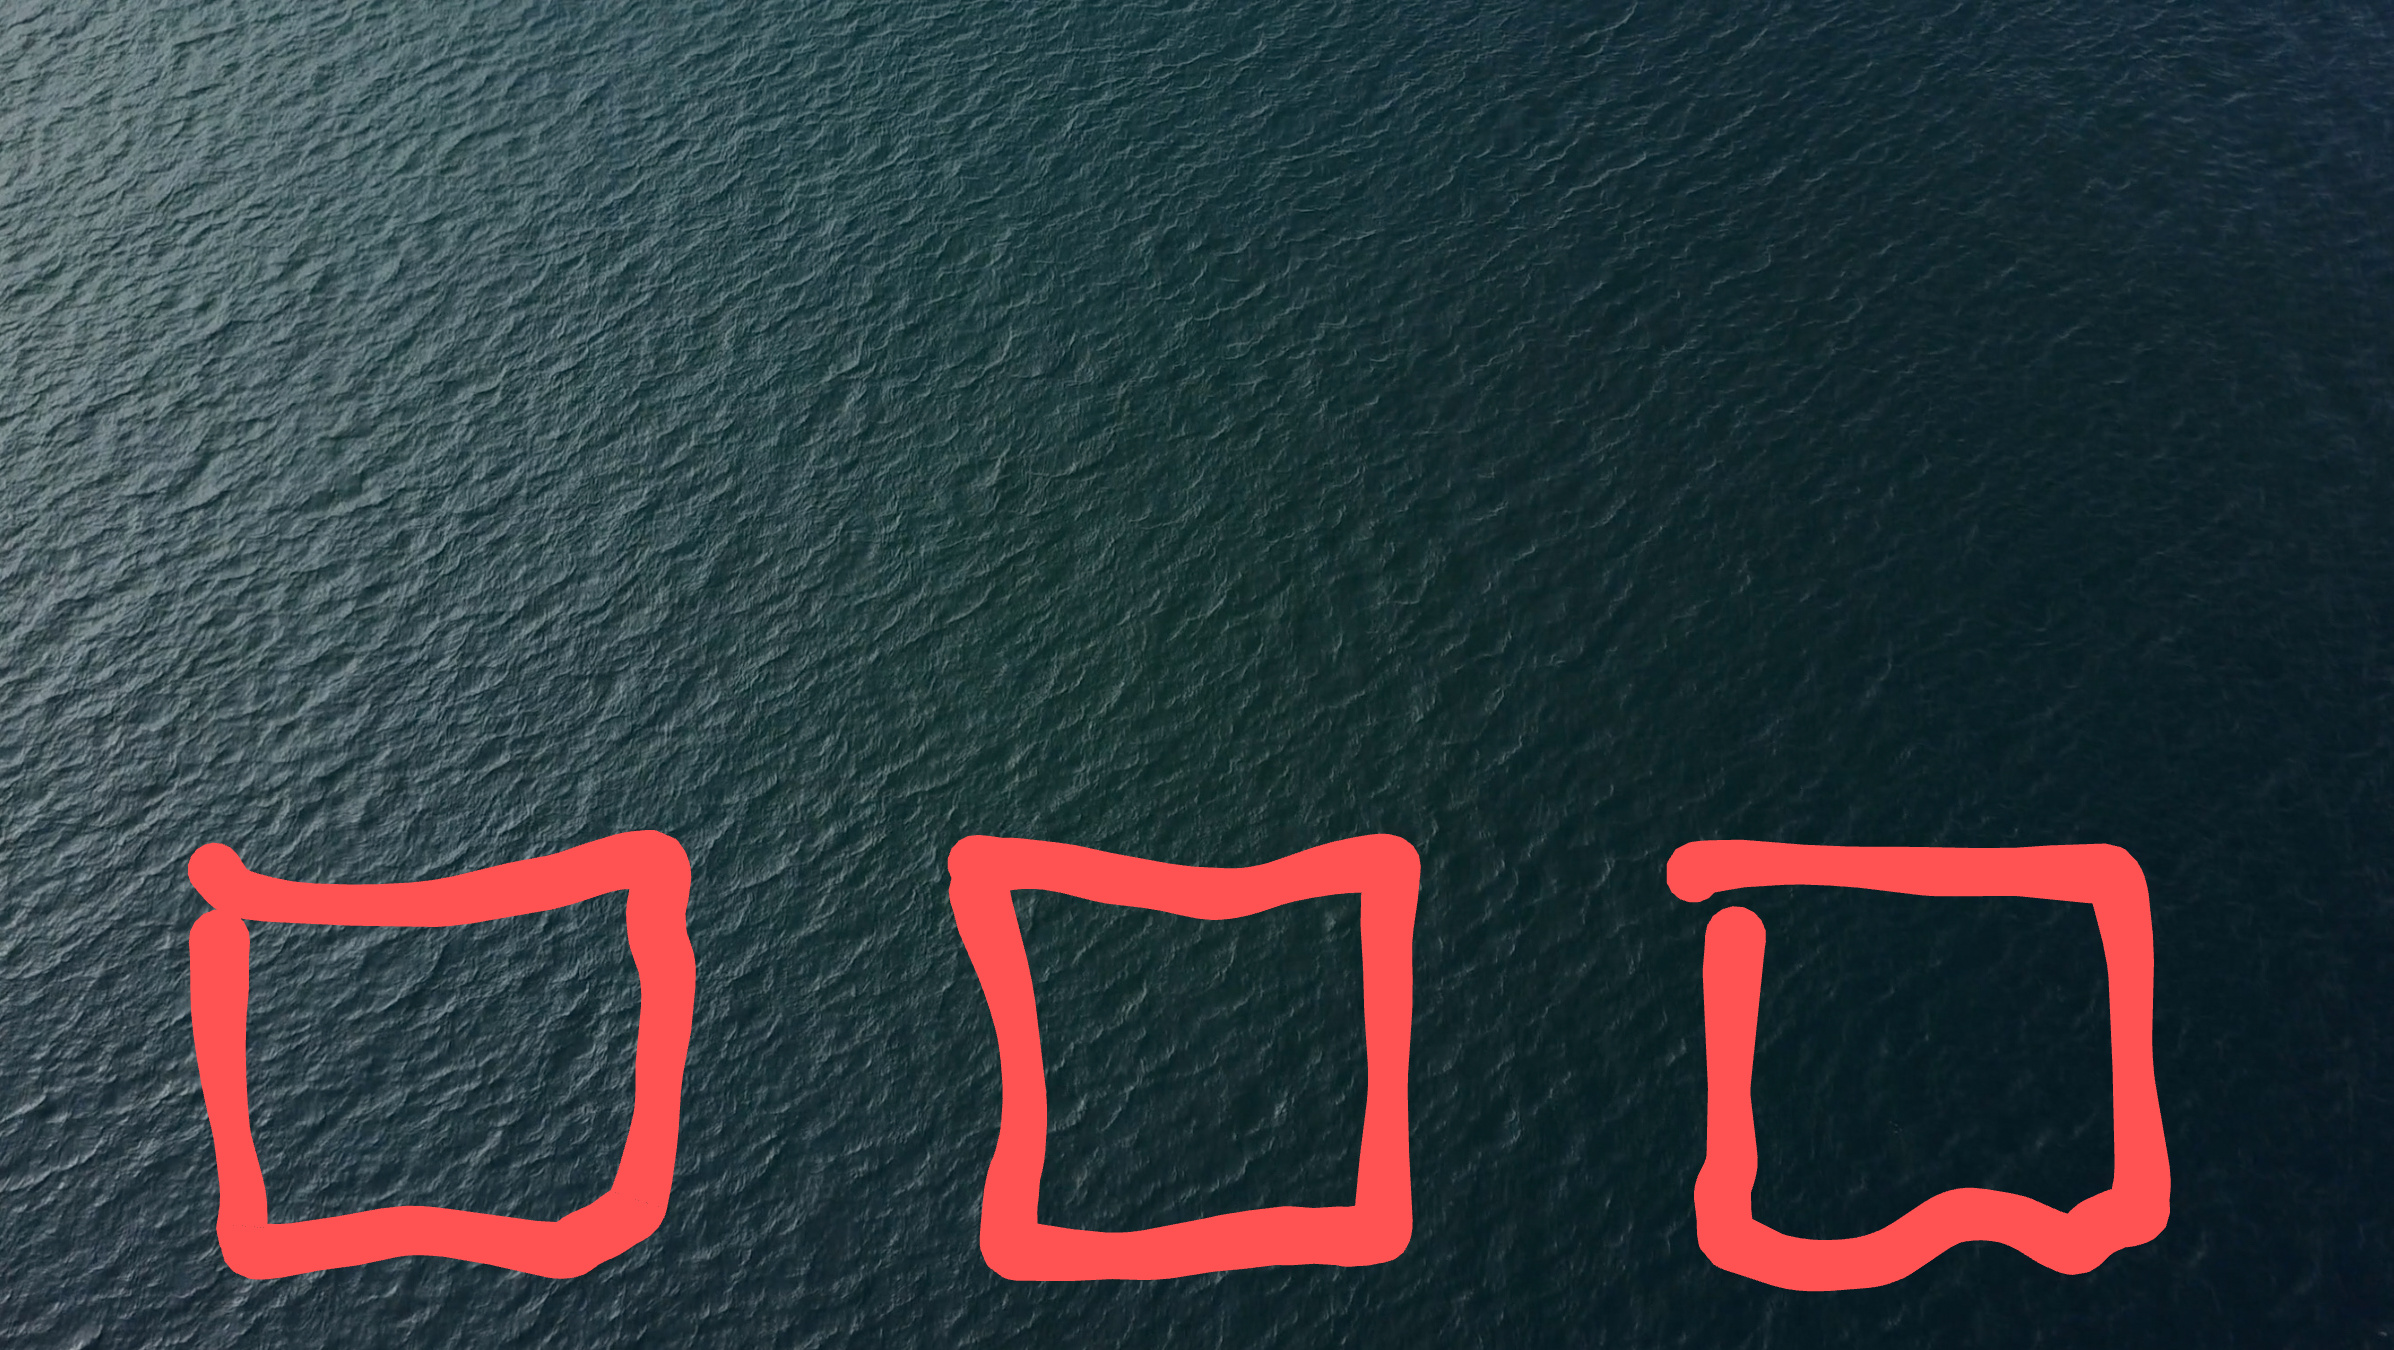
So, if you are going for photorealism, you are kind of stuck. Your modules are going to get darker the further away they are from the camera (depending on your your orientation to the sun). See here:
You are also stretching the Sky Texture node way beyond its physically-based, realistic settings. If you want realism, you should keep the settings as realistic as possible.
If you are fine with bending those realism rules, you could use a plain light blue color in the Background node to mimic a flat, even sky color. Adding a sun lamp will likely cause the same issues you have already - the angle of the sun lamp relative to the camera will cause light to reflect differently.
Maybe you can fill us in a little more on your goals and we can help solve this mystery!
Thank you so much for the time you took and super well explained !
I will proceed to give more info:
It is a still render and the style is kind of hybrid. It is between realism and stylized. For example I am using some rocks for bedsea that are kind of gaming look like…so in other words it is a low poly, but with realistic lights and trying to convey the materials in a realistic way. For example the ocean you show is perfect. Is that a material from blender or a ref image???
I am using real scale meshes. It is a little bit crazy from my point of view, but that is the workflow of the studio and It was like that before I arrived…I do not dare to change it yet (iam kind of new). So the ocean has 1000 m by 680 m…I believe it is cause we have to emulate real things and we use many many assets coming from clients in scale 1:1 So In one sense it is easier to work with real scale when you need to have a coherent proportion between things. I tried once to use my own scale…and you are risking messing with the proportions of different things. Sometimes you get a ship and the harbor and the crane totally disassociated after messing with the dimensions.
I am really interested in understanding the sky node (we are constantly doing Ocean infographics and using physical atmosphere, but I am trying to relay less in plugins when Blender offers something so good as the new sky . I love physical atmosphere, but If I can achieve good results with less parameters it means I use less time and that benefits the project time.
Would you share with me your thoughts about the settings in my node sky …what is wrong? Looking forward for your answer and thanks again for your thorough feedback.
Something that I did have trouble with was finding detailed explanations of all the parameters. Some make sense just by reading their names or their tooltips, but without reading the devtalk thread, I might not know, for example, that the Sun Elevation parameter can be set as low as -3°. I’m not sure if that value is still in the 2.90 master codebase, but it also isn’t mentioned in the 2.90 manual here: https://docs.blender.org/manual/en/2.90/render/shader_nodes/textures/sky.html#sky-texture-node The thread also mentions that the default Sun (Disk/Disc?) Size should be .545° - I can only assume that is because that is what is is equal to on Earth.
So, knowing what I do from reading the development thread, stumbling through white papers, and reading what you are trying to achieve, here are my thoughts. A sun size of 90° is quite large - not close to the .545° default. Your altitude is set at 60km, and that is more than halfway to suborbital space. You are literally creating a scene at sea-level. I’d think about lowering that. If you want to make each module have similar lighting, maybe you can render each module separately with the sky texture adjusted (likely just a sun rotation tweak for each module) so that you achieve similar sun-to-water-to-camera angles and then composite the modules back together into your final image.
Please take my suggestions with a grain of salt. I’m interested in how this turns out, and I’d love to see it when it’s done if you are free to share it!
Thanks so much! After setting the sun size and changing the altitude as you suggested the scene became easier to handle and the “modules” are illuminated quite evenly now.
Great tips and research you did!
As a comment aside, I am kind of new to Blender, but having a great fun and really appreciating the piece of software the manage to create without charging a dime…Being said that, the documentation is definitively not a strong point of Blender. I sometimes feel it demands a lot of research and going into forums till you find a proper explanation to some of the features. I guess it also shows that you need to really want to learn it …maybe that is good.