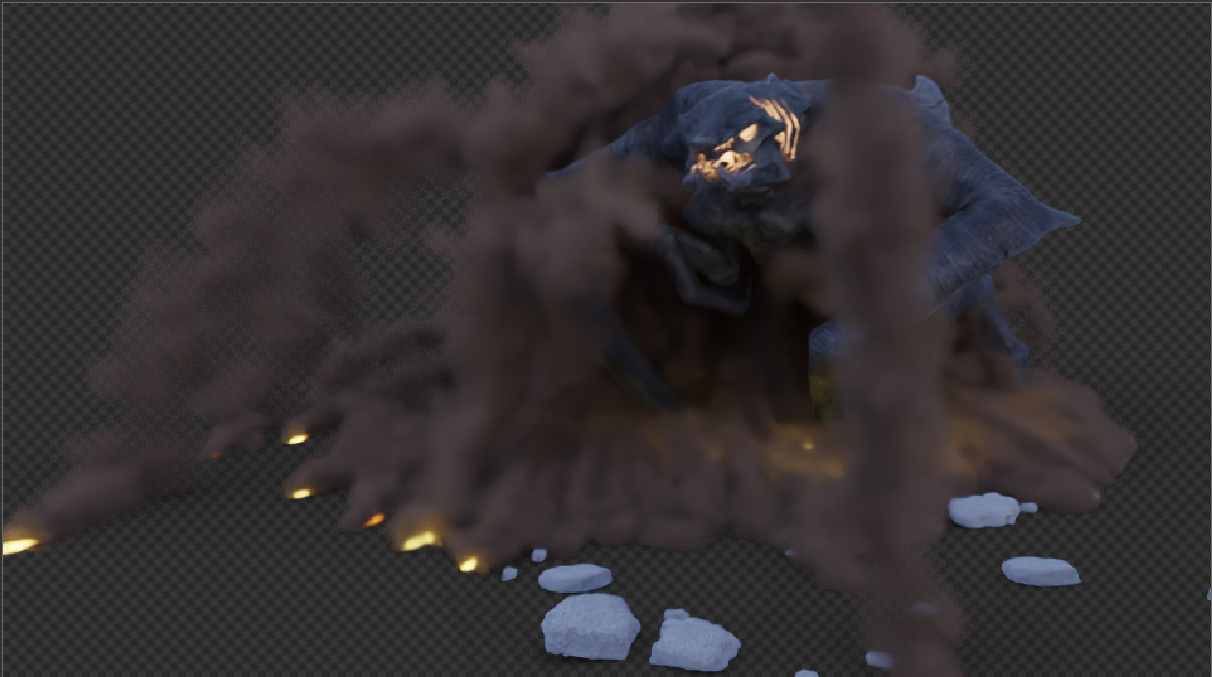
I have a scene where I have a smoke simulation surrounding an object, in this case a creature. I would like to render the scene in layers so I can composite the final shot in After effects.
I can put the smoke and object in separate view layers, however, they don’t effect each others lighting or shadows.
So I put the smoke in the same view layer as the object, and set its visibility to indirect only. The smoke doesn’t show up in the render as expected, but it also doesn’t affect the lighting of the object or cast any shadows.
How do I get two renders, one with the smoke, and another with the object, but with the smoke still effecting the lighting/shadows of the object.
Hope I understood well…
Put them in different collection and right click the collection on the view layer and activate indirect only.
The opposte on the other viewlayer with the other collection.
gave it a try… yeah!! seems not to work as expected (sorry that reply was from my phone while out usually i test before i reply lol)
what about rendering in passes
diffuse direct+ indirect + color
glossy direct + indirect + color
and the volume direct + indirect. and emission if needed and compose
Indirect Only and turning off camera Ray Visibility both result in this issue, but it looks like doing it inside the shader instead — using Light Path > Is Camera Ray to Mix with a Transparent — works just fine, and recombines back to a match.
I tried the same passes with my scene. Not sure what to do with them. They don’t appear to come with any alpha channels. Sorry, but I am unfamiliar with multi pass rendering.
Unfortunately I don’t understand your reply. My issue is when I set volumetric smoke simulation to indirect via the outliner, the smoke does not effect anything indirectly. It just disappears.
it always upset me that this page doesn’t show how to compose the volume passes but ADD is what i use (i just made a test to confirm and it gives me the same as the combined pass from cycles directly) so if you are ADDING you don’t need an Alpha (adding black/0 doesn’t change anything)
here is an example, hope it helps (it gave me the same result as the combined render):
so if you need separate final images the two volume passes (VolumeDir + VolumeInd) and export them as one picture, the rest of the compo like the first picture above from the manual into one picture
don’t worry about the transparency for volume cause they are meant to be ADDED in comp
Yes. Because there’s a bug with volumes and Indirect Only (which also happens if the volume’s Camera ray visibility is turned off).
If you want the volume to behave as expected, you can’t use either of those methods and have to make it “indirect only” manually, by making it invisible to direct camera rays inside the volume material.
Yes, the problem with using the Volume Light passes is they’re just light passes, so there’s no alpha: the volume’s density is baked into the other passes as darkness, and only the volume’s illumination is in the light passes, which fills in the black areas with color.
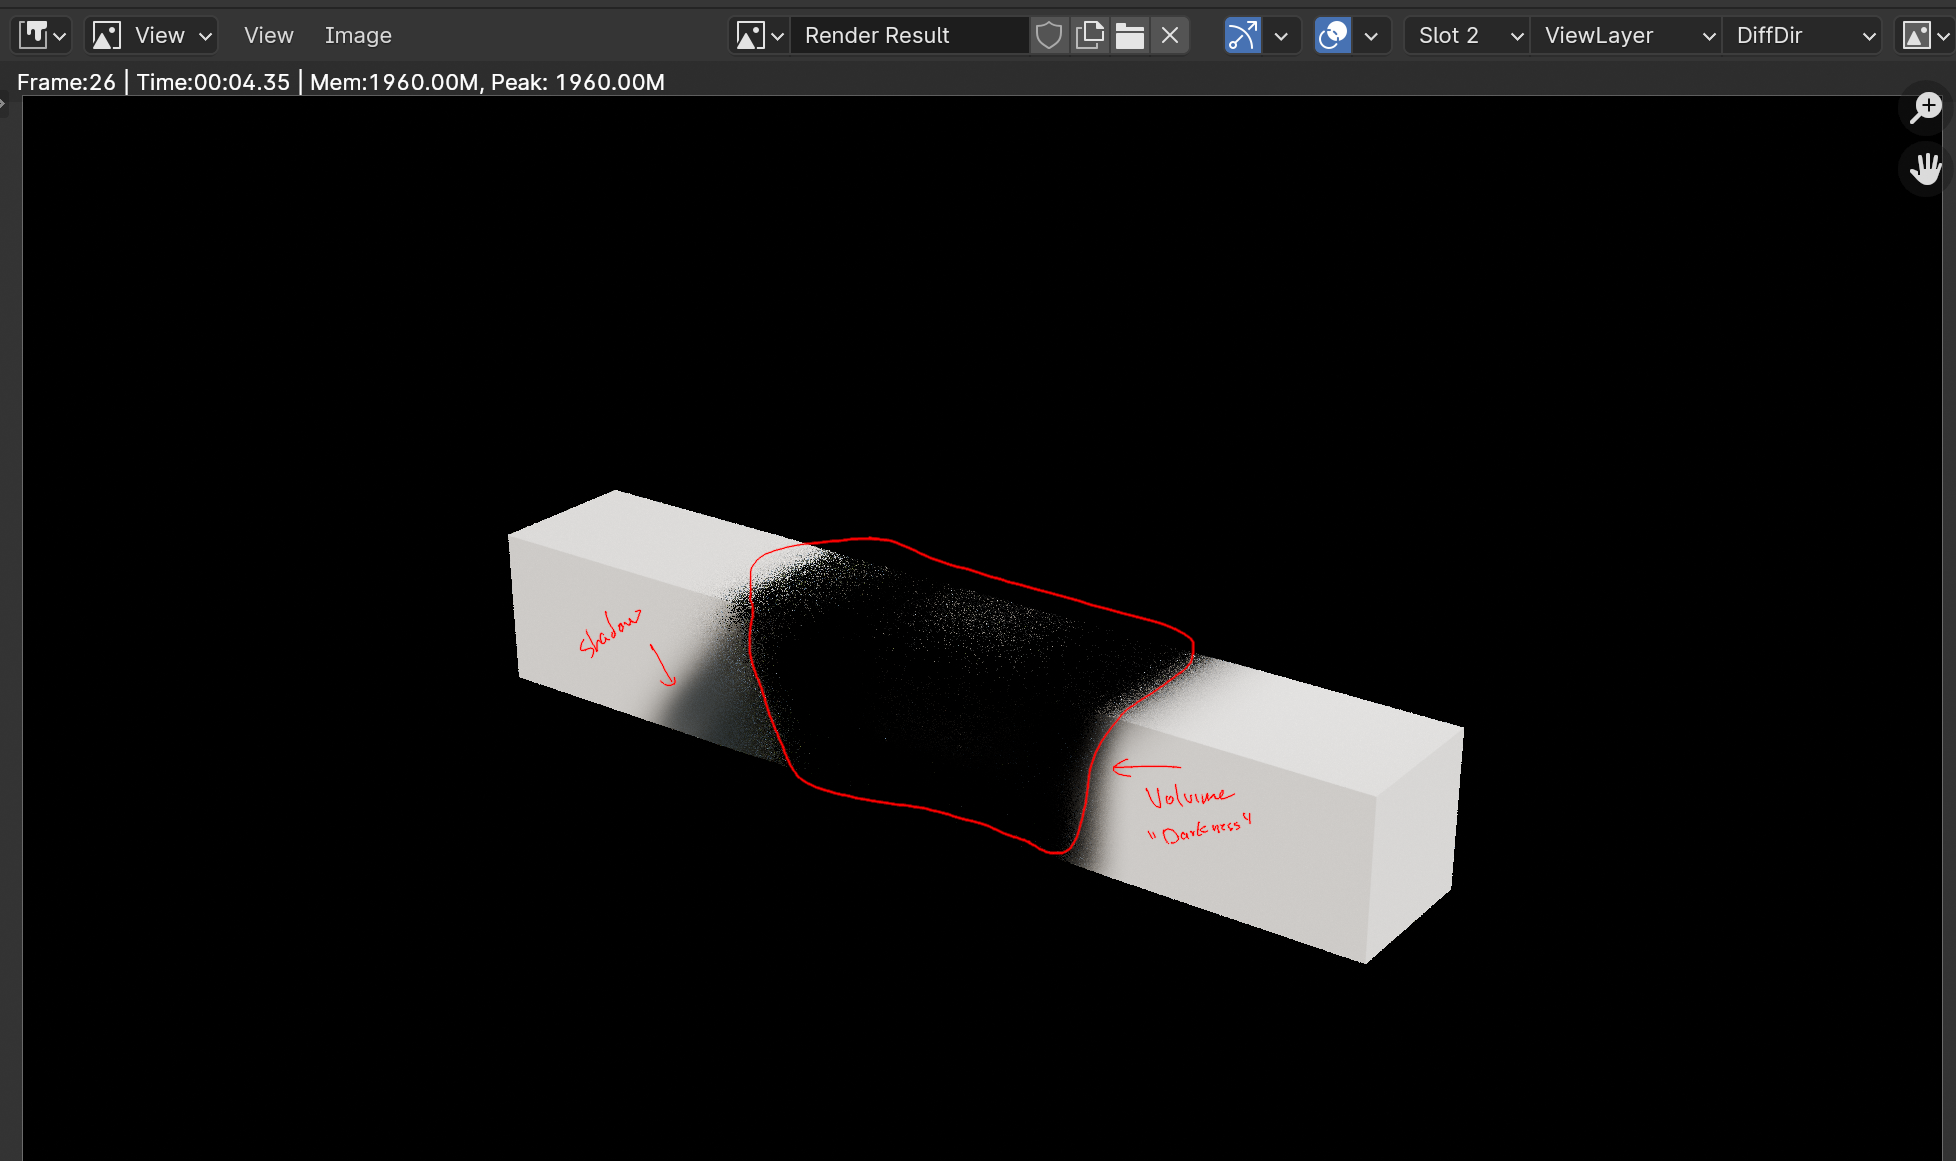
Not ideal for actually isolating the two components—for that, I’d do it your original way, with the volume on one layer and the character on another (with the volume set to indirect using the shader workaround). Then it’s as simple as layering one over the other.
(Can’t do it in one go, of course, since the volume’s material needs to change. You’d have to either render it in two steps—render volume, change material, render character—or use duplicate volumes for each render layer, with different materials: the “beauty” volume, which is rendered in the volume pass and completely deactivated in the character pass, and the “shadow” volume, which is indirect (using the shader workaround) in the character pass and completely deactivated in the volume pass.)
exactly, and light is additive, when adding (black is transparent) that’s why they don’t have alpha, adding alpha will be more complicated and cause bending and artifacts (like trying to have a bloom with alpha on a transparent png)
Thanks, that works, although I came across another problem once compositing the images in After Effects. When I layer them together, there is a white outline around the creature.
It seems that the setting an object to holdout still leaves a bit of a “gap” where the two layers intersect.
thanks for the reply, I’ll keep that in mind. I think carterbk’s solution solved my first issue, although there’s a white outline around the creature in the composited shot.
Awesome!! glad it did
for the outline, I would recommend to check the alpha premultiplied option or not (i don’t use after-effect to point you directly how)
even tho i don’t see the outline on the right of the picture (creature elbow VS tree) and it looks it’s happening just with where the smoke is…!
in the other side (right arm of the creature at the bottom) you can see what’s behind, not a white outline but it’s like the smoke is further away from the creature
so maybe it is that (premultiplied or not ) or what meant here
(I doubt this too cause i will expect more artifacts in the outside of the smoke where it has less density):
did you take the smoke pass with transparency??
maybe @carterbk have a solution for this. meanwhile you can try exporting one volume pass without transparency and compose it as ADD instead of ALPHA OVER and see.
i will try that method too and let you know if i can explain it
I tried that method and got the empty outline too (even tho i used EXR). playing with premultiply options changes how bad it is but i was not able to take it off completely. (there is still hope if you still want that method, I maybe missing something with how to compose this since i don’t use this method)
but the same scene with passes and additive volume method didn’t have it (cause you will have one alpha for all of them to compose with your plate). and that’s why i use it
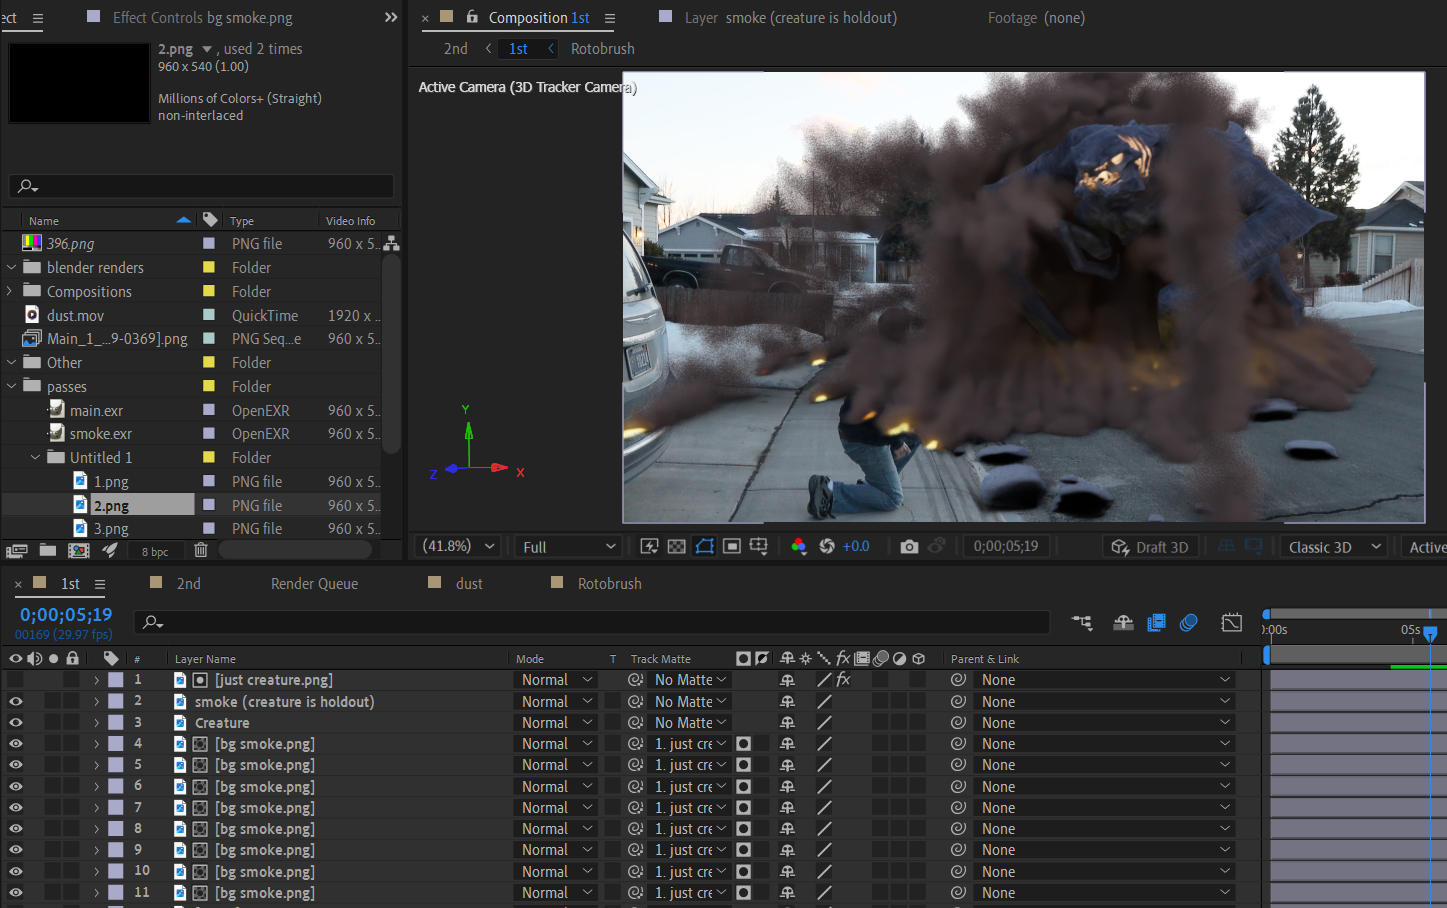
I managed to get rid of the “outline” around the creature by doing some compositing gymnastics.
Render with smoke (no creature and/or indirect only)
Render with smoke (creature is holdout)
Render with creature only
Once I imported these into After Effects, I used the layer with the creature only as a matte for the layer with the smoke only. Then I blurred the smoke layer (no creature) and duplicated it several times. Thus creating a “halo” around the main creature layer, but it fits the smoke that its surrounded by. I then put the smoke layer (creature is holdout) over everything. @cgPixel@carterbk
Although it works, it feels like a workaround for a problem I have not solved yet. I think the issue is using a holdout to cut into the smoke leaves a harsh shape. The software cant get it 100% perfect which is why there is a noticeable outline when compositing.
i was reading your post and thinking workaround and you confirmed, like cutting the creature from the smoke (the volume past is already doing that for you with better precision) not sure why you don’t want to go that way.
i tried to get rid of that outline by playing with alpha but you will affect the areas where smoke is transparent
take your time and render multi-pass export in a multi-pass EXR.
if yuo want separate files, you can use the compo tree from blender to export what you want
the alpha from the top is for creature and smoke. add the smoke (change it’s blending mode in AE to add instead of normal)
and the result uses the above alpha. and problem solved no work around
I will use that workaround personally only if the final product have to be delivered as transparent PNG
P.S: i forgot to mention you have to add de-noise in the node trees which means activate de-noise data passes too
but if it works it works, glad you got it sorted out
I tried your method. Adding the volume dir+indirect pass over the creature in after effects seemed to have worked (no outline). However, the creature pass is left with a dark impression of the smoke in its own layer, which means its not truly separated from the smoke.
When I go to add an effect such as a glow effect to the creature, the “smoke outline” is effected as well.
Also, how do I include shadows/occlusion to the creature pass? The debris seemed to have lost their shadow.
I assume you’re using a shadow catcher for the ground, now that you are rendering in multipass you need to include the shadow catcher pass (that you multiply the plate with).
u can add the ambient occlusion one too if you want to use it for extra tweaking (i usually don’t most of the time since the other pass are taking into account the occlusion and i will end up thinking it’s unrealistic)
cause creature and smoke are in the alpha I think . maybe you need a separate alpha channel with just the creature. you can achieve this with the previous method you tried.
[[[[[
I misunderstood please see edit below
this is the biggest question lol. if they are meant to be composed what’s the issue with that?
for me it make sense as a result, if the smoke is so dense there at a certain spot, light will not make it through to illuminate that zone. go there yourself in similar case and you will not see light,
if the object is meant to reflect light it will hit the smoke(and other objects) and gives indirect light. if the smoke blocked the light… the object will not have light to reflect to begin with
now you have to make your mind between “Truly Separated” <> “influence each other” which i though that’s what you wanted and those are kinda opposite, you have to choose based on your needs and artistic choices
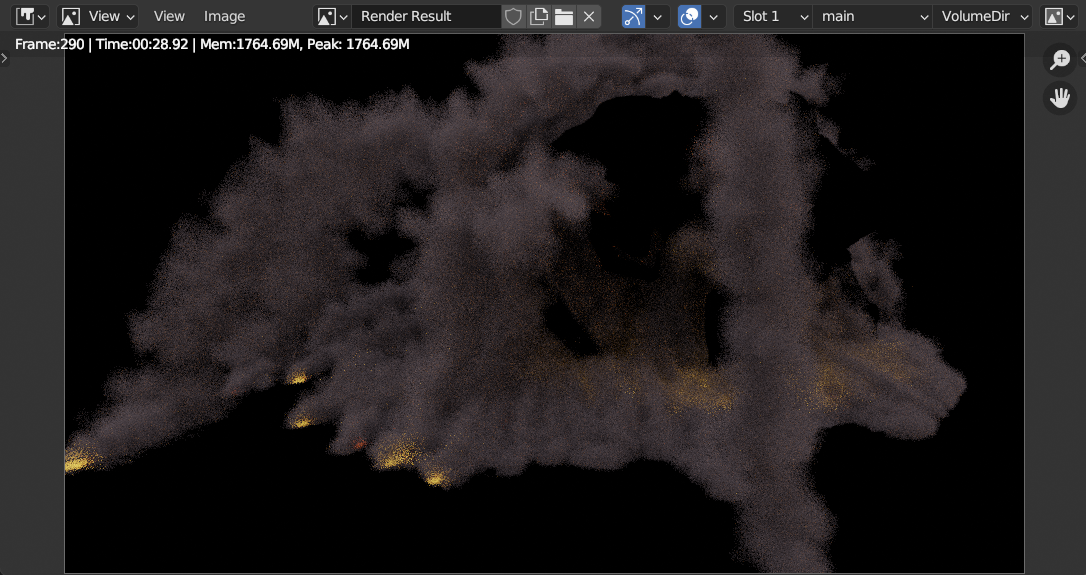
P.S: not sure why your smoke turned all black btw compared to the previous screenshots, is it something you meant to do, or an issue with compositing this method
]]]]]
Edit:
Oh wait you meant the whole layer was black where the smoke is supposed to be. if so sorry i though you meant the creature was dark just where it’s close to the smoke. and was wondering why the smoke is black now
look at your alpha channel and you will see smoke and creature. cause that’s the alpha of the composed image from blender not of the passes (i tricked you into this with my screenshot cause it was enough for the test ) as a result the alpha over will think that’s part of the layer and adds it too.
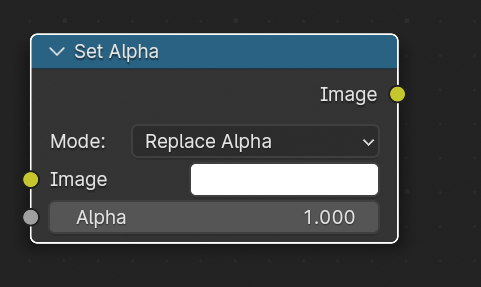
so: ObjectIdexes or CryptoMatte, or as i said above, use another view-layer of just the creature (kinda the previous method) and take it’s alpha to plug into the alpha-over (composing in blender). and if you are exporting the whole creature from blender to after effect use a setAlpha node with the one of just the creature. (but again who cares if the smoke is going on top of that, unless a lot of changes to the smoke going to happen in post)
by the end of the day it needed some workaround too lol but that’s cause there is a known bug with colume and view-layers issues
Thanks for the reply. Sorry if I am missing some basic information. I have never separated layers/passes in this way until now.
Could you show how to add all of the shadows back into the creature pass? Also, it looks like “Shadow” is missing under the other category in your screenshot.
If you are willing, please show how to use the Set Alpha node. I presume it is to separate the creature from the smoke?